How to clean a Bosch dryer
 Dryer users rarely forget to clean the lint filters, because they are located right in plain sight - right behind the device's loading hatch. Therefore, even with the naked eye you can detect signs that the fluff filters are clogged. However, high-quality cleaning of a Bosch dryer is not only about treating the mentioned filters, because other key components of the “home assistant” often suffer from contamination. Let's study what else needs to be cleaned in the machine from time to time so that it always works perfectly.
Removing dirt from the heat exchanger
First of all, it is worth mentioning the heat exchanger of household appliances, which must be cleaned with your own hands at least once a month. Cleaning it is extremely important, since foreign objects, dust and various contaminants directly affect drying, impairing its efficiency and increasing the cycle time.
The frequency of cleaning depends solely on how often the owner uses the machine.
To carry out preventive cleaning yourself, you first need to disconnect the device from the power supply and wait until it cools down. Then be sure to place old towels or unnecessary rags under the device so that the remaining water does not flood the floor covering. At this point the preparatory stage is completed, you can proceed to the cleaning process itself.
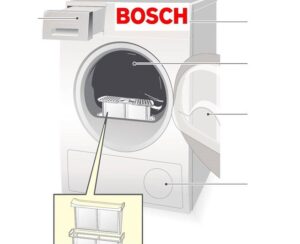
- Get to the heat exchanger door - it is located at the bottom of the front panel of the dryer.
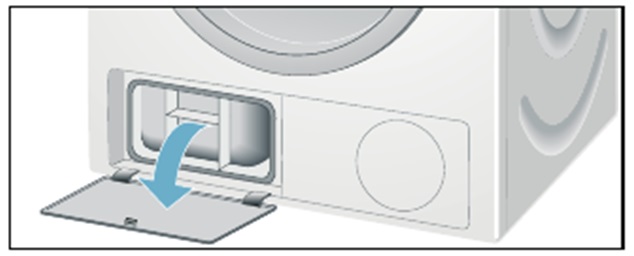
- The door can be located either on the right or left side under the loading hatch. This depends on the company that manufactured the device and the model of the device.
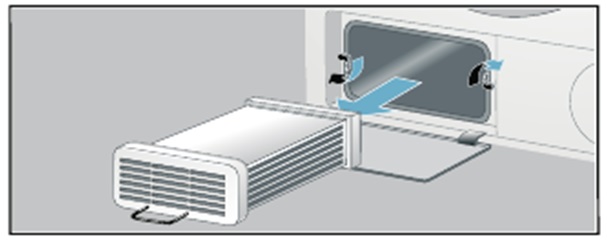
- Open the door, and then turn both levers of the unit towards each other, which is necessary to remove the top cover of the unit.
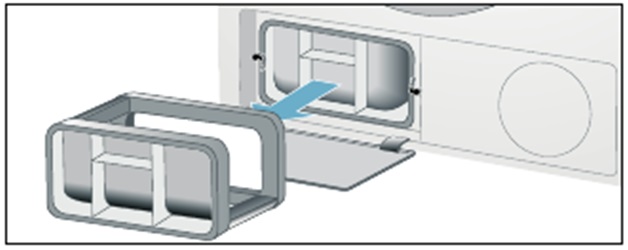
- Now carefully remove the element.
- Clean the part thoroughly using a strong stream of tap water.
- If you find heavy dirt, remove it with soft sponges and rags. At the same time, it is prohibited to use sharp objects and rough tools with an abrasive surface, as they can easily damage the heat exchanger.
- Do not forget to remove lint contamination not only from the main part, but also from the seal.
You should not wait until the element is completely dry - you can install it in place immediately after all the liquid has drained from it. Carefully place the part in its seat, and then secure it using the protective cover and the locking levers set to their original position.
As a result, cleaning the heat exchanger with your own hands is very simple, because you do not need any special tools or special skills to disassemble household appliances. This type of repair can be completed in about half an hour, so don’t be afraid of this process and put it off for a long time.
Where does dirt and dust come from in the dryer?
Monthly cleaning of the dryer is required due to the formation of lint, threads, dust, hair, pieces of fabric and other things that get into the equipment with clothes. Contaminants penetrate into the “home assistant” even if the clothes have just been washed in an automatic washing machine, so you should not think that the machine is completely protected if it only dries washed clothes.The presence of dust on things is easy to detect if you dry them outdoors or in the house - the dust will slowly move away from the things, falling into the air, where it will be visible even with the naked eye.
But if you replace line drying with drying in household appliances, then all this dust will not end up in the air and human lungs, but in the lint filter of the dryer. Of course, this is good for the user, but it is dangerous for an expensive device. Due to the abundance of dust with small particles on things, the lint filter can become clogged after just a couple of sessions. Moreover, after just five operating cycles it will need complete cleaning.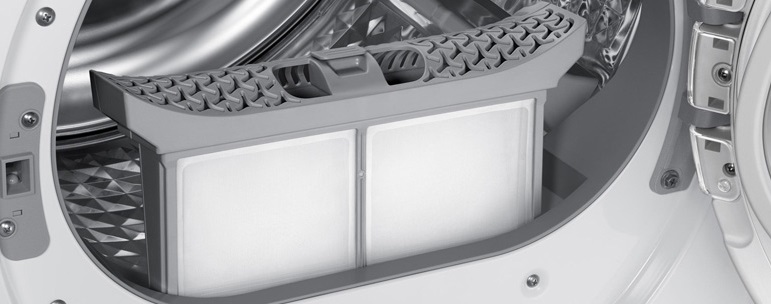
That is why the manufacturer recommends thorough cleaning not once a month, but after each drying, in order to thus prevent any negative scenarios. Therefore, you should not be afraid of dust inside the equipment, because this is in the order of things. On the contrary, it’s even good that dust clogs the fluff filter and does not penetrate into the apartment, because in this case nothing threatens human health, and the dryer can simply be cleaned.
Try cleaning it yourself several times a month or more often - this will help the device last longer. Moreover, there is nothing complicated in the cleaning process - you just need to remove the fluff filter, place it under running water, carefully clean it with sponges or brushes, and then put it back in place. This procedure can be combined with cleaning the heat exchanger, as well as other components, which will save time and optimize prevention.
We remove contaminants from other elements
In Bosch brand products you can find a special humidity sensor installed to measure the moisture level of clothes during drying.This element is made of stainless steel, so it is reliably protected from damage. However, it is still sometimes covered with lime, plus particles of household chemicals, which should be removed from time to time so that deposits do not affect the performance of the sensor. This is very important, because if the part’s performance is incorrect, this will directly affect the quality of drying.
To clean it, you just need to open the door slightly, get to the sensor and carefully remove all the dirt using a damp cloth. The sensor should not be cleaned using rough brushes or other abrasive tools, which can damage it just like a heat exchanger.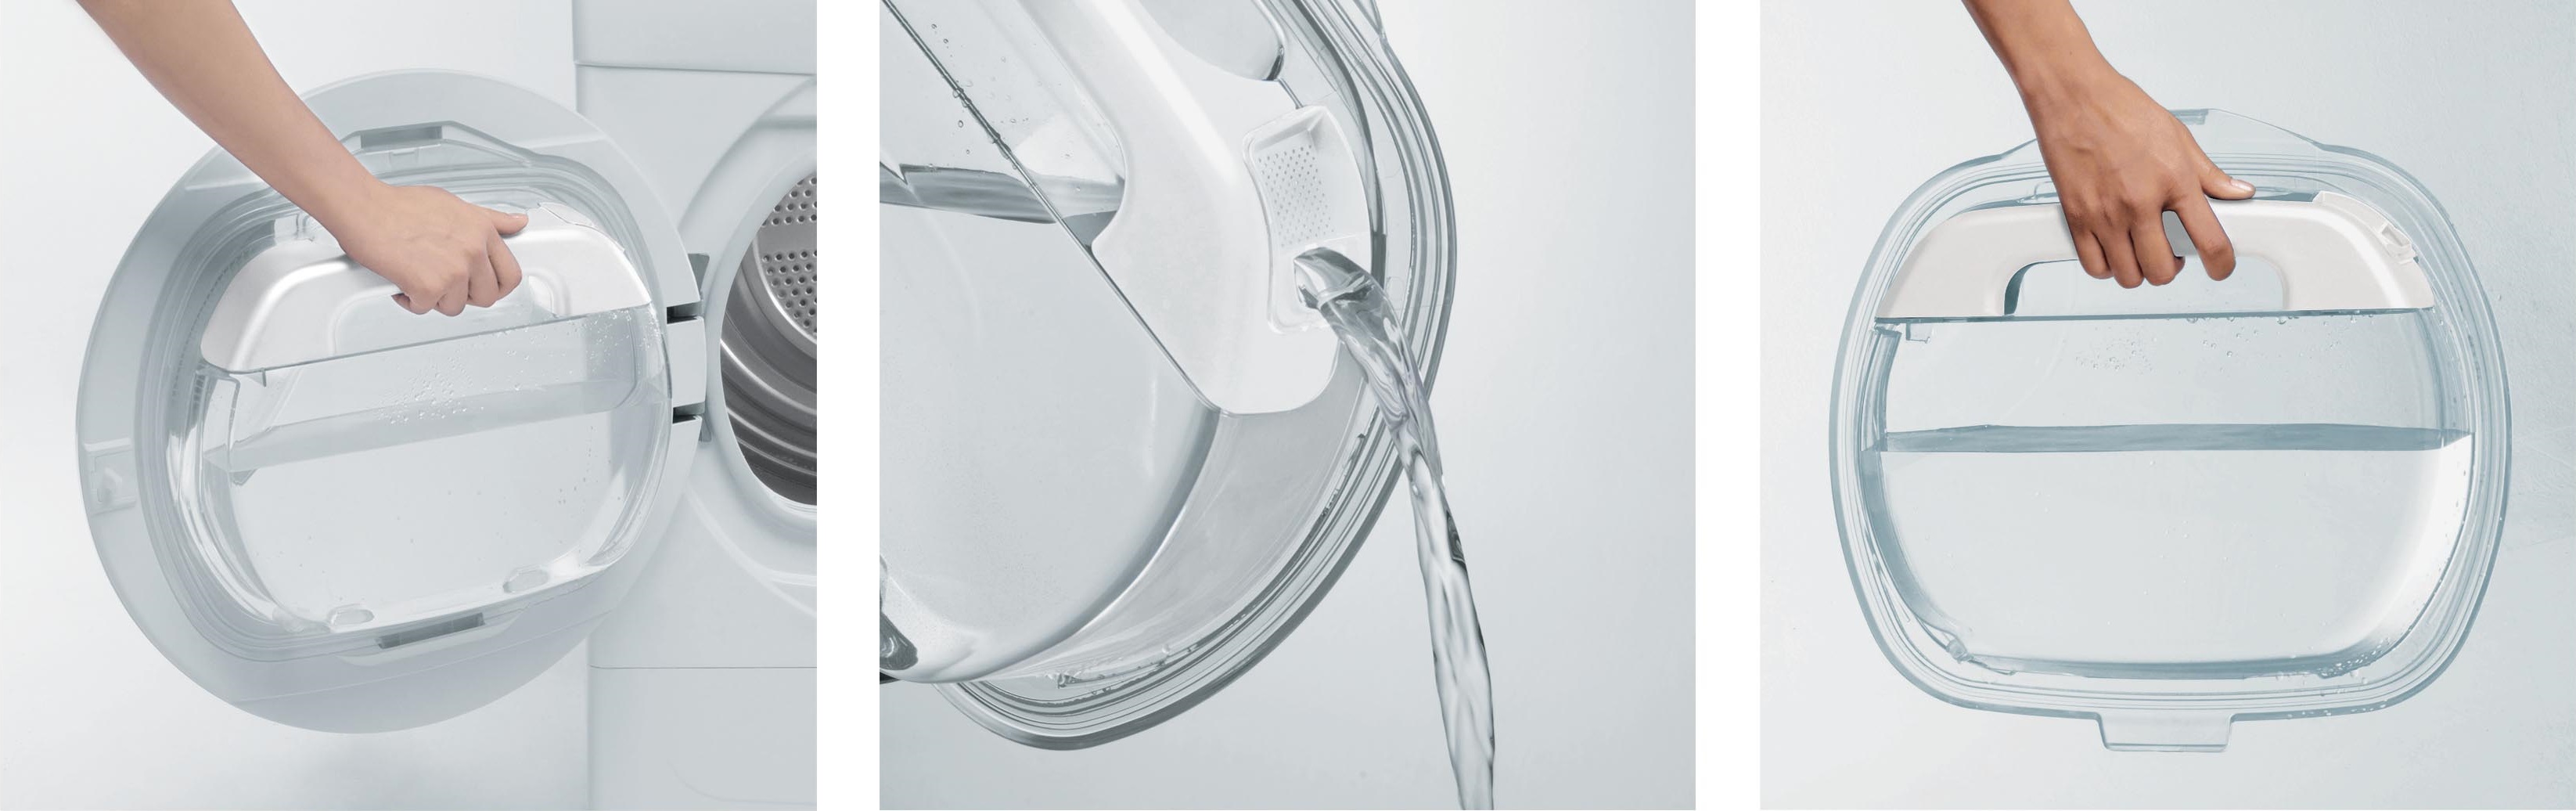
Finally, you need to monitor the condensate container, remembering to empty it after each drying. If you forget about this special tank, then the “home assistant” may not start the work cycle due to the fact that she will have nowhere to drain the condensate formed during the drying process. Emptying the container is very simple - remove the reservoir, holding it in a horizontal position, drain all the condensate, and then install the compartment back, making sure that it is securely fixed in its place. As a result, a comprehensive cleaning of the dryer takes less than half an hour, so it is simply unreasonable to ignore it, given how necessary it is for the device.
Interesting:


Reader comments
- Share your opinion - leave a comment
Categories
Washing machine repair


For buyers


For users


Dishwasher


Add a comment