Washing machine handle structure
 Inaccurate opening of the door may result in damage to the door handle. This is unpleasant and troublesome, but completely solvable. Especially if you do the repairs yourself: the master will charge 500-1500 rubles, but it’s not difficult to figure it out on your own for 0-100 rubles. But you will have to try, study the mechanism of the washing machine handle, halve the hatch and replace faulty elements. Let's look at what to repair and in what order in more detail.
What elements does the handle consist of?
The door handle of a washing machine is designed quite simply. There are no circuits, chips or other electrics here - just a banal mechanism that is easy to understand in a couple of minutes. Therefore, it is doubly offensive to give money to the locksmith to replace the lock; you can do it on your own. But first, let’s understand the structure of the element.
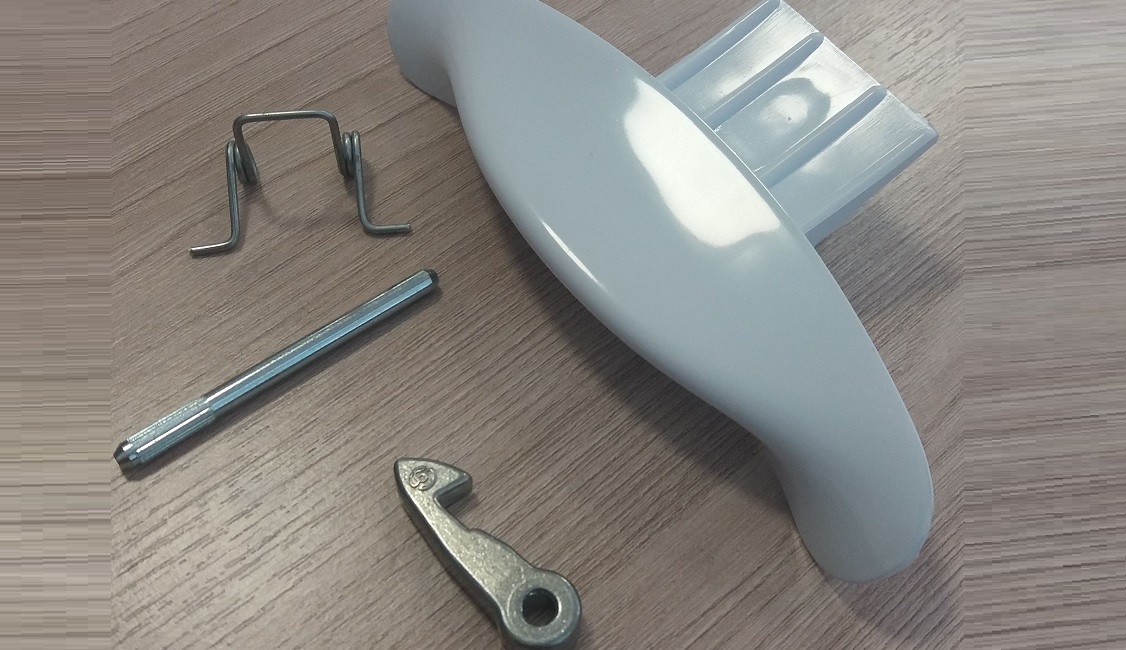
The washing machine door handle consists of a spring, a hook, a latch and a pin.
So, the hatch handle consists of:
- springs;
- metal hook;
- plastic “pedal”;
- pin.
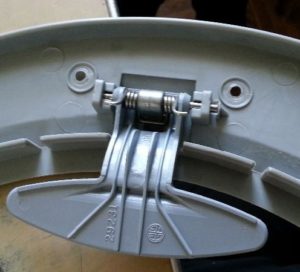
The pin is made of metal and is fixed in special grooves on the inside of the door. A spring-loaded pedal, connected to a hook, rests against it, like a support. The principle of operation of the mechanism is simple: the user clamps the handle, the latch moves and the hatch opens. The sequence is broken only in three cases: the plastic lever breaks, the locking pin falls out, or the spring pops out.
Getting to the mechanism
You won’t be able to get to the handle without disassembling the door - you’ll have to remove and half the hatch. It sounds complicated, but it’s easy to do: the main thing is to adhere to a certain sequence. So, we proceed as follows:
- unscrew the bolts holding the door;
- We place the removed hatch on the floor face down;
- we release all existing fasteners, getting to the latch mechanism;
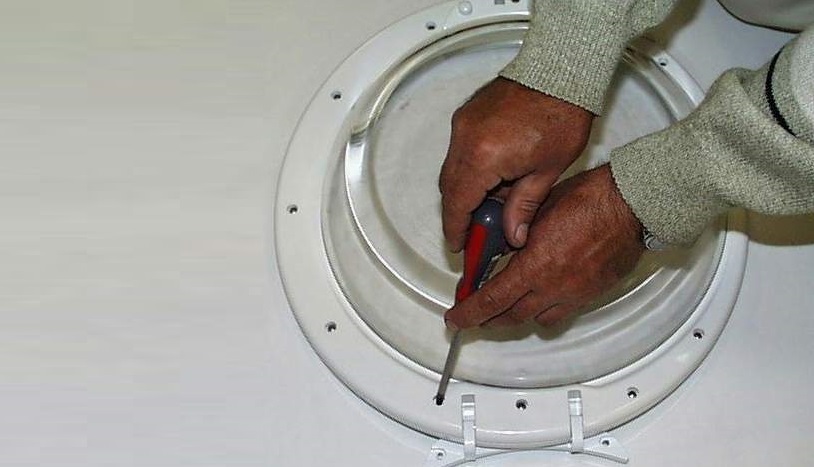
- half the hatch, carefully separating the door with a flat screwdriver, releasing the plastic latches;
- remove the outer rim and glass.
When removing glass, be careful - it is heavy, and there may be sharp burrs on the cuts!
At the last stage, be extremely careful. The glass is quite thick and heavy, try not to drop it when “transporting”. Some hatches have sharp burrs on the edges, especially on low-quality budget washers. Did you disassemble the door? Then we begin repairing the handle.
Repairing the handle
Latch repair begins with disassembling the entire mechanism. The pin is pushed through with a sharp screwdriver and removed, followed by the remaining parts being removed from the device. Then we inspect all the components, assess their condition and diagnose the breakdown.
Faulty elements must be replaced by purchasing original analogues in the store. Next we proceed to assembly:
- install the spring;
- fix the pedal;

- holding the pedal, turn the pin;
- we string all the elements onto a pin, securing the structure.
To avoid mistakes during reassembly, it is recommended to record the disassembly process on camera!
Once the mechanism is assembled and fixed, we return the hatch to its place. First, we insert the glass into the grooves, then we connect the halves of the door, snapping all the fasteners provided. Next, screw in the bolts removed earlier and attach the hatch to the washer. Don’t forget to immediately check the result of the repair and open and close the drum several times. If the lock works without problems, everything is done correctly.
Interesting:


Reader comments
- Share your opinion - leave a comment
Categories
Washing machine repair


For buyers


For users


Dishwasher


Add a comment