Error 7 in the Asko washing machine
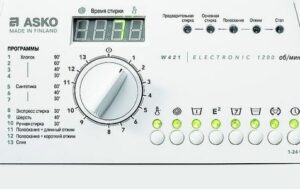 Errors in household appliances are a normal occurrence and, unfortunately, every housewife encounters them from time to time. Error 7 in the Asko washing machine indicates that the equipment has detected problems with drainage, so the “home assistant” hatch door remains blocked, and the machine itself freezes without completing the work cycle. Let's analyze this situation in detail - why this happens and what to do about it.
First we check the filter
When this fault code appears, you first need to conduct a thorough diagnosis of the CM - this will allow you to find the exact cause of the problem. In this situation, it is very important to determine the exact stage of the operating cycle at which the system failed, the amount of water that managed to leave the tank, and also to recognize the sound that the machine made before the error occurred. Only after diagnostics can you understand what to do with the device.
Most often, Asko brand equipment issues this fault code in two situations: if the pump fails or if the garbage filter is clogged. The latter is quicker and easier to check, so let's start with that.
- Disconnect the equipment from all communications.
- Remove from and under the machine any items that are susceptible to moisture, such as washing powder, toilet paper, rugs, etc.
- Cover the floors in the room with oilcloth, rags or towels to protect the floors from moisture.
- Prepare a large basin for water or another container.
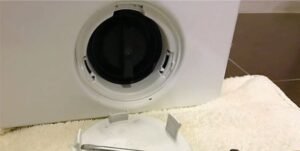
- Using a flat-head screwdriver, use a flat-head screwdriver to hook the door of the SM technical hatch, which is located at the bottom right of the housing, and open it.
- Look for a garbage filter in the hole that looks like a black round lid.
- Tilt the washing machine backwards until the front legs are about 5 to 8 centimeters off the floor.
- Place a basin under the garbage filter.
When the preliminary preparation is completed, you can remove the filter yourself. To do this, you need to take the protruding part of the element and turn it clockwise. Then you need to pull the plug towards yourself to remove it from its seat. Everything described must be done as carefully as possible, because water under strong pressure will begin to pour out of the tank as soon as you remove the filter.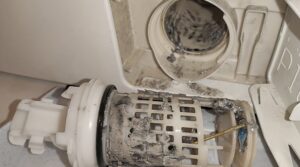
After all the waste fluid has flowed out, you can examine the garbage filter for damage and clean it of contaminants. Remove the toughest dirt, such as stubborn debris and clumps of hair, first. Then the spiral must be rinsed under a powerful stream of hot water from the tap. Pay attention to scale and other deposits that cannot be easily removed - if they are present on the unit, then soak it for about 5 hours in a citric acid solution. The water should be warm, but under no circumstances boiling water, otherwise high temperatures will deform and damage the element.
Never remove the garbage filter with your own hands if there is hot water in the washer tank, because this can lead to serious burns, so you will have to wait until the liquid cools down.
Also, fault code 7 may occur due to a dirty filter seat. That is why it is so important to check not only the part, but also the place where it is installed, for example, using an ordinary flashlight. Clear the hole and remove any foreign objects that may have gotten into the seat.Additionally, it is worth wiping all internal surfaces with a damp cloth to completely remove dirt and small objects. If all the manipulations done did not correct the problem, then you need to study the “home assistant” pump.
How to remove the pump from the machine?
Often it is the washing machine pump that needs repairs. The pump is installed in the equipment in order to pump out waste liquid from the tank and drain it into the sewer, so if it fails, the machine simply cannot get rid of the water. The situation can be corrected after checking and restoring the element, for which it must be removed from the Asko machine.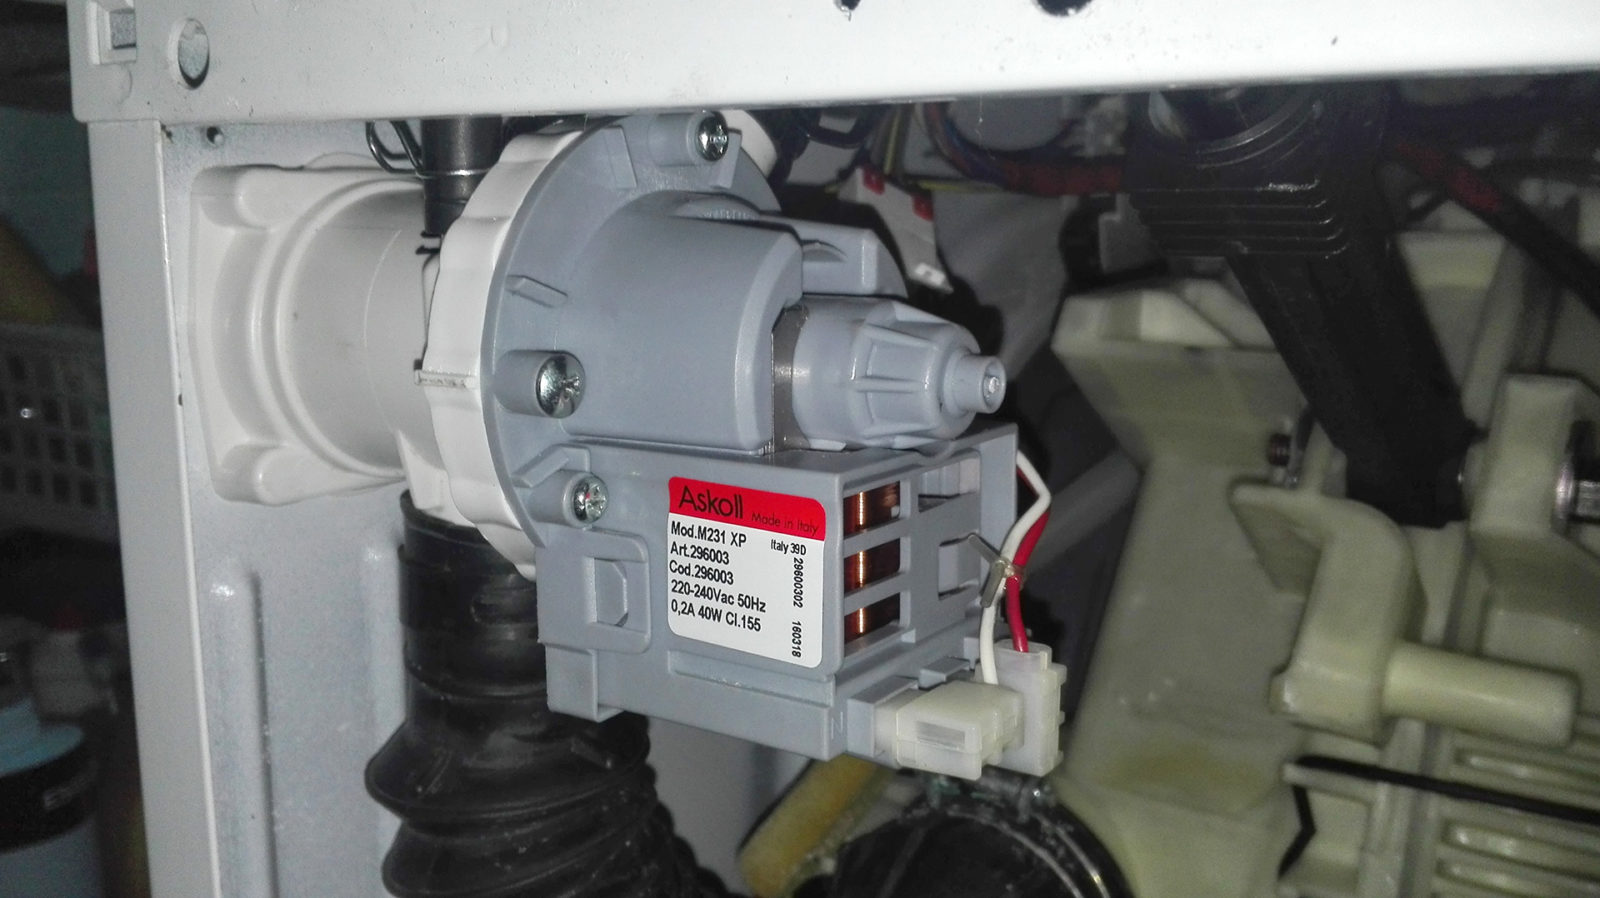
Asko brand washing machines are designed in such a way that the pump can be reached through the bottom. First prepare a wrench, a screwdriver, a basin for waste liquid, and then disconnect the household appliances from the power supply and water supply. For partial analysis, follow our instructions.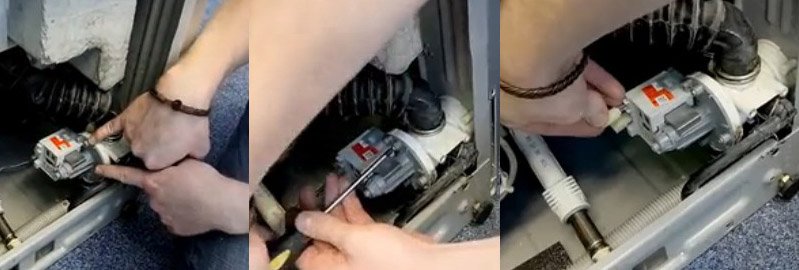
- Use a screwdriver to pry up the technical hatch and open it just as in the first instructions.
- Remove the debris filter.
- Release the pump from the fixing bolt, the head of which sticks out.
- Tilt the body of the machine back so that you can access the pump through the bottom.
- Unhook the wires and pipes connected to the pump.
Just in case, take photographs of the wiring connected to the part, so that later you will have an example of the correct connection at hand.
- Turn the pump counterclockwise, pushing the element inward at the same time.

- Reach through the bottom and remove the pump.
It will be easier to remove the pump if you first lay the washing machine on its left side, although this will require more space to work with.This will give you a good view of the internals of the device, so you don't have to touch it. Once you have the pump in your hands, you can begin inspection and repair.
Disassembling and cleaning the pump
First you need to disassemble and clean the pump, because it may be fine, just very dirty. Remove the pump impeller, the only rotating part of the assembly. To do this, you need to use a screwdriver to remove the retaining screws, divide the element body into two parts and find the part with the blades.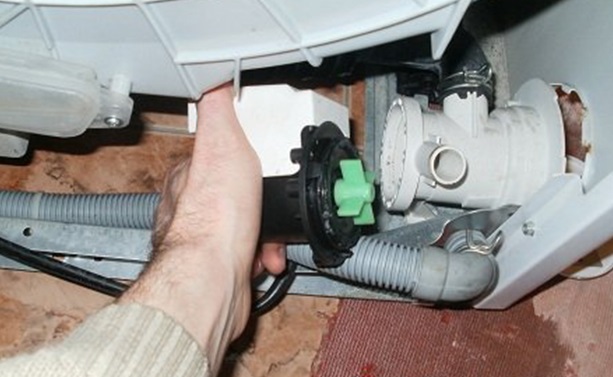
The impeller must rotate well in its seat, but not too freely. Therefore, if it flies off its axis, then it needs to be more securely fixed in its place. If the blades cannot rotate due to hair, dirt, threads and other debris, then it is necessary to remove all excess and rinse the entire assembly under water.
Experts advise diagnosing and cleaning your “home assistant” at least once a year so that the equipment lasts longer than its recommended service life.
When the repair is complete, return the pump to its place, following our instructions in reverse order. Be sure to run a test run cycle to check the functionality of the device. In a situation where the operation of the machine is devoid of extraneous noise, all the liquid is drained after the program is completed, and the fault code does not appear on the display, then everything is in order. Otherwise, you will have to replace one of the key elements of the SM.
I'll have to check the coil
To avoid getting into an unpleasant situation, it is better to immediately check the pump not only visually, but also using an ordinary multimeter. To do this, the tester must be set to resistance measurement mode, attach its probes to the pump contacts and activate the multimeter.The normal value is considered to be from 150 to 260 Ohms.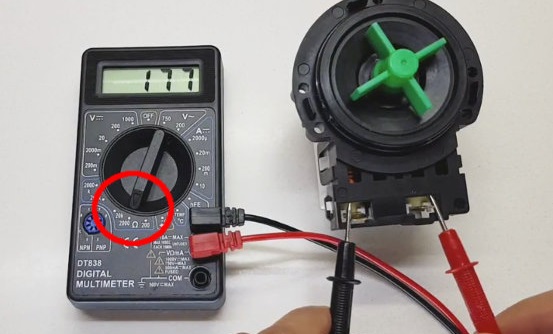
If the device displays “0”, then the pump is damaged as a result of a short circuit, and when the display shows less than 120 ohms, then most likely the broken winding needs to be repaired. This can be dealt with, but it is very expensive and difficult, so it is easier to buy a new pump and not waste energy and nerves on the damaged element.
Buying a suitable part is easy - you can simply copy the serial number of the Asko washing machine, or take the damaged pump with you to the store as an example. Then all that remains is to replace the element, which is easy to do according to our instructions above.
The worst thing is if you cleaned the garbage filter and its seat, and also made sure that the pump is working, but the drain still does not start working properly. In this case, the cause of the malfunction is in the CM control module, which you cannot fix yourself, but will have to call a service center specialist.
Interesting:


Reader comments
- Share your opinion - leave a comment
Categories
Washing machine repair


For buyers


For users


Dishwasher


Add a comment