Plucking machine from the Malyutka washing machine
 In the post-Soviet space, small-sized Malyutka washing machines were extremely popular for some time. However, now almost no one uses them, although the equipment is of very high quality and still works. In order not to waste good things, if you wish, you can make a wonderful feather removal machine from the Malyutka washing machine. How to do it?
Getting fingertips
In fact, Malyutka's device does not require major modifications when turning into a feather plucking machine. The only serious aspect that needs to be taken care of is the kicking fingers. For the machine to work smoothly, their quality must be at its best.
Buying fingers for plucking poultry is not difficult. They are sold either in specialized stores or on the Internet, you can even find good samples. Experts recommend taking: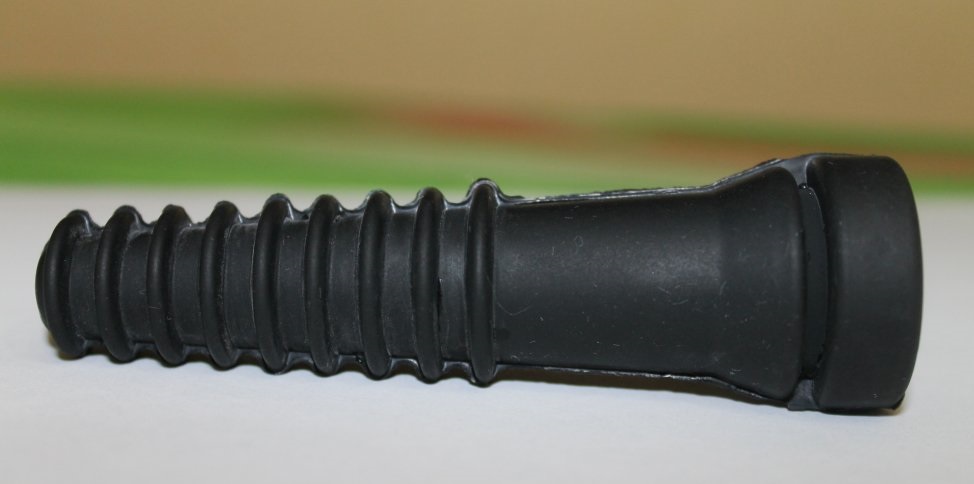
- for plucking small birds (quails and partridges, chickens) - feather-picking fingers from Placker. Their Shore hardness is 48 units, total length is 5 cm, working length is 4.5 cm. The diameter of the seat hole is 1.05 cm, and the groove of the seat is 0.2 cm. Costs from $0.15 to $0.1 per piece.
- For preparing a large bird carcass, larger fingers with a hardness of 50 units, a total length of 9.3 cm and a working length of 8 cm are suitable. The landing hole is 2 cm in diameter. The price for one finger is from $0.2.
Placker's fingers are made of high-quality rubber, thanks to the softness and elasticity of which the birds' skin is not damaged when removing feathers. The material is non-toxic and has a long service life.To transform Malyutka into a feather-plucking machine, you will need about 50 beating fingers, maybe a little more or less.
Making a machine
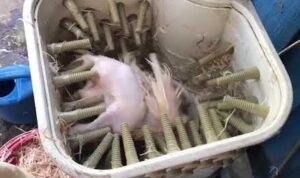
Let's start making the device. Take your Baby with or without a lid. It is better if the lid is preserved, since during the process of plucking feathers it can protect the bird carcass from flying out of the chamber of the feather removal machine. Next, you need to remove the machine activator. Cut a circle from an old plastic basin to the size of the activator. Next, we need to drill 12 holes in the plastic circle, in accordance with the diameter of the landing grooves of our fingers.
Attention! If the diameter of the hole is chosen correctly, you will not need to secure the pins additionally; they will stick well in the mounting grooves.
Now insert 12 fingers into the holes. Now we move on to the washing machine tank itself, which will be the capacity of the new plucking machine. Along the perimeter of the walls of the washing tank, you need to drill holes that are evenly spaced in relation to each other and cover the entire tank inside in a circle. Make sure that the holes are not too close - the optimal distance is 7-10 centimeters. When the holes are ready, first install the activator in place, and then screw the circle with fingers to it.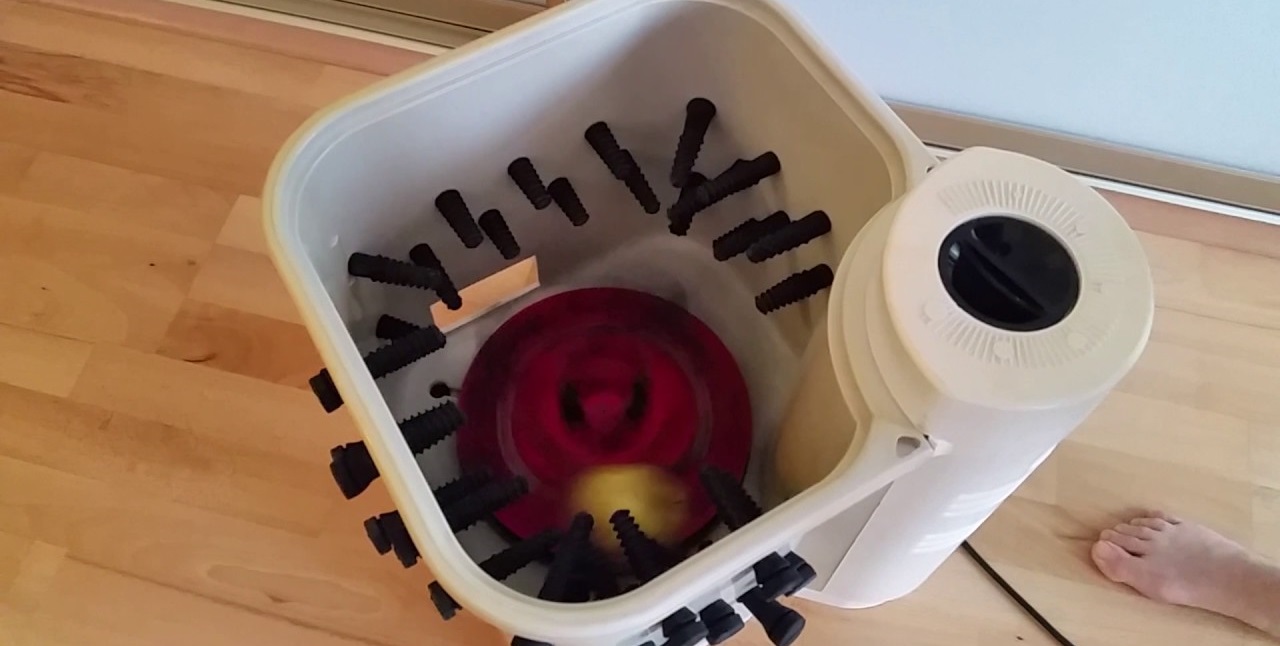
For the feather plucking machine to function fully, it is necessary to ensure the flow of water into the chamber. To do this, just throw the end of the water hose inside the machine. Strong pressure is not needed; it is important that the carcass be watered during the plucking process.
Checking and further operation of the machine
Before testing a new unit, you need to take care of its location.It is not recommended to place the feather removal machine indoors, since during its operation a lot of dirt will form: feathers will fly in all directions, and the waste water will need to be drained somewhere. So it is better to install the plucking machine outside or equip the room with a drain. Only after this can you begin the “test drive”.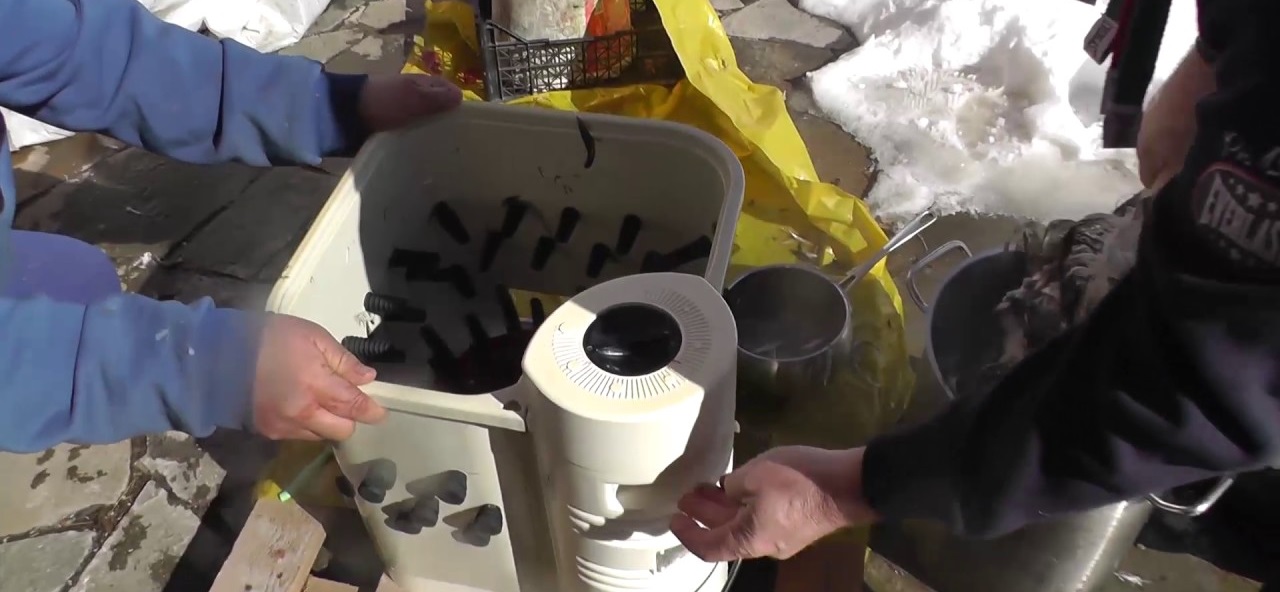
- We connect the machine to electricity.
- We start the machine and wait for the activator to gain momentum.
- We start a stream of water and bring the scalded carcass under the stream.
- We throw the bird's body into the camera and watch the plucking.
- When one carcass is ready, remove it from the tank and put the next one there. There is no need to turn off the machine and turn off the water between uses. If damage is observed on the skin of the bird after plucking, it is necessary to increase the water pressure.
Practice shows that hand-made feather removal machines work excellently despite the fact that they are easy to manufacture. The pins also last a long time and do not need frequent replacement.
Interesting:


Reader comments
- Share your opinion - leave a comment
Categories
Washing machine repair


For buyers


For users


Dishwasher


Add a comment