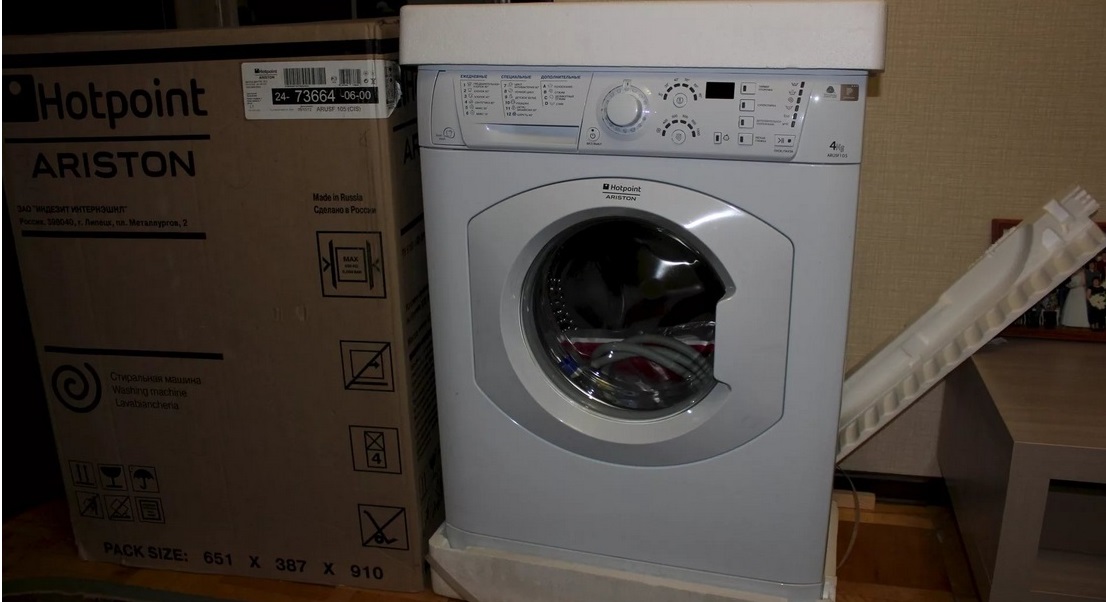
The next step after purchasing an Ariston washing machine is its installation and connection. This includes choosing a place to place the equipment, unpacking, studying the instructions, connecting communications and starting a test wash. Anyone can cope with all the tasks: you just need to arm yourself with tools and recommendations. There will be no problems with the latter. We offer you step-by-step instructions for connecting an Ariston washing machine.
We will carefully choose a place
The first task on the list is to choose the optimal location for the washing machine. Ideally, the issue of placement is resolved before purchase, since this factor significantly influences the choice of dimensions and characteristics of the machine. So, if you want to build a machine into a cabinet, under a sink or into a kitchen unit, you should pay attention to narrow models with removable covers; in other cases, full-size units with a large load are suitable.
More often, the washing machine is placed in the bathtub: next to the toilet or under the sink. In rooms with a larger square footage, the machine is installed in a separate closet or niche. But here everything is individual: the owners adapt to their desires and free space. However, all options still have a significant drawback - high humidity, which reduces the life of the washing machine. There is also a “plus” - communications are nearby, and there will be no problems with their connection.
Often machines are “settled” in the kitchen. Most housewives “hide” the units in the unit, while others place the washing machine next to the cabinet. The advantages of placing it in the dining area are obvious: there are more free meters, there is ventilation, accessible communications and a lower percentage of humidity. There are also disadvantages, such as the need to store detergents and dirty laundry away from food, which complicates the washing process.
If there is no space in the kitchen and bathroom, then choose a hallway or pantry. There are no problems with odors and humidity, but the machine is troublesome to connect to the water supply and sewerage. The bedroom has similar pros and cons.
It doesn't really matter what the room is called. Any room can “shelter” a washing machine if it meets several requirements.
Communications. Ideally, the distance between the selected location, pipes and outlet should not exceed 1-1.5 m. Otherwise, the costs of connecting equipment will increase.
Flat floor. The manufacturer recommends installing the washing machine on a concrete, tiled floor or other hard surface. The machine must not be allowed to stand unsteadily.
Sufficient square footage. Equipment should not be placed close to furniture or walls.
When choosing a place for Ariston, you need to focus on the relevant standards and requirements.
It is worth understanding that not all machines should be connected to centralized communications. It can be connected to water and sewerage through alternative options: install a fence from a tank or barrel, and drain into a sink or toilet. The main thing is to ensure full operation of the machine. If the optimal location has been chosen, we proceed to installation.
Preparing the machine
It is not enough to simply plug in the machine and connect it to the water supply and sewerage system. Each purchased washing machine requires a number of preparatory measures, without which the washing cannot be started. We are talking about the following mandatory steps:
studying the factory instructions (it contains an explanation of the icons, a list of components, all requirements and connection nuances);
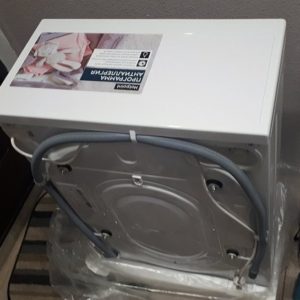
unpacking the machine with the removal of all protective films, gaskets, ties, foam blocks;
removing the transportation bolts (this is done according to a specific scheme, which is given in a separate article);
It is contraindicated to operate the washing machine with the transport bolts not removed!
inserting plastic plugs into the holes freed from the transport bolts (included in the package).
We begin to install the prepared machine. We carefully move the equipment to the designated place, leaving space at the back for subsequent connections. Afterwards we proceed to installing communications: first drainage, then water supply and electricity. Don't forget about body alignment - we'll tell you in more detail later.
Sewage disposal
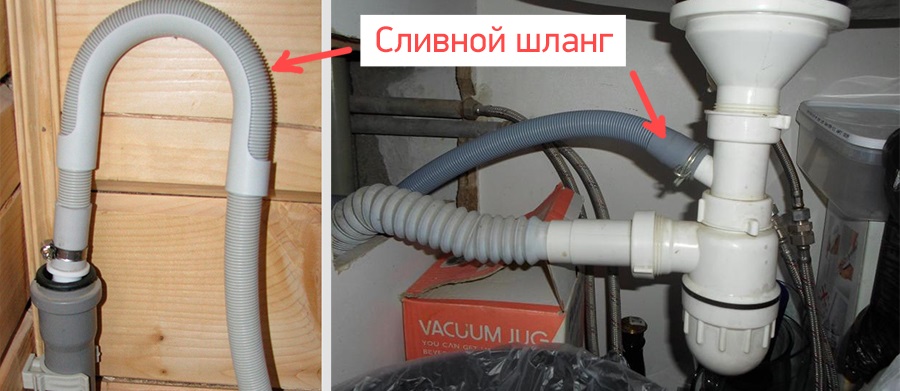
There are several ways to organize drainage. The easiest and fastest way is to lower the end of the hose into the bathtub, sink or toilet. The waste liquid from the washing machine will be “sent” by the pump to the plumbing and removed through the already established sewer system. But it is better to practice such draining only at the initial stage: an extended hose looks sloppy, threatens to slip out, and dirty water leaves a specific coating on the ceramics.
It’s better not to be lazy, but to install a drain through a siphon. The instructions included with the washing machine will definitely contain a clause about connecting to the sewer system, which specifies all the requirements. In particular, you should not miss the recommended bending height, which varies between 50-70 cm. Each Ariston model has its own minimum, so we do not neglect this indicator. Having clarified the standards, we install the siphon, attach a hose to it and secure it with a clamp.
For owners of an Ariston equipped with a check valve, any bending height of the drain hose will suit them.
There is a third option - connect the washer's drain hose directly to the sewer pipe. To do this, you need to purchase a special rubber gasket and place it between the metal and the sleeve. Be sure to secure all joints with clamps and treat them with sealant.
Water supply
Next in line is the plumbing. Here the connection diagram does not depend on the method of water supply, centralized or “home”. In any case, setup will occur according to the same algorithm:
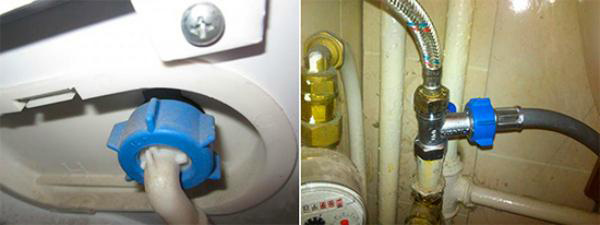
take an inlet hose (it comes complete with Ariston, differing from the drain hose in a smaller diameter, but sometimes you have to buy it separately);
go around the machine and find the water supply pipe in the upper part;
attach the curved end of the hose to the found tube;
cut a proportionate hole in the water supply;
insert a tee into the pipe with a separate line leading out to the washing machine;
connect the hose to the tee;
tighten all fasteners and tighten the clamps.
Plastic nuts are tightened only by hand, without the use of wrenches or pliers!
When establishing a water supply, a sealant is used. The joint must be treated with a water-repellent agent. After connecting, it is necessary to visually assess the tightness of the connection - if drops of water appear on the hose, then the fixation is unreliable.
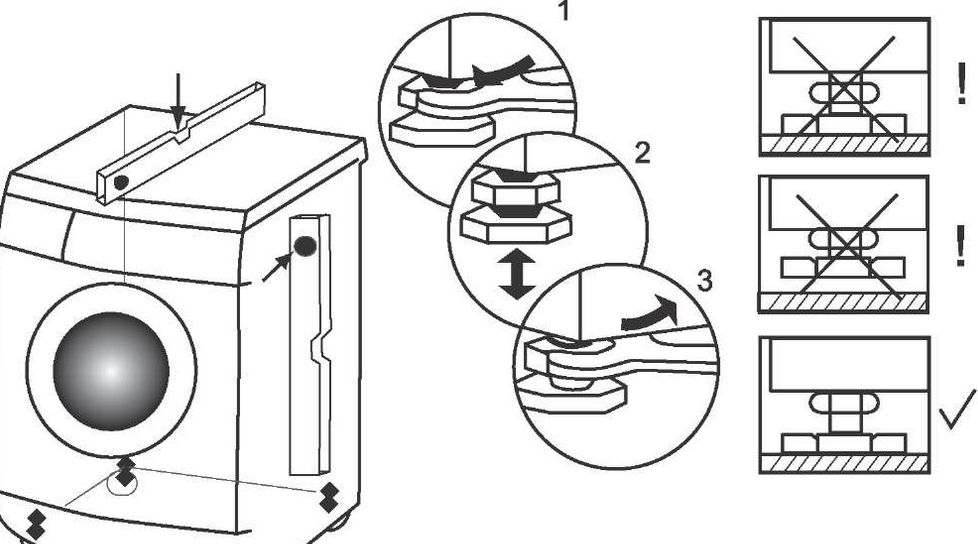
Place the machine correctly
After connecting to the water supply and sewerage system, we place the washing machine in the chosen place: move it closer to the wall, lift it under the sink, into a niche or into a closet. But you cannot insert the plug into the socket and start the wash - first the machine equalizes. An unstable unit will “jump” during operation due to increased vibration, which will lead to damage to equipment, including death.
Perfectly level floors are rare, so we take a building level and begin the procedure:
place a level on top of the washing machine;
monitoring the level indicators, we adjust the legs to the desired height;
we check the stability (it is enough to push the machine lightly to the side; a stable machine will not move);
fix the adjustment;
We put anti-slip attachments on the racks;
It is prohibited to operate an unstable Ariston washing machine!
Ariston should not jump and clank when washing. A slight vibration is allowed, which increases during spinning.
Finishing touch"
The Ariston installation is completed by connecting to the electrical network. Everything is simple here: the power cord is plugged into an outlet. The main thing is not to rush, but to assess the readiness of the wiring for an increase in load.
The wiring is ready to turn on the washing machine if:
there is grounding;
an RCD is included in the circuit;
The socket is protected from moisture by a special cover.
Having connected to electricity, we start a test wash. An “idle” cycle will wash away the factory lubricant and make it possible to evaluate the quality of installation.
 The next step after purchasing an Ariston washing machine is its installation and connection. This includes choosing a place to place the equipment, unpacking, studying the instructions, connecting communications and starting a test wash. Anyone can cope with all the tasks: you just need to arm yourself with tools and recommendations. There will be no problems with the latter. We offer you step-by-step instructions for connecting an Ariston washing machine.
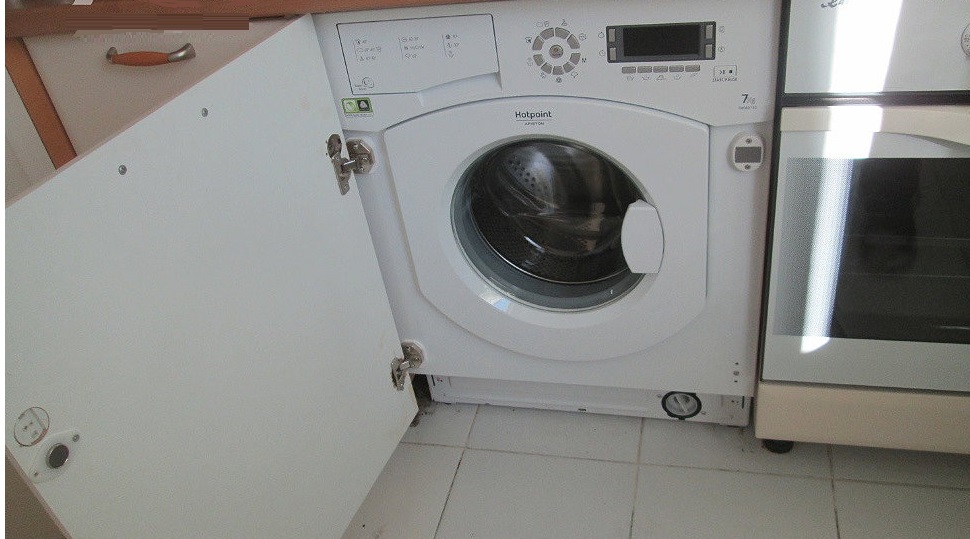


Add a comment