How to connect a Miele washing machine
 The initial installation of the washing machine is a simple process that can be completed without the help of a service center specialist. To connect a Miele washing machine with your own hands, you only need to prepare a minimum set of tools, as well as find detailed instructions that will list all the precautions and important installation nuances. In this article, we have collected basic recommendations so that a new user can independently prepare a “home assistant” for work.
Where will the machine be located?
Before you start preparing any household appliances, you need to decide where to install the equipment. It is better to do this before purchasing the machine, so as not to make a mistake with the dimensions. For example, in a spacious bathroom it makes sense to install a full-size Miele washing machine with a front-loading type of laundry; in a small room it is better to place a compact washing machine with a vertical loading type; finally, built-in washing machines are designed for kitchens and furniture sets.
Most often, washing equipment is placed in the bathroom, near the toilet, washbasin, or right under the sink. This is not a rule of installation, since placement primarily depends on the size of the room, design and preferences of the housewife. The main disadvantage of installing a washing machine in the bathroom is high humidity, and the main advantage is its convenient location next to all communications.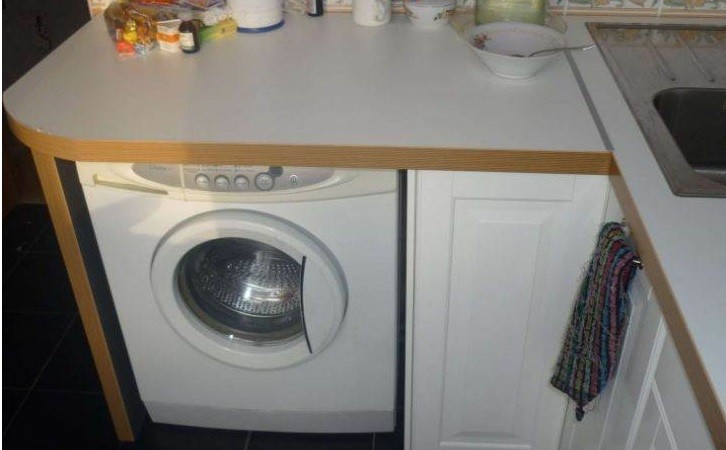
The second place in the house where a washing machine is often installed is the kitchen. On it, appliances are usually built into the kitchen unit, or simply placed on the same level near the floor cabinets.The undeniable advantage of the kitchen area is good ventilation and relatively low humidity, especially in comparison with the bathroom. As a disadvantage, it is necessary to note the odors of food that can settle on freshly washed clean clothes.
Finally, the third option for the location of the “home assistant” is the hallway or storage room. The advantage here is that there is no humidity or strong odors of cooked food. The downside is that usually the pantry and hallway are very far from the necessary communications. In any case, what is more important is not the purpose of the room where household appliances are installed, but its arrangement for installing a washing machine. The following must be prepared in the room:
- durable and smooth floor covering. It is necessary to ensure that the machine stands on the floor as level and stable as possible. Therefore, it is better to install the equipment on concrete or tiles, but not laminate or other wood covering, which can swell after a leak;
- convenient location of communications. This list includes an outlet, sewer outlet and water connection. It is advisable that they all be no more than one meter away from the washing machine.
Do not rush to connect the equipment until you are sure that the intended installation location is really suitable for installing the washing machine.
Equipment does not always need to be connected to centralized communications. For example, if we are talking about a summer house, then the drain hose of the machine can be routed into a deep basin or simply outside, and water for the working cycle can be collected from a canister or tank if there is no organized water supply. Therefore, the most important thing is to prepare the conditions for the operation of the unit.
Preparing the equipment
Do not rush to immediately start connecting the device to all communications after it has been delivered to your home. First, the equipment should remain at room temperature for several hours after it has been outdoors. It is very important to fully study the official user manual, because all safety precautions and installation rules are described there. It is advisable to remove the packaging of the machine without a stationery knife, so as not to accidentally scratch the body. Remove all cardboard packaging, film, foam, tape and other packaging material required for transportation.
Pay special attention to the shipping bolts that hold the washing machine drum in a stationary position during transport. If you forget about them and start the work cycle, then in a short time the machine will fail, damaging key components. Such damage will void the warranty, so you will either have to pay for expensive repairs out of pocket or buy a new “home assistant.”
The easiest way to remove the bolts is with a wrench or pliers - the transport locks are usually located on the back panel of the CM. Unscrew the screws and in their place install the special plastic plugs that come with every Miele washing machine.
The most expensive SM Miele models are equipped with special transport tubes instead of transport bolts. To remove them, find two hatches on the back wall, approximately in the middle, on the right and left, and open them. Hook the hook of the wrench into the hole in the tube and turn the tube half a turn counterclockwise. Hook the wrench on the tube and pull it towards you. Do the same with the second tube.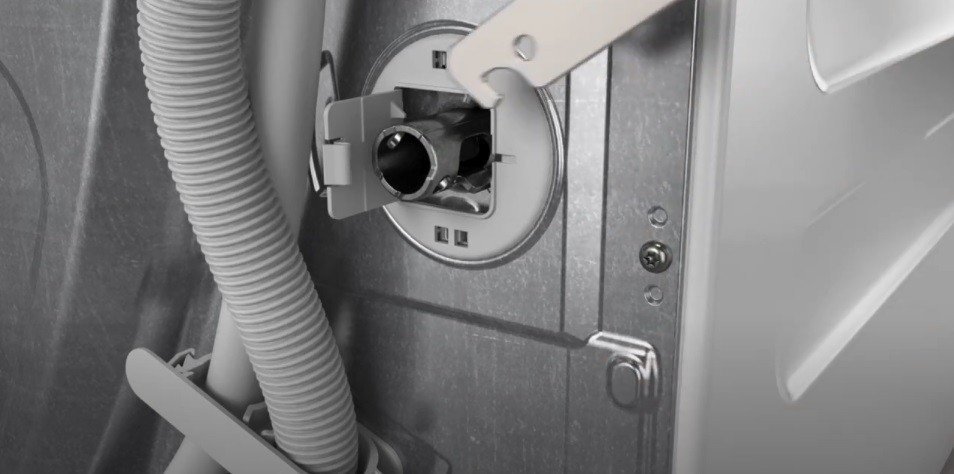
Only now can you begin preparing household appliances by moving them to their future location so that there is free access for working with the back of the case. First of all, we will prepare the drain, then the water intake, then we will level the device to the building level, and the last step is to connect it to the electrical network.
To the sewer
The most basic way to drain waste liquid is to place a drain hose in the bathroom, sink or toilet. This is simple and quick, but unaesthetic and unhygienic, because a trace of dirty water will remain on the walls of snow-white ceramics, which you will have to regularly remove with your own hands. This is why it is best to install a drainage hose through a siphon.
Carefully study the manual, which contains a separate chapter on the nuances of connecting the washing machine to the sewer.
One of the most important recommendations for organizing a drain is related to the bending height of the drain hose. It is believed that it must be raised to a height of 50-60 centimeters from the floor level. You need to secure the siphon under the sink or bathtub, put a drain hose on the branch, securely fasten it with a clamp and check the tightness of the connection.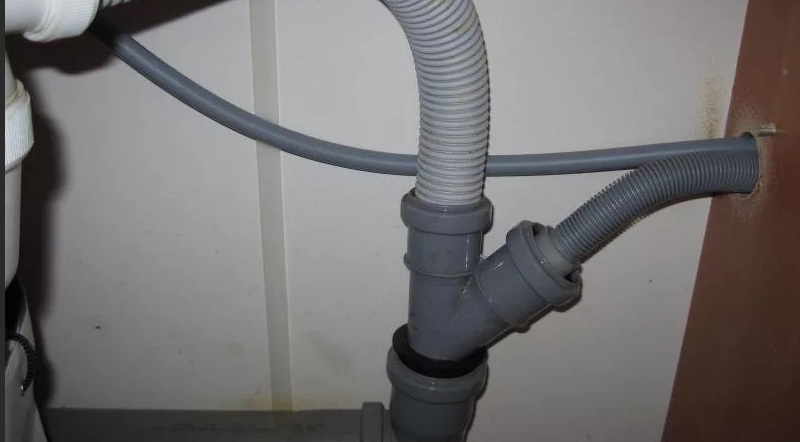
It is also permissible to connect the hose directly into the sewer pipe. In this case, you need to purchase a special rubber gasket, install it at the joint and connect the drainage hose, not forgetting to securely fix it.
Connect to water
Now you need to move on to connecting the water supply. If you have previously used an automatic washing machine, then there is already a connection in the room. If not, you will have to organize it yourself according to our instructions.
- Take the inlet hose.
- Connect its curved end to the pipe installed on the rear of the SM body.
- Make sure that the polypropylene water pipe is closed, cut it where the tee is installed, solder ¾ inch nuts and screw the tee tap to create a place to connect the washing machine. Solder the pipe only dry!
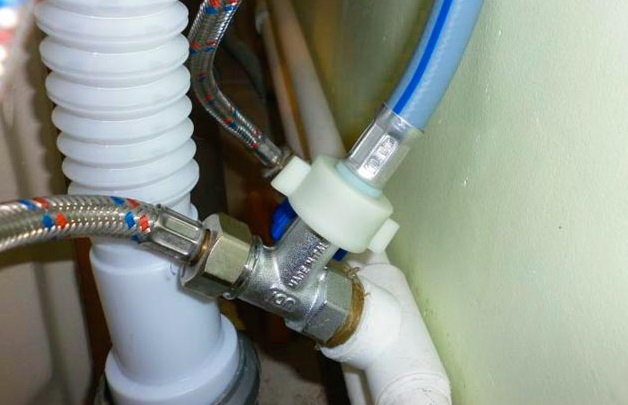
- Install the filling hose into the tee valve.
When installing a tee tap or special sockets with water protection, be sure to use silicone sealants with increased water resistance.
Carefully examine the connection you have made. It is very important that there are no drops of water or other evidence of a leaky connection in the structure. If it seems to you that the connection point is not airtight, then it is better to spend time and modify the connection.
Equipment must be level
When the connection of the SM to the water supply and sewerage is completed, the household appliances must be installed in the place prepared for it. Do not run the work cycle, because first you need to make sure that the equipment is level. If you do not ensure a perfectly even position, then during washing and spinning the “home assistant” will not only vibrate strongly, but also hum excessively, bounce and even change its location. For additional adjustments, you will need an ordinary building level.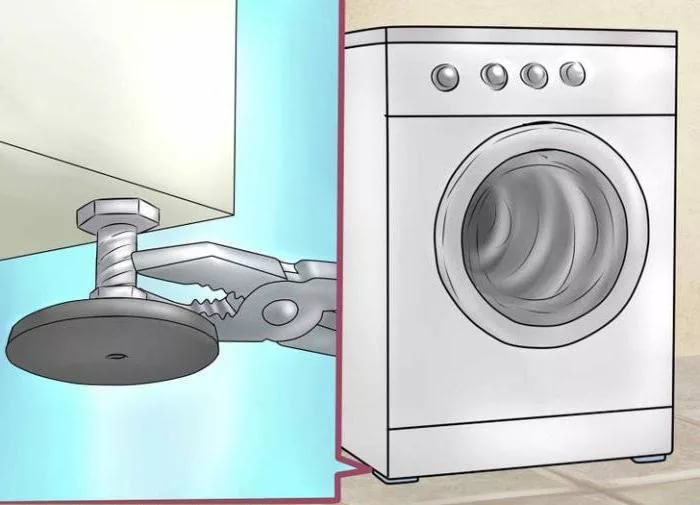
- Place a level on the lid of your Miele washing machine.
- Using the level as a guide, tighten the legs of the unit.
- Then try pressing on different corners of the machine to check whether it wobbles or not.
- If everything is in order, then tighten the nuts on the CM legs.
Experts advise against washing clothes in a machine that is not stable on the floor. Due to increased vibration, such washing can cause damage not only to the body of the equipment, but also to the internal elements of the equipment.For additional fixation, you can place a special anti-vibration mat under the washing machine, which will also reduce the noise level during washing and spinning.
Power supply for equipment
Finally, we move on to the electrical grid. Under no circumstances should you connect your washing machine to the mains using an extension cord, as this is contrary to safety regulations. For such demanding household appliances, you need a separate outlet with grounding, as well as protection from water. It is also advisable to prepare a protective shutdown system with a cut-off current of 10 mA if we are talking about a bathroom, and with a cut-off of 30 mA if the machine is installed in a room without high humidity. Such protection will protect your expensive washing machine from sudden power surges in the network.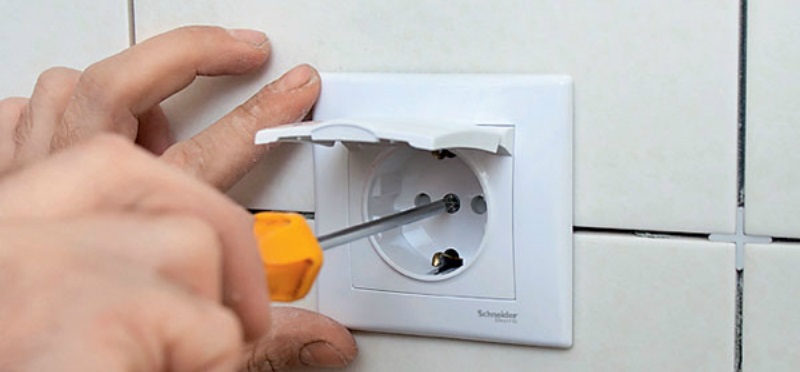
Only after all the manipulations have been done will the new “home assistant” be ready for launch. Be sure to check its functionality during a test run without laundry. Carefully monitor the operation of the SM in order to promptly detect a leak or other problem associated with improper installation or manufacturing defects.
Interesting:


Reader comments
- Share your opinion - leave a comment
Categories
Washing machine repair


For buyers


For users


Dishwasher


Add a comment