How to make an apple press from a washing machine?
 The idea of making an apple press out of a washing machine arose back in the 1980s. Drawings of juice presses from the Soviet semi-automatic machines “Riga”, “Oka” and “Vyatka” were repeatedly published in popular scientific journals of that time. But even after decades, the idea of converting a washing machine into a useful thing for everyday life is still relevant. We propose to rethink this “concept” in a modern way and make an apple press from a 21st century machine. Step-by-step instructions with explanations are given below.
What is it for?
The desire to make an apple press with your own hands is hardly explained by the desire to save money. In fact, buying a juicer is much easier, and these devices are not expensive. Moreover, you don’t have to waste time searching for tools, tests, or the work itself—you just need to walk to the store.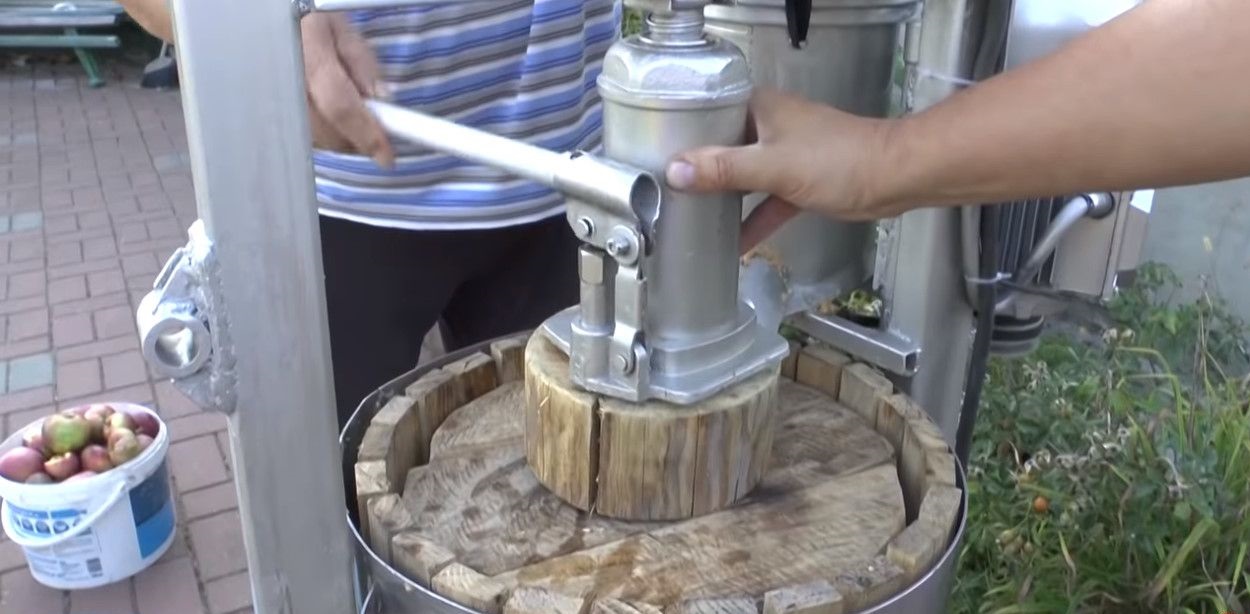
The point is different - in the process itself. It is a joy for home craftsmen to give new life to old things, turning trash into a useful and necessary thing in the household. You can also show off to friends and acquaintances, test your strength, or add to your collection of homemade items. Especially if you have the time and desire to build a standing unit from hardware.
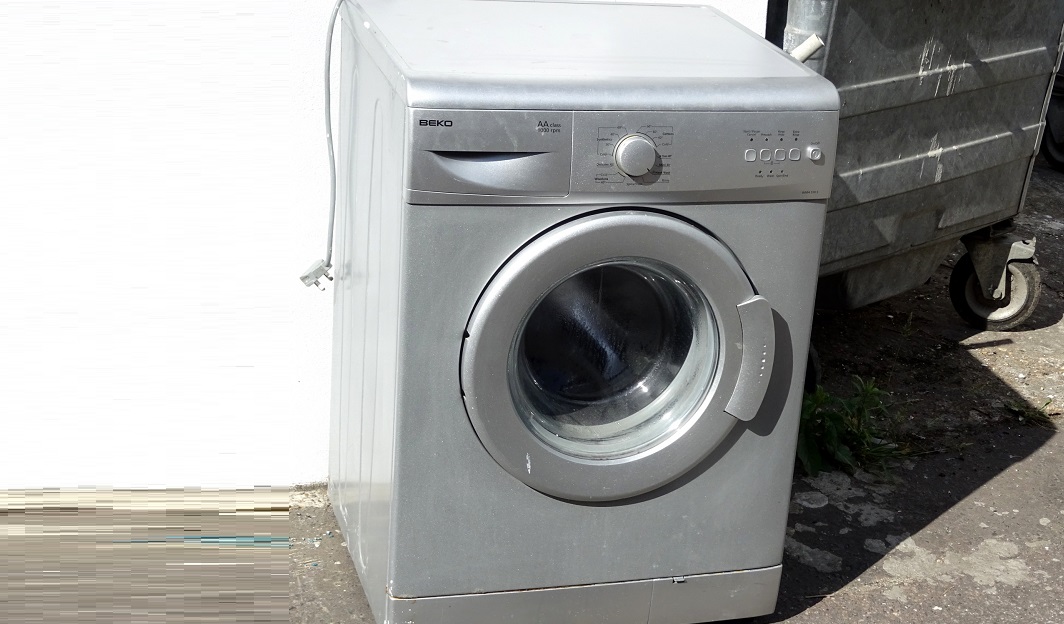
You can make an apple press from any washing machine, both front-loading and top-loading.
Modern washing machines are an excellent tool for new inventions. They can be converted into a concrete mixer, crusher, miniature sanding machine and many other devices and structures. A juicer also completes the list. Want to try? Then prepare your tools and get down to business.
Parts and tools
The first stage is preparation. It is necessary to collect the tools and additional materials and parts required for the work. So, for a juicer you need:
- broken washing machine – 1 pc.;
- shock-absorbing spring – 2 pcs. (they will help compensate for horizontal centrifugal force);
- metal mesh measuring 30 cm by 6 cm – 2 pcs.;
- 3 mm fasteners;
- container, basin or bucket – 1 pc. (for collecting juice and pulp);
- drain hose – 1 pc.;
- stubs.
The washing machine will not be fully equipped, so excess parts are removed immediately. So, you should immediately dismantle the pump, level sensor, inlet valve, debris filter and instrument panel with the electronic unit. Be sure to disconnect the bottom and back wall from the body. All this will not be useful for the future press.
To make a juicer for fruits and berries you will need an automatic or semi-automatic machine and several additional parts.
As for the tools, you should prepare:
- drill with drills;
- grinder;
- welding machine;
- Phillips and slotted screwdriver;
- scissors for cutting metal;
- set of open-end wrenches;
- pliers;
- hammer.
In general, the scheme for converting a washing machine into a juicer looks like this. The machine is placed with the back panel down and fixed in the corners with bars - this way the washing machine will take a stable position. The hatch, rubber cuff, drum with tank, motor and drive remain in place as key elements of the press. As for starting the system, the motor is connected separately, since the control board has been removed. Now you can begin preparing parts for subsequent assembly. First we get to the tank:
- pull the belt off the pulley and engine;
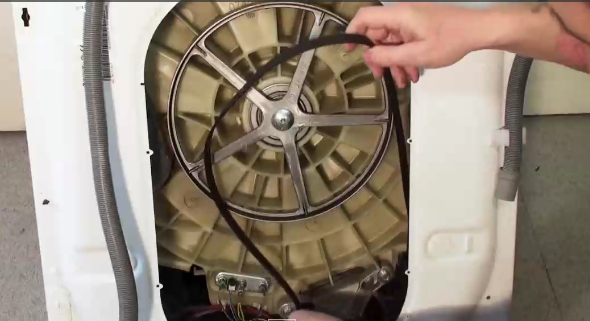
- unscrew the shock absorbers;
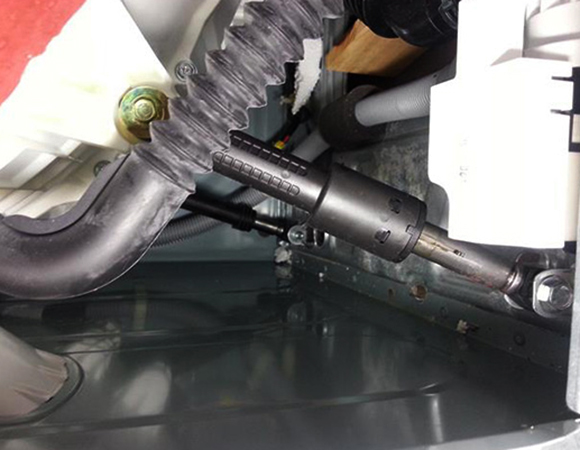
- we free the tank from the remaining connected parts (heater, temperature sensor, dampers, pipes);
- loosen the clamps on the cuff and remove the seal;
- take out the tank with the drum.
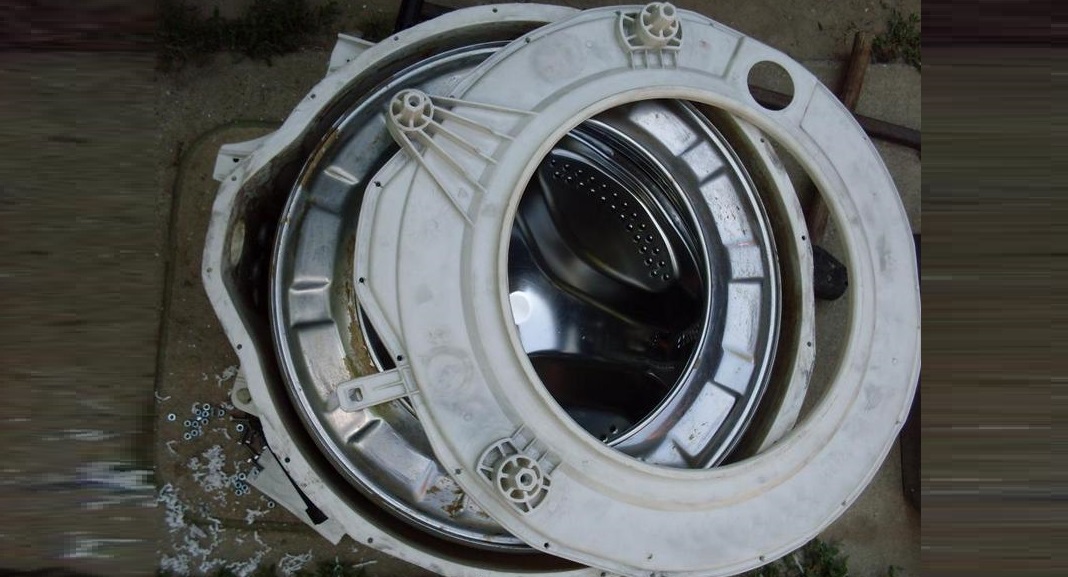
Then we act according to the situation. If the tank is disassembled, then unscrew the screws provided around the perimeter; if it is solid, carefully halve it with a grinder along the weld seam. There is no need to disconnect the drive and remove the drum cylinder. The main purpose of disassembly is to wash the tanks from accumulated dirt, scale and soap deposits. Just a rag and soap are not enough; it is recommended to disinfect the inner surface with a vinegar solution.
It is recommended to convert front-facing automatic juicers with stainless steel tanks into juicers.
The result is a clean tank: without dirty deposits, debris and unnecessary spare parts. The vacated holes from sensors and devices are closed with previously stored plugs. There is only one “hole” left - from the drain pipe. We do not touch it, since it is needed to connect the new hose. Then we turn our attention to the drum. The existing perforation must be sealed by welding, since the holes are too large. Instead, we drill new holes, but smaller ones - maximum 1 mm. We also unhook the rib punches from the walls, and leave the grooves and clamps provided for them: they will be useful for cutting fruit.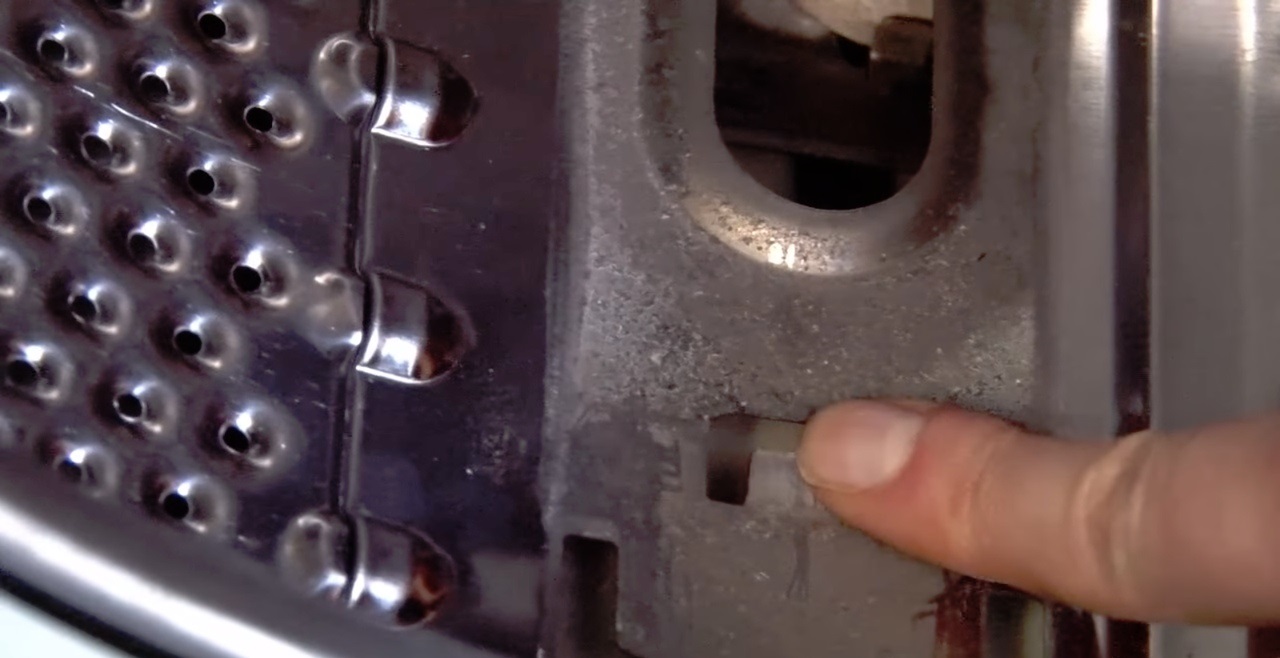
The final stage of preparation is assembling the tank. If the tank was solid, then to connect it you will have to drill about 20 new holes around the perimeter, treat the joint with sealant, and then tighten the halves with screws. There is no need to cut off any remaining sealant that has come out; it will provide additional protection against leaks.
All! All that remains is to return the tank to its place in the washing machine. Together with it, we install the shock absorbers back and fix the cuff on the hatch. This completes the preparation - you can proceed to assembly.
Press assembly
The next step is to assemble the prepared parts into a single structure. First of all, we pay attention to the drum - it needs to be “modified” and turned into a fruit receptacle. The sequence is:
- we fix the mesh on the surface of the drum (between the previous “blades” and on the back);
- We fix the mesh with screws (it will work like a shredder);
- straighten the fasteners from the rib punches and sharpen their edges (they will become “knives” and will be useful when cutting fruit).
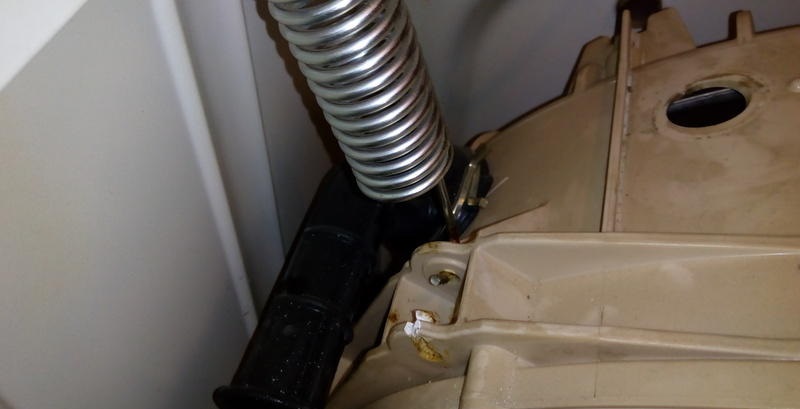
The drum turned into a fruit receptacle. Next, we extend the life of the juicer by improving the shock absorption system. You should additionally secure the tank with two springs, screwing them to the wall of the housing. This will help dampen the vibration emanating from the cylinder due to the action of centrifugal force spreading horizontally. It is worth understanding that the position of the washing machine has been changed, the unit is turned on with the hatch up, which will disrupt the initial balancing. At the “finish” we set up the drive mechanism - we connect the engine to the electrical network. To do this, find a power cord with a socket and connect it to the motor terminals
Unit operation
Having completed the assembly, we immediately check the functionality of the juicer by starting the “washer”. The drum should spin immediately to maximum speed. It is important that there are no extraneous sounds - rumble and clanging. Be sure to look at the stability of the unit and the reliability of the support bars.
Was the check successful? Then we move the juice container under the drain hole and put the “filling” into the drum.The fruit should be in moderation: if you load it to capacity, the apples will not be crushed, they will give less liquid, and what’s worse, they will damage the bearing unit.
Do not load the fruit receptacle more than halfway!
A homemade press works according to the following principle: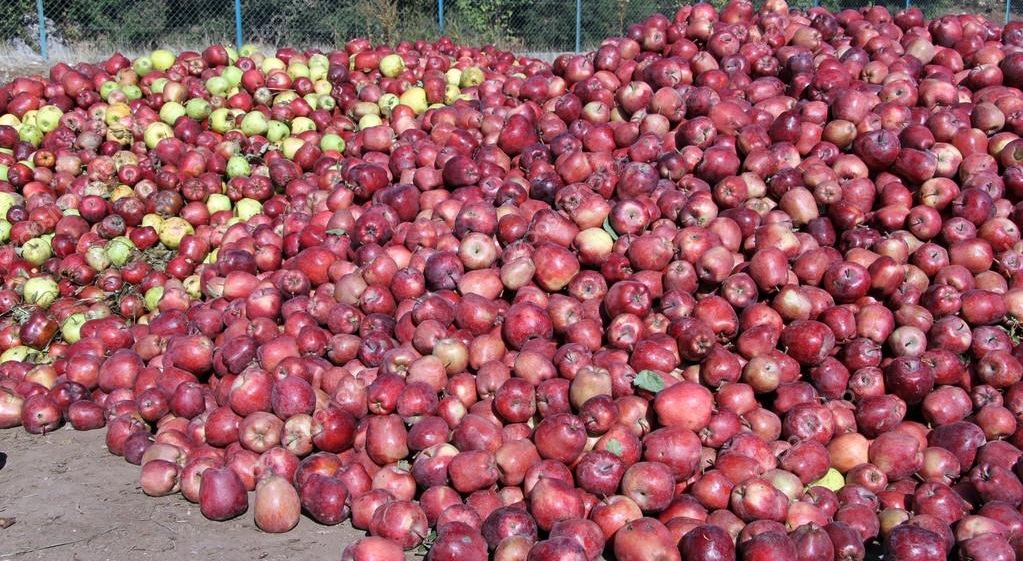
- the fruits spin in the drum at a speed of 800-1200 rpm, depending on the power of the washing machine;
- due to centrifugal force, mesh and sharpened fasteners, the fruit crumbles;
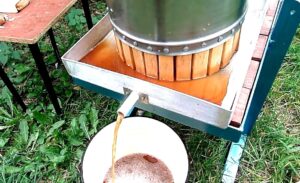
- the apples are “kneaded”, the juice and part of the pulp are squeezed out through the holes of the drum into the tank;
- The juice flows down the walls of the tank and through the drain hose “goes” into a container placed nearby.
It is important to observe the loading rate of the fruit receptacle so as not to damage the unit and obtain high-quality juice. It’s easy to calculate the maximum volume - we focus on the density of the fruit: the higher it is, the fewer pieces are placed. So, hard apples are poured up to half the drum, and soft apples - up to 1/3.
Interesting:


Reader comments
- Share your opinion - leave a comment
Categories
Washing machine repair


For buyers


For users


Dishwasher


Add a comment