How to repair the shock absorber of an LG washing machine?
The resistance of the LG washing machine to vibrations emanating from the rotating drum is ensured by a shock absorption system. Several springs and dampers keep the tank suspended, preventing imbalance. If the shock absorbers fail, the machine begins to “jump”, knock and vibrate during washing and spinning. It is dangerous to start equipment with faulty dampers. It’s better not to take risks, diagnose and repair the shock absorbers of the washing machine.
Types of shock-absorbing elements
When spinning, the washing machine accelerates to 400-1800 rpm, which inevitably leads to vibrations of the entire structure. Depreciation is responsible for suppressing outgoing vibrations in the machine. Depending on the LG model, there are two options for damping centrifugal force:
shock absorbers;
dampers and springs.
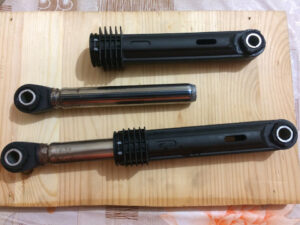
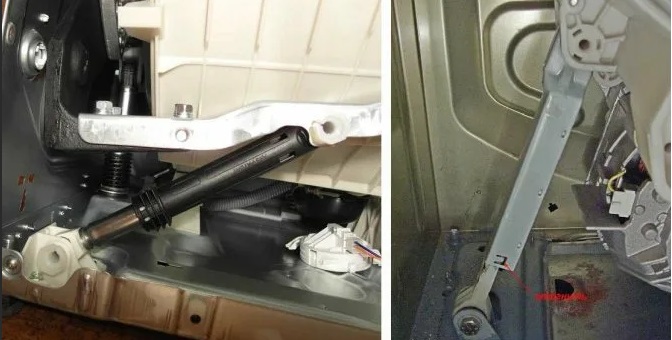
Shock absorbers are cylindrical struts with a piston and a return spring. Between the body and the mechanism there are rubber gaskets with lubricant, thanks to which the structure operates. At the end there is a rod-rod.
LG washing machines have two dampers or shock absorbers.
Damper is a more advanced type of shock absorber. There are no springs in its design: they are carried out separately and hold the washing tub on top. This ensures better vibration damping. These are exactly the kind of vibration dampers that LG cars are often equipped with.
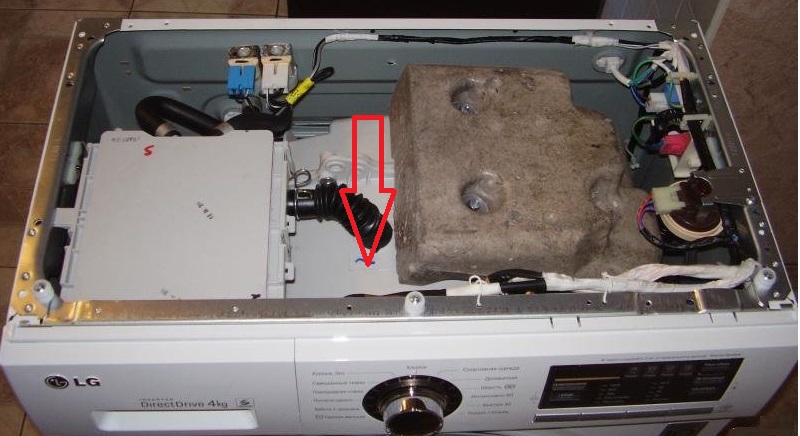
Both dampers and shock absorbers are located at the bottom of the washing machine - they are attached to both sides of the washing tank.If the first ones are practically useless to repair, then the second ones are cheaper to repair at home. But before disassembling and repairing the racks, you need to verify their malfunction using a simple test.
How can you tell if a shock absorber has failed?
You should not immediately begin dismantling and disassembling the shock absorber. First, you need to verify its unsuitability with a quick DIY test. The instructions are as follows:
disconnect the machine from the power supply;
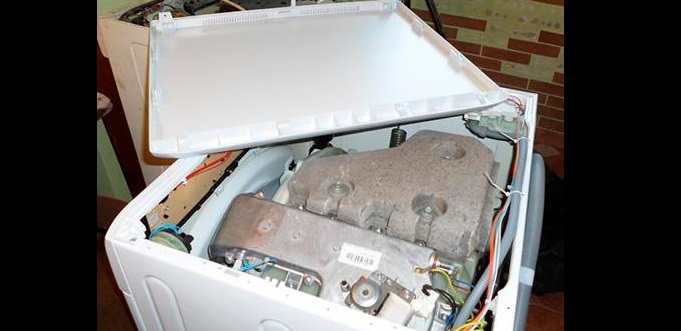
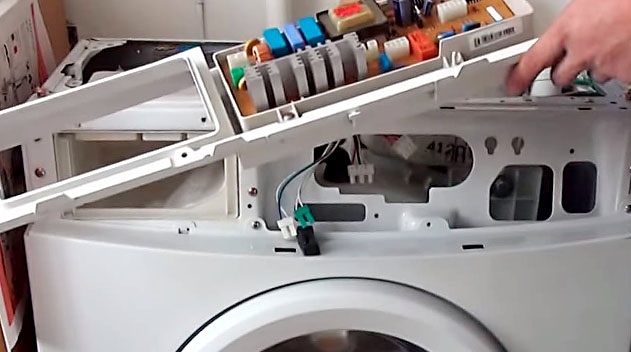
remove the top cover (first unscrew the bolts securing it, then lift it and push it away from you);
reach the washing tub with your hand;
press on the top of the tank, lowering it 5-7 cm above the original level;
suddenly release your hand;
evaluate the “behavior” of the reservoir.
Normally, the shock absorbers should work instantly: the tank will immediately rise up and stop. If the tank begins to swing in different directions, like a pendulum, then the racks are faulty. They need to be replaced or repaired.
You can guess that the dampers are faulty without a test. If there are problems with vibration dampers, the LG washing machine indicates a number of signs:
When washing, equipment creaks and hums;
the machine “jumps” during the spin cycle;
the drum rotates slowly (due to lack of lubrication in the racks).
To repair a shock absorber, you need to find out the cause of its failure. As a rule, racks fail due to:
natural wear (after long-term use, liners and dampers are wiped and lubricant is produced);
deformation (due to manufacturing defects, improper operation or transportation of the washing machine);
wear of the fasteners (the bolts holding the dampers may loosen and break).
Only severely damaged dampers cannot be repaired. If the cause of the malfunction lies in the wear of the gasket or weakening of the fixation, then the racks can be restored to functionality without calling a specialist. Step-by-step instructions are below.
Repairing the shock absorber
It is dangerous to delay the repair of faulty dampers - an imbalance can lead to serious mechanical damage to the structure. As a result, the bearing assembly will quickly become unusable or the washing tank will break through. To prevent breakdowns, you should immediately begin repairing the depreciation.
Most often, to repair shock absorbers, it is enough to change the sealing gasket. You will need to partially disassemble the machine, dismantle the dampers, remove the old rubber band and fix the new one. The instructions are as follows:
de-energize the machine;
remove the top housing cover;
remove the powder receptacle;
unhook the dashboard;
disable UBL;
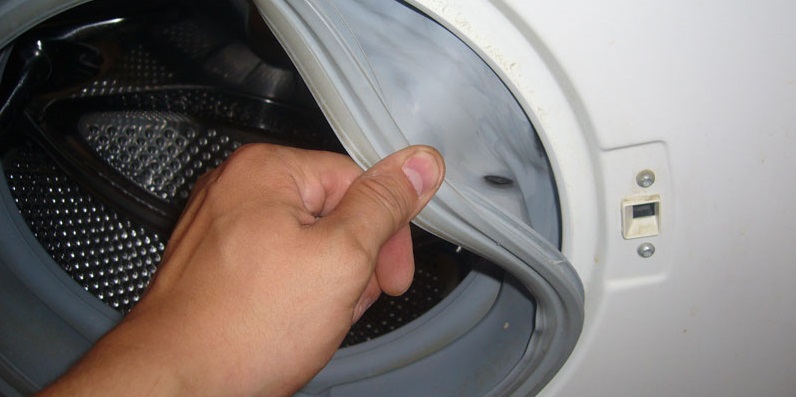
insert the hatch cuff into the drum (after loosening the outer clamp);
disconnect the front panel from the body;
loosen the fasteners holding the shock absorbers;
pull out the racks;
disassemble each damper, find the gasket and assess its condition;
cut out a gasket of the required size and thickness from PCB or a piece of rubber;
install new seals.
Sometimes repairing the damper is impossible, and the only option left is to install new struts. Moreover, the entire set is changed at once, since it is necessary to ensure uniform vibration damping. If you leave one damper old, it will wear out faster and the whole system will break down faster.
Record all manipulations on camera to avoid mistakes during reassembly!
Replacement begins with dismantling the old dampers. There are two options here: when the racks are disconnected from the washing tank or not.In the first case, the repair is faster, since it is enough to remove the front wall, remove the shock absorbers and install a new set. If you can’t get the “extinguisher” without a tank, you will have to almost completely disassemble the LG washing machine:
disconnect the washing machine from the power supply;
remove the top cover, detergent tray, dashboard, upper springs, front wall;
disconnect all connected pipes, sensors and devices from the washing tank;
remove the tank with dampers;
repair the racks or replace them with new ones.
When disassembling the LG to replace shock absorbers, you can immediately check other elements of the system: the bearing assembly, crosspiece and drain. It is dangerous to wait for the final breakdown and clogging of parts - it is better to change and clean the devices for prevention. To remove a thick layer of scale and remove stuck parts, use WD-40 cleaning lubricant.
Then we assemble the machine, following the instructions in reverse order. At the “finish” we check the quality of the repairs performed using the previously described test.
 The resistance of the LG washing machine to vibrations emanating from the rotating drum is ensured by a shock absorption system. Several springs and dampers keep the tank suspended, preventing imbalance. If the shock absorbers fail, the machine begins to “jump”, knock and vibrate during washing and spinning. It is dangerous to start equipment with faulty dampers. It’s better not to take risks, diagnose and repair the shock absorbers of the washing machine.
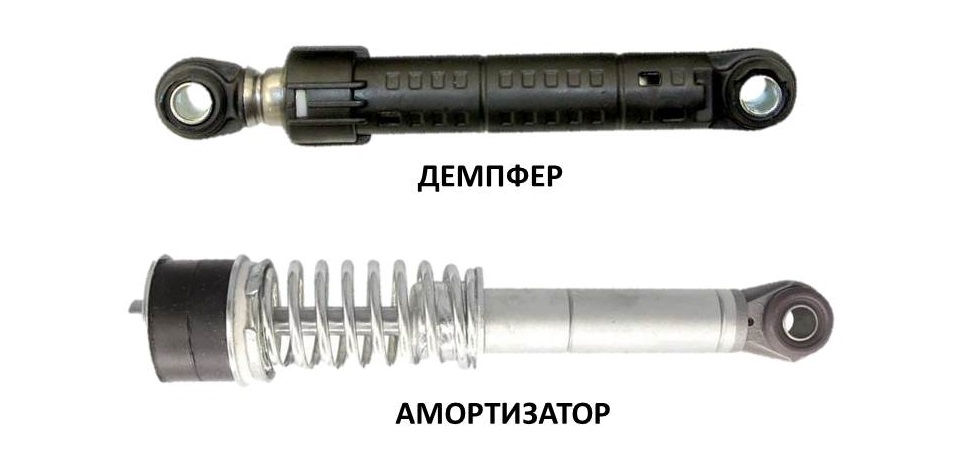


Many thanks for the idea! The dampers are the same as mine (LG machine). I'm running to the market to pick up a hose!