Removing the control panel on the washing machine
 Repairing the control board yourself is too risky, and contacting a service center for diagnostics is expensive and useless - the technician will only see the breakdown and recommend a replacement. Therefore, it is cheaper to immediately remove the control panel on the washing machine and install a new one in its place. Especially if the equipment has been in use for a long time, and the controller, even after a quick inspection, looks burnt out. But replacing a board is a difficult task, and the slightest mistake can lead to breakage of the new part. For installation to be successful, it is recommended to follow the given instructions.
How to find and dismantle the panel?
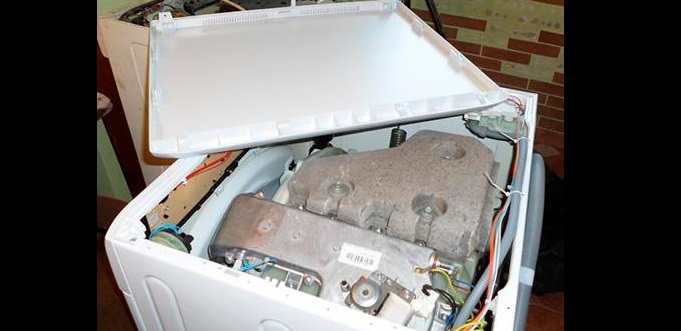
The control panel takes up quite a lot of space on the washing machine, so finding it will not be a problem. As a rule, on frontal automatic machines the controller is located behind the front instrument panel, and on vertical ones - on top. The exact location of the module is indicated in the factory instructions. To remove the panel with your own hands, you must first remove the top cover of the washing machine, and then free the module itself from the fasteners. The sequence is:
- de-energize the machine;
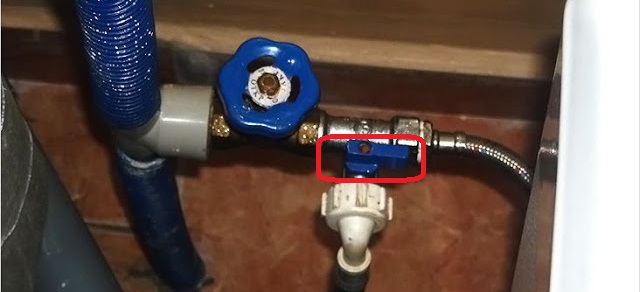
- disconnect equipment from the water supply;
- unscrew the two screws holding the top cover (they are located on the rear panel);
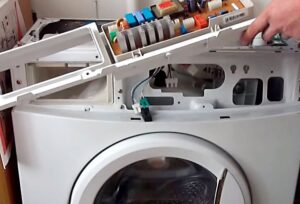
- move the cover and, lifting it, press the locking latches;
- unhook the powder receptacle (pull it all the way and hold the central button);

- loosen the bolts “hidden” behind the tray;
It is recommended to record your actions on a video camera to avoid mistakes when reassembling the washing machine.
- unscrew the screws holding the dashboard along its perimeter (on some models of washing machines, plastic latches are provided instead);
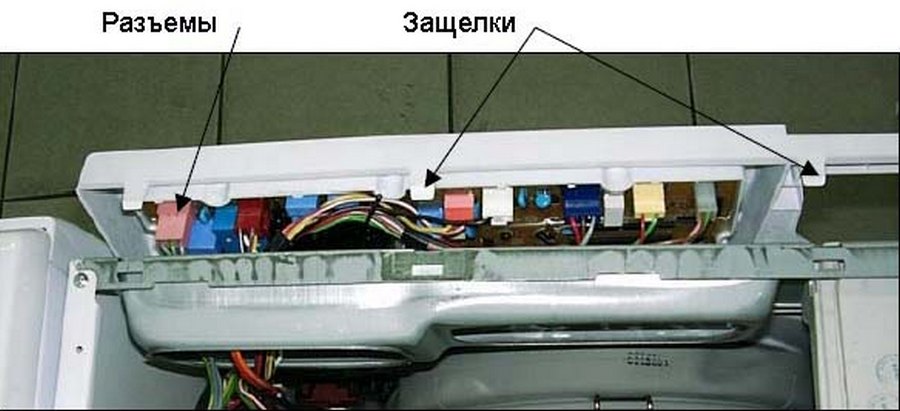
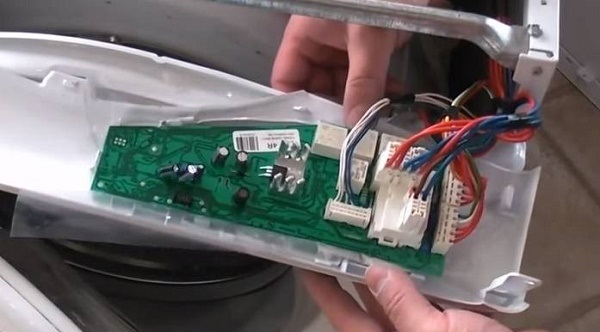
- disconnect the instrument panel from the body;
- take a photo of the location of the contacts on the block;
- disconnect the connected wiring;
- unscrew the screws holding the control module;
- get the board.
It is worth understanding that at home the board is dismantled only after the end of the warranty period. After removing the module, it is recommended to carefully inspect the contacts and microcircuits: in case of serious damage, the damage is clearly visible. Thus, scorch marks, dark spots, rust, chips, and traces of burning coils and capacitors will be visible on the surface.
The new board is installed in the reverse order. The most difficult moment is connecting the wires in the original order. Upon completion of the replacement, it is necessary to test the equipment by running a single wash.
Is it necessary to remove the panel?
Replacing the control board is easy. The difficulty lies in another point - sometimes the problem lies in a completely different place in the washing machine. So, another element of the system, a UBL or a pump, may break, creating the appearance of damage to the electronics. As a result, the new module does not fix the problem, money is wasted, and the machine will still need repairs.
In order not to blame the board in vain, it is necessary to diagnose the defect that has appeared. Ideally, in case of any malfunction, the machine should be thoroughly checked, leaving the control module until the last moment. Only if other components and mechanisms prove to be operational, can you remove the dashboard and inspect the electronics.
The second option is to suspect problems with the board based on the characteristic “symptoms”.A washing machine with a broken control board radically changes its “behavior,” revealing the electronic nature of the cause of the failure. You just need to recognize the signals and identify them.
- The washing machine does not spin, and after the rinse is completed, the dashboard freezes - it does not respond to user commands and does not display an error code on the display.
- The LEDs on the dashboard flash randomly. Despite the current supplied to the board, the program cannot be started - the machine does not respond to button presses.
- After starting the cycle, the machine does not fill with water or immediately starts draining. As a result, the equipment freezes “tightly”: all that remains is to reboot the system. In this case, after rebooting, the machine washes normally.
- Regardless of the type of program, the machine washes for 3-4 hours without stopping, without switching to rinsing and spinning. The drain pump does not start, and the system simply freezes over time.
- After connecting the machine to the network, it is not possible to set the washing mode: the system freezes and immediately turns off.
- The program starts, information about the mode is displayed on the screen, the timer starts counting, but the washer is silent. Water does not pour, the drum does not rotate - nothing happens.
- The engine operates strangely: it suddenly changes speed when it is not required by the program. The opposite option is also possible, in which the drum rotates for a long time in one direction.
- Problems arise with heating: the heating element either overheats the water or leaves it cold. Thermistor readings and program settings do not play a role in this case - everything happens in a chaotic manner.
Before replacing the control board, you need to make sure that it is faulty - conduct a comprehensive diagnostic of the washing machine.
It is worth understanding that the listed signs only hint at a possible module malfunction. However, similar failures can also be caused by malfunctions of other elements and mechanisms of the washing machine. To make sure that the control board is broken, it is recommended to first run an autotest of the system, and then do manual diagnostics of the machine.
Launching an autotest occurs in different ways - it all depends on the brand and model of the washing machine. It is enough to carefully study the relevant section of the instructions and follow the algorithm given in it. For example, on an Ardo washing machine, autotesting is activated as follows: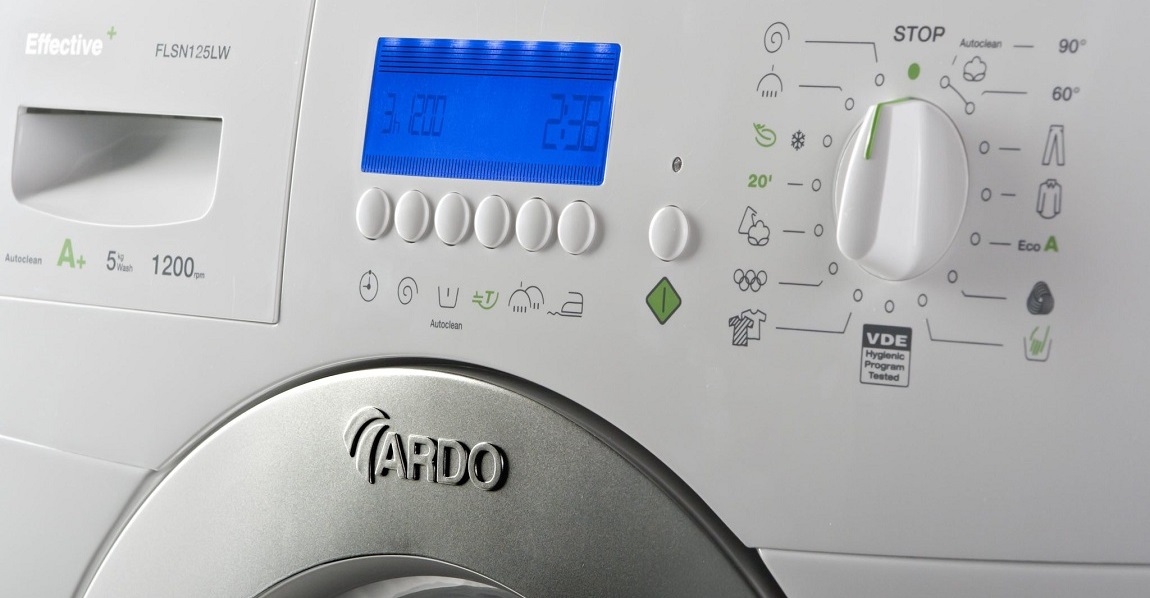
- connect the washing machine to the network;
- scroll the programmer to a strictly vertical position so that the arrow points down;
- set the temperature to zero;
- make sure that the drum is empty (there is no water or things in it);
- close the hatch door;
- Simultaneously press all the buttons on the washing machine’s dashboard (this activates the autotest);
- wait for the system mode to complete;
- look at the display - an error code will appear on it (the explanation of the combinations is given in the factory instructions).
Modern washing machines have a self-diagnosis system, which is launched automatically or manually through a special button on the dashboard.
Not all washing machines have an autotest mode. Modern machines instead provide a built-in diagnostic system that operates constantly. If a problem occurs, self-diagnosis automatically records the failure and displays the corresponding error code on the display. It's another matter if the machine is equipped with an asynchronous motor.Self-testing is impossible with such equipment - only a “manual” check performed by the user.
It is recommended to check the autotest result during manual diagnostics. It is advisable to sequentially run multimeters on all suspicious components and elements of the system, and last but not least, on the board itself. It will take a lot of time to check one by one, but you can be 100% sure of the cause of the malfunction.
Interesting:


Reader comments
- Share your opinion - leave a comment
Categories
Washing machine repair


For buyers


For users


Dishwasher


Add a comment