Brushes worn out in washing machine
 Any commutator motor of a washing machine is equipped with electric brushes. These are two graphite rods with springs. They are needed to direct electricity to the rotor. When parts are erased, the contact is broken, the motor loses power or refuses to work. What to do if the brushes are worn out in the washing machine? What are the signs to tell when it’s time to change the tips? We'll tell you how to reinstall graphite rods with your own hands.
What happens when brushes wear out?
If you use an automatic machine a couple of times a week, then the need to replace graphite tips will arise 7-8 years after purchasing the equipment. With active, almost daily use of the washing machine, electric brushes can wear out in 3-5 years. The “home assistant” will notify the owner that the rods have worn out and the motor is not operating at full capacity. Signs of wear on electric brushes may include the following:
- the washing machine freezes during the cycle, and the power cord of the machine is not pinched or damaged, there are no power outages;
- a hum and grinding noise is heard as the drum rotates;
- the machine does not spin clothes well (which is not surprising, because the engine speed decreases);
- the machine smells burnt;
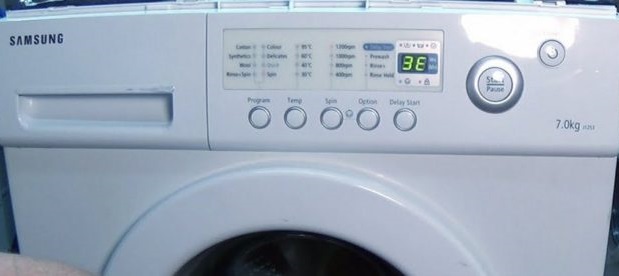
- An error code is displayed on the display of the washing machine, indicating a malfunction of the electric motor.
You may only notice one of the signs of wear listed above. Sometimes they are observed in combination. In any case, you will have to check the condition of the electric brushes.
You can replace the brushes of the commutator motor yourself, without the help of a specialist.
To get to the electric brushes, you will have to partially disassemble the body of the automatic machine. To be more precise, remove the top cover and back panel. The work is classified as light, so there will be no problems with replacing tips.
Do you need a lot of tools?
To change graphite rods, you will need a minimal set of tools. First of all, you need to purchase new components, focusing on the model and serial number of the washing machine. Even if only one brush is worn out, they must be replaced in pairs. In addition, the following will be useful for repairs:
- screwdrivers: Phillips and slotted;
- pencil or marker;
- TORX key (size – 8 mm).
You should prepare for repairs. Be sure to turn off the power to the washing equipment and turn off the tap on the pipe responsible for the water supply. After this, unhook the drain hose from the housing.
The final stage of preparation is draining the remaining water from the system. To do this, cover the floor under the machine with rags, place a small container at the location of the garbage filter and unscrew it. All the liquid in the pipes will flow out of the hole into the basin. Next, all that remains is to move the machine away from the wall and begin replacing the brushes.
We do the replacement ourselves
Since the brushes are located in the commutator motor, first you have to get to the motor. It is necessary to remove the top panel of the washing machine by unscrewing the 2 bolts securing it. Next, the rear wall of the case is removed, also by removing the screws holding it. The electric motor can be seen immediately, it is located under the tank. The further algorithm of actions will be as follows:
- remove the drive belt from the pulleys;
- take a photo of the wiring diagram for connecting the motor;
- reset the contacts connected to the motor;
- Unscrew the two bolts that hold the motor in the housing;
- remove the engine from the machine;
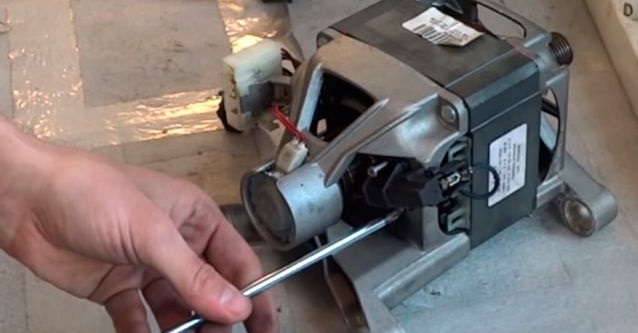
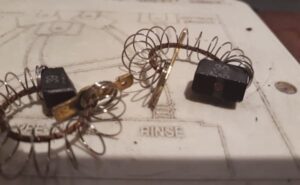
- find the electric brushes - they are located on the sides of the engine;
- remove the brushes one by one by unfastening the wires, moving the contact down and stretching the spring.
New components are installed in place of the removed ones, with the tip in the socket. The spring then contracts and returns to its original position. The brush is covered with a contact and a wire is attached to it.
After replacing the electric brushes, the collector is put back. The motor is securely fixed in the housing with bolts. Then the previously discarded wires are connected to it.
When connecting the wiring, be guided by the photo you took - this will help to avoid mistakes.
Having connected all the contacts to the motor, you can work on the drive belt. Pull the rubber band first onto the motor pulley, then onto the drum “wheel”. After the case is assembled, the back panel and top cover are returned to their place.
And finally, all that remains is to move the machine to the wall, connect it to communications and run a test wash. In the first few cycles after replacing the brushes, the machine may make a slight noise. Then the tips will “grind in” and the uncharacteristic sound will disappear.
Interesting:


Reader comments
- Share your opinion - leave a comment
Categories
Washing machine repair


For buyers


For users


Dishwasher


Add a comment