How to care for your dryer
 Not every family has an automatic dryer, but this is the same device that greatly simplifies the life of a housewife. But, as with any other household appliance, this “home assistant” must be carefully looked after. Proper care of your dryer can significantly increase its service life, so this should not be neglected. Moreover, there is nothing complicated in this process if you follow our detailed instructions.
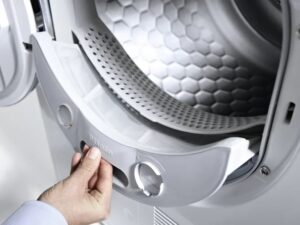
Shake out the lint trap
Care should always begin by cleaning the machine’s lint filter, which is installed specifically to retain lint while drying clothes. It is recommended to clean it after each working cycle, otherwise the equipment will start to work more slowly. Moreover, if you systematically ignore this maintenance stage, then at a certain moment the dryer display will display information that the lint trap is clogged and needs to be cleaned. Therefore, cleaning the element should not be skipped, as this directly affects the performance of the equipment.
The cleaning message can be used as a guide, but this information only appears on some dryer models, so make sure yours supports this feature first.
It is also worth considering that a number of machines, for example, from the Miele brand, have two filters installed at once to block lint - they are installed in the area of the door loading hatch. Therefore, it is necessary to clean two elements instead of one, having first pulled them out and cleared lint not only from the mesh, but also from the perforated tongue.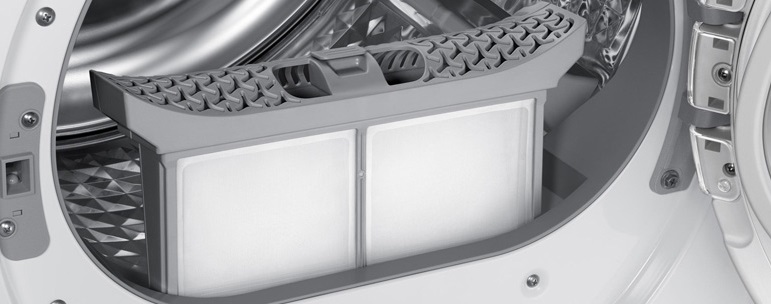
You can do this yourself using a damp cloth or cloth. After cleaning, do not forget to rinse the screens under a powerful stream of hot tap water. In addition, experts advise cleaning the lint trap with a vacuum cleaner for maximum effect.
Filter in front of the heat exchanger
Next to the lint element, you need to clean the base filter, which protects the heat exchanger. Finding it is easy - it is located behind a small cover on the front panel of the “home assistant” directly under the loading hatch. Depending on the model of household appliance, it will be either on the left or on the right.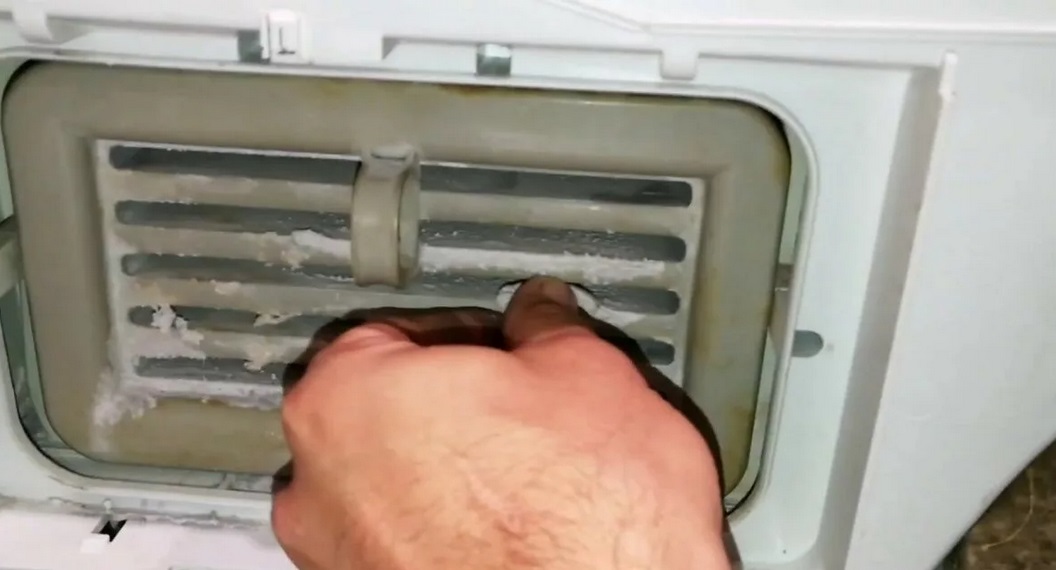
In the mentioned Miele machines, as in a number of other devices, the part can be removed using a special handle, which must be removed before washing. Next, you should lower the assembly under running water, wring it out and dry thoroughly before installing it back in its seat. Never install a wet or even slightly damp part into the equipment, as this will cause the expensive dryer to break down. The handle must be wiped separately, as well as the outer cover.
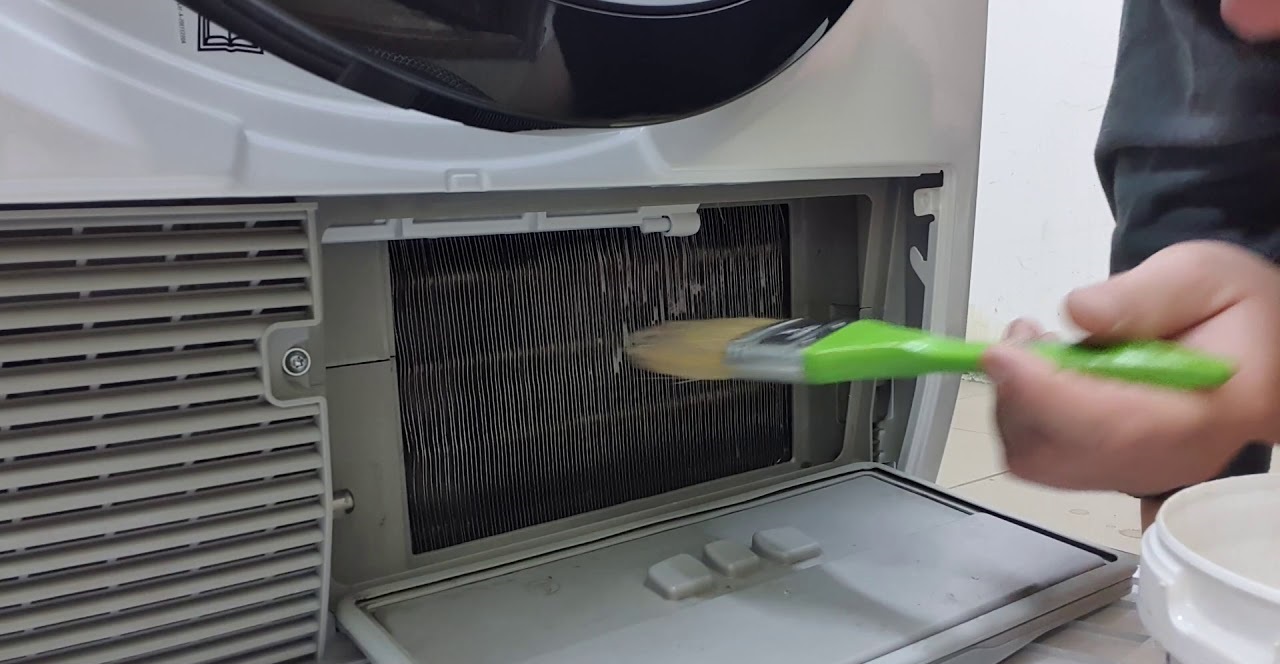
Cleaning the heat exchanger
Finally, we move on to maintaining the dryer coil, which should be cleaned at least once a month. To create an accurate cleaning schedule, you should focus on how actively the “home assistant” is used. It is better to clean the part a little more often than necessary, because it is in it that dust and various debris can actively accumulate, which will increase the work cycle time and worsen the quality of drying things. To understand how to care for the heat exchanger, carefully study our instructions.
- To clean the unit, you must first unplug the machine and wait until it has completely cooled down after the operating cycle.
- Then you should place unnecessary towels or rags under the hatch so as not to accidentally flood the floors with waste liquid if it remains in the device.
- Find the heat exchanger door - it is located at the bottom of the front wall of the dryer under the loading hatch on the left or right.
- Open the door and move the locking levers towards each other - this will allow you to remove the top cover of the heat exchanger.
- Carefully remove the assembly.
- Run the element under hot water to remove dust and other contaminants.
- Additionally, you can use soft sponges and rags, but do not use detergent or a brush with an abrasive surface.
- Both the heat exchanger and the seal should be cleaned.
After cleaning, you don’t have to wait until the element is completely dry like a plinth filter. Make sure that the water has drained from the heat exchanger, and then install it in its seat according to our instructions in reverse order. This will complete the maintenance of your dryer, so you can once again effectively dry any clothes and not worry about the performance of the unit.
Interesting:


Reader comments
- Share your opinion - leave a comment
Categories
Washing machine repair


For buyers


For users


Dishwasher


Add a comment