How to install a Gorenje washing machine
 Selecting, purchasing and transporting household appliances is just the beginning. Afterwards, the new equipment needs to be placed and connected to communications. Installation of a Gorenje washing machine can be done in two ways: by the user or with the help of a service specialist. Sometimes the manufacturer clearly states that self-installation will void the warranty. If this condition is not in the documentation, then read the instructions and prepare the machine for the first wash.
Was the machine damaged during delivery?
A new Gorenje washing machine is not a cheap pleasure, so you need to approach its purchase as seriously as possible. The first step is to carefully inspect the selected machine in the store: to see if there are any dents, chips or other defects on the body. The second step is to open the hatch and turn the drum in both directions by hand. The cylinder should rotate silently, but with some tension. Then we ask the seller to connect the equipment to electricity to check the functionality of the dashboard. A working “tidy” will respond with LEDs that light up, which will change position when the programmer is rotated.
Particular attention is paid to transporting equipment to your home. Ideally, you should order store delivery to insure yourself against errors during transportation. If you decide to transport the equipment yourself, then be extremely careful - after payment and signing of the contract, all responsibility for the unit passes to the new owner.
Be sure to check the integrity and serviceability of the washing machine you buy in the store!
When choosing store delivery, you should also be careful.You cannot sign immediately after receiving the box from the courier - you need to check the quality of transportation. Proceed like this: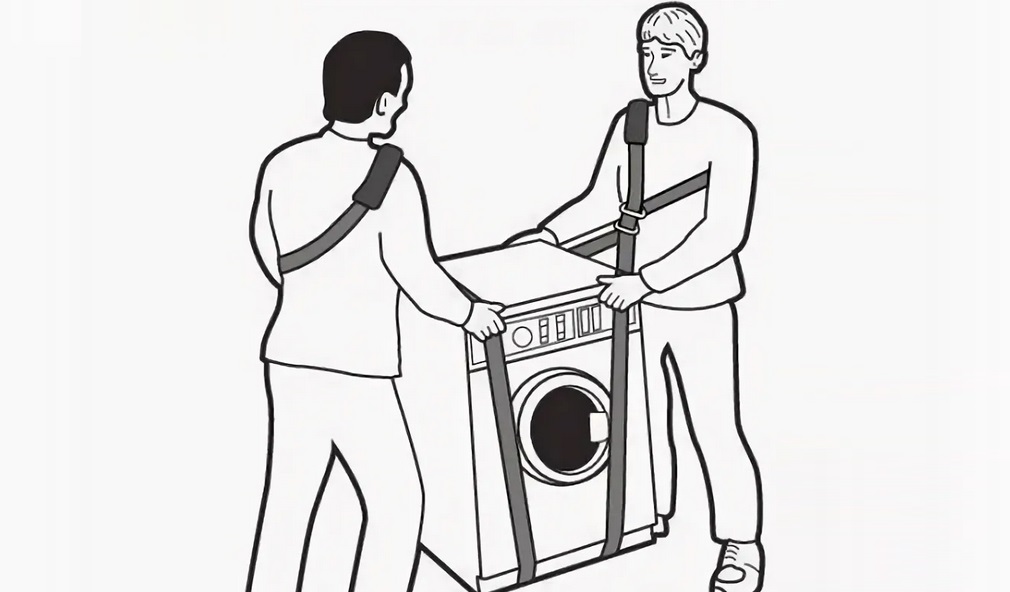
- open the package;
- inspect the machine for damage;
- connect the equipment to the power supply and check if the dashboard works;
- check the availability of components, warranty card, instructions and other documentation;
- If everything is in order, sign the goods acceptance certificate.
If during inspection and verification chips or other defects were found, then the documents cannot be signed. In this case, the consumer has the right to compensation or replacement of the goods. It is better to send the courier back and wait until the store provides an equivalent replacement or returns money for damaged products.
Unlock the tank
It is not recommended to immediately install a newly delivered washing machine. First you need to let the technique “settle”, leaving it alone for 2-3 hours at room temperature. Especially if transportation was carried out during the cold season. After the measured time, you can move the machine to its intended place and begin connecting to communications. When installing Gorenje yourself, be sure to read the instructions. It describes in detail the entire process of installing the machine, provides tips and visual examples. It’s better not to be lazy, but to spend 2-3 hours “getting used to” the washing machine by studying the technical documentation.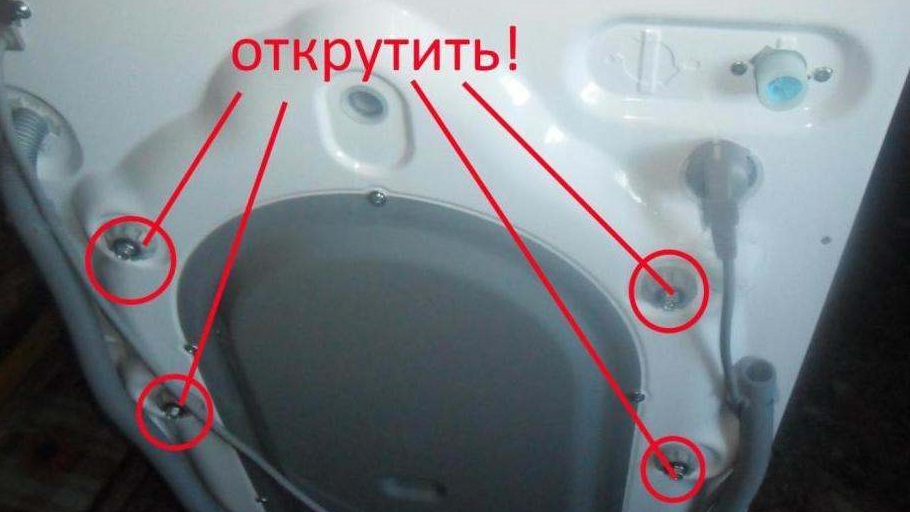
The instructions clearly state that the first step is to remove the shipping bolts. They are mandatory when transporting equipment, as they fix the tank in a stationary position, protecting the tank itself, adjacent parts and the shock absorption system. But it is forbidden to start a cycle with them - the engine will try to spin the attached drum.As a result, the cylinder, the motor, the shaft, and other structural elements will suffer. By the way, such damage is considered non-warranty, and the inattentive user pays for repairs.
It is easy to remove the transport bolts: just follow the algorithm from the instructions. Using pliers, remove the upper part from each fastener, after which the rods are deepened into the body, and the remaining holes are tightly closed with the plugs included in the kit.
Base for housing
It is advisable to decide where to install the new “home assistant” before purchasing it. Moreover, the model is selected depending on the size of the room, style and other buyer requests. Especially if you need a built-in machine, it must fit perfectly into the provided box. Otherwise, the washer “will not fit” and will stick out and get in the way.
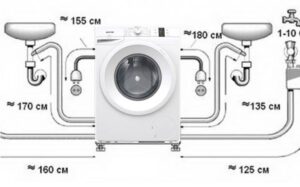
It is worth considering in advance the connection to the water supply and sewerage system. It is important to understand that the location chosen for the machine must be located next to the riser or siphon. Lengthening the hoses by extending the hose is unsafe, and purchasing another corrugation is troublesome and expensive. The same applies to power supply: you need to select an outlet that the power cord can reach. Be sure to pay attention to the floor covering. It should be smooth and strong: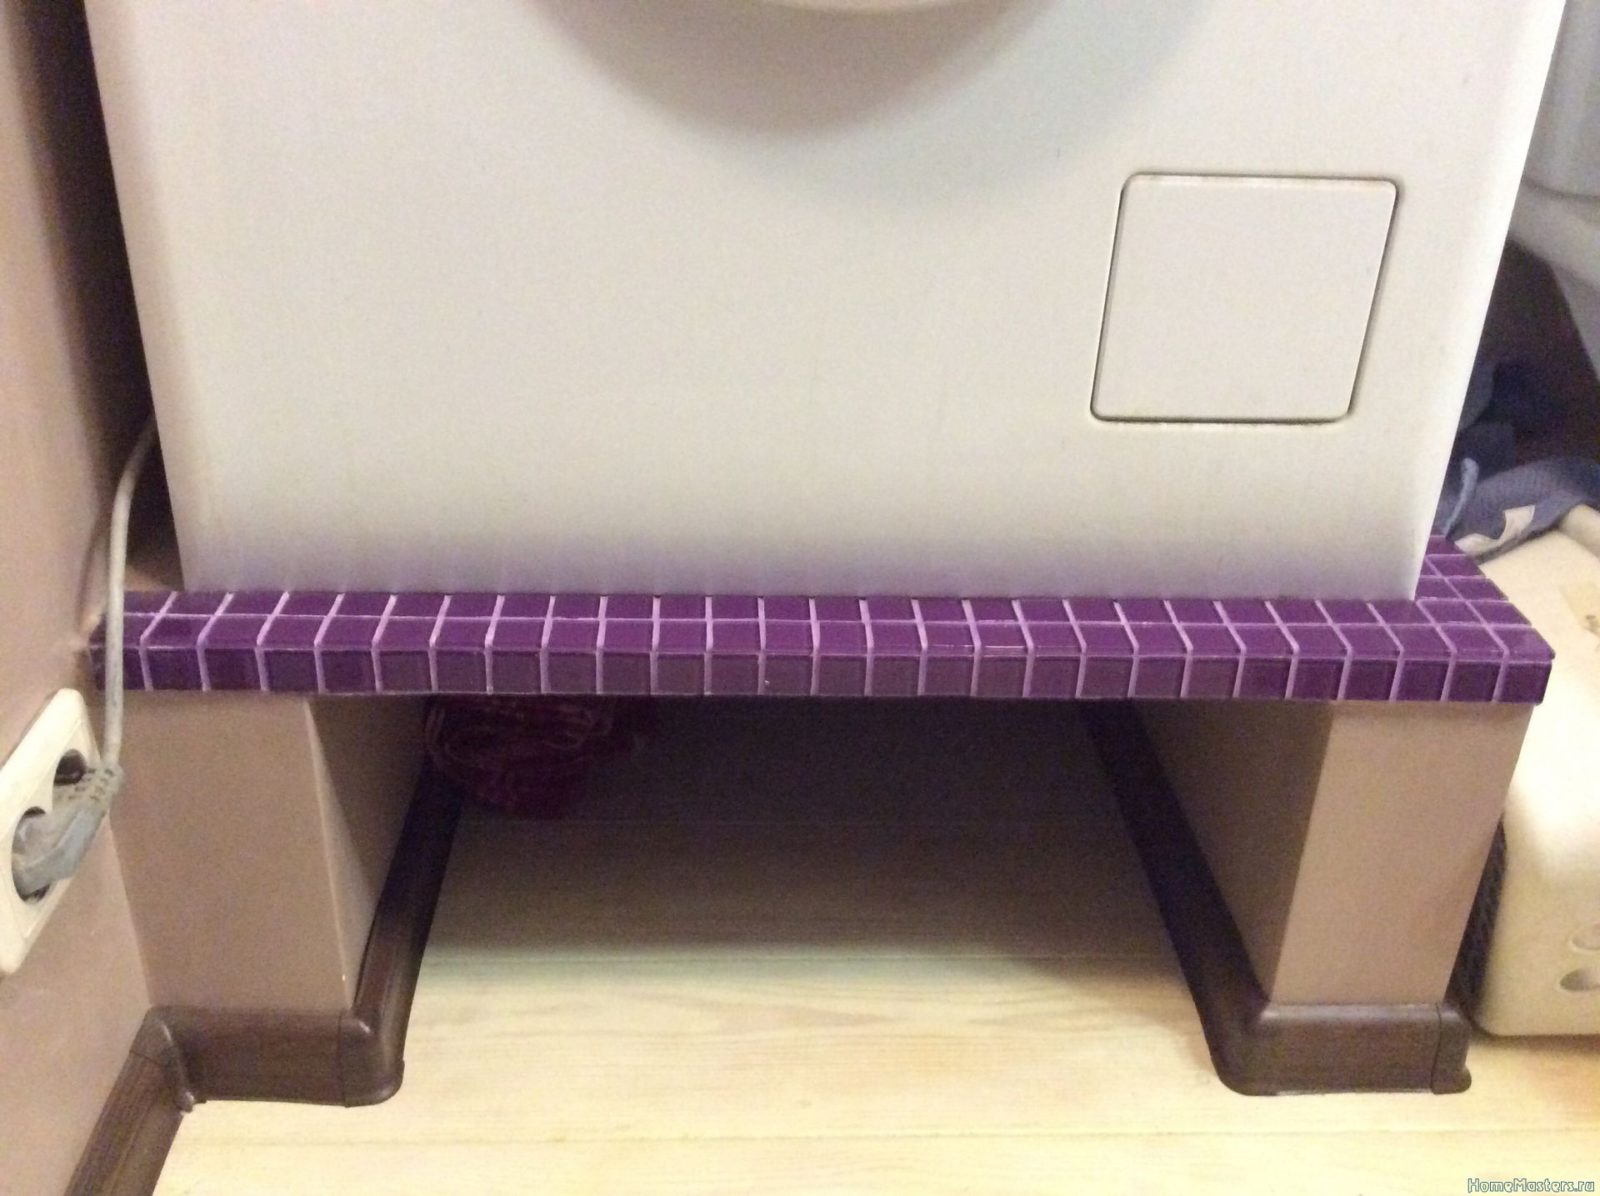
- the ideal option is tile or concrete;
- wood is acceptable, but pre-strengthened;
- It is not recommended to place the washing machine on laminate flooring, which will become saturated with moisture and swell if it leaks.
Having selected and prepared the location, you can begin connecting and adjusting the housing. We'll tell you what exactly to do next.
Electrical connection point
Connection to communications begins with the installation of power supply.It is better to plan this point when choosing a location, so that there is a maximum distance of 1.5 m from the washing machine to the nearest outlet. This is the length of the power cord provided on most Gorenje machines. Remember that the manufacturer strongly does not recommend using extension cords - it is unsafe for both the user and the equipment.
Particular attention is paid to the outlet itself. This must be a separate electrical point with a voltage of 220V and grounding. Ideally, it is necessary to conduct separate wiring with conductors corresponding to the power consumption of the machine. If the washing machine is installed in the bathroom, then protection against moisture should be provided.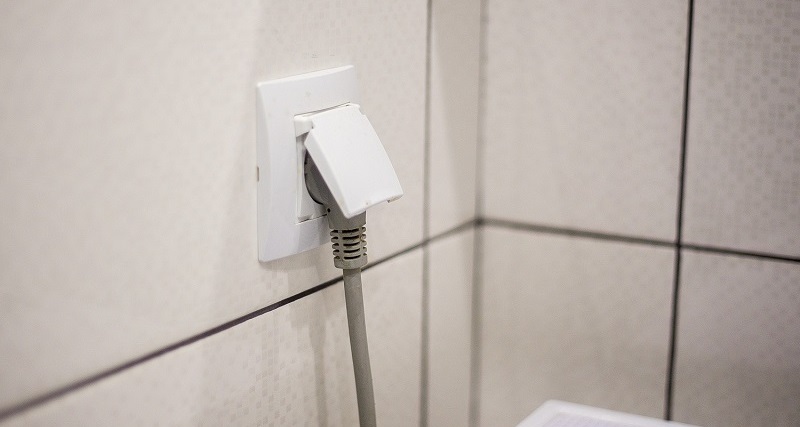
When setting up a power supply with your own hands, it is important to ground. If you turn on the washing machine without the latter, there will be consequences. At a minimum, a working machine will “prick”, at a maximum – it will give an electric shock if it breaks down on the body. It’s better not to take risks, but to think in advance about protecting family members.
We provide water supply
The second step is connecting to the water supply. Typically, the machine’s inlet hose clings to the “cold” riser. Some Gorenje models allow connection to a hot pipe, but only as an exception. It is worth understanding that this option is many times more harmful for the machine: filters and hoses will become clogged faster, and things will be washed less easily due to increased rigidity.
It is recommended to open the shut-off valve on the water pipe only when washing.
Heating water is the task of the heating element. Connecting to a hot water supply will not extend its service life, but, on the contrary, will shorten it due to a layer of scale. It is better not to experiment, but to act according to the standard, connecting the hose to a cold riser.If there was already a washing machine in the room, then setting up communications will be simple: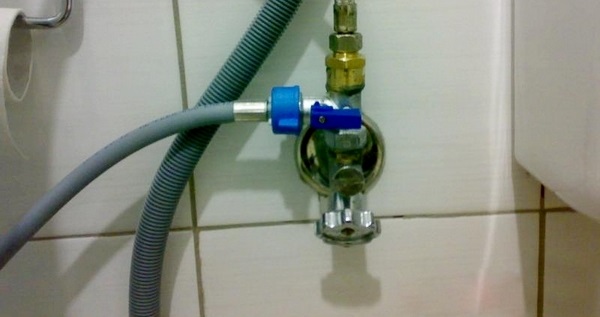
- screw the inlet hose to the existing outlet point;
- tighten the clamp;
- open the water tap;
- check if water is leaking at the junction.
It’s more difficult if the machine is installed in a new location. Then you will have to turn off the water, organize a tie-in into the pipe, making an outlet point. The pressure in the riser is measured in advance - the value must correspond to the norm specified in the Gorenje instructions. It is difficult to establish a water supply from scratch with your own hands; it is better to call a specialist.
We organize the drainage of “working off”
The next stage is the organization of drainage. Here the user has two options. The most common one involves lowering the “free” end of the drain hose into the toilet or washbasin. Yes, water will be pumped out of the washing machine into the sewer, but such simplicity will be unaesthetic, inconvenient and unhygienic. You will have to constantly stretch the corrugation, put up with rubber under your feet and wash the plumbing more often.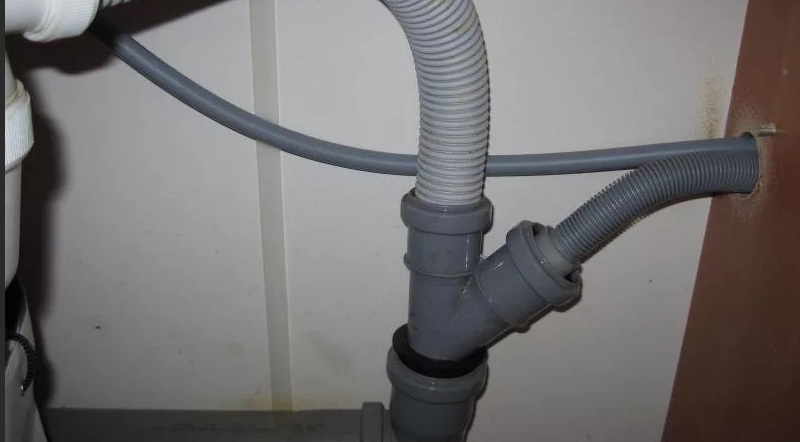
It’s better not to be lazy and choose the second option - connecting the drain hose to a sewer pipe or siphon. The sleeve is fixed on a special tee and tightened with a clamp. You just need to follow a few rules: raise the corrugation 50-60 cm from the floor level and ensure bending using a hook attachment. The washing machine connected to the communications needs to be adjusted. It is enough to place a building level on the lid and, using the device as a guide, tighten the legs. Next, we start the idle cycle, checking the quality of installation and the serviceability of the machine.
Interesting:


Reader comments
- Share your opinion - leave a comment
Categories
Washing machine repair


For buyers


For users


Dishwasher


Add a comment