How to remove a stuck bearing from a washing machine drum?
 Knocking out a stuck bearing is a difficult task even for a professional craftsman. To a beginner, such a task may seem completely impossible, but this is not so. You can remove dilapidated rings from the drum of a washing machine; it will take a little patience and skill. In order to achieve the goal and not aggravate the situation even further, it is better to strictly follow the recommendations of specialists who have encountered this problem more than once.
Let's start with regular tapping
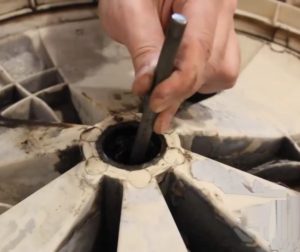
To press out a collapsed bearing, you do not need to immediately pick up a grinder. Initially, it is worth resorting to simpler and safer methods for technology. Try to knock out a stuck bearing using a chisel and hammer. Perhaps the ring will give in, and you won’t have to resort to more severe methods.
To remove a dilapidated bearing with your own hands, place a chisel on its outer race. Gently tap the tool with a hammer, trying to knock out the part.
Universal aerosol lubricant WD-40 will help remove a stuck bearing.
So, if the ring does not come out of its socket, spray it with an aerosol and wait a few minutes. Then try tapping the part again. To remove the inner rim of the washer bearing, a similar method is used, only the chisel is installed on the inner rim of the element.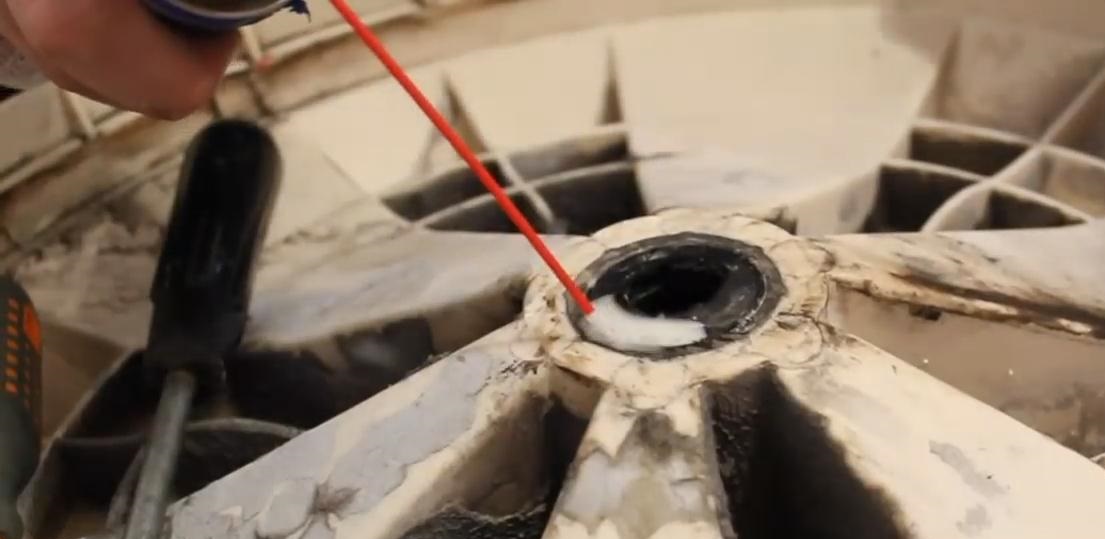
Usually, by knocking out, it is possible to remove either the entire broken bearing, or most of it, from the drum of the washing machine. There is rarely an outer ring left in the design, which is quite difficult to pry off. Let's figure out how you can pull out a ring stuck in a socket if the chisel can't cope with the task.
Removing the inner and outer races
When part of the bearing remains in the tank, removing it can be very problematic. But it is imperative to remove the fallen clip from the socket, otherwise you will not be able to repair the washing machine. To get the job done, prepare the following tools:
- hammer;
- a long thin drift (approximately 12 mm thick in diameter);
- slotted screwdriver;
- gas key;
- Bulgarian
So, if the bearing race is stuck, you must:
- treat the seat and the stuck part of the part with WD-40;
- use a screwdriver to remove all rust from the rim, spray the assembly again with aerosol;
- wait 10-15 minutes;
- turn the tank lid over and look into the “socket” from the outside. There will be a protruding edge of the stuck-on clip;
- push the drift inside so that it rests against the protruding edge of the stuck part;
- Use a hammer to tap the inner rim, moving the drift crosswise.
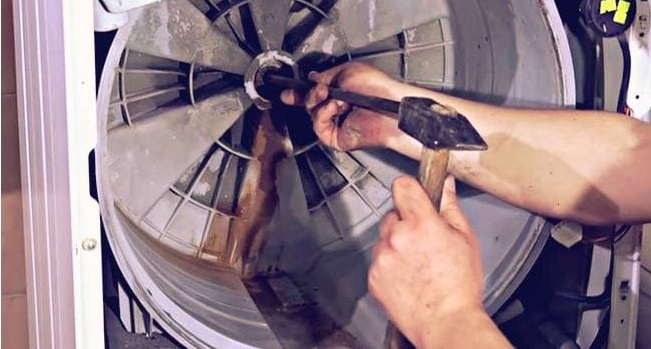
If you're lucky, the stuck bearing support will fall out after a couple of blows. In most cases, you will have to knock on the clip 10-20 times. When you still can’t pull out the part, treat the seat and the dilapidated ring again with WD-40. Wait 15 minutes until the part gets wet and continue knocking out the rim.
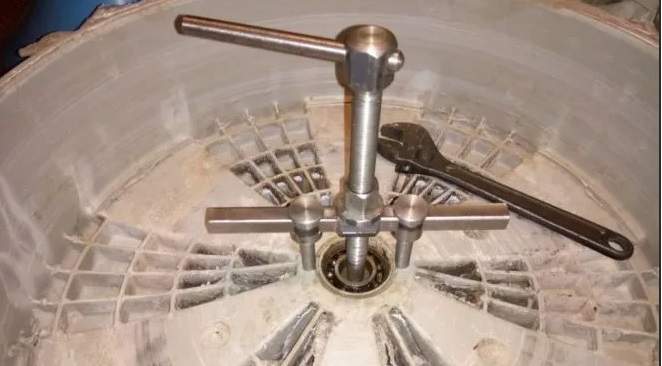
It happens that part of the bearing gets stuck to the drum shaft. The element must also be deleted. For this:
- treat the part of the bearing that “sticks” to the shaft with WD-40 aerosol, leave the structure to soak for 10-15 minutes;
- use a gas wrench to try to twist the clip;
- if the key slips, use a grinder - use it to make notches on the right and left sides of the stuck rim. You should act carefully so as not to damage the shaft sleeve;
When using a grinding machine, be sure to follow safety precautions and wear special safety glasses.
- again spray the joint with WD-40 liquid, wait until the aerosol takes effect;
- use a gas wrench to twist the stuck part of the bearing. Do-it-yourself risks will help you remove the clip.
This is how you can press out a collapsed bearing. The work can take from 20 minutes to three hours. It is important to be patient and act carefully so as not to damage the tank and drum shaft. After removing the broken ring, all that remains is to clean the seat from traces of wear, rust, and metal shavings. Next, you can begin installing new components.
Interesting:


Reader comments
- Share your opinion - leave a comment
Categories
Washing machine repair


For buyers


For users


Dishwasher


Add a comment