How to replace shock absorbers on a top-loading washing machine
 Users rarely pay much attention to shock absorbers, but it is precisely because of this element that household appliances are stable, especially during spinning. If the shock absorbers are damaged, the “home assistant” will make loud noise and bounce, which is why there is a high risk of not only damaging the floor covering, but also the internal elements of the SM. To prevent this from happening, at the first sign of a problem, you need to replace the shock absorbers of your top-loading washing machine. We will analyze in detail this simple repair, which you can handle on your own without the help of service center specialists.
Let's prepare the machine for repair
First of all, the washing machine needs to be prepared for replacing shock absorbers. To do this, you need to disconnect it from all communications, and then remove the hoses. Then, in the room where the repair work will take place, you should lay rags or towels, and then move the machine there.
Old rags or unwanted towels or blankets will help keep any water that may have remained in the system from flooding your floors.
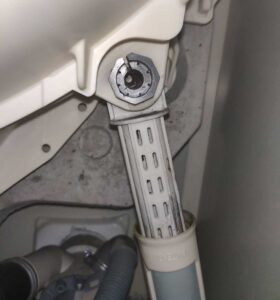
Afterwards, you need to remove the right wall of the device case, having previously unscrewed all the fixing screws with a Phillips screwdriver. Remove the wall and you will see the drive mechanism, belt and pulley, behind which are shock absorbers that need to be replaced.
We replace damaged shock-absorbing elements
Before replacing, you can additionally check the “home assistant” to make sure that the element is truly damaged.This is very simple to do - you can simply monitor the operation of the equipment, during which you will notice excessive jumps in the machine during washing, or you can check the performance manually.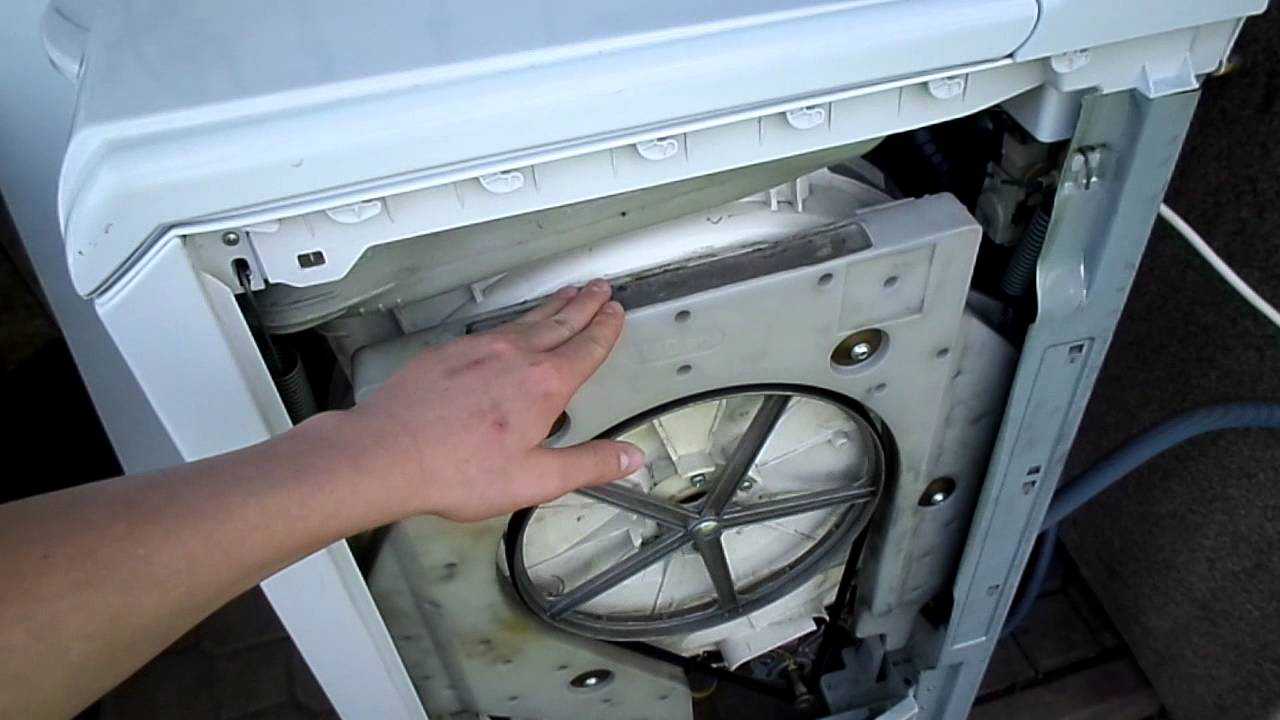
To do this, you need to open the lid of a top-loading washing machine, press on the drum, thereby lowering it, and then evaluate the behavior. If it is hard to press on it, plus, due to the pressure, there will then be only one jump, after which the element will almost instantly return to its original position, then the shock absorbers are normal. However, if the pressure is very easy, and the drum manages to make several jumps before becoming motionless, then the washing machine needs repair. Replacing shock absorbers with your own hands is not difficult if you strictly follow our instructions and do not rush.
- First, remove the right cover of the CM, if you have not already done so.
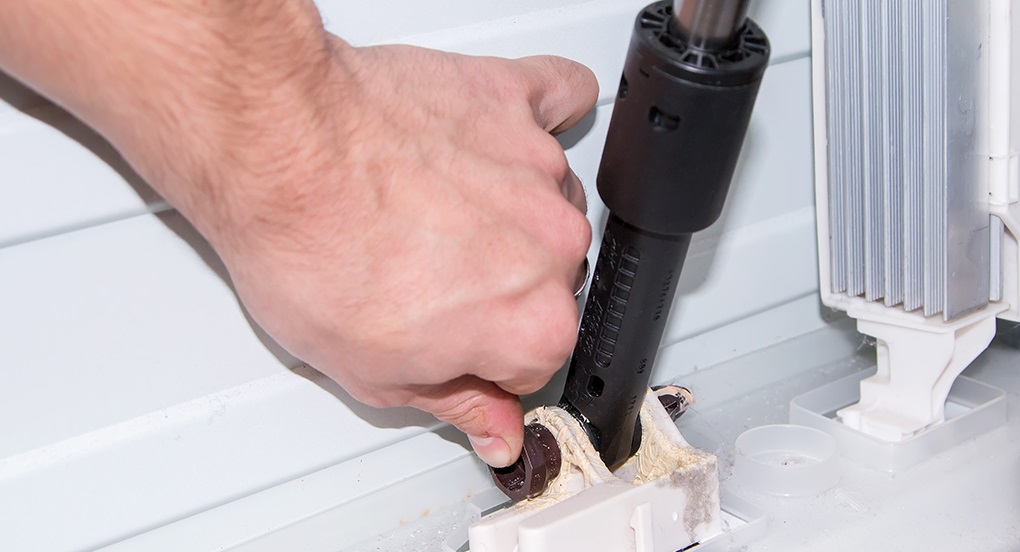
- Find the shock absorbers and, using pliers, remove the upper and lower fastening mechanisms, for which you need to press the “pawl” on the bushing from the side with your hands, if you have enough strength, or with other pliers, and then remove the element itself.
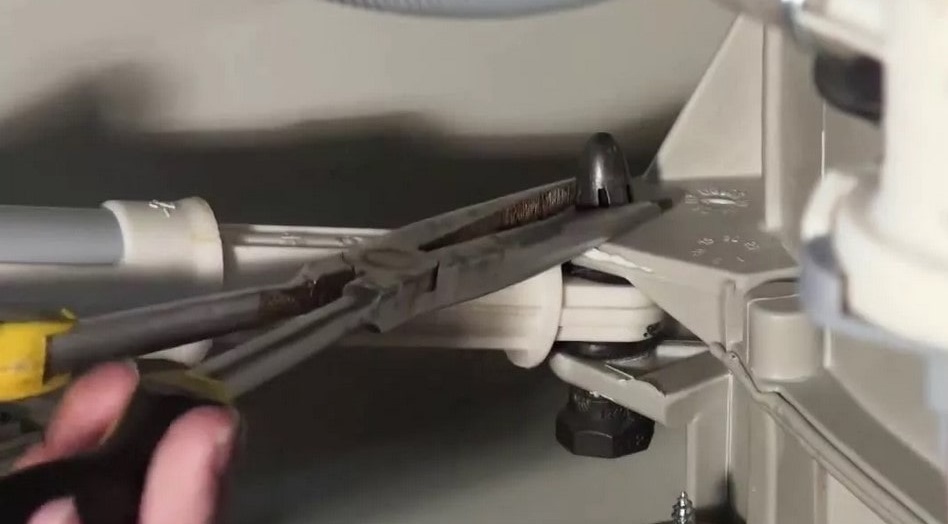
- Repeat the last step with the second shock absorber.
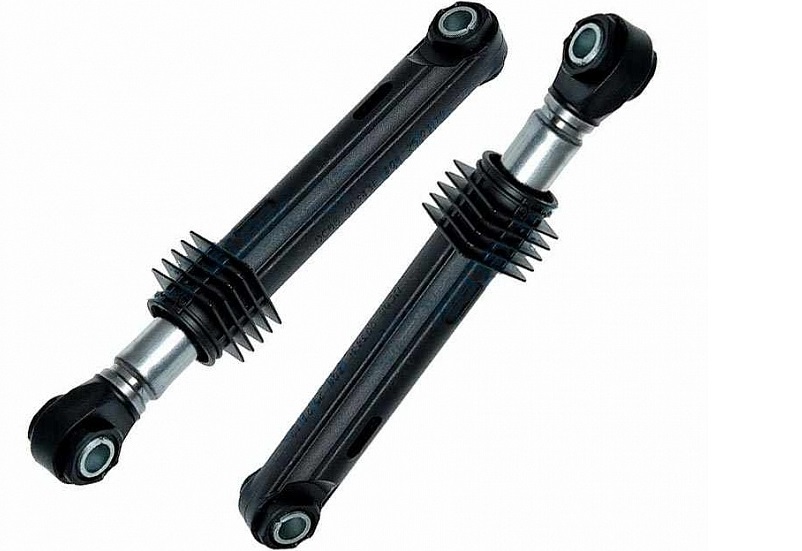
- Check the element - the O-rings should not be worn, and the shock absorber should not dangle freely without being fixed.
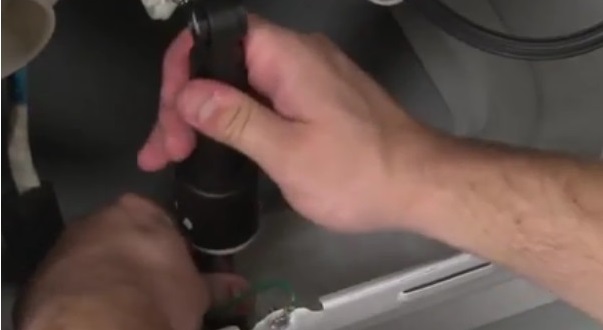
- If you need to replace a unit, you should find exactly the same part, or a similar one, but the length of which will exactly match the original spare part.
It is best to buy high-quality original parts from the manufacturer, rather than analogues that can quickly fail.
- We assemble the equipment according to the instructions in the reverse order, placing new shock absorbers on the seats, and then installing bushings on the bottom and top, on which the “pawl” must first be straightened so that the part does not accidentally jump out of the seat while the washing machine is running.
- Be sure to make sure that the bushings go through the shock absorber and the machine's support bracket.
- Additionally, the bushings can be slightly knocked down with a hammer so that they are tightly fixed in the shock absorbers.
- Next, all that remains is to attach the side wall of the machine in place.
At this point, the repair is complete, and you only need to arrange a test operating cycle. Idle washing will make sure that the problem with increased vibration is solved, and the washing machine can again be used without restrictions.
Interesting:


Reader comments
- Share your opinion - leave a comment
Categories
Washing machine repair


For buyers


For users


Dishwasher


Add a comment