How to change the tank in an Indesit washing machine
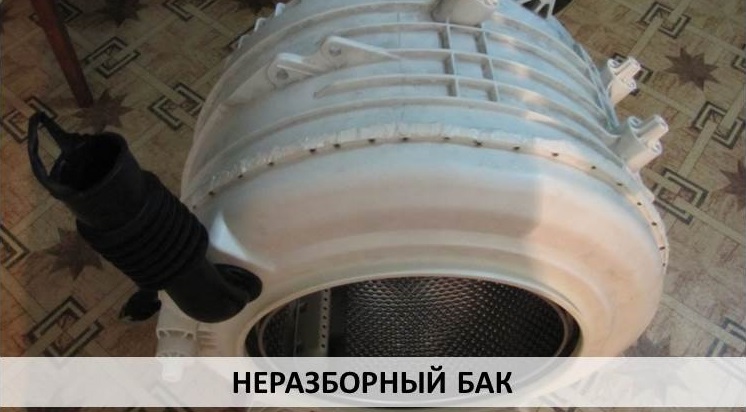
 Even the most modern and technologically advanced SM can fail if handled incorrectly or carelessly. When a hole suddenly appears in the plastic tub of your washing machine, it is most likely due to improper transportation, a fall, or another accident. If the damage is large, due to which it cannot be reliably repaired, then the tank in the Indesit washing machine needs to be replaced. In such devices, the tank is non-separable, so the entire “tank-drum” assembly will need to be replaced. Today we will talk about how to change this part in a machine with your own hands.
Preparatory activities
First of all, you need to carefully prepare for such repairs. To do this, you need to prepare all the basic tools that will be needed for replacement. There is nothing unusual in the list that would not be found in the standard set of tools that every man keeps at home. Prepare the following for work:
- hammer;
- screwdrivers with different attachments;
- screwdriver;
- pliers;
- side cutters;
- hexagons.
We will also need to buy a new tank-drum assembly, but do not purchase it in advance, as you may choose the wrong marking, so first remove the old tank, and only then look for a replacement.
Having prepared or purchased all the tools for repairs, start preparing the washing machine itself. The replacement will most likely take you the whole day, so it would be logical to pre-arrange a comfortable workspace so that nothing distracts or interferes with your work. A garage or a large living room with enough free space is best suited for this purpose.
If it is not possible to move the device to a non-residential premises, then it is worth emptying the whole or at least part of the room in the house, and also covering the floor with thick fabric so as not to damage the floor covering during all manipulations. Only now is it worth starting to restore the home assistant.
Replacement of the “Tank-drum” unit
Do not rush to move the machine from the bathroom or kitchen; first disconnect it from all communications, and also drain the remaining water that usually remains at the bottom of the tank after the operating cycle. To drain, you will need a large container, for example, a basin, which you need to install under the body of the washing machine, and then, having separated the garbage filter, begin to slowly drain the water. The filter also needs to be given attention: remove debris, rinse, dry and leave alone until the repair work is completed.
When you disconnect wires and other small parts of the washing machine, be sure to take a photo of how everything was connected initially, so that you don’t get confused later when reassembling it.
We proceed to replacing the “Tank-drum” unit in the Indesit automatic washing machine. Do not rush to finish quickly, so as not to accidentally damage the device even more. Follow our instructions carefully and everything will be fine.
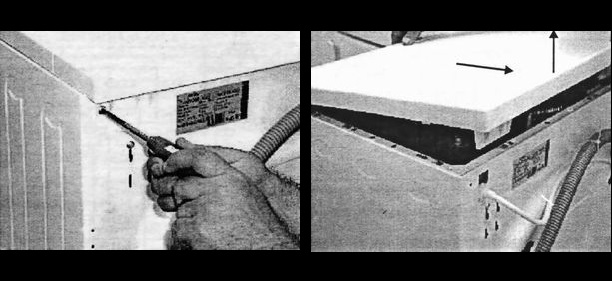
- Remove the top cover of the washing machine by unscrewing all the bolts that are located on the back of the device (at the top under the protrusion of the cover). If you push the cover back a little and pull it up, it will be much easier to remove. Place the lid aside so it doesn't get in the way.
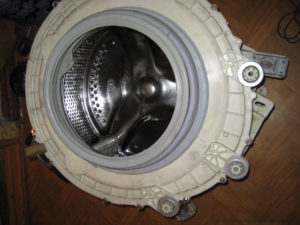
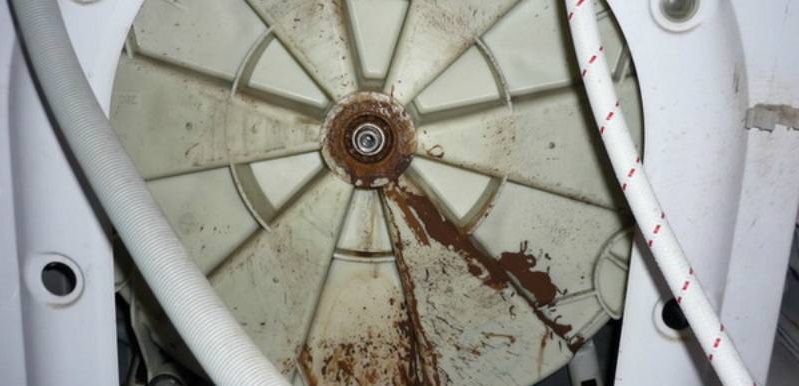
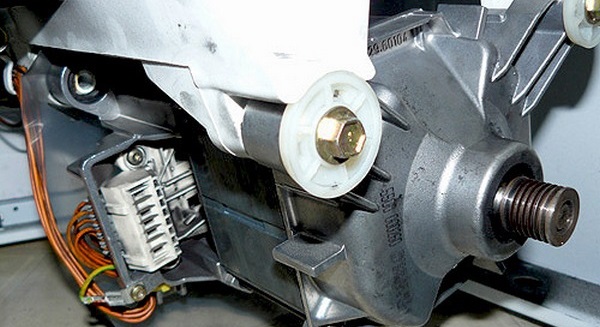
- The drum and drive mechanism of the device can now be seen. Be sure to disconnect the operating belt and also inspect the inside of the machine.If you find rusty streaks coming out from the central point of the tank, it means the oil seal and bearings are broken.
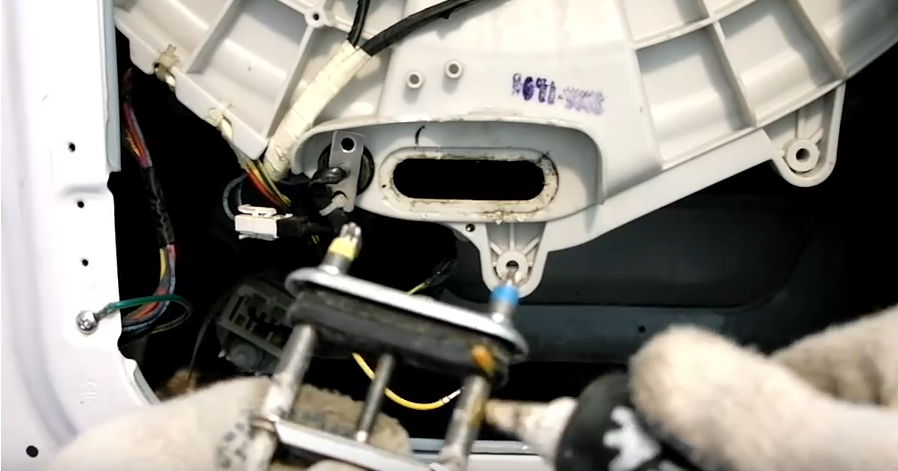
- Start disconnecting the cables and wires that are attached to the drum. This will disable the water heating element and temperature sensor. There should be no scale or damage on the heating element, otherwise you will have to either thoroughly clean it or buy a new one. Also, do not forget to unscrew the bolts that are used to secure the washing machine motor.

- At this stage, it is necessary to remove the heater mounting nut and pull out the element with slow rocking movements.
- We remove the counterweight, which is located on top of the machine. This large part will be very clearly visible immediately after you remove the top cover of the washer. It is this element that prevents household appliances from jumping and moving around the house. To disconnect, use a hex wrench to loosen all the counterweight fasteners.

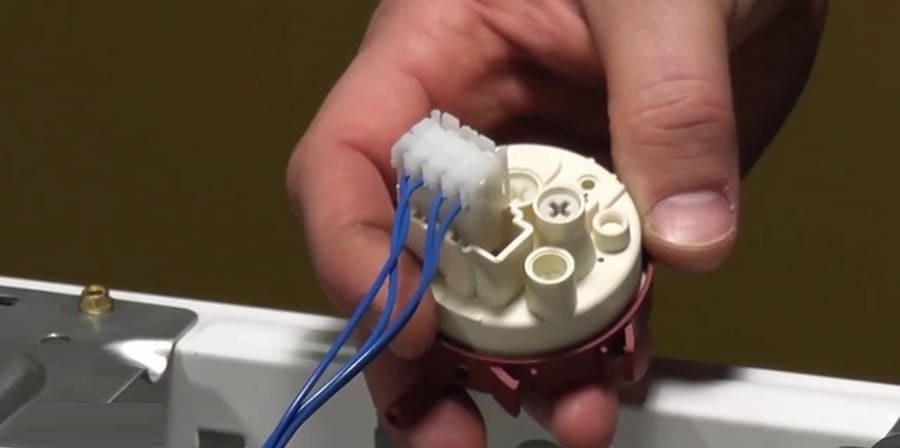
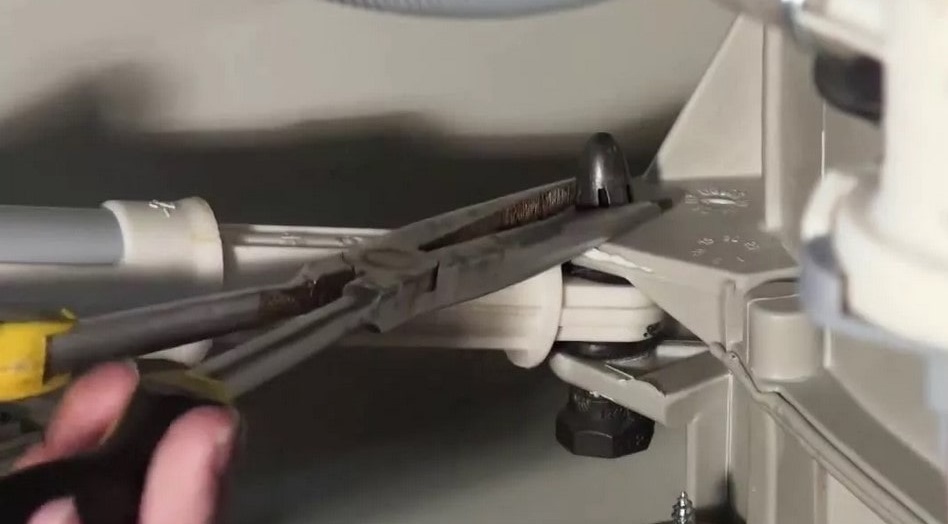
- We remove the wiring and hose from the pressure switch, and then take out the level sensor itself.
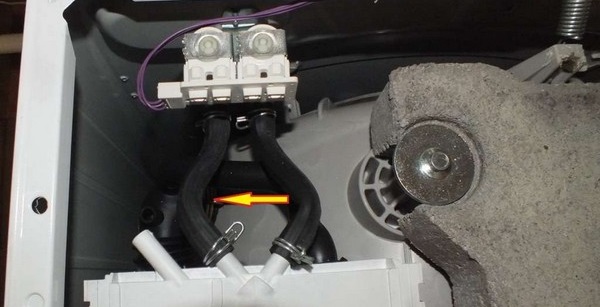
- We remove the detergent tray and powder receptacle of the washing machine, first loosening the pipe clamps.
- Carefully place the machine on the right side. Inspect the bottom of the device - if there is a bottom, then it needs to be disconnected. To do this, unscrew all the screws located on the sides of the garbage filter and push the snail in which the filter is located inside the body of the home assistant.
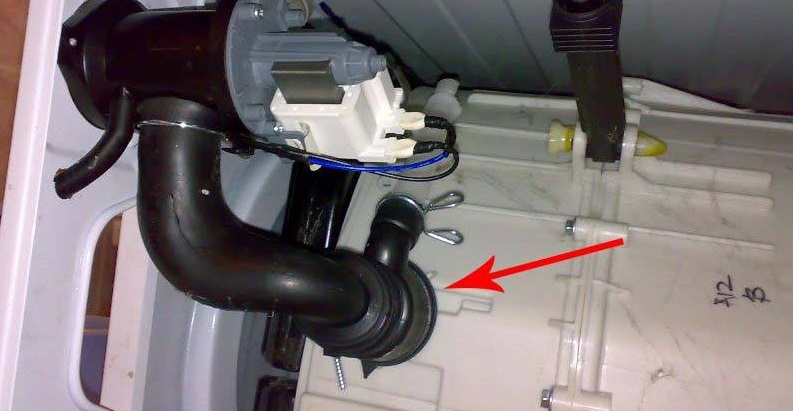
- We remove the chip with wires from the pump, loosen the clamps, remove all the pipes from the pump, and then the pump itself.
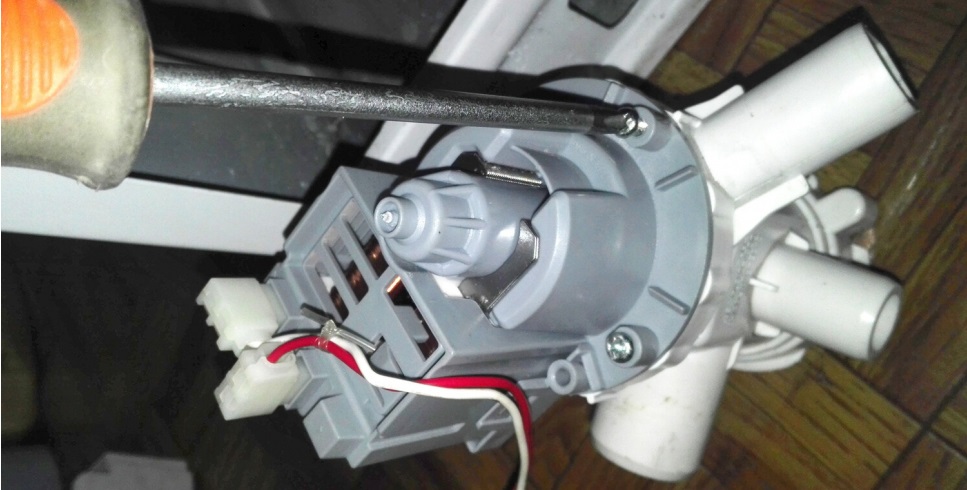
- We remove the heavy motor of the device, which needs to be released back a little and pulled down.
- Now you need to unscrew the shock absorbers supporting the tank from below.
- Carefully return the Indesit equipment to a vertical position. Due to the fact that the tank and drum are now fixed to the machine with only two springs, all manipulations should be done slowly.
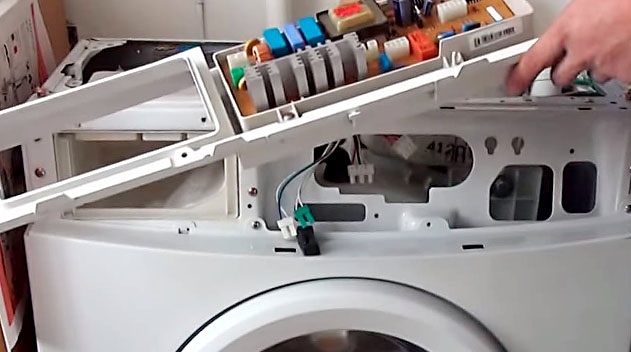
- If the control model does not allow you to reach the drum, you need to turn it off. To do this, disconnect the wires, remove the mounting bolts and supporting latches, and then remove the control module itself.
- Finally, all that remains is the Tank-Drum assembly itself, which is very difficult to get on your own, so it’s better to call for help. Together with an assistant, you can easily remove the element from the shock absorbers and pull it out through the top of the washer.
This completes the disassembly of the washing machine. The fifteenth action can be considered the purchase of a new combination of tank and drum and installation of it in household appliances. Next, all steps must be performed exactly as in the instructions, but this time in reverse order.
The first step will be to install the “Tank-Drum” assembly into the body of the machine, for which it will have to be hung on springs and connected to the shock absorbers below. Next, we install all the remaining parts and run a test wash to check the functionality of the home assistant. If the test passes without problems, then the repair was completed successfully.
Interesting:


Reader comments
- Share your opinion - leave a comment
Categories
Washing machine repair


For buyers


For users


Dishwasher


Add a comment