How to change the bearing in a Vyatka-automatic washing machine?
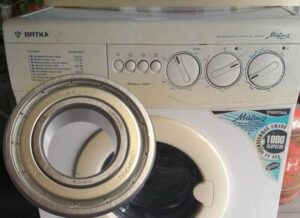 On the one hand, replacing the drum bearing in a Vyatka-automatic machine is much easier than on modern washing machines. All its internal parts are metal, secured with ordinary bolts. The old unit does not have intricate latches or tricky plastic clips that can easily be broken if pressed inaccurately. However, in the process of repairing a Vyatka car, you may encounter other difficulties. We'll figure out how to perform the replacement and tell you what problems we're talking about.
Where can I get new bearings and seals?
The main difficulty when repairing old washing machines is finding replacement components. Thus, the first copies of the Vyatka-automatic were released back in 1981. Despite such a long period of time, the units were well preserved. They function properly to this day.
Since Vyatka-automatic cars stopped being assembled in 2005, it is difficult to purchase spare parts suitable for the model today.
We'll have to look for analogues from more modern washing machines. To repair a bearing assembly, you need to find and purchase:
- internal bearing. “Ring” dimensions 30x62x16 mm;
- external bearing, 25x50x15 mm;
- sealing rubber (oil seal), 38x62x10 mm.
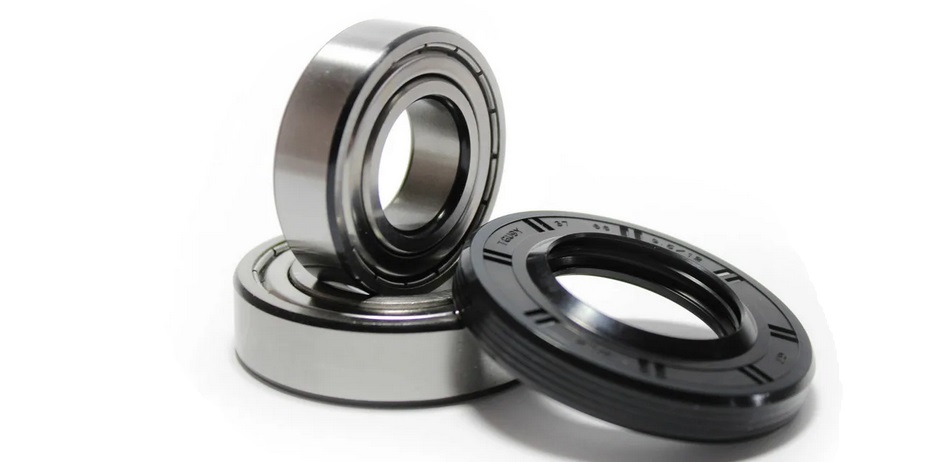
There will be no problems purchasing bearings. “Rings” of these sizes can be found in specialized stores or ordered online. They are quite common, as they are suitable for modern automatic machines Indesit, Ariston and others.
The situation will be more complicated with the oil seal.On the Russian market it is almost impossible to find a seal exactly the same size as the one on Vyatka-automatic. You can try your luck in workshops that dismantle and repair equipment; suddenly, quite by accident, they sell an old washing machine for spare parts.
But there is a way out - in the AliExpress online store you can find an oil seal measuring 38x62x10 mm. The seal will cost about $3-5, depending on the supplier. The only negative is long delivery. We'll have to wait to repair the Vyatka-automatic machine, which has served faithfully for many years.
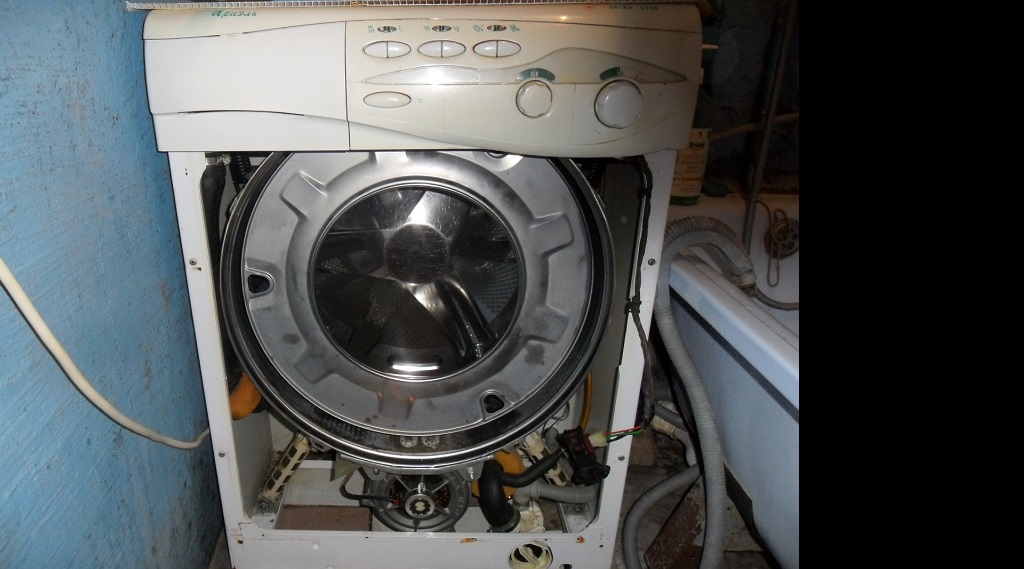
How to disassemble the machine?
So, it was decided to repair the washing machine with our own hands. The work is simplified by the fact that to replace bearings on a Vyatka machine you do not need to remove the front wall of the housing. It will be enough to remove the top panel and the rear technical hatch.
Before disassembling the automatic machine, be sure to turn off the power and turn off the water supply tap.
You can disassemble the housing using a screwdriver. To begin, unscrew a pair of bolts securing the top panel. After removing the fasteners, you can slightly move the “cover” back - after that it can be easily removed. The rear part is removed in the same way - after unscrewing the screws located around the perimeter of the service hatch. The further algorithm of actions will be as follows:
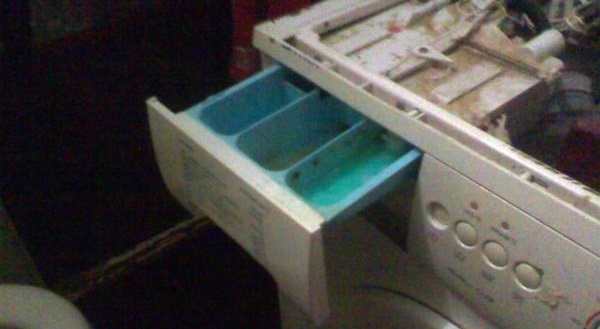
- remove the powder receptacle;
- loosen the clamps on the dispenser pipes, disconnect the hoses and remove the “hopper”;
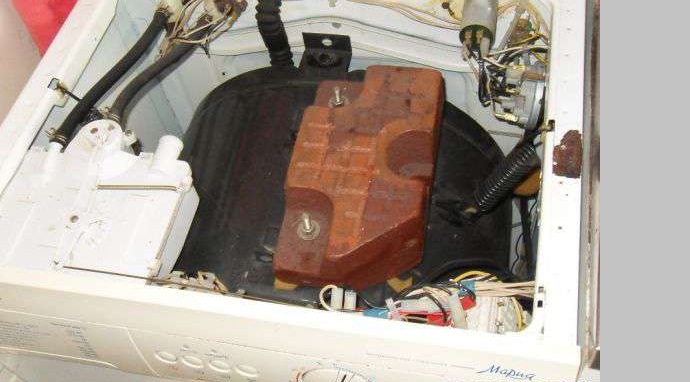
- unscrew the bolts holding the cast iron counterweights, remove the weights from the body;
- remove the drive belt from the pulley;
- Unscrew the screws holding the motor;
- disconnect the wiring from the engine and remove the element from the housing;
- disconnect the wires from the heating element and drain pump;
- disconnect the drain pipe from the tank;
- remove the lower counterweights;
- pull out the outer clamp securing the hatch cuff;
- tuck the rubber seal inside the drum;
- Unscrew the dampers (shock absorbers that hold the tank in the body). It’s more convenient to do this by going behind the machine;
- disconnect the water level sensor tube;
- remove the upper springs securing the tank;
- remove the tank-drum assembly from the housing.
The unit must be placed on a hard, level surface. Now all that remains is to disassemble the tank, remove the broken bearings and install new components. Let's figure out how to do it yourself.
We disassemble the tank, change the bearings
To change the bearings, you will need a screwdriver or screwdriver, a small hammer and a drift (it can be replaced with a regular metal rod). The tank of Vyatka-automatic machines is made of stainless steel and is collapsible. You just need to unscrew the bolts around the circumference of the container and gain access to the drum. To remove the drum from the tank, you will have to unscrew the cross and carefully knock out the shaft. Let's look at the algorithm for replacing bearings and oil seals step by step:
- use a thin screwdriver to pry up the oil seal and remove the rubber seal;
- install the drift in the center of the outer bearing;
- tap the “ring” by moving the punch in a circle and hitting it with a hammer;
- knock out the inner bearing in the same way.
This is how old bearings are dismantled. Before installing new components, you need to clean the seat from dirt and metal shavings. It is also necessary to treat the recess, the “rings” themselves and the oil seal with a special lubricant - it will protect the unit from moisture and temperature changes.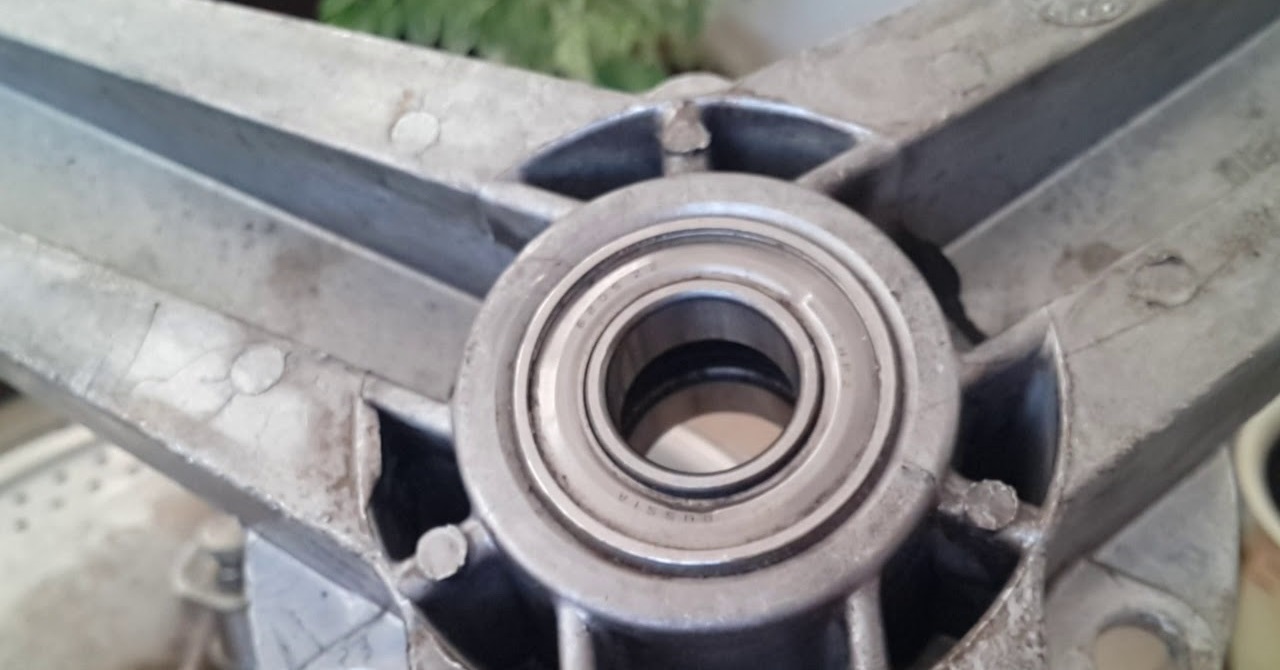
The shaft should also be cleaned. This can be done first with zero-grit sandpaper and then with GOI paste.To install the bearings, you should place them one by one in the appropriate recesses and carefully press them in with a drift and hammer. It is allowed to knock only on the inner ring of the ring, otherwise the part may be damaged.
Next, you need to put the cross in place, connect the halves of the tank and begin assembling the Vyatka-automatic. It is done in reverse order. The main tank is secured in the housing with dampers and springs, a pressure switch hose and a drain pipe are connected to it, and lower counterweights are installed. The cuff, heating element, engine, drive belt and other elements are fixed. Having completed the assembly, all that remains is to connect the “home assistant” to the utilities and run a test wash. If the machine does not hum while rotating the drum normally, it means the replacement was completed correctly.
Interesting:


1 reader comment
Add a comment
Categories
Washing machine repair


For buyers


For users


Dishwasher


What are the bearing sizes? On a truck?