How to change the heating element on a Vestel washing machine?
It is not difficult to understand that the heating element of a washing machine has failed. The water in the tank will remain cold throughout the entire cycle, and the glass of the hatch door will become covered with condensation. Many modern machines will not start washing at all, displaying the corresponding fault code on the display. You can replace the heating element in a Vestel washing machine yourself, without inviting a technician. The repair will take about half an hour; the only tools you need are a couple of screwdrivers, a small hammer and a socket wrench. We'll tell you how to remove the old and install a new heating element.
Let's find the part
First, you need to understand where the heating element is located in the washing machine. If the machines Indesit or LG The heating element is located in the back, then in machines Vestel – in front. Therefore, in this case, it is the front wall of the case that will need to be removed, and it is a little more difficult to dismantle than the rear panel.
There are some advantages to this arrangement of the heating element. Firstly, you don't have to move the machine far away from the wall to gain access to the back panel. Secondly, it is not at all necessary to disconnect the drain and inlet hoses from the unit. If you decide to change the heating element yourself, follow the following algorithm:
Turn off the power to the automatic machine by unplugging the power cord from the outlet;
close the valve responsible for supplying water to the system;
prepare a low container and a dry cloth;
open the technical hatch located in the lower corner of the housing;
place a basin under the bottom of the machine in the area where the garbage filter is located;
unscrew the “trash can” plug and collect the water that begins to flow out of the hole;
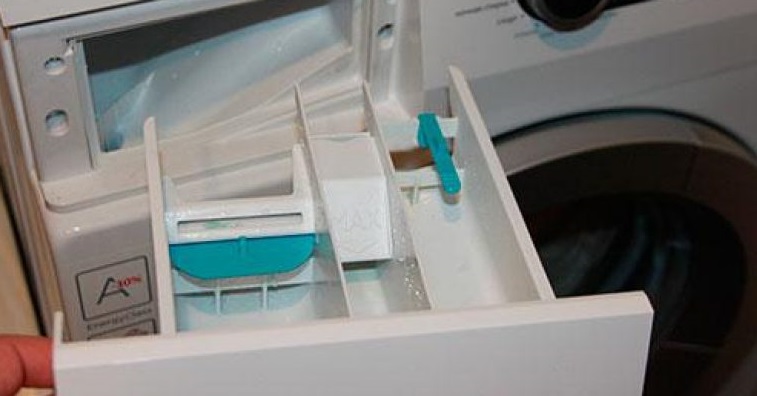
remove the powder receiver tray;
Unscrew the 2 bolts holding the housing cover;
move the top panel to the side;
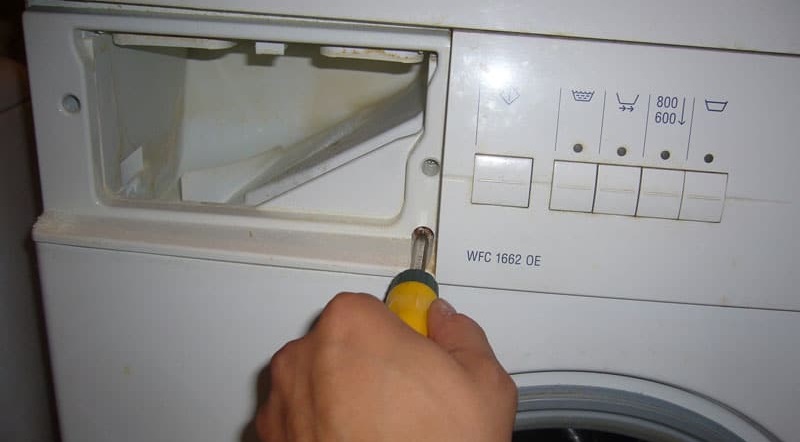
unscrew the pair of screws that appeared after removing the powder receptacle;
remove the bolt located on the right side of the dashboard;
Carefully place the control panel on top without breaking the wiring;
When lifting the “tidy”, be careful, the wires are very flimsy and can be easily damaged.
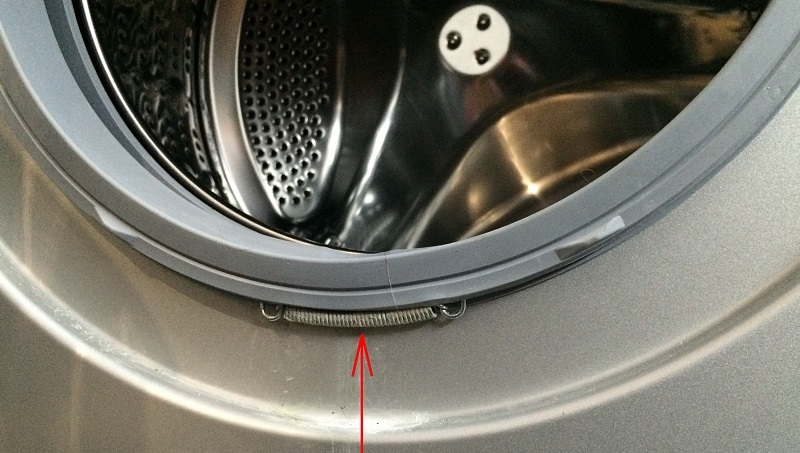
open the hatch door, use a slotted screwdriver to hook the cuff clamp, loosen the latch and pull the ring out;
tuck the rubber seal inside the drum;
Unscrew the remaining bolts holding the front wall of the housing. They are located near the garbage filter and in the control panel area;
Now the front wall of the Vestel machine is supported only by a pair of hooks. Grasp its lower corners, carefully lift it and remove it from the fastenings;
Place the panel on the side of the body. You must act carefully so as not to damage the wires of the hatch locking device, which will follow the retractable front wall.
Having removed the front panel, you can begin the repair. First of all, we recommend making sure that the problem is really in the heating element. After all, the reason that the water remains cold may be a damaged control module or a failed temperature sensor. We'll tell you how to check whether a tubular heater is working properly.
Check the heating element carefully
There is always time to change the heating element; first you need to check the part. To diagnose the heating element, you will need a multimeter. The tester should be switched to resistance measurement mode.Afterwards, you need to unhook all the wiring from the tubular heater. It is important to act carefully so as not to damage the contacts. Once finished, you can proceed directly to diagnostics:
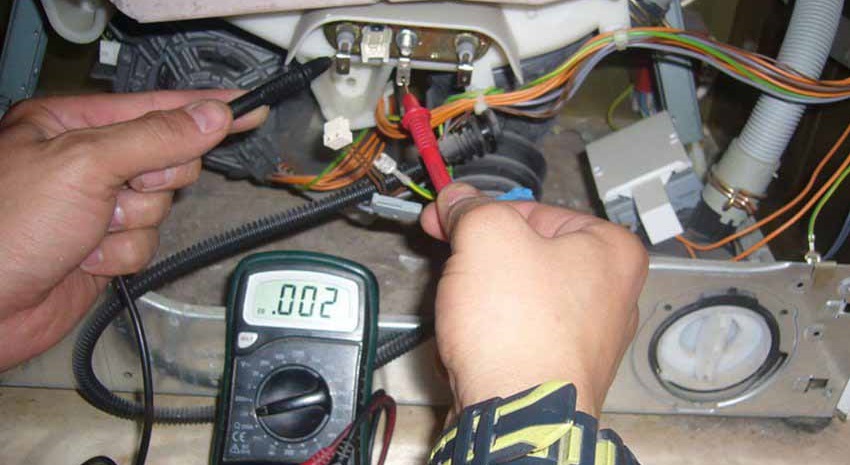
attach the multimeter probes to both contacts of the heating element;
look at the number displayed on the tester screen;
compare the values with the normative ones.
When a number within 25-30 Ohms appears on the multimeter screen, it means the tubular heater is working. If 0 or 1 is displayed, we can talk about the failure of the heating element. You will have to buy a new part and install it in place of the burned out one. In fact, the heater is not the most expensive spare part of a Vestel automatic machine. You can buy a new part for 10-15 dollars.
The heating element power of Vestel washing machines is usually 1800 Watt.
You should purchase a heater based on the model and serial number of the automatic machine. Different Vestel washing machines have heating elements that differ in their modification, so you need to be careful when purchasing. The ideal option is to take the failed heating element with you to the store. The consultant, based on the marking of the part, will select the appropriate heater.
We remove the burnt heating element and install a new one
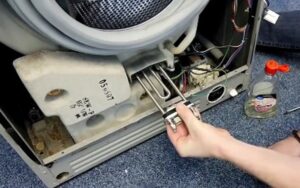
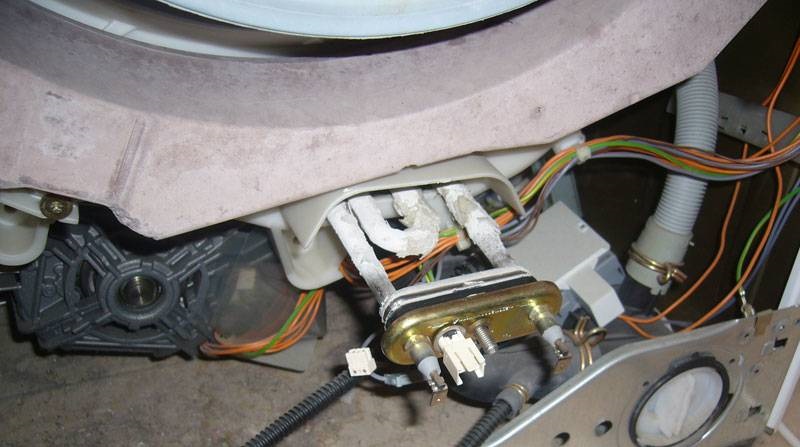
Having purchased a working part, you can start replacing it. To work, you will need a socket wrench - use it to unscrew the central nut of the heater. The algorithm of actions will be as follows:
loosen the central fastening nut;
grasp the contacts of the tubular heater;
swing the part in different directions;
Use a small hammer to tap the stud from which the nut was screwed. The bolt should fall inside;
Using a slotted screwdriver, carefully pry up the heating element and move the heater from its seat;
pull the contacts of the element and pull it out.
Having taken out the heating element, inspect it. Most likely, the part will be covered with a thick layer of scale. There may also be black spots on the surface of the tubes - a clear sign that the element has burned out. Next, you need to take the purchased spare part and use a multimeter to verify its serviceability. Installing the heating element with your own hands is very simple - you need to lubricate the rubber seal with machine oil and push the tubular heater into the “socket”. Afterwards the part is fixed with a nut.
Having completed the installation, you need to connect the contacts of the temperature sensor and the previously removed wiring. Next, all that remains is to assemble the body of the washing machine: hang the front wall, secure it with self-tapping screws, secure the hatch cuff, control panel, insert the powder receptacle, and return the “top” of the machine to its place. Then you can run a test wash and monitor the behavior of the “home assistant”.
In order for the new heating element to work as long as possible, it is important not to forget to periodically clean the “insides” of the washing machine from scale with special means. It is also advisable to install a filter to soften hard tap water - then limescale will not accumulate on the machine parts.
Let's remove the trash from the tank at the same time.
Not everyone knows that debris constantly accumulates at the bottom of the tank of any automatic machine. These can be pieces of scale, soggy paper, buttons, tacks, paper clips, coins and other foreign objects. The more rubbish accumulates inside, the higher the likelihood of disruptions in the work of the “home assistant” in the future.
When changing the heater, it is better to use the opportunity and at the same time clean the tank of debris.
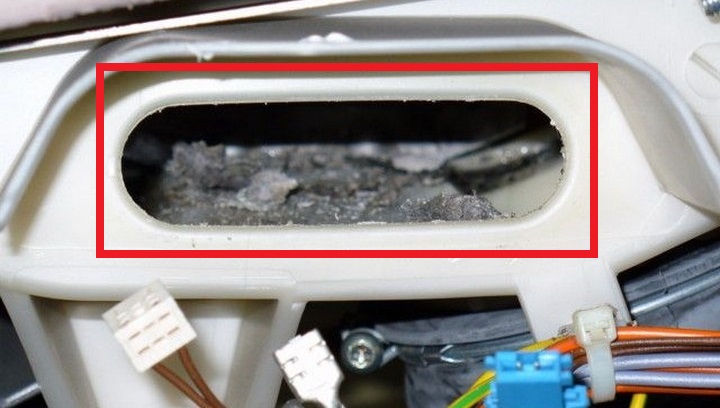
The hole that is formed after removing the heating element is quite large.Through this “hole” you can remove with your own hands all the garbage that has fallen into the tank of the machine. How to proceed? You can simply stick your hand into the hole and take out everything that has accumulated at the bottom of the “centrifuge”. Another way is to take a spoon and use it to remove the debris. A clean tank is the key to the normal operation of an automatic washing machine. Therefore, this recommendation should not be neglected.
Now even a “newbie” can understand how to check the heating element of a Vestel washing machine and, if necessary, replace it. The work will not take much time if you follow the instructions strictly. Therefore, if you notice that the automatic machine does not heat the water, do not rush to call the technician, try to fix the “home assistant” yourself. If replacing the heating element did not help, and the machine still does not heat the water, more extensive diagnostics will be required. Perhaps the issue is a breakdown in communication between the tubular element and the control board. To check the electronic module, it is better to invite a specialist; it is not recommended to get into the “brain” of the washing machine yourself - you can only worsen the situation.
 It is not difficult to understand that the heating element of a washing machine has failed. The water in the tank will remain cold throughout the entire cycle, and the glass of the hatch door will become covered with condensation. Many modern machines will not start washing at all, displaying the corresponding fault code on the display. You can replace the heating element in a Vestel washing machine yourself, without inviting a technician. The repair will take about half an hour; the only tools you need are a couple of screwdrivers, a small hammer and a socket wrench. We'll tell you how to remove the old and install a new heating element.
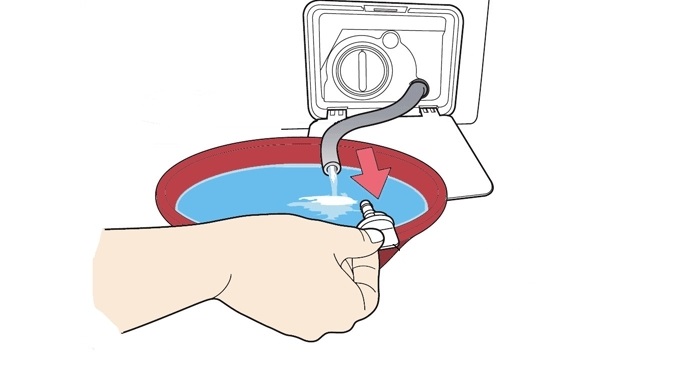


Add a comment