Replacing the oil seal on a Zanussi washing machine
 swelling of the lubricant on the back wall, noise and excessive vibration are reasons to replace the seal on your Zanussi washing machine. Often, not only the rubber gasket needs to be replaced, but also the bearings. In any case, the repair will follow the same plan: almost complete disassembly of the machine, dismantling the tank, “halving” it and knocking out the shaft. We’ll tell you in detail what everything looks like in step-by-step instructions and what to pay special attention to.
We will collect everything you need for repairs
Dismantling and replacing the oil seal is a labor-intensive and slow task. To simplify matters, it is important to carefully prepare for the manipulations. First of all, you need to disconnect the washing machine from communications, move it away from the wall, placing it in the center of the room, or move it to the workshop. Secondly, assemble the required set of tools in advance.
When replacing oil seals the following will definitely come in handy:
- screwdrivers (slotted and Phillips);

- pliers or pliers;
- hammer;
- set of open-end wrenches;
- set of socket heads;
- lubricant-cleaner WD-40;
- sealant (must have moisture-resistant properties);
- lubricant (for processing the bearing unit, shaft and oil seal);
- car puller, drift, metal pin or chisel (for knocking out bearings).
The third step is to take care of purchasing replacement parts. If you have time, it is better to first disassemble the washing machine, remove the damaged components, bring them to the store and, using a sample, select an analogue. But you can go another way - determine the size of spare parts, focusing on the model and serial number of Zanussi.Be sure to study the factory instructions, which specify the parameters and types of bearings and oil seal used in the design.
When repairing a Zanussi washing machine, you must use only original components!
Replacement components are purchased only from trusted sellers. Ideally, they are ordered directly from the manufacturer. It is not recommended to purchase third-party seals from other brands, even those that are suitable in size and type. You can install “foreign” parts, but they will quickly become unusable. Having prepared for the procedure, we cover the space around the washer with oilcloth or rags. Now you can start repairing.
How difficult is it to remove the drum?
To install the oil seal correctly, you need to remove the tank and drum from the machine. Of course, this is not easy to do: you will have to almost completely disassemble the machine. You should remove the top, rear and front panels of the case, free the wiring, heating element, motor, pressure switch and many other elements of the system. The main thing is to do everything consistently and carefully. The instructions are as follows:
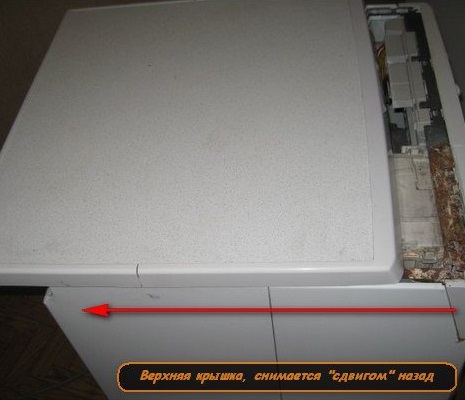
- unscrew the bolts located at the back end of the upper housing cover;
- remove the “top”;
- pull the “handle” of the powder receptacle and, holding the special latch, pull it out of the body;
- release the dashboard from the retaining screws and unhook it from the washing machine;
- disconnect the back panel from the case;
- remove the drive belt from the pulley;
- use a screwdriver to pry off the technical hatch door (bottom front) and move it to the side;
- open the hatch;
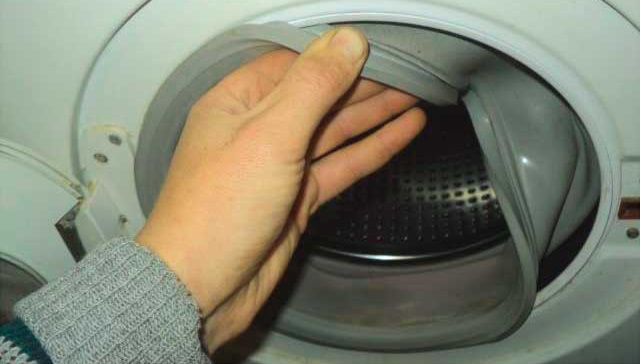
- loosen the outer clamp using a screwdriver and pliers;
- tuck the cuff inside the drum;
- disconnect the wiring from the UBL;
- Unscrew the screws holding the front panel and remove the end.
At this stage, Zanussi is almost completely disassembled - access to the tank with the drum is provided. All that remains is to free the containers from the connected wiring and several components. So, you need to disconnect:
- sensor from the fill valve;
- drain hose;
- wires going from the tank to the engine, heating element and pump;
- pressure switch tube;
- counterweights;
- shock absorber struts.
The drum is dismantled along with the tank!
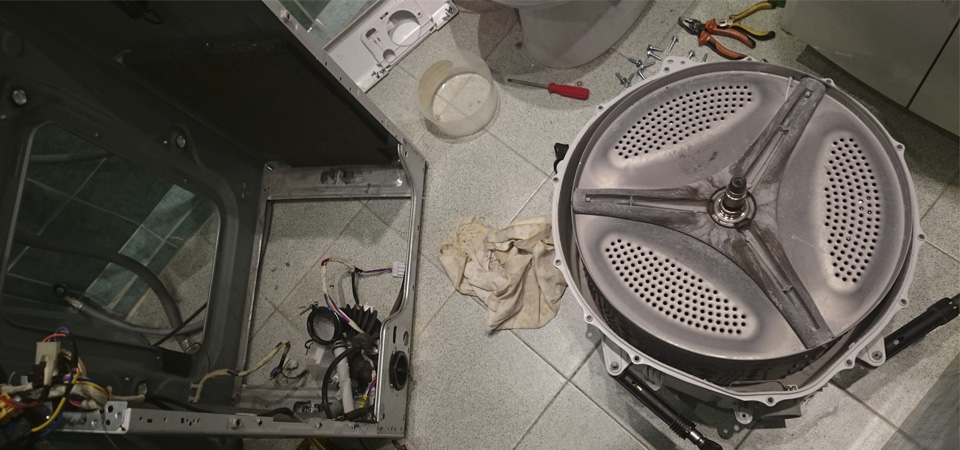
Now the tank will be held in the machine only by the upper springs. To get the container, you need to squeeze them out and pick up the drum. It is best to act with four hands so as not to strain too much. However, you can do it alone, since the tank weighs a little. The dismantled tank should be placed on a flat, dry surface - the floor or table. Next, we proceed to divide it into two halves.
Divide the tank into halves
Zanussi washing machines are equipped with collapsible tanks, which greatly simplifies the process of separating them. There is no need to saw the container along the seam or carry out other risky manipulations. Everything is simple here: just unscrew all the bolts around the perimeter of the tank and release the provided latches.
If the fasteners are firmly stuck in the seats, you should treat them with WD-40 cleaner, wait 15-20 minutes and try again. The main screw is unscrewed last, and the halves are carefully separated. For further repairs, a part with a drum and a cross is needed.
“Stuck” parts and fasteners are treated with WD-40 lubricant before dismantling.
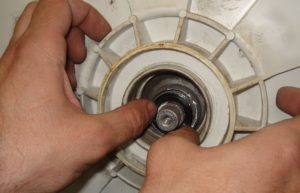
The drum pulley is removed and the bolt is returned to its place. Then a puller, drift, chisel or any metal pin is placed on the screw. The selected instrument is moved in a circle and tapped with a hammer.Thus, the shaft is knocked out for subsequent dismantling of the oil seal and bearings. The main thing is to act carefully so as not to damage the node.
We install a new rubber band
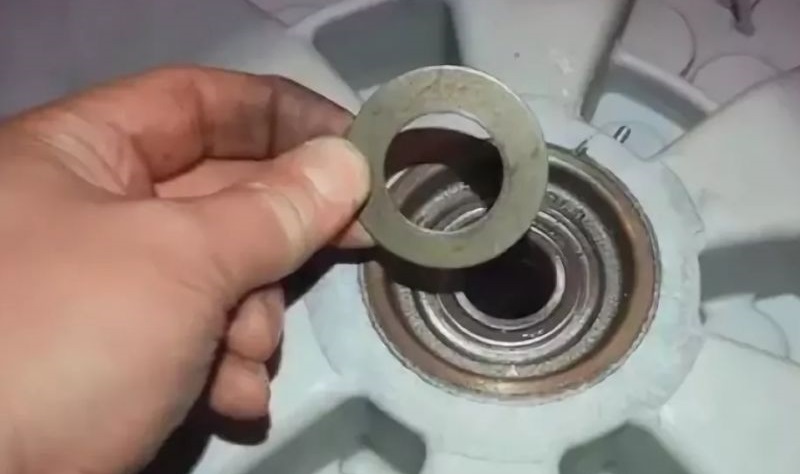
Having halved the tank, you can begin to remove the seals. It is necessary to carefully examine the back of the assembly, where a round rubber gasket will be visible in the center, under the shaft. It is enough to pry it with a slotted screwdriver and remove it from its seat.
It is better to immediately assess the condition of the bearing assembly. If the oil seal has been damaged for a long time, then there is a high probability that moisture that has penetrated through it has washed the lubricant from the bearings. Without sliding, the clips quickly become unusable - they break and wear out. Therefore, they and the gaskets are changed at the same time.
The bearing is pulled out of the “socket” as follows:
- a punch or puller is placed on the holder and punched with a hammer, moving in a circle;
- the impacts continue until the upper bearing moves;
- Having removed the upper bearing, remove the lower one in the same way.
After dismantling the oil seal and bearings, it is advisable to thoroughly clean the seat. It is necessary to generously treat the joint with WD-40, then remove any remaining grease, dirt, rust and scale. Finally, wipe with a dry cloth or leave to dry.
Next we proceed to installing the bearings:
- lubricate the seat, shaft, oil seal and bearings with special lubricant;
- We insert the lower bearing (smaller) first, and the larger one from the top;
- place the oil seal on the bearing;
- Apply a layer of sealant on top.
Then we return the shaft with the cross into place and proceed to connecting the halves. We attach the parts to each other, apply silicone sealant to the seam, and then screw in all the removed screws and snap the latches.It is advisable to immediately check the tank for leaks: plug the existing holes with rags, fill with water and look at the joint. If there are no drops or smudges, everything is done efficiently.
New bearings are lubricated with special grease.
After checking the tank, you can assemble the Zanussi. We follow the instructions suggested earlier, but in reverse order. First, the drum is suspended on springs, then the shock absorbers, pipes, wiring and pressure switch are returned. Then the walls are installed, the cuff is straightened, the dashboard is screwed on and the powder receptacle is inserted.
It is recommended to test the assembled Zanussi washing machine immediately. The first wash should be done empty - without laundry and with detergent. This way, the bearing assembly and tank will be washed from excess lubricant and sealant. If a leak occurs, contact the service center.
Interesting:


Reader comments
- Share your opinion - leave a comment
Categories
Washing machine repair


For buyers


For users


Dishwasher


Add a comment