Diagnostics of the Candy washing machine
 There are several situations when it is necessary to diagnose a Candy washing machine, but the most common is considered to be the termination of operation of a household appliance for no reason. If the machine stops in the middle of the cycle, you need to enable the test mode option, find out the cause of the malfunction and assess the extent of the damage. Knowing how self-diagnosis is carried out, this can be done without the involvement of a third-party specialist.
Why look for an error manually?
A modern Candy washing machine is a fairly “smart” household appliance that can turn on a self-test mode automatically as soon as there is a malfunction in the functioning of any of its systems. However, any device can sometimes fail, and then it needs the “help” of the owner, who will run the diagnostics manually. The program will check the operation of all modules of the device and display an error code on the display screen. The owner of the equipment will only have to analyze the information received.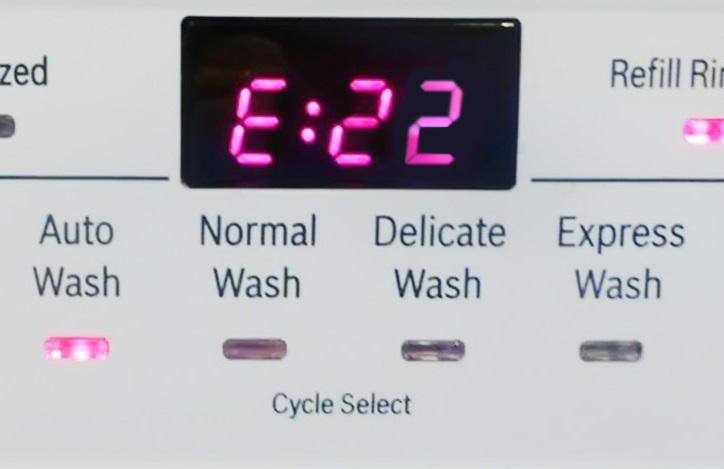
The washing machine will indicate that there was a malfunction in the functioning of the device and the self-diagnosis could not start by stopping operation at any stage of the cycle: washing, rinsing or spinning. The electronic control panel will simply freeze and stop executing entered commands.
To understand what happened to the home assistant, you will need to enable the “Service Center” option.
Preparing for testing
Diagnostics of the Candy washing machine requires some preparation. First, you will need to use a digital ammeter with a measurement limit of 20 A/AC: it is connected in series to each power supply wire of the device.This will allow you to estimate the supply of electricity and estimate the current strength. If all electromechanical components comply with 220V parameters, you can proceed to the next step, namely releasing the washing machine drum.
The water should be drained from it and the laundry should be removed, since their presence in a household appliance can cause additional diagnostic errors. Now you need to set the programmer to the “OFF” position.
How to start and run diagnostics?
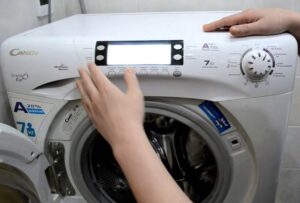
Now you can begin diagnostics and troubleshooting. To start the service test, you will need to find the first button on the left side of the control panel, which is responsible for selecting additional functions, and hold it down. Without releasing the button, you need to turn the programmer two positions clockwise, setting it to the COTTON 60° program.
From the moment the LED lights up, you should count 3 seconds and only after that release the first button, which is responsible for selecting additional functions. The correctness of the actions will be indicated by the lighting of the LEDs of all buttons, including the light signal for the remaining time and spin intensity.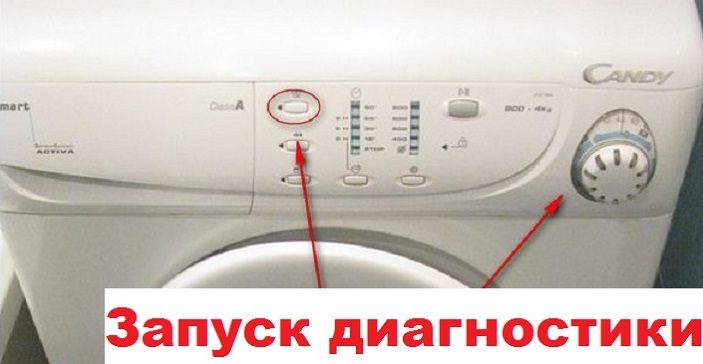
- MDL module: pause for 3 seconds, then press the Start/Pause button for 5 seconds.
- INVENSYS module: hold the button for 5 seconds and press Start / Pause.
The activation of the self-diagnosis program will be indicated by the blinking of the LEDs: the spin speed and the remaining time indicator will begin to blink together, and the additional option buttons will blink alternately with them.
Self-diagnosis of Kandy brand washing machines proceeds as follows. A small amount of water, about 5-6 liters, enters the tank of the household appliance. First, it is drawn through the department intended for pre-washing.Once the water level reaches the base level, there is a pause of 1 second. The water supply is provided by cold and/or hot water solenoid valves (depending on the configuration). Further, diagnostics is “gaining momentum.”
- After a pause, the water supply is carried out through the detergent tray intended for the main wash. The heating element is also turned on for 20 seconds, the solenoid valve for supplying cold water, the recirculation pump (if included) and the main engine continue to operate.
- The rotation of the drum is checked for 15 seconds at a speed of 55 revolutions per minute, the movement occurs counterclockwise.
- After the time required for testing, the engine will stop operating for another 4 seconds. After this, the water supply begins again and the same manipulations are carried out as in the previous step, but the drum movement will be carried out clockwise and for 10 seconds.
- Next, the drain pump will begin its work. Draining will be carried out until the signal “tank is empty” is received from the pressure switch.
- This will be followed by checking the operation of the spin function - for about 15 seconds the machine will operate at half the maximum speed.
After all these manipulations, the household appliance will report the end of self-diagnosis and issue a failure code. In this case, the first LED of the remaining time and the first additional function button will start flashing again. The period of time during which the error is displayed is 15 seconds. The error code will correspond to the number of flashes of the diodes, after which the indicator light will turn off until the corresponding 15 seconds have passed.Then the cycle will repeat again and will continue until the household appliance is turned off or the owner of the unit eliminates the malfunction.
Interesting:


Reader comments
- Share your opinion - leave a comment
Categories
Washing machine repair


For buyers


For users


Dishwasher


Add a comment