Error E43 in an Electrolux washing machine
 Which elements are broken by error E43 in an Electrolux washing machine? The answer to this question is in the instructions for the equipment. The code indicates a malfunctioning sunroof locking device. Also, the reason may be damage to the triac that controls the operation of the UBL. Let's figure out what to do in this situation.
Let's get acquainted with the design of the machine lock
If you notice a fault code on the display of your Electrolux washing machine, decipher the symbol. A description of each error is presented in the equipment instructions. After this, it will become clear what details of the “home assistant” to pay attention to.
Error E43 indicates a breakdown of the blocker. Before you begin diagnosing and repairing it, it is worth understanding how the SMA lock works. Modern Electrolux washing machines are equipped with bimetallic UBLs. This is a rather complex mechanism consisting of: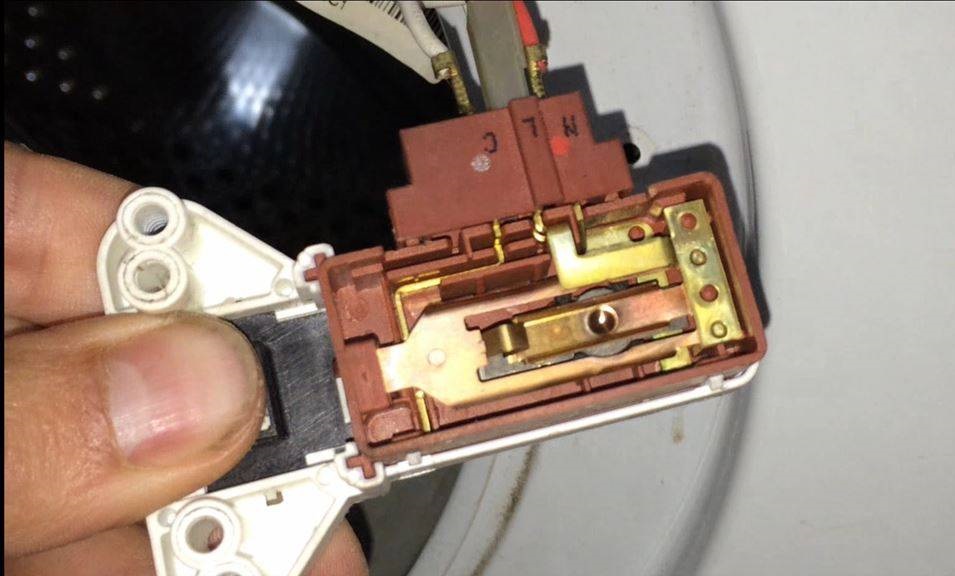
- bimetallic base;
- thermoelement;
- retainer.
Modern Electrolux automatic machines are equipped with bimetallic locks.
The operating principle of such UBLs is as follows:
- the SMA control module supplies current to the thermoelement;
- the sensor heats up in a few seconds and transfers the charge to the metal plate;
- the plate expands, putting pressure on the “tongue”;
- the latch falls into a special groove;
- the locking mechanism is activated, the hatch door of the washing machine is blocked;
- The washing machine begins to fill the tank with water.
A characteristic click informs about the activation of the UBL. This means that the system is now sealed. Only after this the machine begins to spin the drum and draw water into the tank.
The hatch door opens in a similar way.After the current supply to the thermoelement is stopped, the metal base cools down, decreases in size, and the latch returns to its original place, falling out of the groove. The lock on the automatic machine is removed. This process usually takes from 2 to 5 minutes. If, after a while, you still cannot open the washing machine, it means that there is a malfunction in the mechanism.
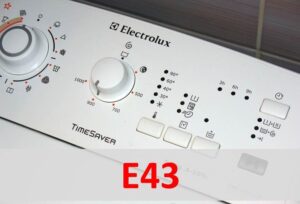
Extracting and checking UBL
It’s easy to check the blocker yourself. To remove the lock, you don’t even need to disassemble the washing machine. Algorithm of actions:
- turn off the power to the Electrolux washing machine;
- disconnect the machine from communications;
- open the SMA door;
- Unscrew the screws holding the UBL;
- remove the two bolts securing the SMA housing cover;
- remove the top panel of the machine;
- run your hands down to the location of the UBL;
- disconnect the wiring connected to it from the blocker;
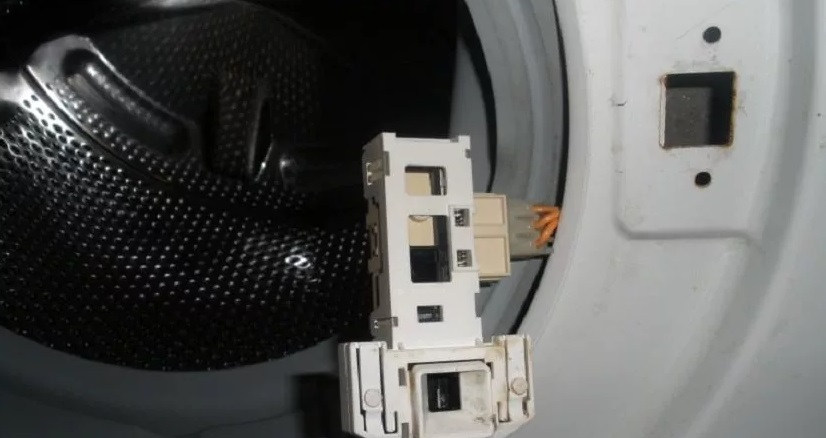
- take out the lock.
Next, you need to check the hatch locking device. For this you will need a multimeter. The tester is switched to ohmmeter mode, after which its probes are applied to the “phase” and “neutral” of the lock. The device display should display a three-digit number; if not, the UBL will have to be changed.
If the multimeter produces a three-digit number, you can proceed to the next test step. An “empty wire” is attached to the common contact of the UBL, the second is connected to the “phase”. Then the locking mechanism is moved with a screwdriver. The circuit is connected to the electrical network. You should hear a click. If the lock does not click, it will need to be replaced.
When purchasing a new UBL, tell the seller the model and serial number of the Electrolux washing machine.
A new blocker is installed in the same way. First, the discarded wiring is connected to it, then it is secured in place with bolts.Next, the top panel of the washing machine is attached, the machine is connected to communications and the test cycle starts.
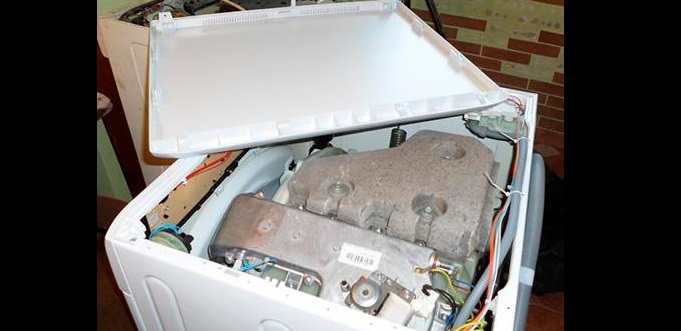
Find and change triac UBL
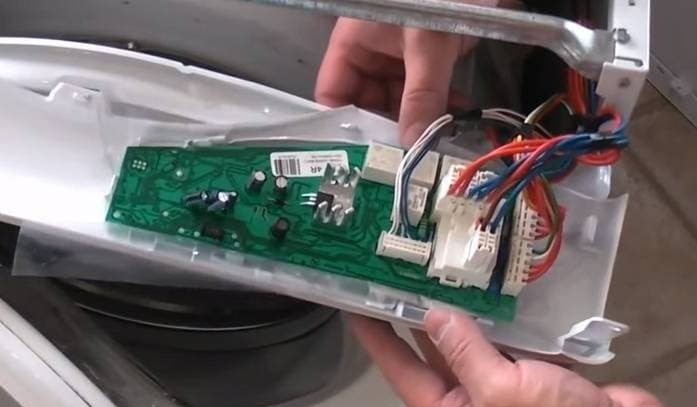
If no problems are identified during the UBL diagnostics, you will have to check the control module. More precisely, a triac that controls the operation of the lock. To do this, you will need to remove the electronic unit from the SMA housing.
This is done as follows:
- disconnect the automatic machine from the power supply, water supply and sewerage;
- unscrew the two bolts holding the upper wall of the case, remove the “cover”;
- remove the powder receptacle from the machine;
- remove the screws holding the dashboard;
- Having dealt with the latches, remove the “tidy”;
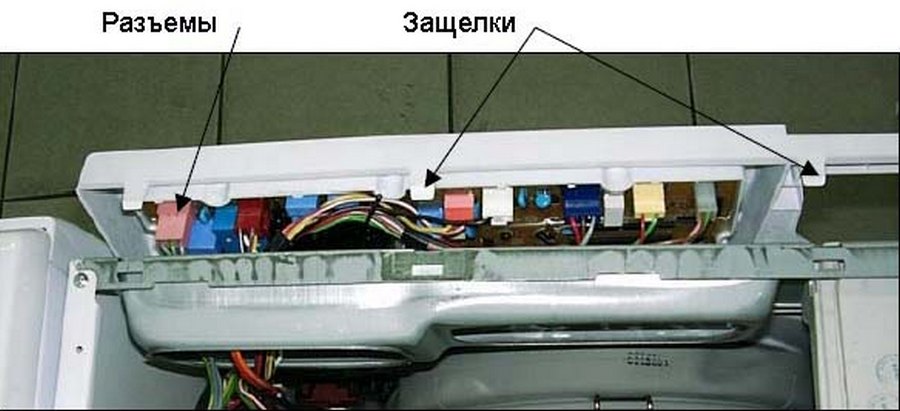
- take a photo of the wiring diagram from the control panel to the module;
- reset the wiring, move the “tidy” to the side;
- Unscrew the bolts securing the electronic module;
- remove the board from the machine.
Triacs are semiconductors that constantly open and close throughout their entire cycle. They provide transmission of electric current in forward and reverse directions. Each element is responsible for the operation of a specific part of the SMA.
A triac consists of a pair of crystals “looking” at each other and a control electrode. Due to the latter, the opening and closing of the semiconductor element is ensured. A break may well occur in the circuit, and the triac may also burn out due to a short circuit.
The location of the triac that controls the operation of the UBL can be seen in the picture below: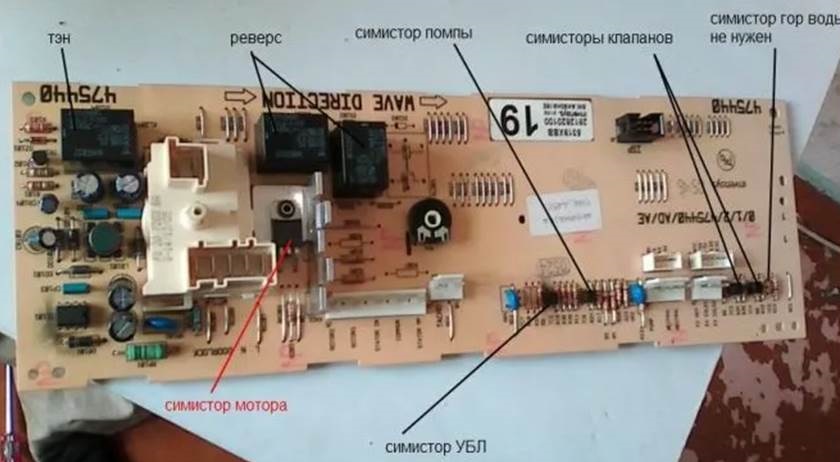
The triac test is performed with a multimeter. Testing can be done:
- with soldering of the semiconductor;
- directly on the control module.
The second method is much more convenient, since you can check the triac without additional manipulations with the board.However, the first method will show the most accurate results.
How to test a semiconductor? The UBL triac has 3 contacts - a pair of power contacts and one control contact. The first ones are marked with the letters A1 and A2, the remaining one is G.
The multimeter is switched to dialing mode, its probes are applied to the power contacts of the triac. 1 or OL should light up on the tester display. This will tell you about the health of the semiconductor.
Next, one probe of the tester is leaned against the control contact, the second remains on the power output. If everything is normal, then the multimeter screen will display a value from 100 to 200 V. The faulty triac will have to be removed and a new one installed in its place. If you are not sure that you can handle the repair, it is better to entrust the work to a specialist.
Interesting:


Reader comments
- Share your opinion - leave a comment
Categories
Washing machine repair


For buyers


For users


Dishwasher


Add a comment