Error F7 in the Gorenje washing machine
 Error F7 appears in the Gorenie washing machine when there are problems with draining water. But while experienced professionals immediately see the source of the problem, ordinary people have to be content with only a vague decoding of the code. To understand who is to blame for stopping the machine, you will have to partially disassemble the washing machine and begin diagnosing each element of the drainage system. We will now provide step-by-step instructions and explanations.
Decoding the code
If error F7 appears on the display of the Gorenye washing machine, it means that there are problems with pumping waste water into the sewer. The water decreases too slowly and the level does not fall below the “minimum” mark. First, the system tries to repeat the drain cycle, and if it fails, it signals the user about operational irregularities with a special code. Difficulties arise with draining for the following reasons:
- faulty or heavily clogged pump;
- garbage filter clogged;
- loss of power supply to the drainage pump;
- broken pressure switch;
- problems with the control board.
Error F7 indicates problems with the pump, debris filter, pressure switch or control board.
To identify the root cause and fix the problem, you will have to diagnose each mentioned element of the washing machine. You need to start with the simplest thing - a garbage filter, gradually moving to the drain pump and pressure switch. It’s better not to deal with the control board yourself - the complex mechanism can easily be damaged and completely ruined.
Let's check the filter
Diagnostics begins with the simplest thing - cleaning the garbage filter.This is a plastic spiral on which dirt and other debris that gets into the machine settle. The element is located in the lower right corner of the Gorenye washing machine behind a round or square technical hatch. Before checking the plastic and cleaning it, it must be removed.
- Disconnect the machine from the power supply and water supply.
- Use a knife or screwdriver to pry up the hatch and, releasing the latches, open it.
- Lay a rag nearby or place a container to collect water.
- Holding the tab on the filter, unscrew the filter clockwise.
You cannot remove the garbage filter immediately after the end of the cycle - the water will not have time to cool down.
Now let's move on to the actual repairs. We rinse the filter under running warm water, after removing debris and deposits from the spiral. If the layer of dirt is too thick, you can soak it in a solution with citric acid for 20-40 minutes.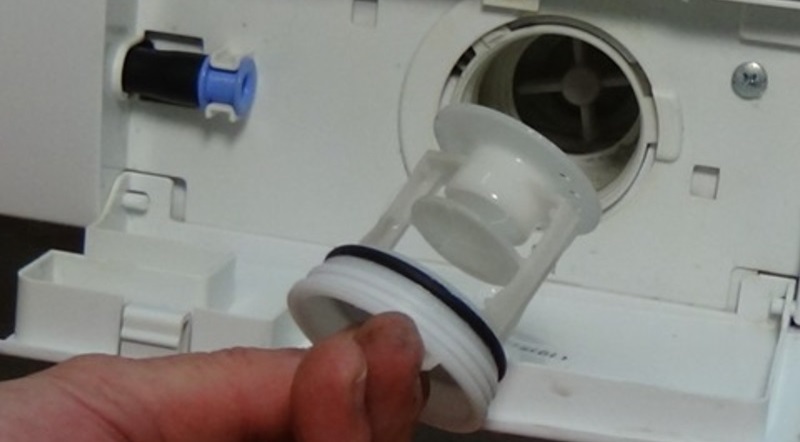
You shouldn’t limit yourself to just cleaning the garbage filter. At the same time, it is better to immediately check the pump, volute and drain pipes for blockages. We take a flashlight and shine through each element, and if we find foreign objects, we pull it out with tongs or pliers. We pay special attention to the pump impeller, on which hair often gets wrapped up, causing breakdown and error F7.
Testing the drain pump
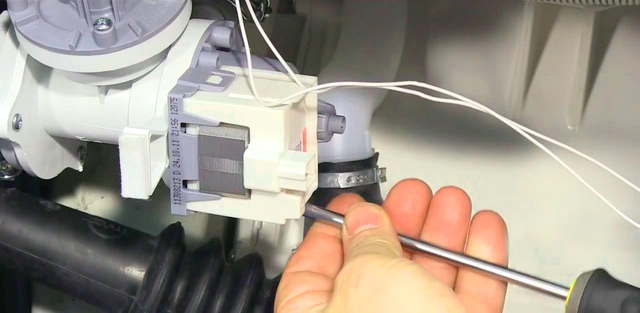
Error F7 also appears due to a power failure at the drain pump. To check the pump, you will have to take it out and carefully inspect it. To do this, we look inside the case through the missing bottom. We disconnect the machine from communications, place the unit on the back wall and begin the test:
Before turning the machine over onto the back wall, make sure there is no water in the dispenser and drum, otherwise a leak will occur.
- remove the chips or terminals from the pump;
- connect the terminals from a pre-prepared conductor with a plug to the pump;
- we check the reliability of the connection and the absence of third-party contacts;
- plug the plug directly into the socket;
- We assess the situation. If the pump starts working and the water begins to drain, then the drainage is in perfect order, and the problem with the drainage should be looked for in the control board or pressure switch;
There is another way to diagnose a pump: attach multimeter probes to the contacts in resistance mode. Normally, the readings should be in the range of 150-260 Ohms. If the display shows “0”, a short circuit will be confirmed, and if the normal value is exceeded, a break in the stator winding will occur. In case of deviations, the part will have to be replaced, since repairing it yourself is unprofitable, difficult, and sometimes impossible.. After replacement, we test the drainage again with 220 Volts. A mechanical check of the pump according to the following plan is also acceptable:
- snail removal;
- rotation of the impeller. Ideally, rotation occurs intermittently, since the rotor is made of a magnet and moves jerkily;
- swaying of the impeller to the sides across the axis. At the slightest play, a malfunction is detected and the pump needs to be replaced;
- connecting the motor to the network via a power cord and socket. The device must work properly and silently.
A replacement pump is selected by serial number. Ideally, the original is purchased and installed, but installation of an analogue with similar characteristics is also allowed. The main thing is that the new pump has the same power and repeats the method of attachment to the seat.
Let's check the pressure switch tube
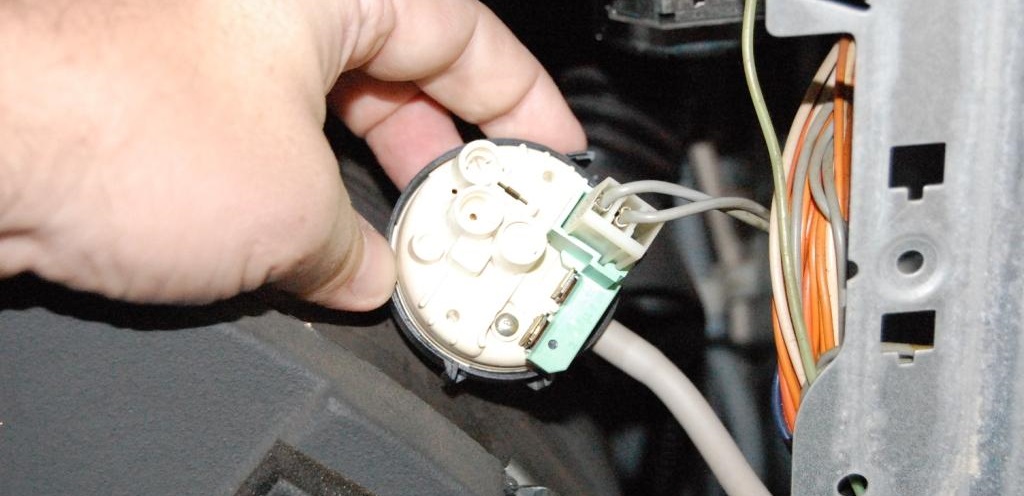
If everything in the drain system is clean and in good order, then it is worth checking the pressure switch.It is the level sensor that transmits information about the degree of filling of the tank to the control board, starting to collect or drain water. When the tube becomes clogged or loses contact with the module, the readings are displayed incorrectly and the system displays error F7. You can confirm or refute your guess by following the instructions.
When making repairs, remember safety precautions and disconnect the washing machine from communications.
- Disconnect the washing machine from the power supply and water supply.
- We unscrew the bolts holding the top cover of the machine and move the panel forward.
- We are looking for a pressure switch - a round plastic box in black or white.
- We unscrew the bolts and disconnect the wiring, removing the sensor with the tube from the housing.
- We inspect the box and tube for damage or blockages.
The key point is to check the pressure switch for functionality. You will need a tube with a diameter equal to the sensor fitting, which should be inserted into the pressure hose. Next, all that remains is to blow lightly into the hole. If the contacts are closed and the device is working, you will hear 2-3 characteristic clicks. Otherwise, the situation can only be corrected by completely replacing the device.
If everything is in order with the pump, debris filter, hoses and level sensor, then the problem is with the control board. It is useless to figure out how and what to do here - it is almost impossible to cope with electronics on your own. It is better to immediately contact professional repairmen.
Interesting:


Reader comments
- Share your opinion - leave a comment
Categories
Washing machine repair


For buyers


For users


Dishwasher


Add a comment