Conversion of a Gorenje washing machine with a water tank
 From the outside, the washing machine with a tank from the Gorenje brand seems to be a unique device, because with its help you can wash both without running water, for example, in the country, and with running water, using it like an ordinary machine. However, the problem is that this “home assistant” simply cannot be used with running water, because to do this you will first have to seriously modify the device. We'll tell you how to properly convert a Gorenje washing machine with a tank for running water at home.
We adapt the Gorenje machine to the water supply
Of course, it is not easy to remake household appliances with your own hands, but it is possible if you use our instructions. The most important thing to understand before starting work is that you cannot remove the equipment from the water tank and then simply connect an inlet hose to it. This is due to the fact that such a device has a two-coil pump mounted in a special two-way volute. Moreover, the complex machine is also equipped with an unusual filling valve, which is not suitable for working with water pipes.
That's why before you start remaking the CM, you need to find a fill valve with wiring that should be connected to the pump. The point is to dismantle the old filling valve, install a new one in its place, and then connect it to the double pump through an ordinary connector. This will activate the valve and turn on one pump impeller to begin pumping water out of the tank. What should I do for this?
- Disconnect the Gorenje washing machine from the power supply and water supply.
- Move the appliance away from the wall so you can access the back panel.
- Remove the clips holding the top panel of the case in place, and then remove the cover itself.
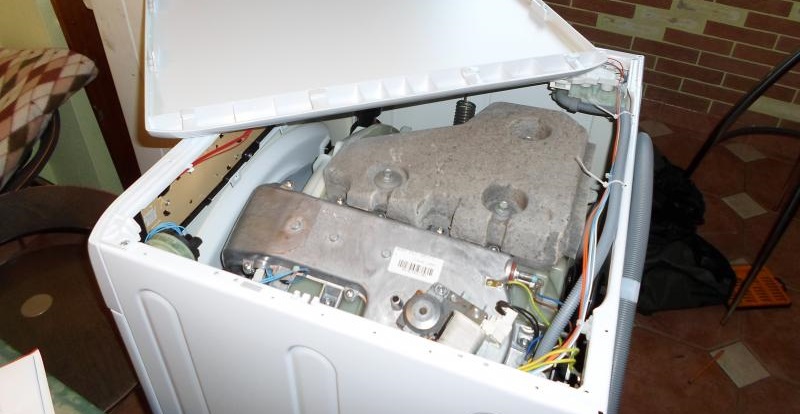
- Next you need to remove the screws securing the back panel of the machine, and then put this element aside.
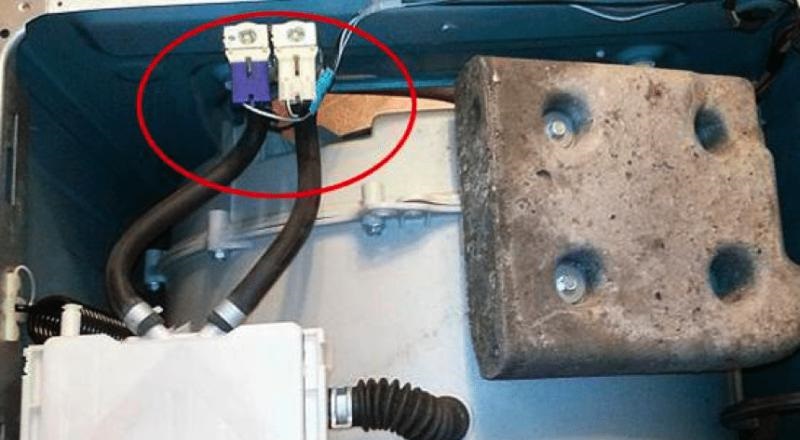
- In the upper corner, find the inlet valve, from which you need to disconnect all the wires with pipes, and then remove the valve itself.
Be sure to take several photos of the correct wiring and connections to use as reference during reassembly.
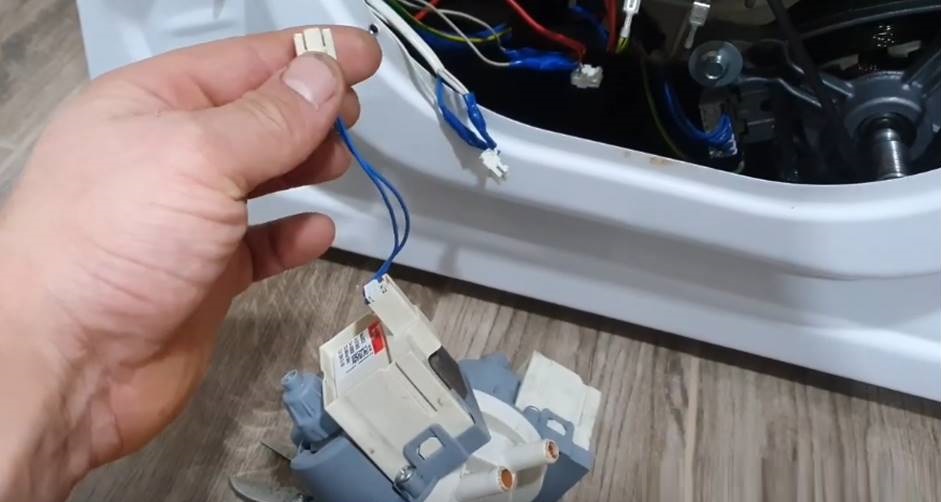
- Install a new inlet valve into the seat, connect the pipes, wires with chips to it, and then run the wiring to the pump.
- Connect the chip to the pump output.
- Assemble the “home assistant” according to these instructions in reverse order.
You can buy a very ordinary element as an inlet valve, the main thing is that it is of high quality. You also don’t have to worry about the inlet hose, because the valves have threads of a universal size, so there can be no mistake.
How to use the Gorenje machine without modification?
Since such a modification affects the manufacturer’s warranty, plus it deprives the equipment of its autonomy, experts recommend using a Gorenje machine of this type without making changes to its design. Such a washing machine is capable of operating in almost completely autonomous mode, because before the start of the cycle, its tank is filled with approximately 30-40 liters of water, which depends on the volume of the tank.
It is very important that the reservoir is filled with clean water, which is free of foreign debris, leaves, insects and other things that can penetrate the internal components of the SM and damage them.That is why it is best to fill the tank with pre-purified liquid, or even better, filtered liquid, especially if it was collected from a river or lake.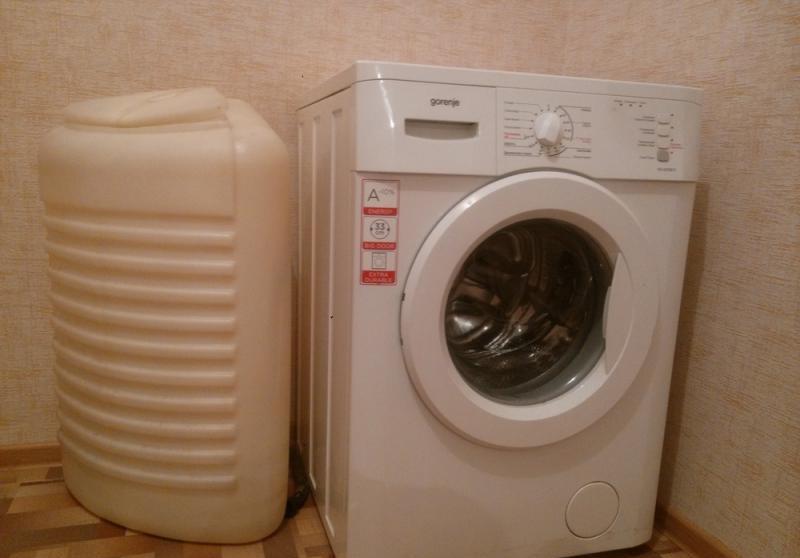
At the same time, a filter is installed in the tank itself for additional safety, but it only blocks large debris, so the safety of the equipment still remains on the conscience of the user. To fill the tank with water, you need to open the lid and fill the liquid exactly to the marking. When the reservoir lid is tightly closed, the work cycle can begin.
As with any washing machine, the first step is to add household chemicals to the powder receptacle. It is divided into several compartments, each of which has a strict purpose.
- A compartment with the English letter “B” or the Roman numeral “II” is needed for washing powder or gel added for the main washing stage.
- The compartment with the English letter “A” or the Roman numeral “I” is the same household chemicals, but for the preliminary washing stage.
- A compartment with a star or flower icon is for rinse aid, which allows you to soften clothes.
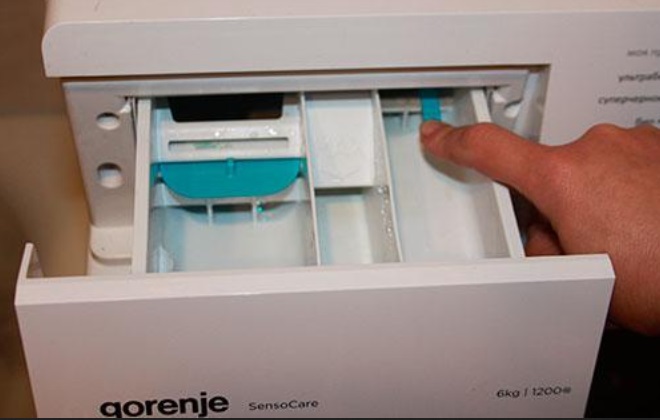
Typically, users use the compartment for the main washing step, ignoring the other two compartments. At the same time, additional household chemicals are often added to the main compartment, such as:
- stain remover;
- bleach;
- descaling agent.
In no case should you confuse the purpose of the trays, since if household chemicals are loaded incorrectly, your “home help” or clothes may be damaged.
It is also very easy to operate the programmer on the SM dashboard, because it is provided with labels with the names of operating modes.All that is required of the housewife is to turn the program switch knob to the required position, make changes to the spin cycle or water heating, if necessary, and then begin the work cycle using the “Start/Stop” key.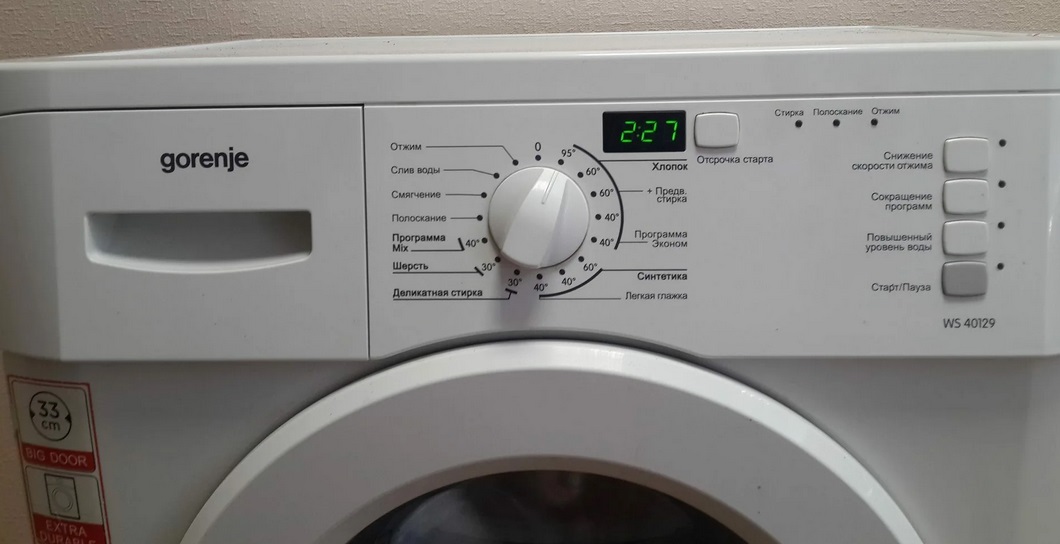
Starting should only be done after dirty clothes are in the drum. At the same time, this process is also very important, because proper sorting and placement of laundry in the washing machine affects not only the quality of washing and the safety of clothes, but also the service life of the Gorenje washing machine. To avoid accidentally spoiling anything, follow a number of recommendations.
- Be sure to sort items by fabric type, color, and degree of soiling.
- Items made from delicate types of fabric must be processed separately, separating silk, linen, synthetics, and so on into different washes.
- If your clothes just need to be freshened up because there are no serious stains on them, then you should choose a daily or quick wash program.
- When it is necessary to remove stubborn stains, you should use an intensive program with the activation of the pre-wash mode.
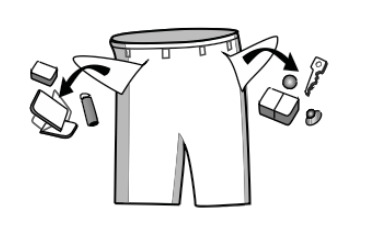
- Be sure to check the pockets of your clothes before loading them into the drum - coins, paper clips, hairpins, keys and other small objects can damage the internal components of the washer.
- It is better to unfasten the removable parts of things before washing them in the machine, so that you can wash them yourself.
- It would be a good idea to fasten all zippers and other fasteners, as well as turn terry and knitted items inside out, plus outerwear - this way the items will better retain their original appearance.
When the drum is full, all you have to do is close the hatch door until you hear a characteristic click, and also return the cuvette for household chemicals to its normal position.Check the tank to see if it is filled with water to the manufacturer's markings. Select the required operating mode and start the “home assistant” using the “Start/Stop” key. After this, the appliance will start washing, which does not need to be controlled. Once the job is completed, the device will inform the user with a loud beep.
There is no need to worry that the water in the tank will run out, so there will not be enough for washing - the tank is designed so that when filled to the mark, there will be enough water for any working cycle.
Do not rush to open the door, because a few minutes after the end of the wash it will be blocked. Once the unit is removed by the CM control module, you will be able to access the drum to remove clean clothes. Be sure to leave the door and detergent drawer open for at least a few hours so that the key components of the machine are completely dry and mold does not appear anywhere.
Interesting:


Reader comments
- Share your opinion - leave a comment
Categories
Washing machine repair


For buyers


For users


Dishwasher


Add a comment