How to clean a washing machine from debris?
 Every housewife should remember that you cannot “start” an automatic machine; it is important to regularly care for the equipment. Some washer contamination is visible to the naked eye, while others can only be detected by “digging” deeper. Dirt accumulates in the drain filter, cuff folds, powder receptacle, on the body, etc.
So that at one “wonderful” moment the washing machine does not refuse to work, you need to service it in a timely manner. Let's figure out how to clean the washing machine from debris. We’ll tell you how often experts recommend washing individual machine components.
Where does garbage accumulate?
An automatic machine gets dirty almost everywhere, but most of the garbage accumulates in specific places. It is these most vulnerable parts that need to be washed in a timely manner. What items need to be kept clean?
- Drain filter. It catches 90% of foreign objects that enter the tank. Dirt, hair, threads, and lint also settle here. Washing the filter element is “vital” for the machine.
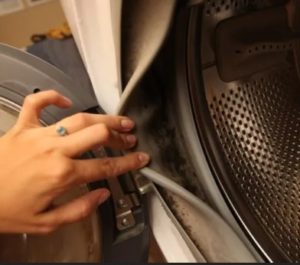
- Drum cuff. Debris gets packed into the folds of the seal, dirt and waste water accumulate there. If you do not clean the rubber band and wipe it dry, it will deteriorate and mold will appear on its surface.
- Pump. Hair and threads are wound around the impeller of the drain pump; sometimes foreign objects that have “slipped” through the garbage filter get stuck between its blades. If the pump is blocked, the washing machine will no longer be able to properly perform its functions.
- Powder receiver. Residues of detergents settle on the walls of the dispenser, and the tray is often affected by mold.If you do not wash the cuvette in a timely manner, it will become covered with a thick layer of limescale.
- Bottom of the tank. Debris that has “fallen through” the holes on the surface of the drum also accumulates here. Getting to these “deposits” is quite difficult, but possible. Moreover, it is very rare to clean the bottom of the tank.
Having understood where the dirt is located, you need to figure out how to remove it from there. Cleaning the washing machine from debris is quite simple; every housewife can cope with this task.
Cleaning the filter element
Almost all washing machines, be it Atlant, Bosch, Siemens, Indesit, have a garbage filter in the front, in the lower corner, on the right. The unit is usually hidden behind a small special hatch or decorative panel. It’s easy to wash an element; the algorithm of actions will be as follows:
- slightly tilt the machine back so that you can place a small basin under it (this is necessary to collect water that will begin to flow out when removing the element);
- securely install the container under the housing;
- open the hatch or remove the panel covering the drain filter;
- Near the trash can, find a hose designed for emergency water drainage. Open the tube and drain the effluent from the system into a container placed under the housing. If your washing machine is not equipped with such a pipe, you will have to gradually unscrew the filter cap, collecting dirty water in a basin;
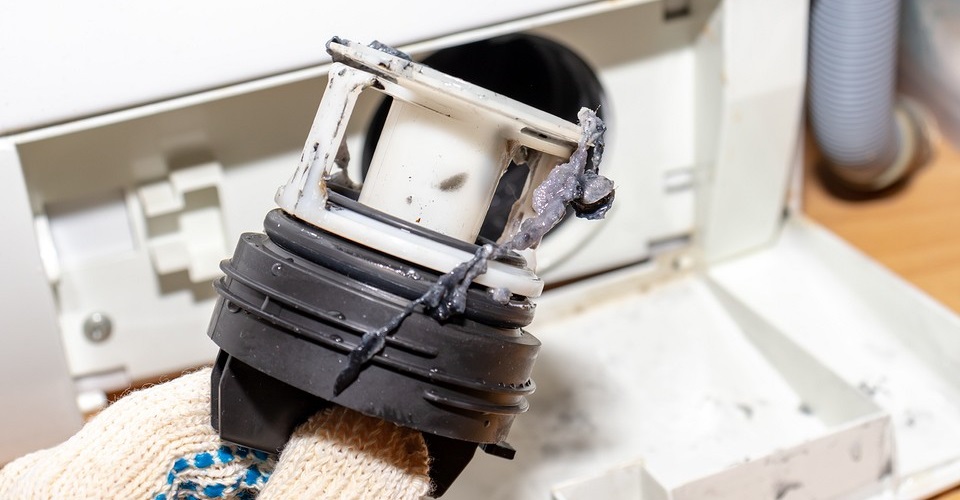
- Pull out the garbage filter completely by turning the plug from right to left;
- inspect the hole created after removing the element. Shine a flashlight into it, so you can see the impeller. If hair or threads are wound around its blades, be sure to clean the part;
- Wipe the walls of the hole with a damp cloth;
- clean debris from the filter, rinse the unit under running warm water;
- place the filter element in the “socket”, screw the plug until it stops;
- close the hatch or replace the decorative panel.
Experts recommend cleaning the garbage filter about once every 3 months.
It is advisable to carry out extraordinary filter cleaning after washing items with long pile and soft toys. Also, if a dog or cat lives in the house, it is better to wash the “trash bin” more often – once a month.
Cleaning the powder drawer
The detergent tray is another “vulnerable” place in any washing machine. Powder particles constantly settle on the walls of the dispenser, and if the container is not cleaned in time, it will become covered with a thick layer of plaque. Therefore, it is recommended to wash the cuvette after each use of the equipment.
Some people have a question about how to get the powder receptacle out of the housing. In fact, everything is simple: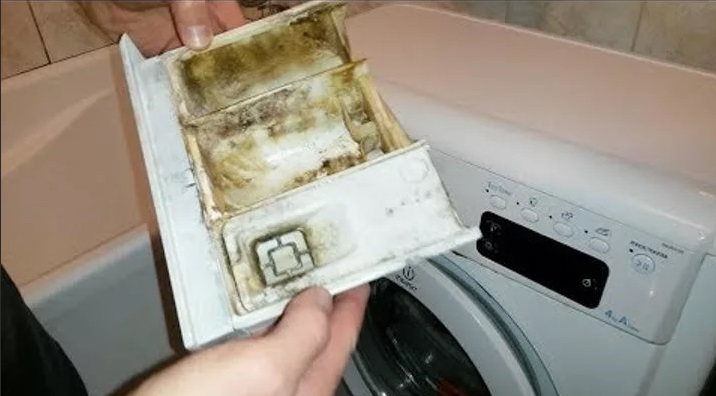
- pull the dispenser all the way in your direction;
- With your free hand, press the tab located above the central compartment of the tray;
- Pull the cuvette further until it is completely removed.
You can clean the detergent container using citric acid. To do this, take hot water (temperature 50-60°C) into a basin and add 250 grams of lemon into it. Then you have to stir the liquid until the granules are completely dissolved. The tray must be soaked in the solution for a couple of hours. Next, you need to take out the cuvette, clean it with a brush, wipe it with a cloth and rinse.
When cleaning the powder receptacle, you can use special household chemicals or improvised means: citric acid, vinegar, soda.
A clean dispenser must be wiped dry with a rag and placed back into the housing. There are special guides in the niche, exactly along which you need to insert the tray.
Hatch rubber
Debris may become lodged in the folds of the drum cuff. It usually accumulates at the bottom of the rubber seal. You should carefully inspect the gasket, unbending it with one hand and cleaning out dirt with the other.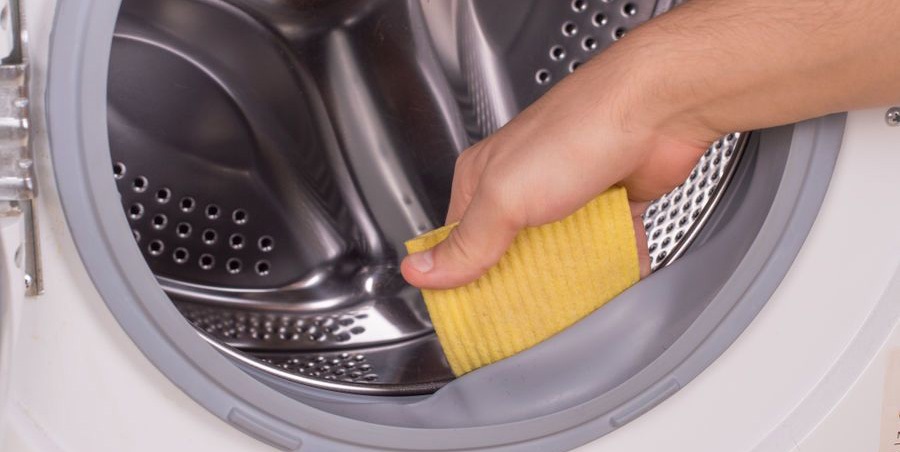
After cleaning the cuff, it is recommended to spray the entire surface of the rim with white. You need to soak a sponge in a chlorine-containing product and use a washcloth to walk along the folds of the seal. Next, close the machine door for 30 minutes for the composition to work better. After time, the gum must be rinsed with clean water and wiped dry. It is prohibited to use products containing caustic acids to clean the cuff. Aggressive components can damage the seal.
Cleaning the drain pump
Cleaning the pump is more difficult and usually requires the help of your spouse to resolve the issue. The drain pump will have to be removed, disassembled, and only then wiped and removed from it. Before starting work, you should turn off the power to the washing machine, disconnect it from the water supply and sewerage, and move it to the center of the room. The further algorithm of actions will be as follows:
- drain the remaining water from the system by unscrewing the garbage filter. Put the element in place;
- carefully place the automatic machine on its right side;
- look under the bottom of the washer. You need to find the pump (small black circle), which is attached to the cochlea;
- take a photo of the wiring diagram for the pump;
- disconnect the wires and contacts from the pump, unscrew the four bolts securing it;
- remove the drain pump from the machine by gently rocking its body;
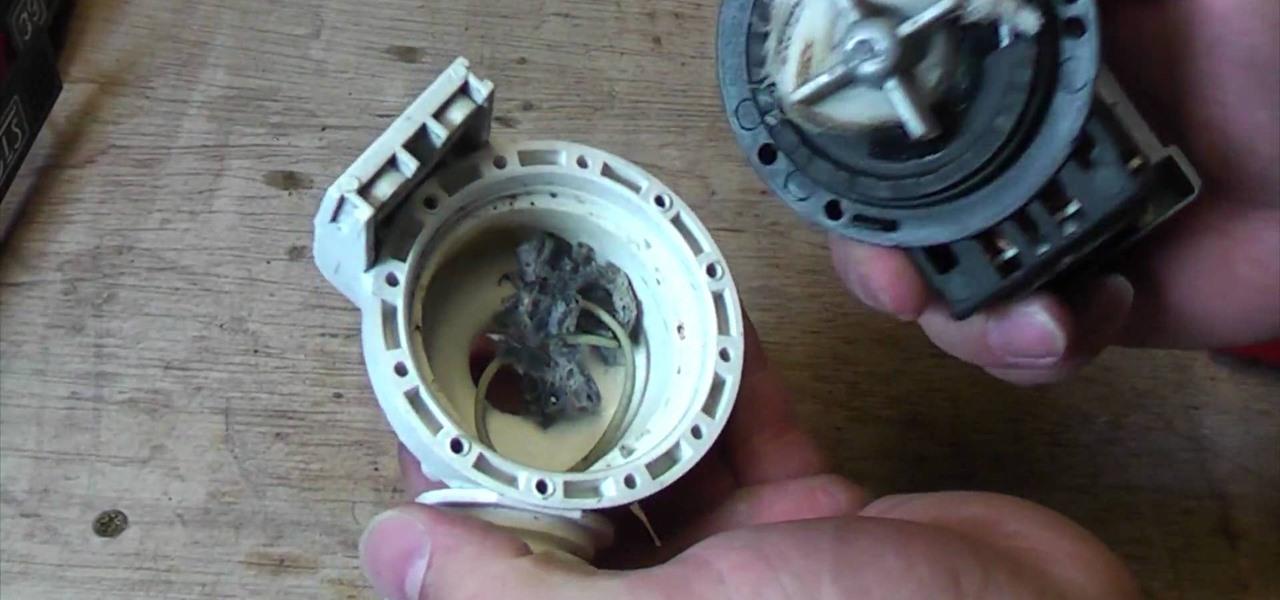
- Check the impeller to make sure there is no debris on it. If hair is wrapped around the blades or lint is stuck, be sure to remove it from the part;
- disassemble the drain pump; to do this, unscrew its housing.Clean the dirt from the internal elements and reassemble the assembly;
- fix the pump on the volute, connect the previously removed wiring to the pump.
Some models of washing machines have a non-removable drain pump. In this case, if the pump is severely clogged, due to which the machine cannot discharge water normally, you will have to replace the element with a new one.
Perhaps, when you take out the pump, you will see that the impeller begins to fall off the body and dangle. There is no need to try to fix the ring with sealant or “seat” it with glue. In such a situation, it would be more advisable to install a working pump.
Let's inspect the bottom of the tank
The hardest part to clean is the bottom of the tank. Such manipulation is required extremely rarely, for example, when there is a suspicion that a bra wire or other object dangerous to the plastic container has fallen inside.
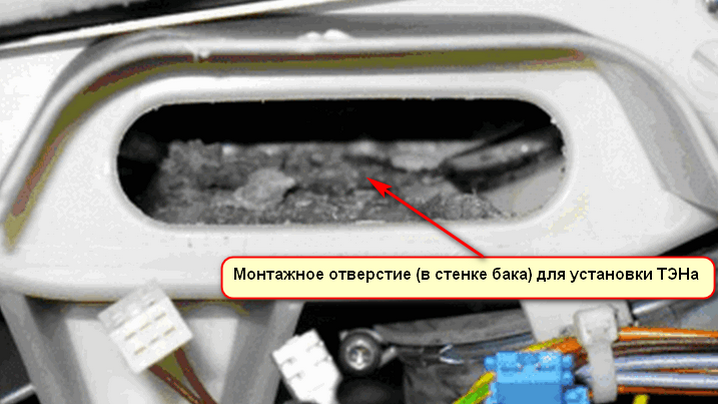
The easiest way to remove debris from the bottom of the tank is through the hole in the heating element.
The algorithm of actions will be as follows:
- unplug the washing machine;
- close the shut-off valve responsible for the water supply;
- drain the remaining liquid from the system through a garbage filter;
- move the machine away from the wall;
- Unscrew the screws holding the back wall of the case;
- take a photograph of the wiring diagram for connecting the heating element;
- disconnect the wiring from the heater;
- remove the temperature sensor;
- loosen the fixing nut and press the stud inward;
- Carefully, using a rocking motion, remove the heating element from the washing machine.
The resulting hole is enough to clear the bottom of the tank from debris. Foreign objects are pulled out by hand or using a wire. All that remains is to return the heater to its place, fix it, install the thermostat, connect the wiring and assemble the housing.
Interesting:


Reader comments
- Share your opinion - leave a comment
Categories
Washing machine repair


For buyers


For users


Dishwasher


Add a comment