How to tighten the drum in a washing machine
 After several years of active use of the washing machine, some users notice that the drum begins to wobble in different directions. Unfortunately, this problem cannot be resolved by simply tightening the fasteners. Usually the causes of play are more serious, and sometimes expensive equipment repairs may be required.
Let’s figure out how to tighten the drum in a washing machine so that it stops “playing”. What to do first? We'll tell you what kind of breakdowns can cause it to become loose.
Is there really any play in the drum?
A slight play in the drum is normal. It is installed when the washing machine is released. In this case, the operating machine will not make any extraneous sounds, except for a slight hum when the tank rotates.
If the drum play is accompanied by a strong knock or other extraneous sounds, we can talk about a breakdown of the MCA.
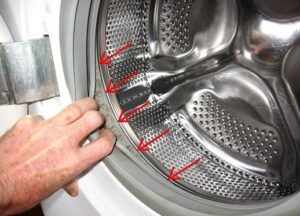
If the machine begins to make a lot of noise during the washing process, you will have to look for the problem. The first thing to do is open the hatch door, and, holding the drum, move it in different directions. Then rotate the tank clockwise and counterclockwise. If these actions are accompanied by strong clanging and grinding noises, then there really is a problem.
It is impossible to find out the cause of the malfunction without disassembling the case. Therefore, to carry out further diagnostics, you will have to look inside the machine. Most often, drum play and loud noise during operation of the washing machine are observed due to:
- problems with counterweights;
- damage to shock absorbers;
- wear of bearings and oil seal;
- workings on the drum bushing.
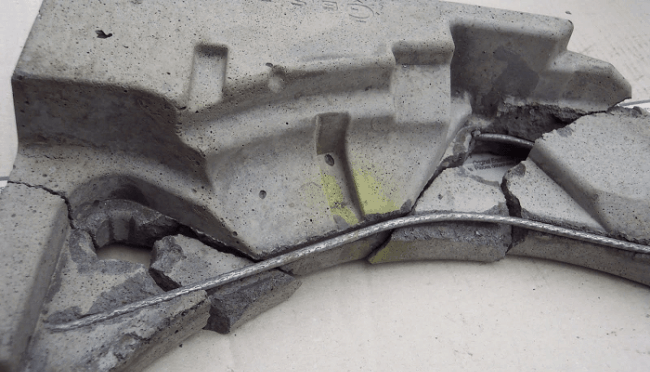
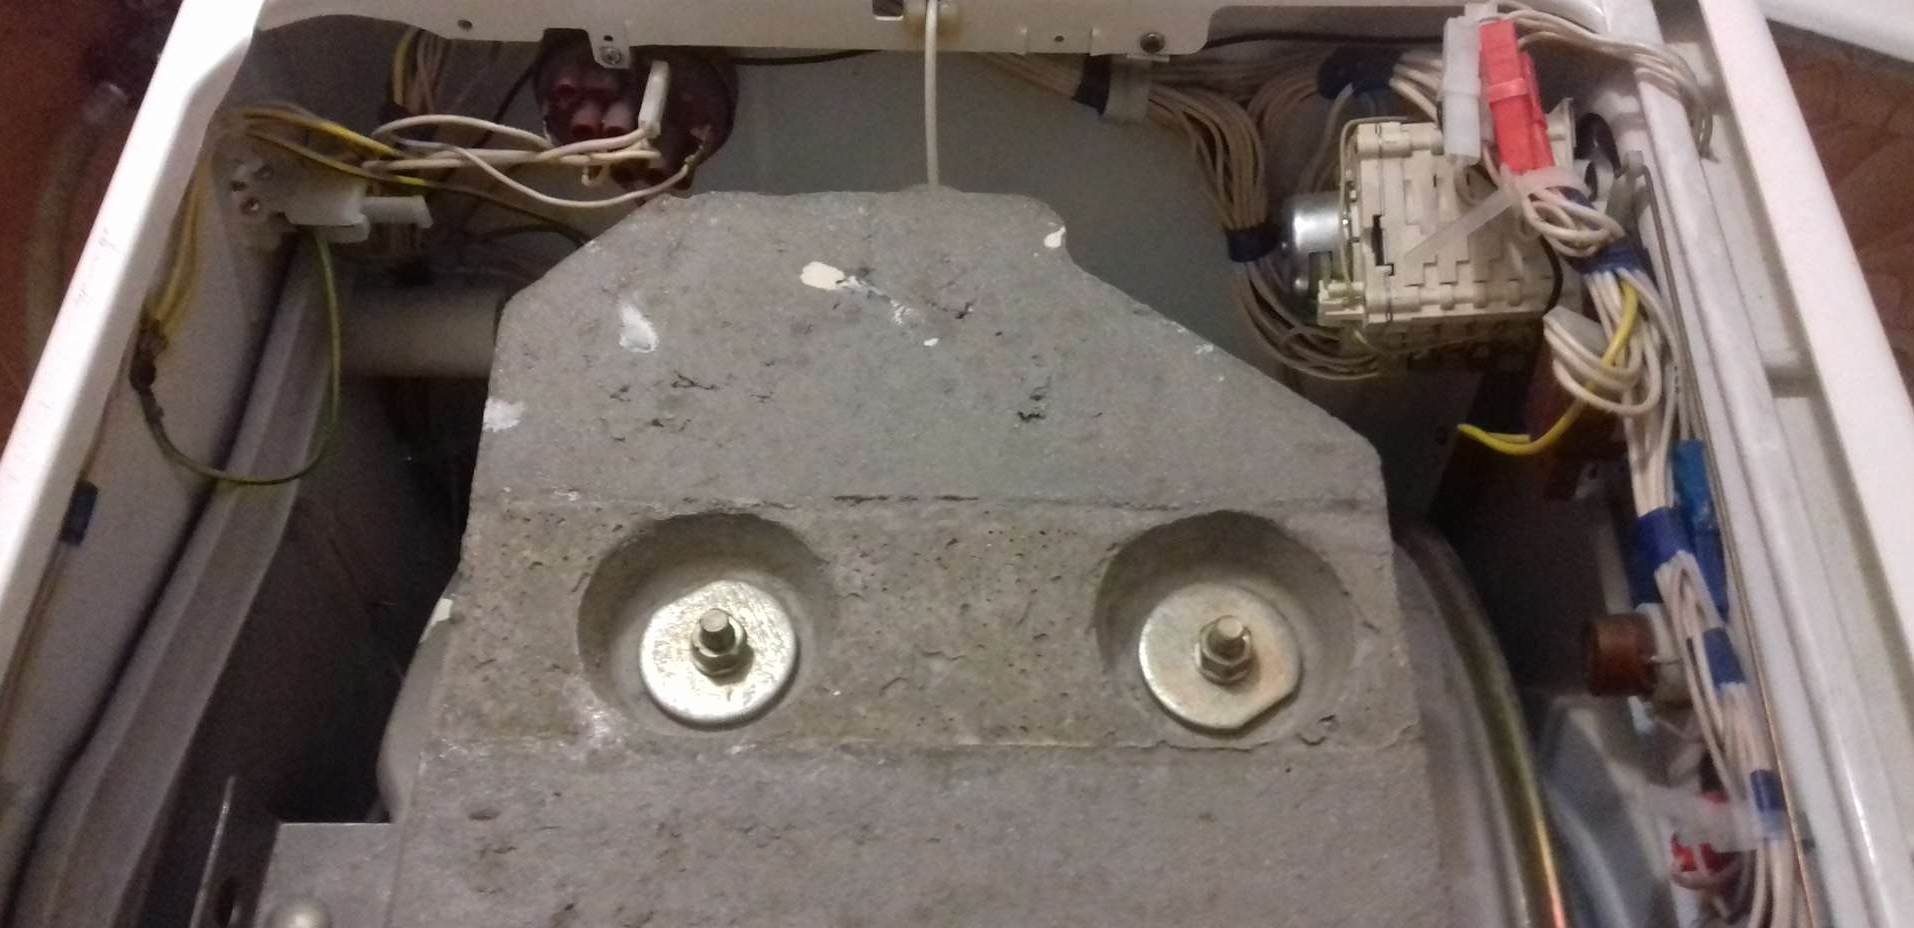
Counterweights are concrete blocks whose main function is to dampen vibrations. Weights can wear out over time and stop doing their job. Because of this, the tank begins to dangle, and a strong knock occurs due to the tank hitting other internal parts.
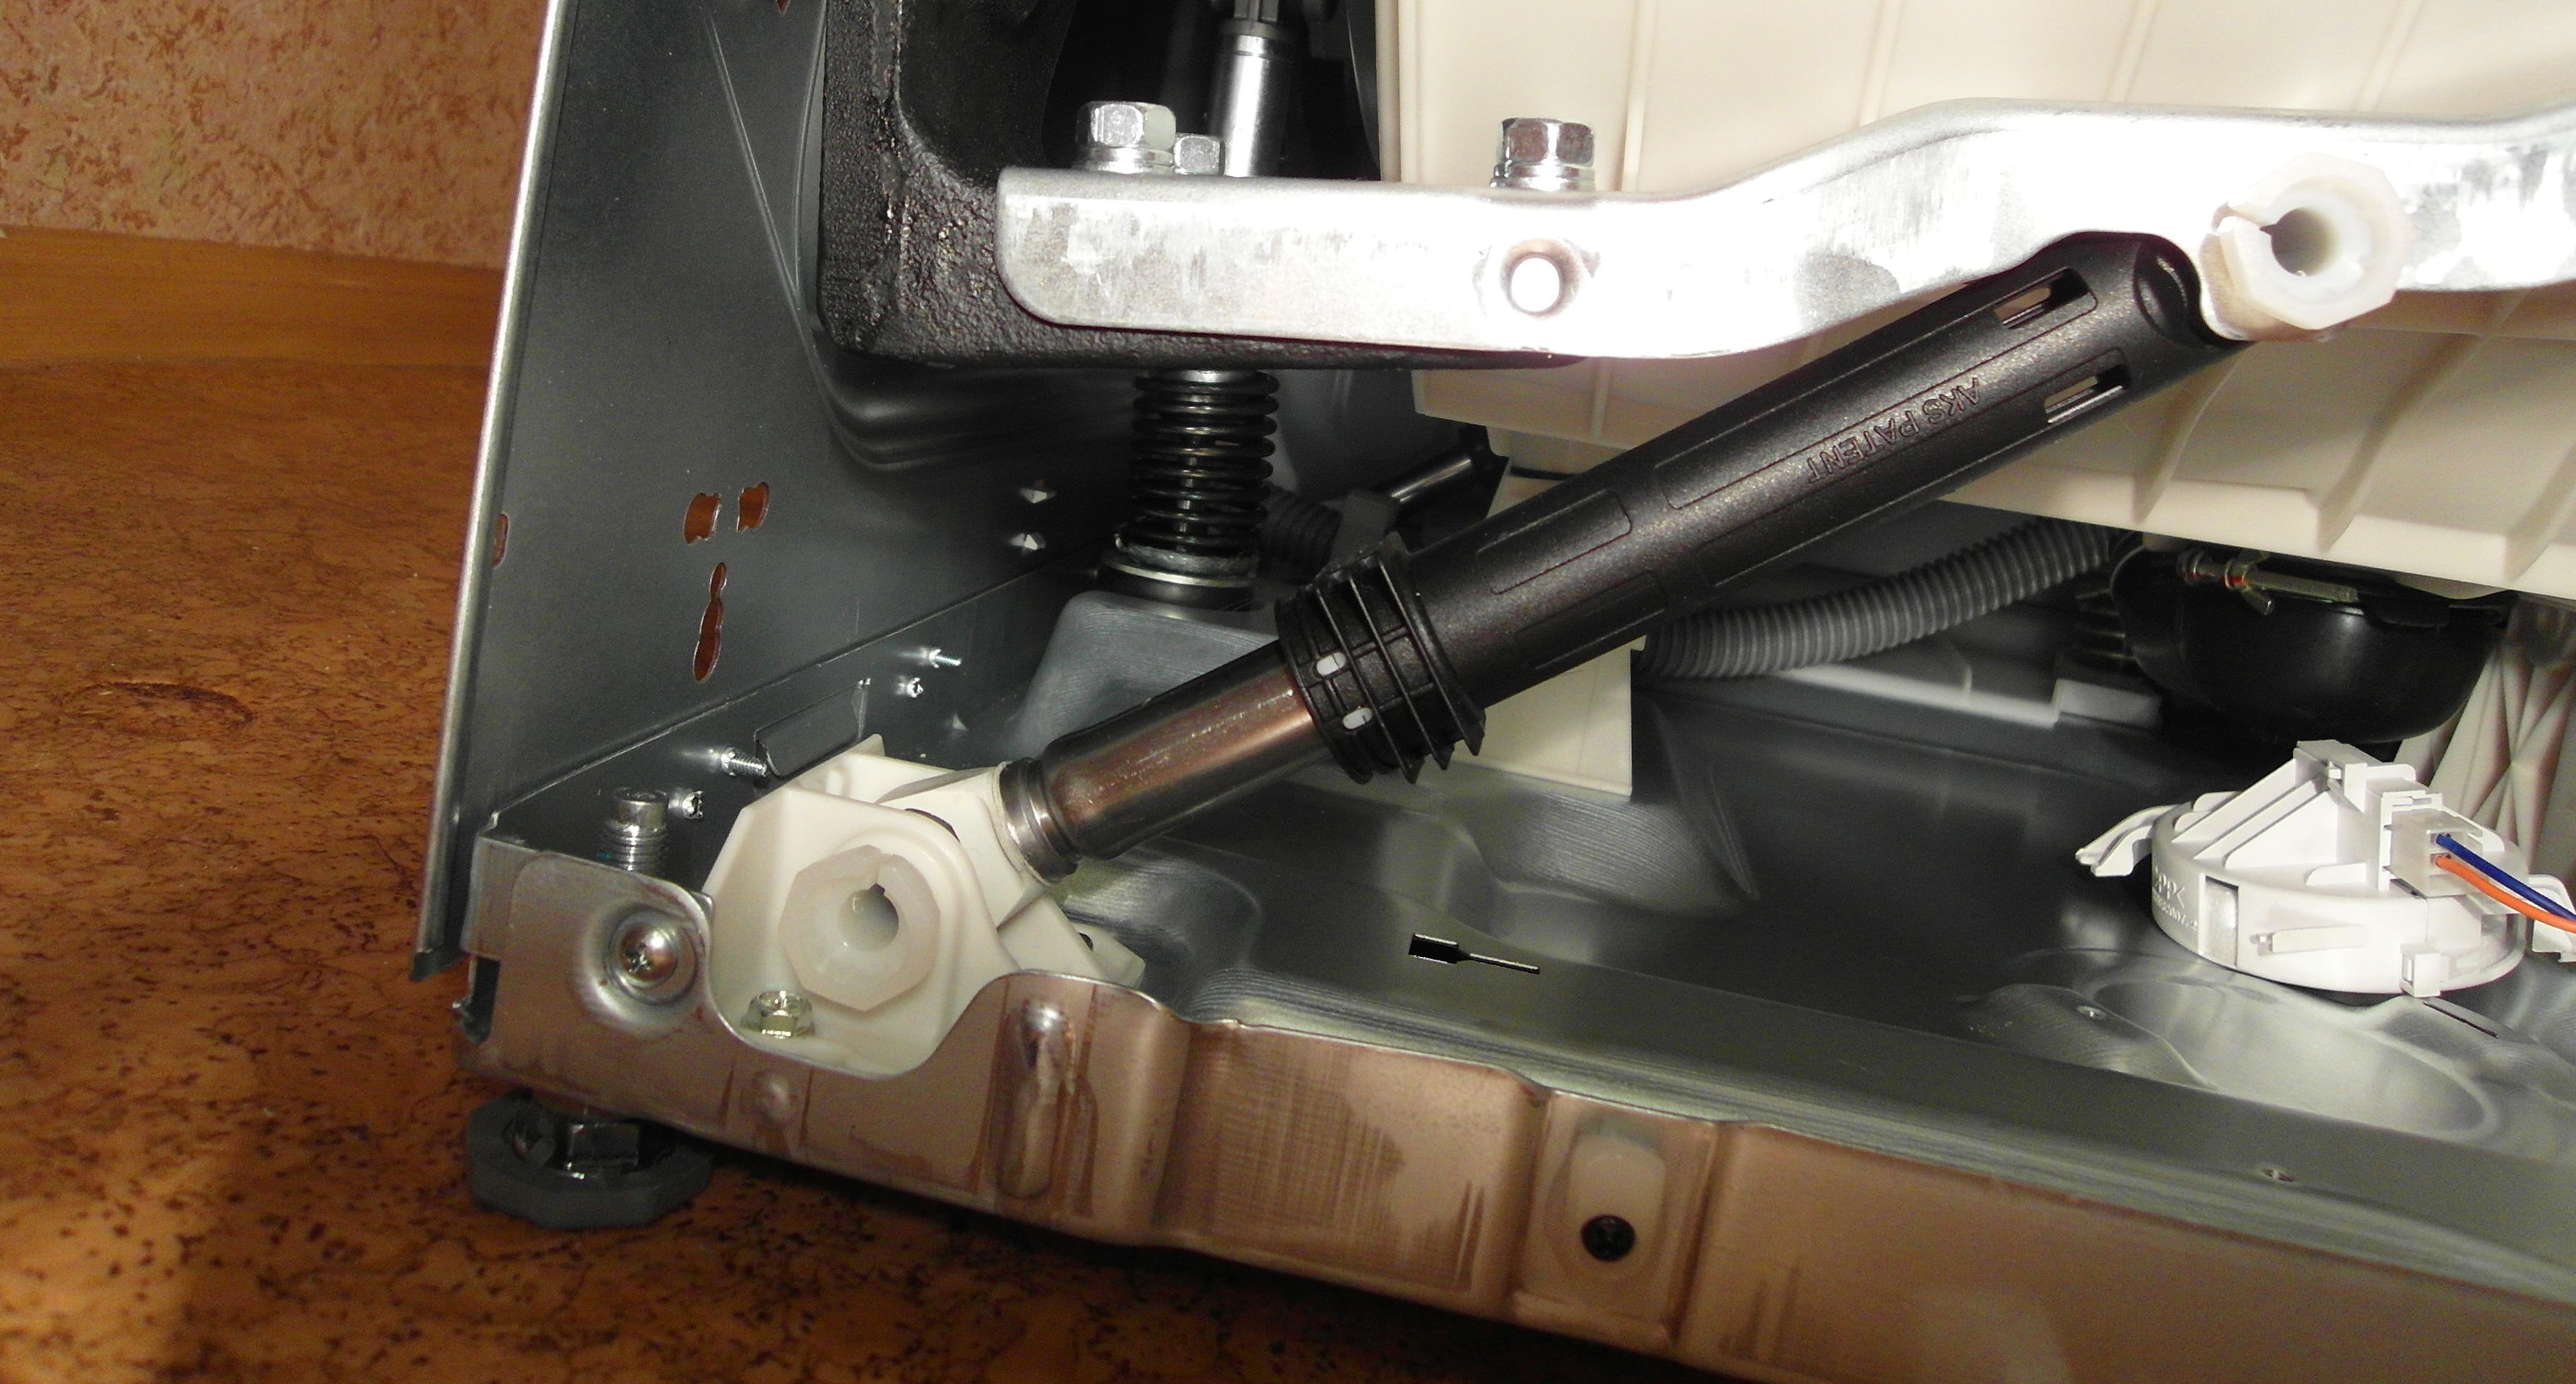
If, upon inspection of the springs and shock absorbers, it is revealed that the elements are faulty, it will be enough to replace the parts. You can buy similar components in specialized stores. To install the dampers, you will have to disassemble the machine and lay it on the floor.
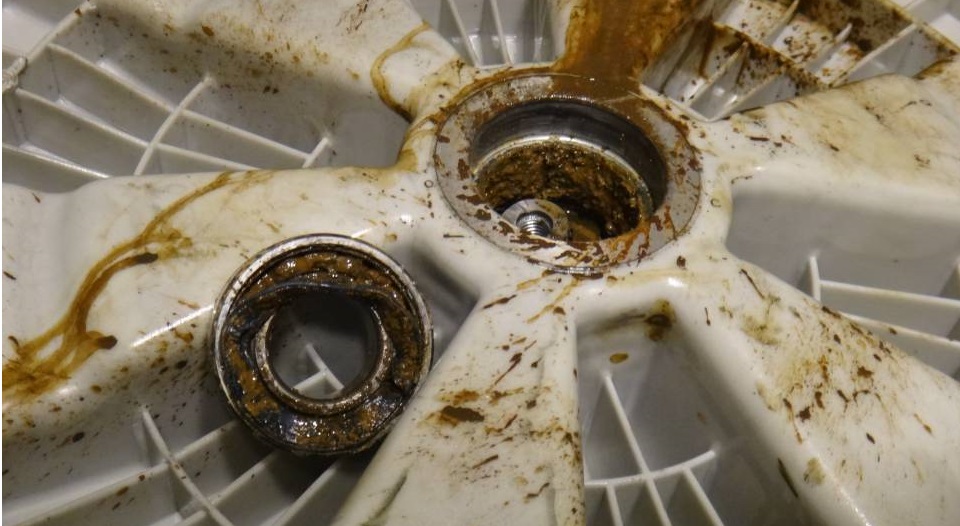
In most cases, the cause is still undamaged shock absorbers or counterweights. Most often, play in the washing machine drum is a consequence of wear of the bearings and oil seal. Let's figure out how to check the unit and repair the SMA.
Replacing the bearing and oil seal
To get to the bearing assembly, you will have to almost completely disassemble the body of the washing machine, pull out the tank and halve the plastic container. This is a rather labor-intensive process, so before undertaking repairs, you need to realistically assess your strengths. During the work you will need the following tools:
- two screwdrivers (phillips and slotted);
- screwdriver;
- hammer;
- punch;
- pliers;
- socket heads of different sizes.
Automatic washing machines can be equipped with collapsible and cast tanks.
If your washing machine has a non-separable tank, you will have to saw it. Therefore, additionally prepare:
- drill with a diameter of 3 mm;
- marker or pencil;
- hacksaw for metal.
Before disassembling the washing machine, be sure to turn off the power to the machine and disconnect it from the water supply and sewerage system. After this, slide the machine to the middle of the room to have access to all sides of the case.The further algorithm of actions will be as follows:
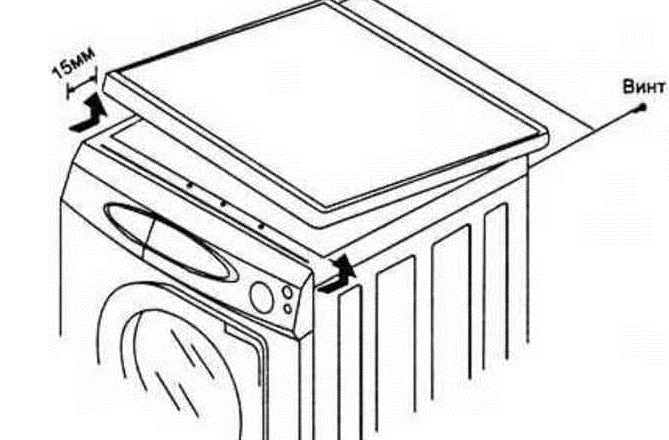
- remove the top cover of the MCA (it is secured with two self-tapping screws located on the back side of the case);
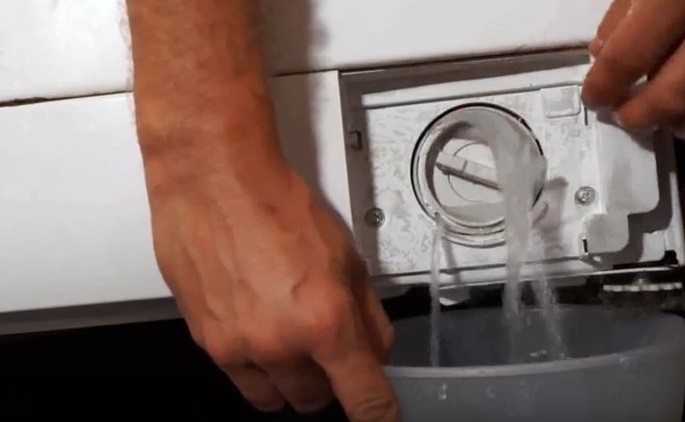
- drain the remaining water from the system by unscrewing the garbage filter (it is hidden behind the lower false panel or technical hatch);
- unhook the drain and inlet hoses from the back wall;
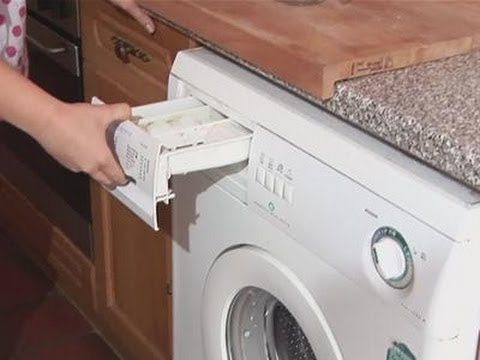
- remove the powder receptacle from the machine;
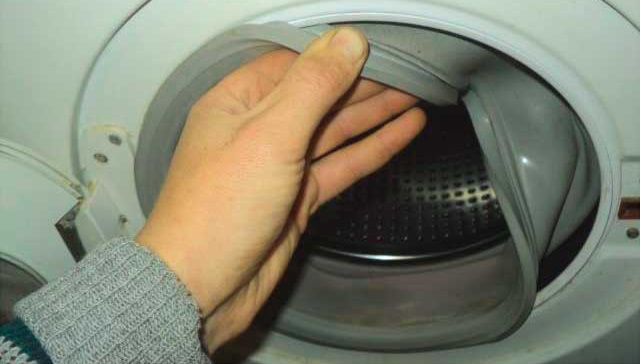
- open the drum door, remove the outer clamp holding the hatch cuff;
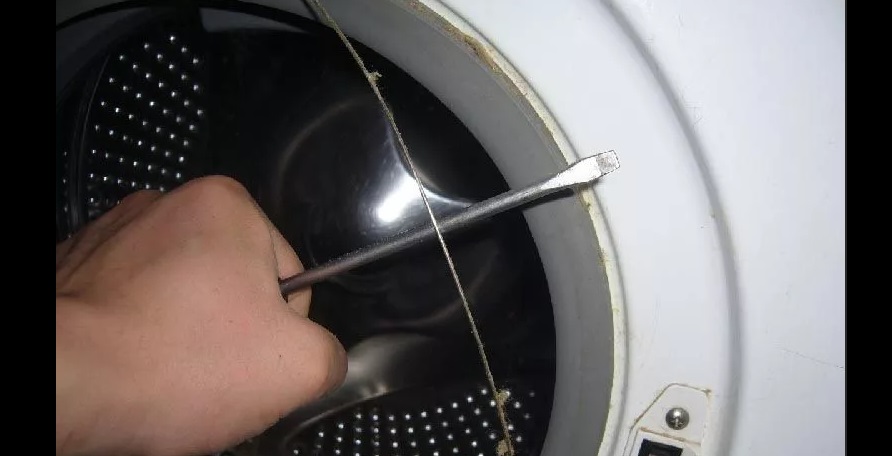
- insert the rubber seal into the drum;
- remove the bolts securing the dashboard;
- carefully disconnect the wires from the control panel and move the device to the side;
- remove the bolts holding the UBL, reset the blocker contacts;

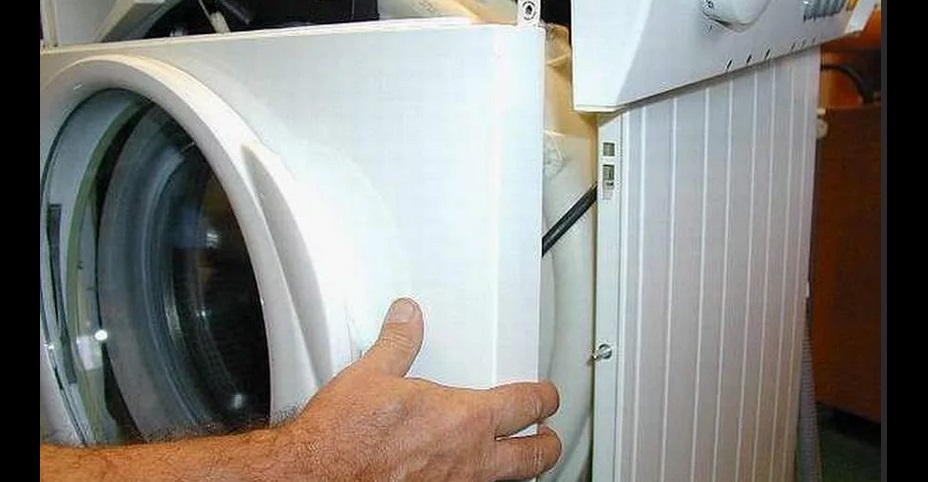
- Unscrew the screws securing the front panel of the washing machine;
- remove the front wall of the automatic machine;
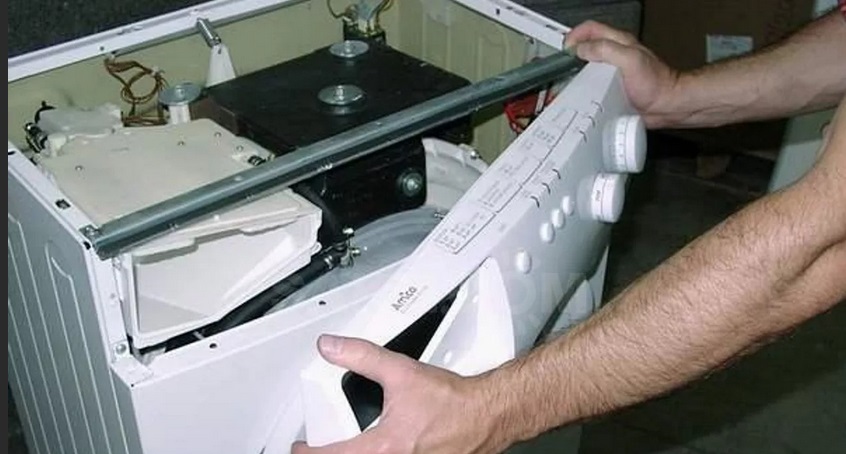
- Unscrew the two screws holding the metal frame of the instrument panel located on top of the case and move it to the side;
- remove the upper and lower counterweights (these are concrete weighting blocks);
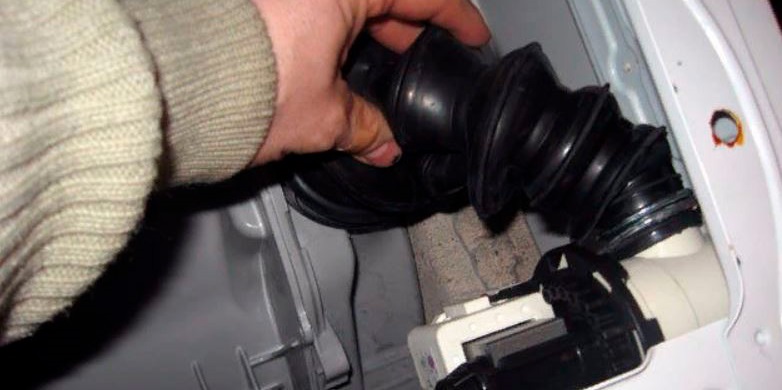
- disconnect all pipes from the tank;
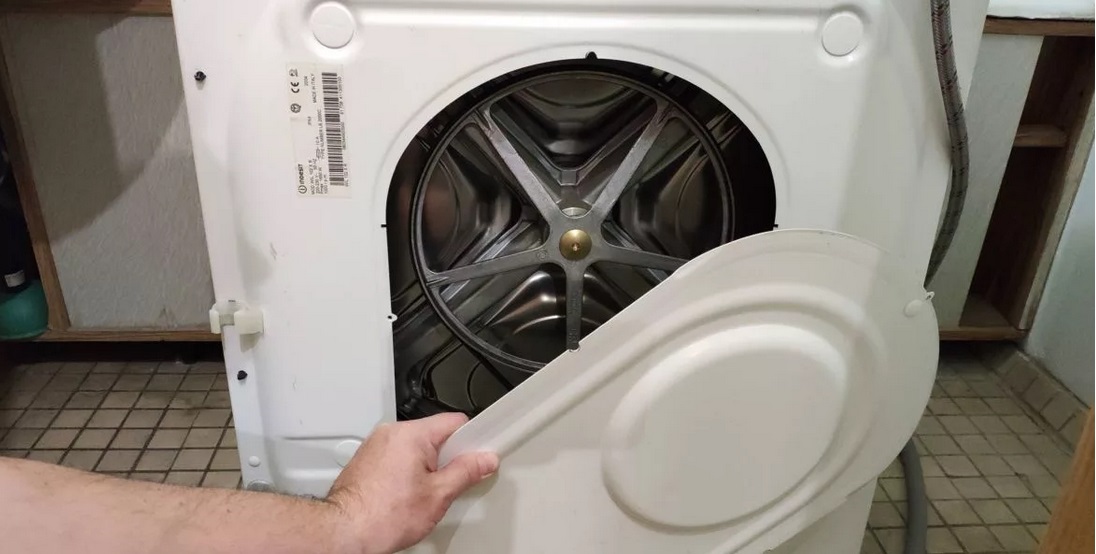
- Unscrew the screws that secure the back panel of the SMA, remove the wall;
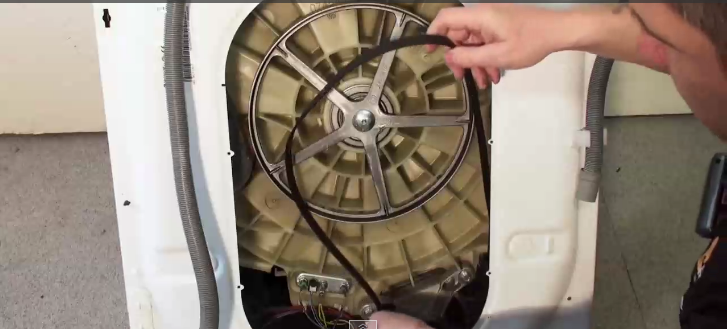
- remove the drive belt from the drum pulley;
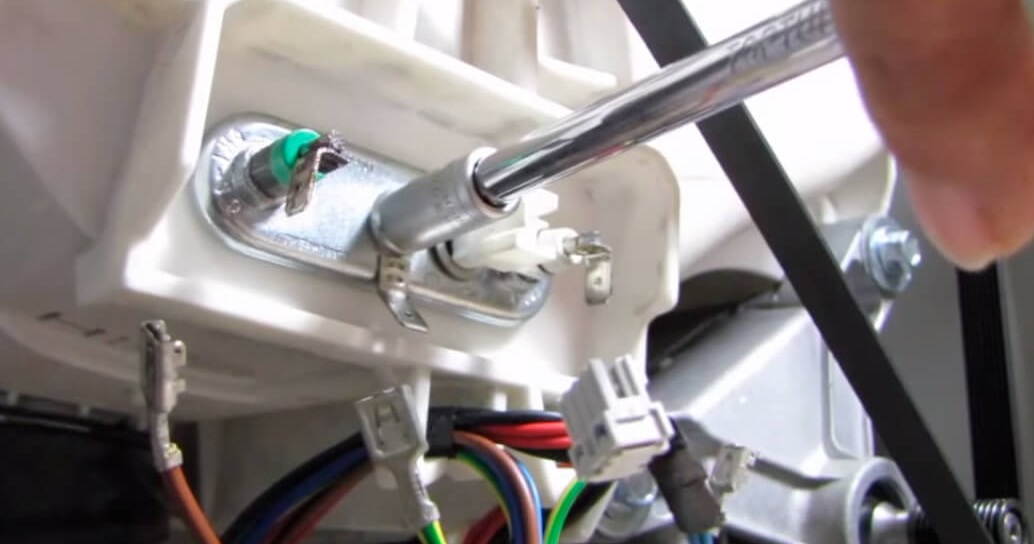
- remove the heating element by loosening the nut holding it and disconnecting the wiring;
- disconnect the wires from the electric motor.
In order not to make a mistake during the reassembly process, be sure to take photographs of how the parts were originally located, contact diagrams, etc. If you connect even one wiring incorrectly, the machine will not work correctly.
Now nothing interferes with the removal of the tank. All that remains is to loosen the shock absorbers, deal with the springs and remove the unit from the SMA body. Next, inspect the tank to see if they are collapsible or not.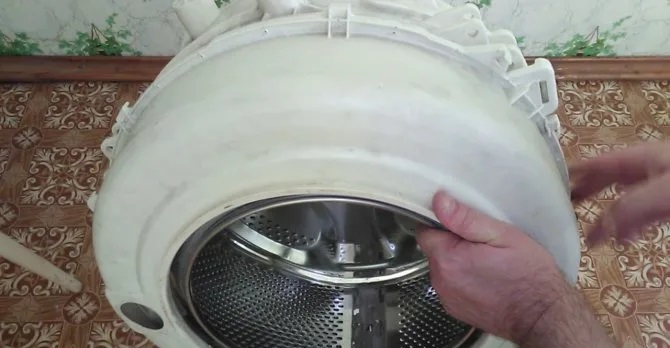
If the tank is collapsible, then it will be very easy to halve it. To do this, you need to unscrew the bolt securing the drum pulley and deal with the latches (these are bolts or latches) located around the circumference. After this, the container will “break up” into halves.
In the case of non-separable tanks, you will have to “sweat”. Such containers are sawed with a hacksaw exactly along the weld seam. Upon completion of the repair, the halves are fastened with moisture-resistant silicone sealant and bolts.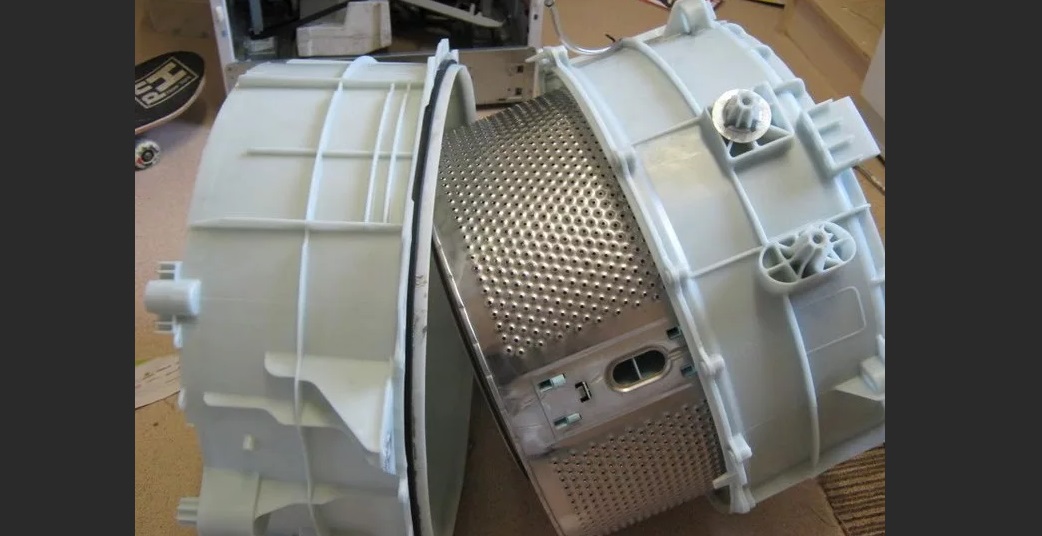
Further work is carried out with the half of the tank in which the drum is located. The metal container must be removed and put aside. In front of you will be a plastic part, in the center of which the bearings and oil seal are located.
The oil seal can be pulled out with a regular slotted screwdriver. Don't be afraid to tear it - the elastic band cannot be reused. The bearings are knocked out of the tank using a hammer and drift. It is important to act carefully so as not to damage the landing “socket”.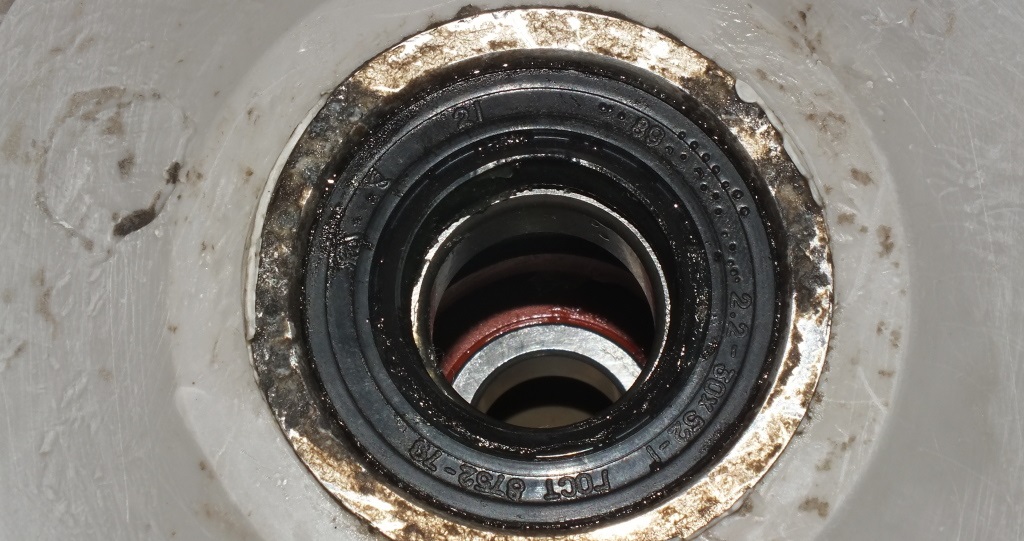
Before installing new bearings, be sure to clean the seat of rust, dirt and chips. Metal rings are also pressed using a hammer and drift. An oil seal is placed on top.
It is advisable to treat new bearings and oil seals with a special waterproof lubricant - this will extend their service life.
Next, the washing machine is assembled. First, the drum is put in place and the pulley is fixed. Next, the halves of the tank are fastened together. For reliability, even if the container is collapsible, it is better to treat the edges with moisture-resistant silicone sealant.
Having placed the tank in the housing, you can return to its place the parts removed during disassembly: heating element, drive belt, counterweights, panels, etc. It is better to tighten all pipes with new clamps.When finished, run a test wash and observe how the machine operates. The noise and knocking should stop.
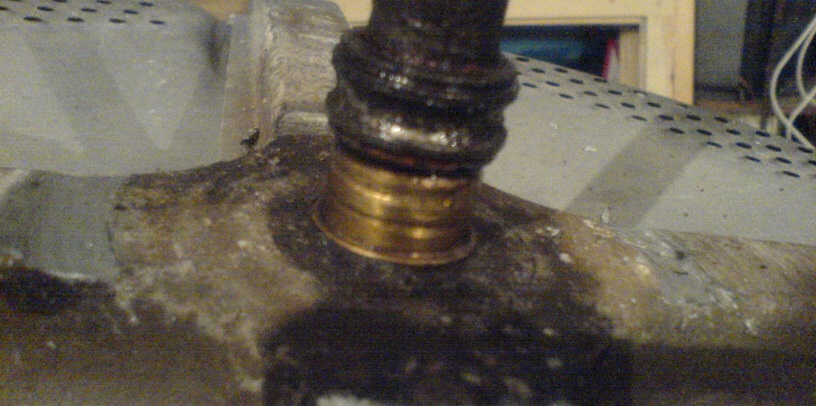
If there is a problem with the bushing
The work of replacing bearings and oil seals does not always go smoothly. Unexpectedly, you may encounter a problem, for example, discovering wear on the drum bushing. This will prevent the installation of new components. How to deal with such a problem yourself?
If there are “grooves” on the bushing of the drum cross that can be easily felt, you will have to work with it. Otherwise, the new oil seal will not be able to ensure the tightness of the unit, water will seep into the bearings, and they will fail even faster. How to deal with production?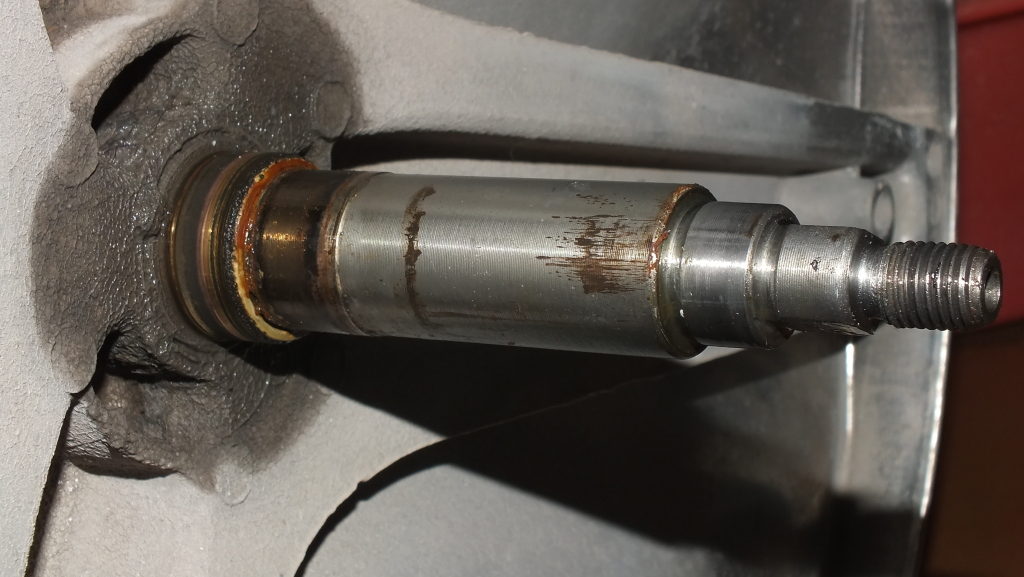
Here you need to focus on the percentage of bushing wear. If the hole is small, it will be enough to polish the metal with a zero polish. When the “grooves” are quite impressive, the part will need to be grooved.
It is worth understanding that after grooving the bushing, its diameter will decrease. Therefore, the oil seal will need to be slightly smaller than it was. For example, instead of a 30 mm seal, you may need a 28 mm ring. It is important that it fits tightly onto the drum bushing.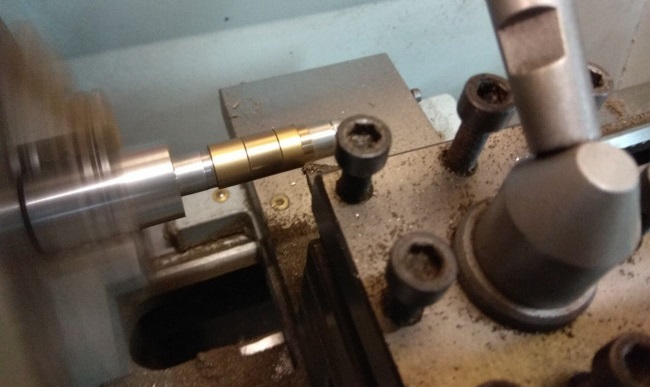
If the drum spider bushing is severely damaged, you should consider replacing the part. Today, stores sell repair kits for different models of washing machines. You can also order spare parts online.
Thus, it is quite possible to eliminate the backlash of the SMA drum at home, without resorting to the help of a specialist. The main thing is to strictly follow the instructions for action. Having correctly identified the cause of the problem, it will not be difficult to deal with it.
Interesting:


Reader comments
- Share your opinion - leave a comment
Categories
Washing machine repair


For buyers


For users


Dishwasher


Add a comment