How to disassemble a Beko washing machine?
 The vast majority of modern washing machines are repairable, which significantly increases the service life of the machines. However, everything is not so simple: in order to repair equipment, it is necessary to disassemble it correctly without damaging serviceable parts and sensors. With Beko, the task is complicated by the fact that the models of this manufacturer differ in some design features. Let's see how to disassemble a Beko washing machine yourself and what you need for this.
Preliminary stage
To make disassembling the machine with your own hands as easy as possible and not complicated by “surprises,” you need to start with preparation. The first step is to disconnect Beko from communications: first unplug the power cord from the outlet, then turn off the water supply tap and unhook the drain hose from the sewer. Then the equipment is moved to the center of the room so that free access is provided to both the front and rear walls.
Next, we collect the tools:
- screwdrivers (slotted and Phillips);
- set of wrenches;
- pliers;
- screwdriver;
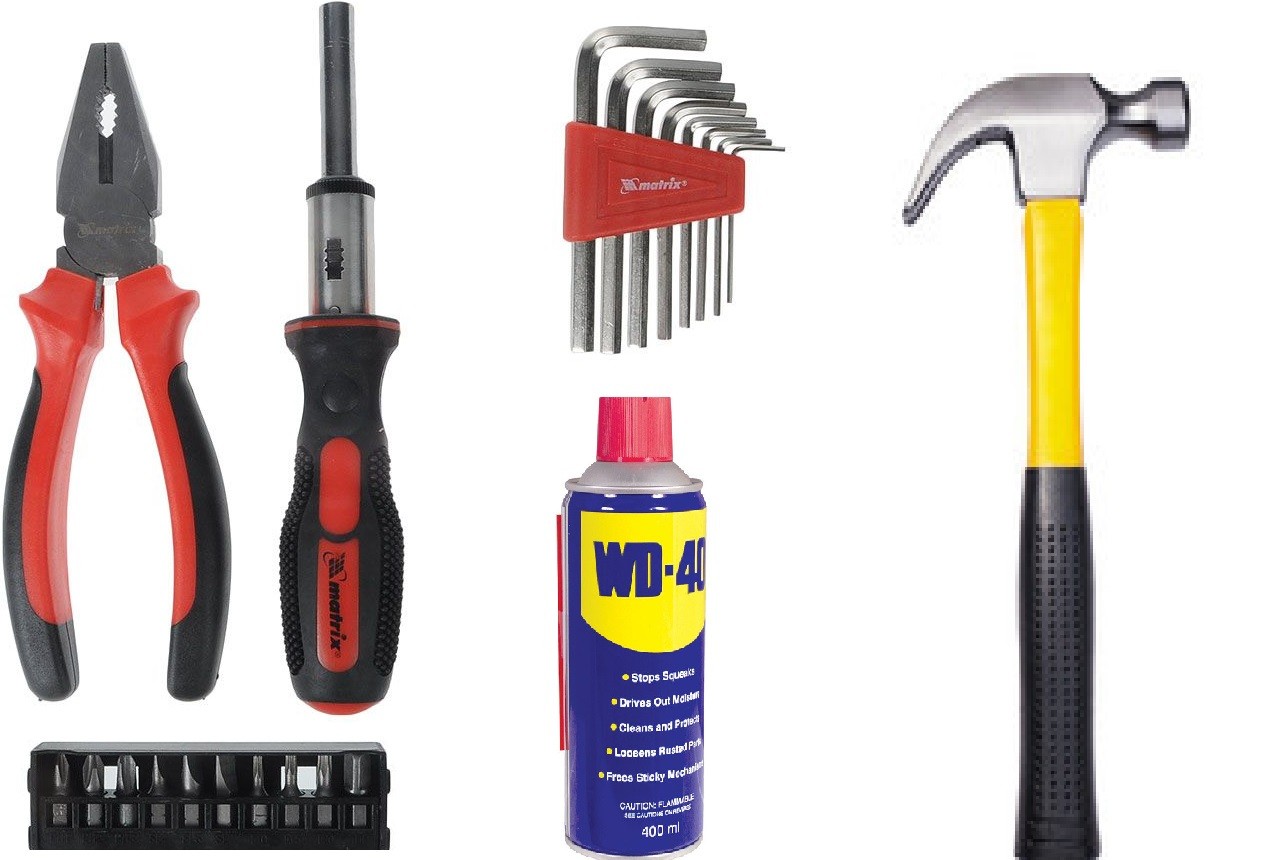
- a set of different sized heads;
- WD-40 lubricant;
- gloves;
- puller (for dismantling bearings).
Before disassembling the machine, it is necessary to study the factory instructions and the electrical diagram of the unit.
If everything is ready, you can start disassembling. The amount of work ahead is serious, so we stock up on patience, time and an assistant.
Description of the work progress
The degree of disassembly of the washing machine depends on the existing problem. If it is necessary to replace the drive belt or inlet valve, then 10-20 minutes will be enough. In the case of repairing a bearing assembly, you will have to remove almost all the main components of the machine and spend at least 40 minutes.However, the procedure will not change.
Before starting disassembly, make sure that the washing machine is disconnected from the power supply and water supply!
The instructions are as follows:
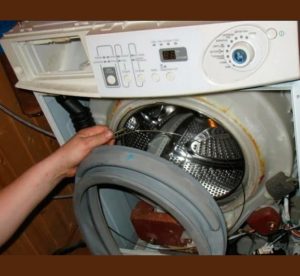
- disconnect the hatch door (unscrew the two bolts on the hinges, lift it and remove it from the rod);
- unsnap the technical hatch door;
- loosen the outer clamp of the cuff and insert the elastic into the drum;
- unscrew all the bolts located around the perimeter of the front panel;
- bend the front panel 2-3 cm, and through the vacated gap unhook the wiring from the UBL;
- remove the “end” completely;
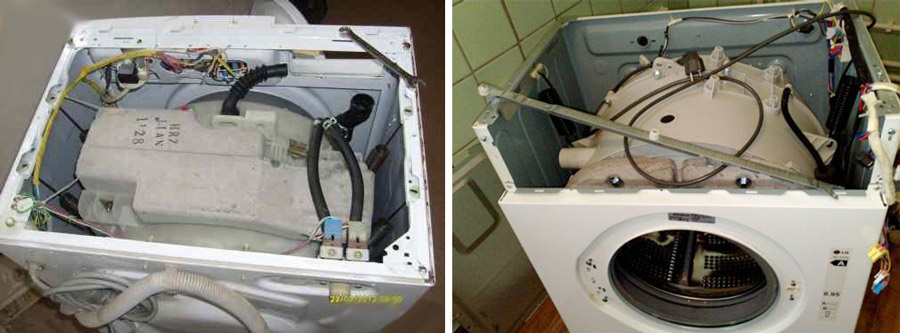
- unscrew the retaining bolts from the rear panel;
- remove the drive belt from the pulley;
- unscrew the screw that secures the pulley wheel (you need to insert a screwdriver between the blades to prevent the wrench from turning);
- release the wires connected to the drum;
- pull out the water supply hose attached to the tank;
- Using pliers, remove the metal brackets inserted around the perimeter of the tank;
- pull the front half of the tank towards you.
On Beko washing machines, the heating element is removed along with the tank - be careful not to damage the heating element during disassembly!
The next one is the drum. We go around the back of the washing machine, place the “dull” tip of the chisel in the center of the cross and punch it with a hammer. As soon as the fixing bolt “falls through,” insert the screw and release the tank.
Next we knock out the bearings. We insert a metal rod into the hole freed from the cross and tap it with a hammer until the oil seal and bearings leave their seat. If the parts are strongly stuck, then the area is treated with lubricant WD-40.
Experienced craftsmen advise not to rush and record the dismantling on the camera, especially when disconnecting the wires. This measure will help avoid confusion and protect against errors during reassembly. The Beko machine is assembled in a similar way, only in the opposite order. The seat for each part is pre-cleaned, as are the components themselves.
Interesting:


Reader comments
- Share your opinion - leave a comment
Categories
Washing machine repair


For buyers


For users


Dishwasher


Add a comment