Disassembling the Haier washing machine
 Sometimes users need to disassemble the Haier washing machine. For example, in the case of self-repair of equipment. We'll tell you how to do the job and what tools you may need during the process.
Necessary set of tools?
To disassemble the automatic machine, you will not need many tools. If this is a minor, superficial repair, then one Phillips screwdriver is often enough. When you need to disassemble the washing machine completely, additionally prepare:
- screwdriver;
- mallet or small hammer;
- pliers;
- pliers;
- puller;
- set of hexagons;
- slotted screwdriver.
To deal with “stuck” fasteners, use a special liquid WD-40.
Anti-corrosion lubricant is applied to the stubborn bolt. After this, you need to wait 10-15 minutes for the liquid to take effect. The screw can then be unscrewed.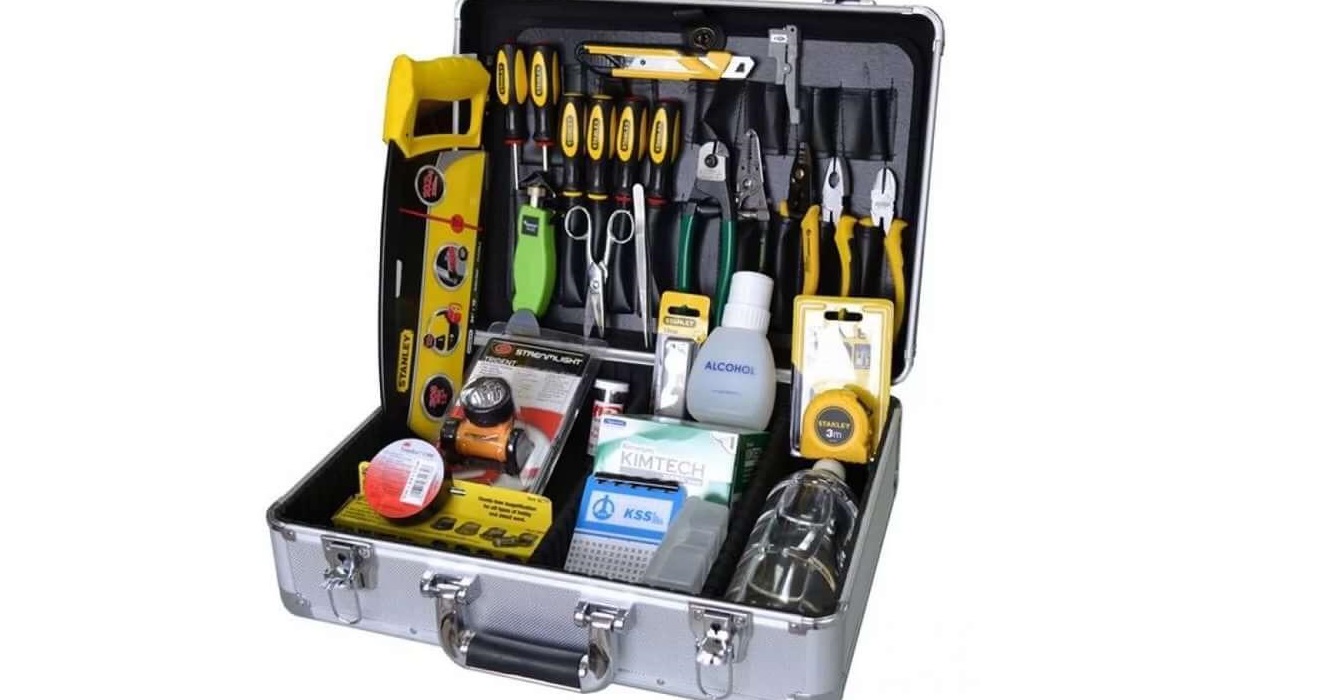
In addition to the listed tools, during the process of disassembling the automatic machine you will need:
- a small container (to drain the remaining water from the machine);
- dry rags;
- marker;
- telephone (to photograph the diagram of connecting wires to parts).
Instead of a smartphone, a regular camera will do. The main thing is to capture the progress of work on camera so as not to make mistakes during the reassembly process. Having prepared the necessary equipment, you can begin repairing the Haier washing machine.
We take out everything except the tank
If you decide to do the repair yourself, carefully read the instructions for the equipment. It describes in detail the location of the main components and parts of the washing machine. Before starting work, be sure to turn off the power to the automatic machine and close the shut-off valve responsible for the water supply.
Next, you need to drain the remaining water from the machine. To begin, carefully disconnect the drainage hose from the body and lower its end into a basin or bathtub. After that:
- find the garbage filter (it is located in the lower corner of the Hayer washers);
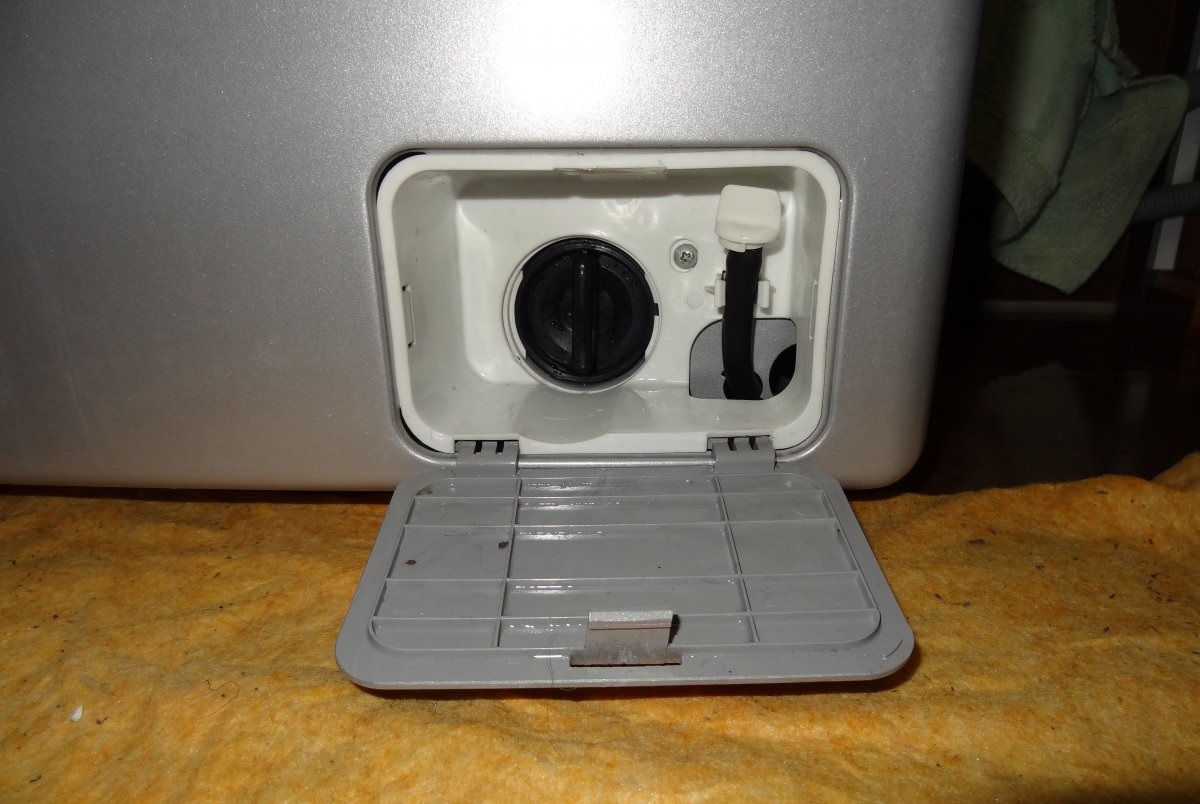
- place a container under the machine to collect water, cover the floor around the washing machine with dry rags;
- unscrew the filter element;
- wait until the water drains into the container.
Now you can start disassembling the SMA. First of all, the top cover of the case is removed. To remove the panel, you need to unscrew the two bolts that secure it.
Next, the powder receptacle is removed from the machine. To remove the cuvette, pull it out halfway, then press the button in the center of the tray. After this, pull the detergent container towards you.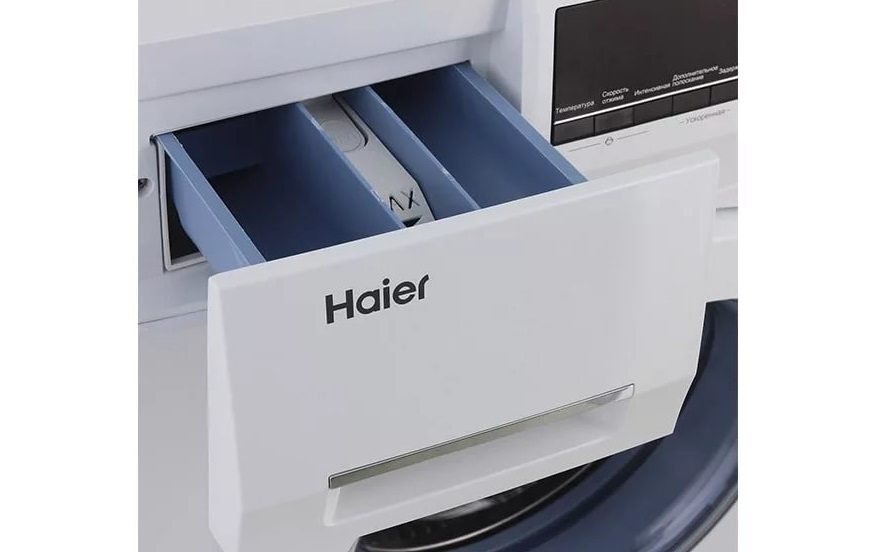
Then you can proceed to dismantling the dashboard. To do this, unscrew all the screws securing it. Usually one bolt is located under the powder receptacle, the second is on the opposite side. Remove the control panel carefully so as not to damage the buttons, programmer or break the wires.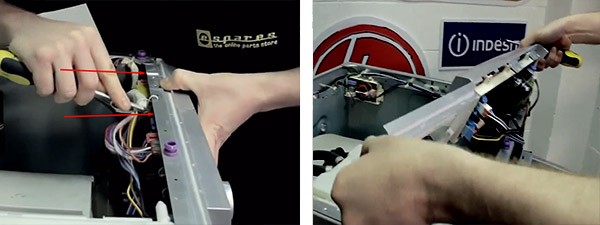
If there is no need, there is no need to disconnect contacts. Carefully place the dashboard on top of the machine or hang it on a hook on the side of the machine.
Next, you can begin to dismantle the drum door. Unscrew the fasteners holding the hatch and remove it from the metal hinges. The sash should be put aside on a flat surface, with a soft cloth placed under it so as not to break the glass.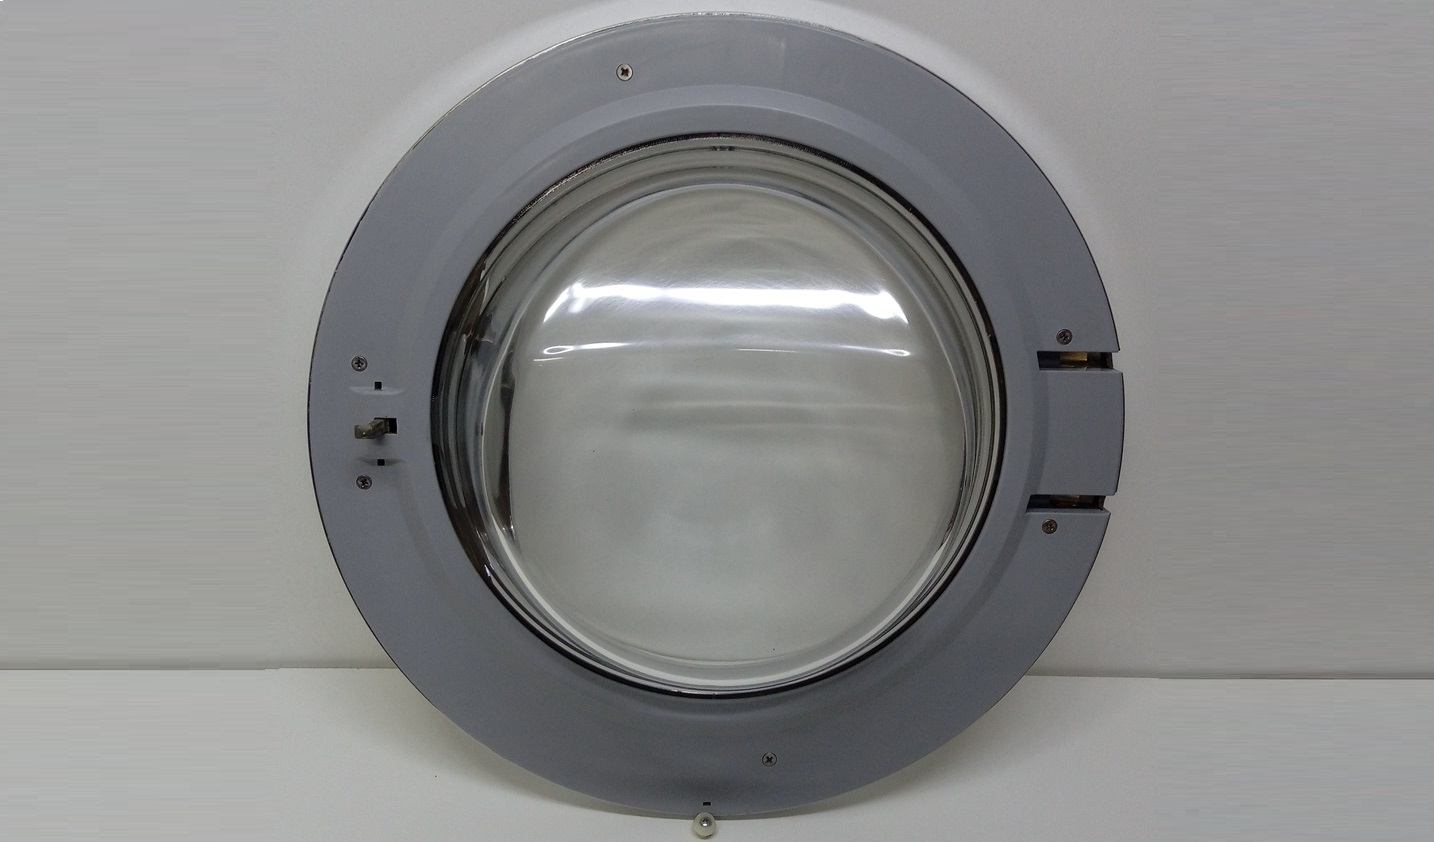
The next step is to remove the front panel. To do this, you need to “hide” the rubber cuff in the drum. It is fixed with two clamps - external and internal. You will need to deal with the latch and pull the outer ring out of the case.After this, the seal is “tucked” inside the washer.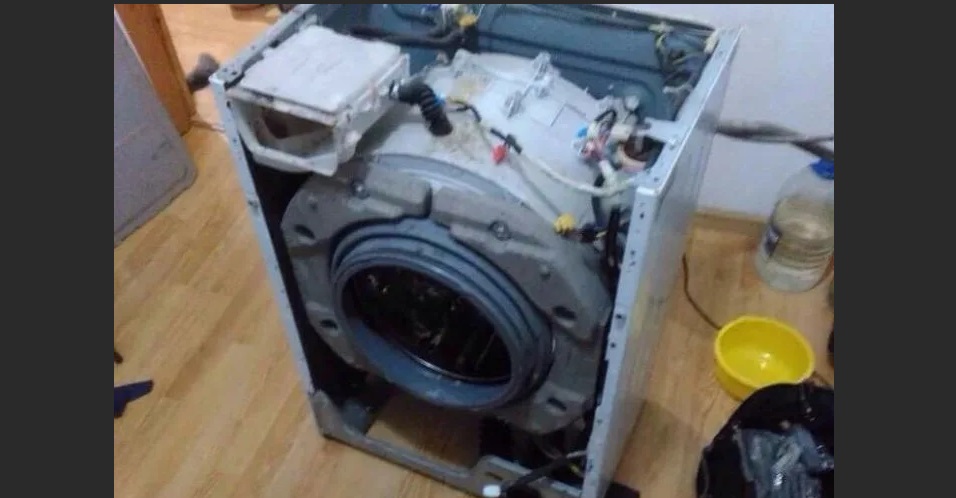
Now you can begin dismantling the front wall. Since the tidy and hatch door have already been removed, nothing will interfere with its removal. Unscrew the screws around the perimeter, lift the panel and remove the hooks securing it.
Removing the back wall of the machine is very simple. The drain hose is already disconnected, so all that remains is to unscrew the bolts holding the panel in place and move it to the side. At this point, disassembling the body of the Hayer washing machine can be considered complete.
Remove and halve the tank
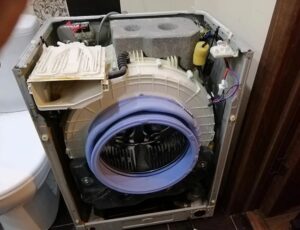
In some cases, partial disassembly of the washing machine is not enough - to eliminate certain types of breakdowns, you need to gain access to the inside of the drum. For example, when replacing bearings and oil seals. In such a situation, you will have to remove the main parts from the machine: tank, engine, etc.
The SMA tank weighs about 10 kg, so it is not recommended to pull it out alone.
There should be no obstacles in the way of removing the tank. Therefore, first of all, we remove the counterweights. These are concrete blocks that are designed to provide stability to the washing machine.
Next, you need to disconnect the pulley from the tank. The bolt that secures the part should be treated with WD-40 aerosol lubricant and wait 10 minutes. After this, you can unscrew it with a hex screwdriver. Be careful not to rip off the hexagon.
The screw should be unscrewed counterclockwise. It is fixed with a special compound, which gives the connection strength. Therefore, you will have to make an effort to remove the fasteners. If it doesn't work at all, treat the area with WD-40 again. After removing the bolt, grab the pulley with both hands and pull the part towards you, slightly rocking the “wheel” in different directions.
Next, you need to disconnect from the washing machine tank all the elements that will interfere with its removal. This is an electric motor, a drain pump, heating element contacts, various pipes and wires. Experts recommend taking pictures at each stage so as not to make mistakes when reassembling the equipment.
When there is nothing obstructing the main container recess, remove the assembly from the housing. The tank of all Haier washing machines is collapsible. To halve it, just unscrew the long screws that hold the plastic parts together.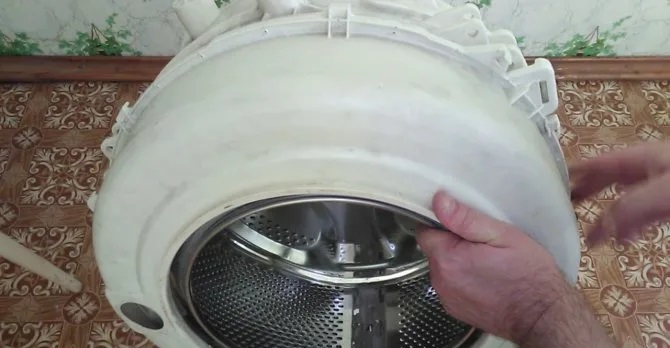
After removing all the screws, the washer tank will split into halves. The drum will be attached to the back by bearings mounted on the shaft. Further work will involve dismantling these metal rings.
It is necessary to take a bolt that is the same size as the screw with which the pulley was screwed to the tank. It is inserted into the existing hole. Then a wooden block is taken and placed in this place. You need to tap the piece of wood with a hammer or mallet until the back wall of the tank comes off the bearing.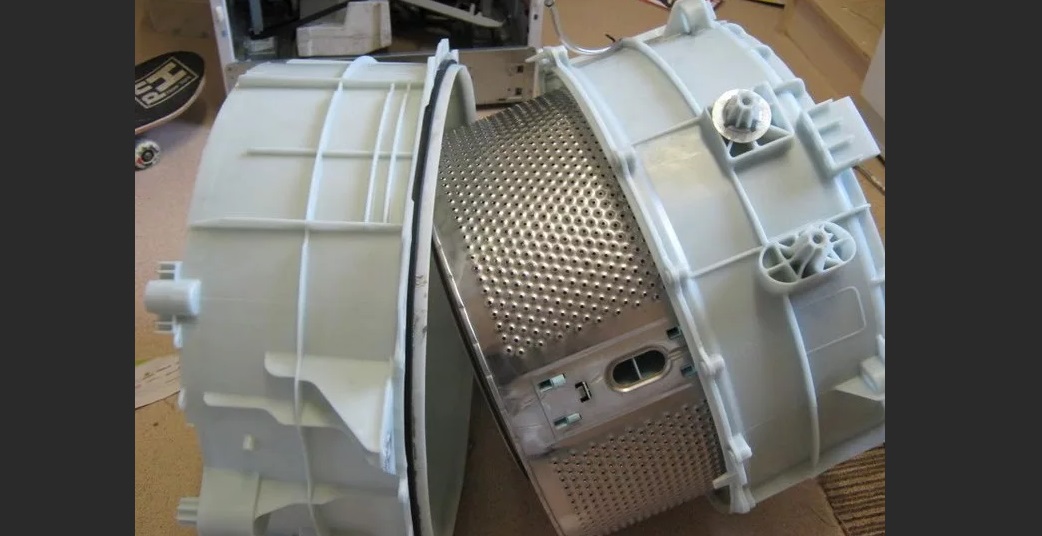
Next, all that remains is to work with the front part of the drum, on which the cross and shaft stand. To completely disassemble the assembly, you will need a puller. The algorithm of actions will be as follows:
- place the puller jaws under the bearing;
- tighten the thread of the puller to obtain the desired voltage;
- treat the bearing with WD-40 lubricant;
- wait 20-25 minutes;
- Continue unscrewing the threads until the bearing falls out of its seat.
Having dismantled the broken bearings and oil seal, you can begin installing new components. Reassembling the washing machine is done in reverse order. It is recommended to rely on photos taken during the work process to avoid mistakes when connecting parts.When finished, run a test wash to check the machine's functionality.
Interesting:


Reader comments
- Share your opinion - leave a comment
Categories
Washing machine repair


For buyers


For users


Dishwasher


Add a comment