How to disassemble an Indesit top-loading washing machine?
 Any repair or diagnosis requires first disassembling the Indesit top-loading washing machine, and only then checking versions and guesses. In order not to break the latches or unscrew too much, you need to have a good understanding of the design and carefully prepare. We suggest that you do not act by touch, but confidently begin to disassemble the machine.
Let's get ready without haste
It is necessary to prepare for any manipulation, and disassembling a washing machine is no exception. In order not to lead to a flood and not to aggravate the situation with a breakdown, it is worth planning all actions in advance. First of all, we provide free access to the machine by disconnecting it from communications and moving it as far as possible from the wall. Ideally, it is better to move the equipment to a garage or workshop, but 2 square meters is enough. m. kitchen or corridor. Next, we prepare the “arsenal” necessary for repairs:
- screwdrivers (positive and negative);
- set of open-end wrenches;
- set of socket heads;
- pliers;
- WD-40 type cleaner.
It is recommended to record each action with a camera to facilitate the reassembly process.
You will definitely need a large container, such as a basin, as well as dry rags or paper. A camera will not hurt; it is recommended to record the location of the wiring for correct reconnection of contacts.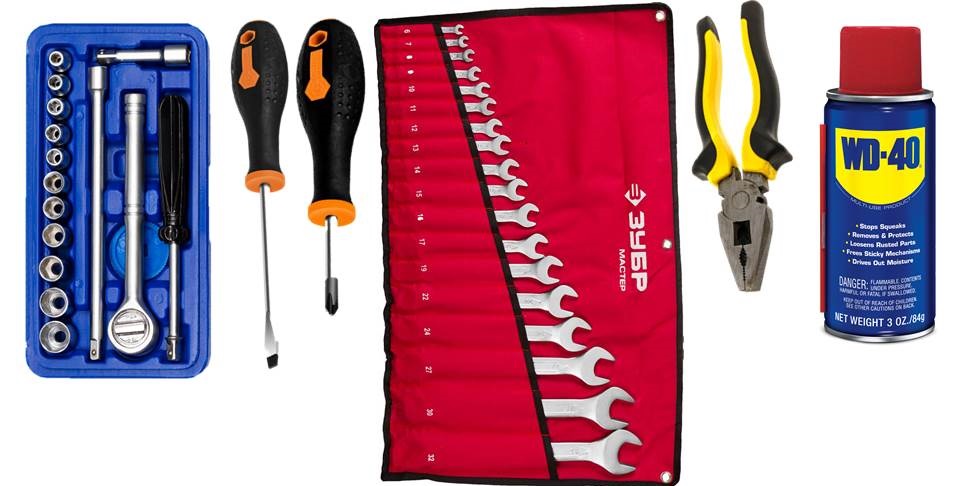
The main thing that is required to analyze the “verticals” from Indesit is experience, free time, desire, patience and accuracy. If at least one item is missing, then it is better not to tempt fate, but to immediately contact the service center for help.
The progress of disassembling the machine
Top-loading washing machines are very different from front-loading models, so the work flow will vary. In any case, before starting the intervention, you should carefully study the design diagram of the “vertical”. Remember that it is not recommended to disassemble the machine yourself without experience and relevant knowledge. If you have not previously come across the concepts of “control board”, “resistor” or “pressostat”, then it is better not to experiment and not create unnecessary problems for specialists. When all doubts are left behind, let's get down to business.
- We disconnect the machine from the network, move it to a free place and prepare all the tools.
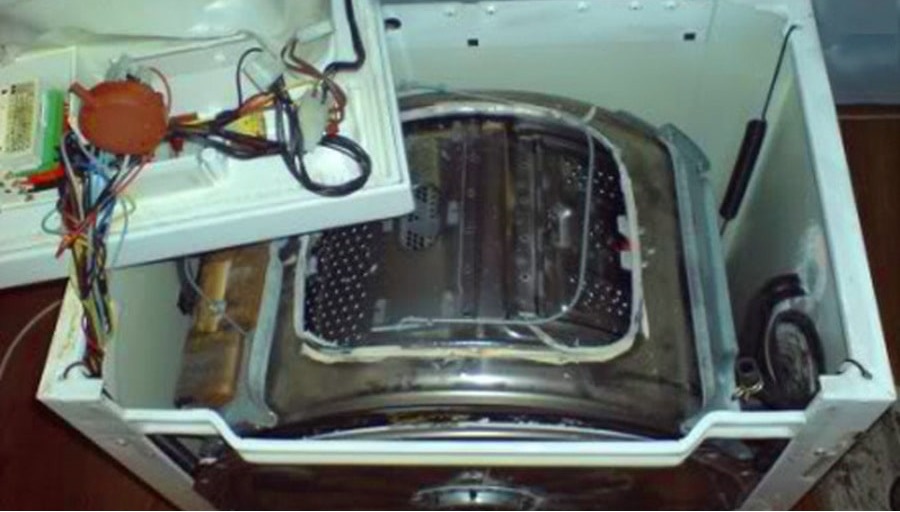
- We remove the dashboard. The procedure depends on the specific model: on some you first need to unscrew the four bolts around the perimeter, while on others it is enough to pry the part and bend the latches. The disconnected board can either be hung on the side wall, or removed completely, freeing the connected wiring.
- We find the fasteners holding the cover. Unscrew them and remove the panel.
- Unclench the clamps on the fill valve nozzle, disconnect the hoses, release the wiring and push out the valve.
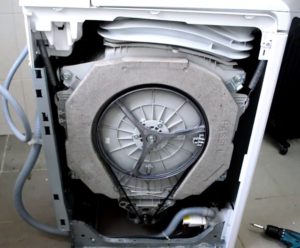
- We unscrew the fasteners around the perimeter of the side walls, move them down and remove.
- We remove the front door latches and open access to the main components of the washing machine.
- We disconnect the wiring connected to the tank. There is no need to remove the drum from top-loading machines, and even the bearings can be changed on site.
- Next, the drive belt is removed from the pulley.
- The wiring is disconnected from the heater, the central nut is unscrewed, the bolt is pressed inward, and the heating element, after swinging from side to side, is removed from the housing.
- We remove the motor after pulling out the chips and releasing the retaining fasteners.
- To remove the pump, release the clamps from the connected pipe and drain hose, and then turn the pump counterclockwise.
Be prepared for water to flow when you remove the pump from the machine!
Disassembling the lid of the vertical washing machine is additional. First, place the panel on a flat surface, and then pull the detergent tray towards you until it leaves the body of the machine. Then we press the top latch, take out the button and unscrew the two screws hidden behind the button. Turning the door over, we find the handle and, unfastening the holders, “half” the hatch.
At this stage, the vertical frame is considered almost completely disassembled and ready for further manipulation. Now it’s easier than ever to carry out repairs or replacements yourself. The main thing is to act carefully and do not forget to clean the equipment from dirt and scale.
Typical breakdowns
Vertical washing machines from Indesit have particularly “sore” spots, which most often lead to machine failure. They are called typical problems, and experienced technicians have long been accustomed to such complaints from machine owners. As a rule, people contact the service center for the following reasons.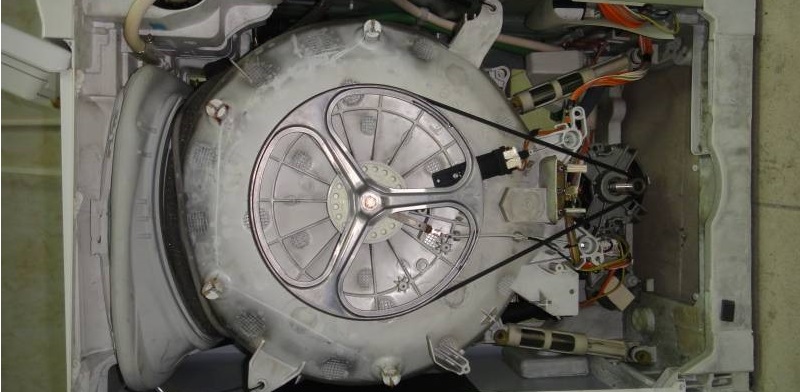
- The drum doors open directly during washing, which leads to damage to the heating element and depressurization of the tank.
- Poor quality metal casing is quickly damaged by corrosion, which makes the machine unsightly.
- The laundry loaded into the drum is unevenly distributed along the walls, and an imbalance occurs.
- The electronics turn out to be weak, the software is often reset, and resistors on the control board burn out.
- Bearings quickly become deformed and destroyed.
Repairs do not always require disassembling the machine. But it is better to know all the instructions so that you are prepared and aware.
Interesting:


Reader comments
- Share your opinion - leave a comment
Categories
Washing machine repair


For buyers


For users


Dishwasher


Add a comment