Disassembling the Vestel washing machine
 For the first time, disassembling a Vestel washing machine for repairs or for spare parts is quite difficult. You will have to remove almost all key components and elements, right down to the front panel and tank. The last thing you need to do is halve and remove the drum. Doing this without clear recommendations is quite problematic, especially when it comes to diagnosis and repair. In order not to damage the structure and not dismantle unnecessary parts, you should act strictly according to the instructions.
Preliminary actions
It is not recommended to immediately start disassembling the Vestel washing machine. First you need to prepare for the upcoming manipulations. First of all, we find a place for repairs. Ideally, this should be a workshop or garage, and not a small bathroom. If there is no special room, then you need to move the machine away from the walls as much as possible, providing free access to the rear, front and side panels of the case. The next step is preparing the washing machine itself. Necessary:
- disconnect the machine from all communications (water supply, sewerage and electricity);
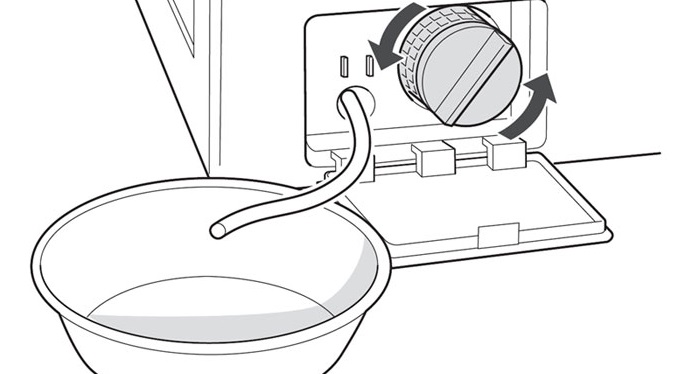
- empty the tank by draining the residual water (through a garbage filter or emergency drain hose).
In order to disassemble the washing machine with your own hands comfortably and without losses, it is worth thinking in advance about the “storage” of the dismantled parts. Large elements must be placed side by side in the order they are removed from the housing. It is advisable to sort fasteners, clamps and other small devices into containers or place them on the inverted top cover of the case.
It is recommended to record the dismantling process on a photo or video camera to simplify reassembly and connection.
Experienced craftsmen recommend immediately preparing a piece of thick wire bent into the letter “S”. It needs to be hooked onto the side wall of the case on the right in order to be used in the future as a hook under the dashboard. This life hack will eliminate the need to disconnect the wiring from the board, the reverse connection of which is very problematic for “newbies”. At the preparation stage, we also collect the following tools: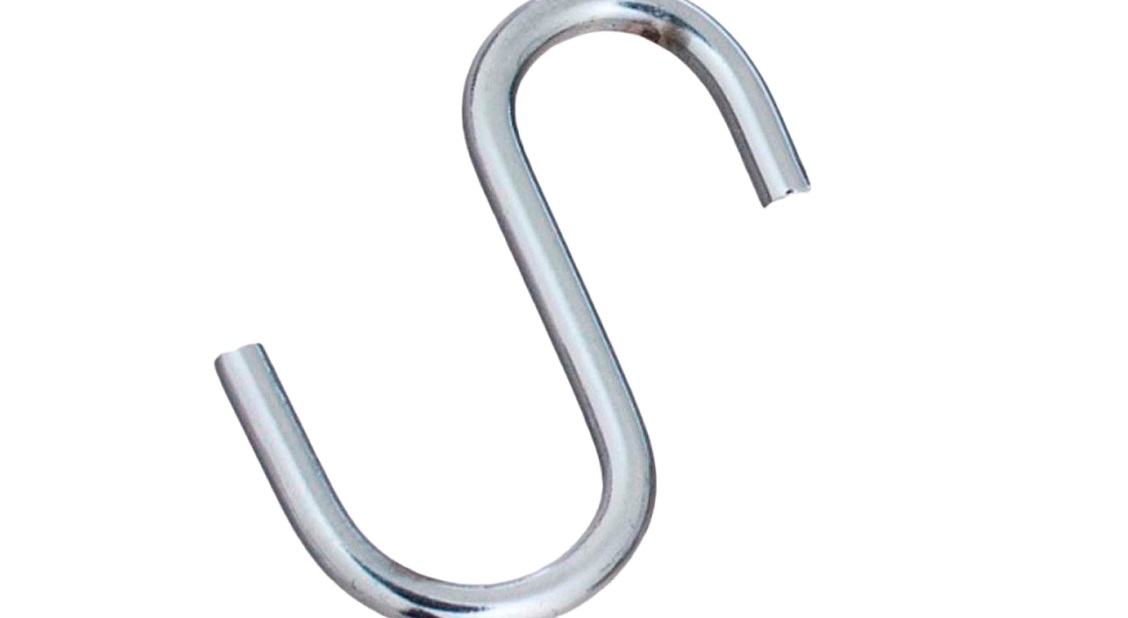
- flat and Phillips screwdrivers;
- pliers;
- metal hacksaw (if you plan to dismantle the drum);
- set of heads;
- set of open-end wrenches;
- hammer;
- rubber mallet;
- drift or car puller.
We are also preparing WD-40 lubricant, which will help “free” stuck and rusted parts. Place a rag next to it and cover the space around the washer with oilcloth. All! Now you can start disassembling the Vestel.
Removing the external elements of the case
Disassembly begins with the removal of external elements. We are talking about the powder receptacle, hatch, top cover, front and rear panels of the housing. We proceed like this:
- We find two bolts on the lugs at the back that hold the top cover of the case;
- unscrew the screws;
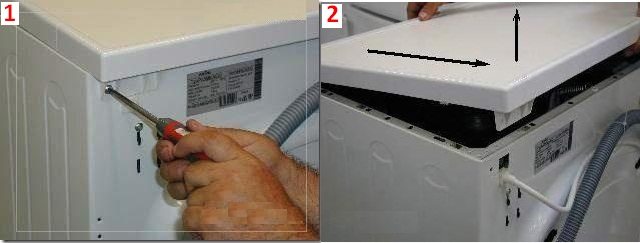
- push the cover back and, lifting it, disconnect it from the body;
- take out the powder receptacle (pull it all the way and press the “tab” in the center of the dispenser);
- Unscrew the screws located in the niche of the tray;
- loosen the screws on the hatch hinges and remove the door;
- use a screwdriver to pry up the outer clamp on the cuff, loosen it and move it to the side;
- tuck the cuff inside the drum;
It is not recommended to remove the entire cuff from the drum - it is very difficult to pull it back on!
- disconnect the instrument panel (unscrew the screws around the perimeter and press out the plastic latches) and hang it on an S-shaped hook wire.
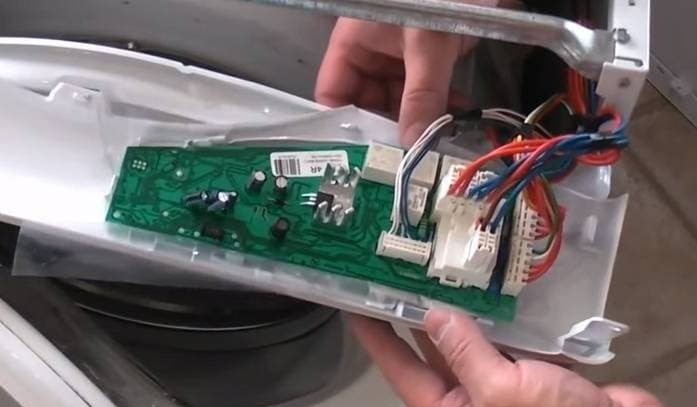
Next in line is the front panel of the case. To remove it, you need to unscrew all the fixing bolts: under the dashboard, around the garbage filter and near the hatch lock. Next, use a screwdriver to pry up the wall, press the latches and remove the end to the side. The back panel is easier to remove. It is enough to unscrew several bolts holding it, and then disconnect it from the body.
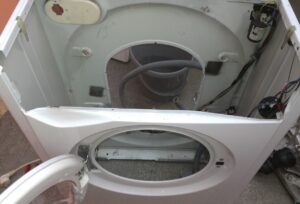
After removing all external elements, free access to the internal structure of the machine will open. But the disassembly of the Vestel does not end there - the tank must be freed from instruments and sensors, and then the tank itself must be halved. In what order to act, we will consider further.
Removing elements around the tank
Before removing the washing tub with drum from the Vestel body, it is necessary to free it from the supplied wires and connected parts. Disconnect the counterweights, drive belt, motor, heater, dampers, pump and other important system components. Disassembly takes place in the following order:
- go to the back wall of the Vestel and tighten the drive belt by turning the pulley;
- free the electric motor from the connected wires;
- loosen the bolts securing the motor;
- we push the engine inward and, having rocked it, remove it from the body;
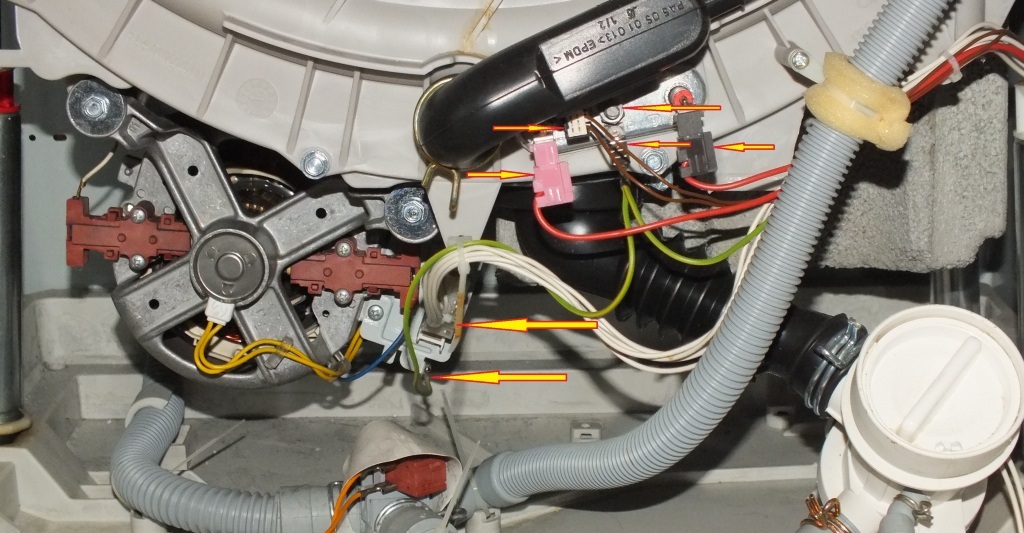
- remove the heater (disconnect the terminals from the heating element and thermistor, unscrew the nut in the center, push the device inwards and remove it from the grooves).
Now let's turn our attention to the upper part of the body. First of all, we unscrew the bolts securing the counterweights and take out the concrete blocks one by one. Then we disconnect the wiring from the inlet valve and the pipes going to the detergent tray. We also make sure to dismantle the pressure switch: both the hose and the “box” itself.
Before removing the tank with the drum, it is necessary to free it from connected parts, hoses and wires.
The drain system is disassembled through the bottom. More precisely, the pump is removed from the cochlea. To do this, disconnect the wiring, loosen the fasteners, turn the pump body clockwise and, pressing the device inwards, remove it from the body. At the “finish line” we deal with depreciation. First, we unscrew the dampers and remove the struts from the body, and then we weaken the upper springs. All! Now the washing tub is “held” only by the provided hooks and grooves. You need to lift the tank and pull it towards you. The container is not heavy, but it is inconvenient to dismantle - it is better to call an assistant.
Removing and “halving” the tank
The removed drum is placed on a flat, dry surface and inspected. As a rule, Vestel washing machines are equipped with solid plastic tanks, welded using a special technology. You can’t just cut it in half - just saw it, and then tighten it with screws and glue it with sealant. With collapsible containers it’s easier: just unscrew the bolts around the perimeter and press the latches. It is very easy to damage the tank, so when disassembling it we act extremely carefully:
- loosen the screw located in the center of the drum pulley;
- half the tank (cut the tank with a hacksaw or unscrew the bolts);

- we remove the “empty” half to the side, and turn the other half upside down;
- we inspect the cross and, having fixed one of the blades with a block, unscrew it;
- pry up the oil seal with a screwdriver and remove it;
- Using a drift, hammer and mallet, we knock out the old bearings.
Stuck parts and fasteners are treated with WD-40 lubricant before dismantling.
When disassembling the Vestel washing machine, it is recommended not to neglect cleaning.It is necessary to immediately wash all dirty areas, especially the debris filter seat, the pump volute and the shaft freed from bearings. If the scale layer is too strong, use WD-40: treat and leave for 15-20 minutes. After dismantling the bearings, disassembly is considered complete. Now you can begin replacement or diagnostics, depending on the initial goal. The Vestel assembly proceeds in the reverse order, but with some nuances, which are discussed in a separate publication.
Interesting:


1 reader comment
Add a comment
Categories
Washing machine repair


For buyers


For users


Dishwasher


How to disassemble, and not break, needs to be shown!