In some cases, you can fix the washing machine yourself without calling a technician. For example, repairing the shock absorbers of a Samsung washing machine is easy to do yourself. The design of dampers is quite simple, so racks can often be restored.
Let's figure out how Samsung SMA dampers are designed. We'll tell you how to remove shock-absorbing elements from the machine. We'll explain how to repair damaged racks at home.
How does the washer damper work?
Before you begin repairing vibration dampers, you need to understand how they work. Samsung washing machines are equipped not with standard shock absorbers, but with dampers. The strut consists of a plastic cylinder, a metal rod, a pair of bushings and a rubber gasket that acts as a piston.
Usually, to repair the SMA damper, it is enough to replace the gasket - it is this gasket that wears out a lot during the operation of the washing machine.
As a result of natural wear and tear, the gasket partially or completely loses its properties and can no longer perform the task assigned to it. This can happen even if there is still lubricant in the cylinder, which creates additional friction.
After deformation of the rubber band, the SMA damper operates without a piston. That is, the rod begins to move freely inside the cylinder; nothing holds it back anymore. Strong vibrations may even cause the metal rod to fly out of the rack.
Let's assume that the problem really is a deformed gasket. Then to repair the damper you will need:
remove the shock-absorbing element;
carefully disassemble the stand, remove the rod (it is very easy to pull out the metal rod, since in such a situation it usually loses resistance);
remove the damaged gasket;
install a new rubber band;
assemble the vibration damper;
put the damper back into the washing machine body.
Sometimes the rod does not give in and it is impossible to pull it out. Then you need to wrap a rag around the stand, hold it in a vice and in this position remove the rod. It is important to act carefully so as not to damage the plastic cylinder.
Before repair, the SM damper must be removed
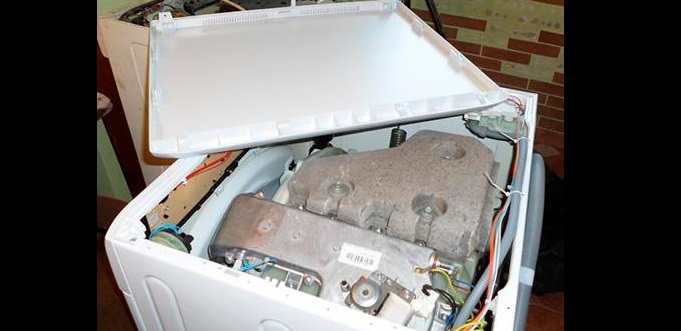
In general, the process of restoring washing machine dampers seems simple and quick. You can actually repair a rack in a few minutes. The main difficulty is to remove damaged shock absorbers.
What symptoms indicate a faulty damper? The washing machine begins to vibrate strongly during operation. Often the machine even “jumps,” especially during the spin phase. There is no point in postponing diagnostics and repairs - constant “shaking” can lead to other, more serious problems.
Before disassembling the washing machine, it is better to carry out a simple test. This will help determine if the problem is really with the dampers. To check if the shock absorbers are working:
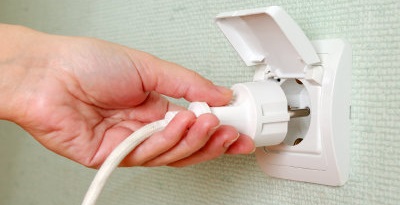
turn off the power to the machine;
remove the top housing cover;
press firmly on the tank, lowering it 3-5 cm;
suddenly remove your hands and stop pressing;
look at the “behavior” of the tank.
If the dampers are working properly, the tank will jump and stop immediately. Damaged shock absorbers will not be able to quickly adjust the position of the tank, so it will continue to rock up and down for some time. Having identified that the racks really do not cope with their function, you can begin to disassemble the SMA.
To remove the dampers, you must:
turn off the power to the automatic machine by unplugging the power cord from the outlet;
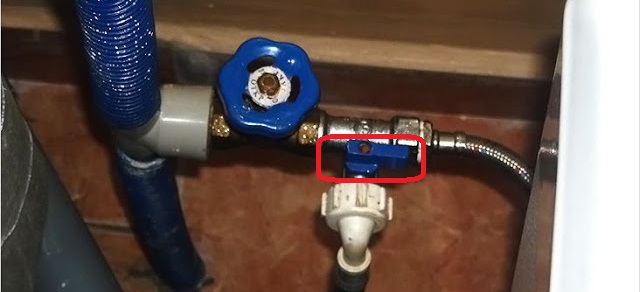
turn off the tap responsible for supplying water to the washing machine;
disconnect the drain and inlet hoses from the machine;
move the SMA away from the wall or out of the furniture to have free access to all sides of the case;
remove the top cover (by unscrewing the screws holding it);
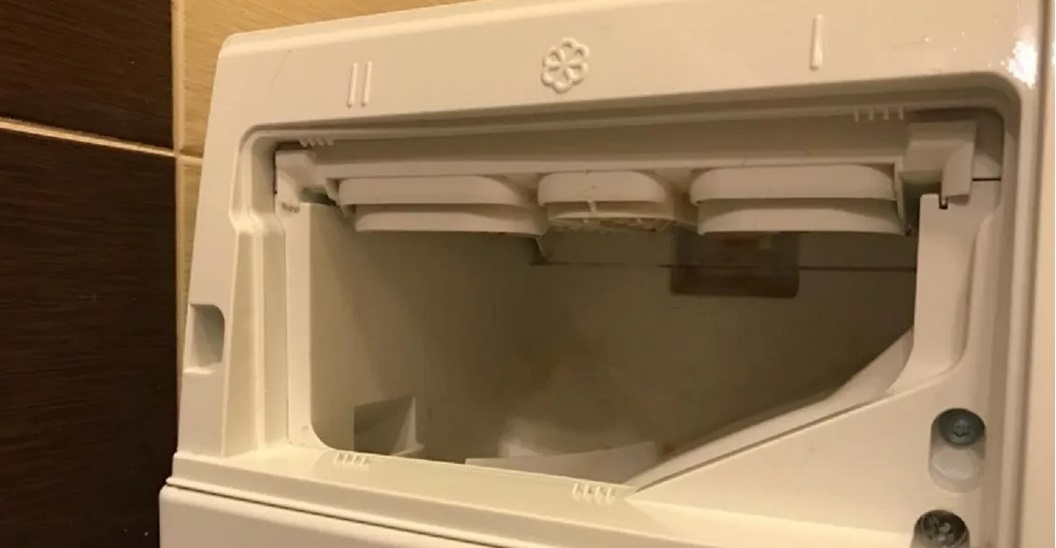
pull out the powder receptacle;
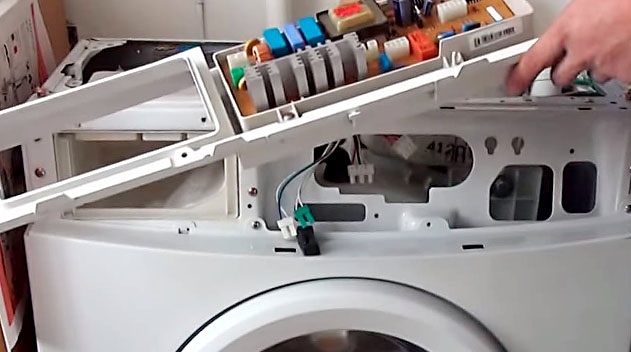
Unscrew the bolts holding the dashboard;
Carefully unhook the control panel from the body and place it on the washing machine;
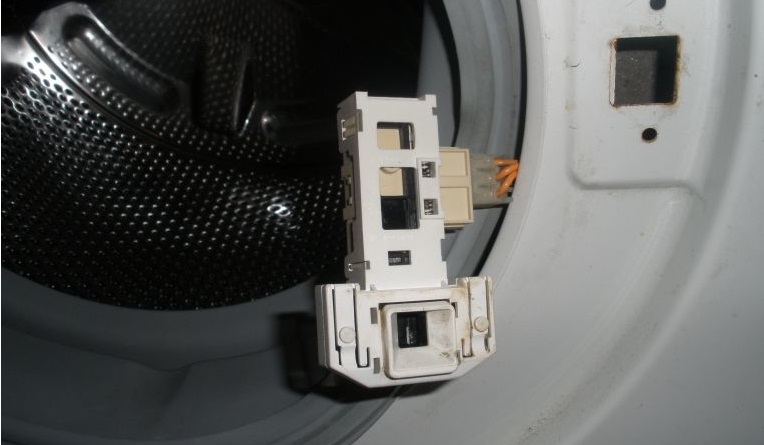
disconnect the UBL contacts, dismantle the locking device;
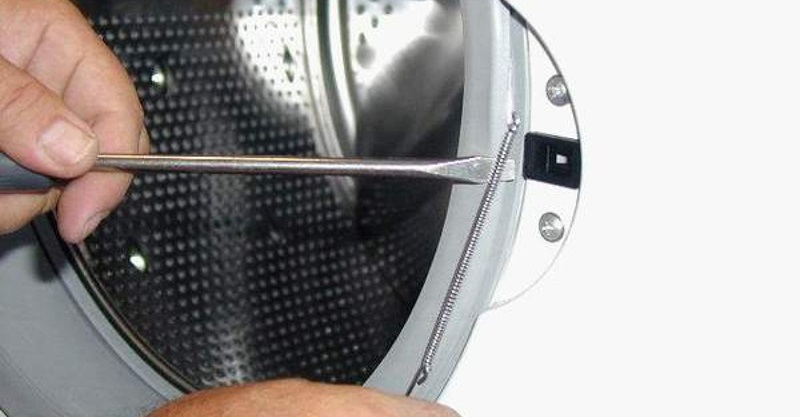
loosen the metal clamp on the hatch cuff;
insert the rubber seal into the drum;
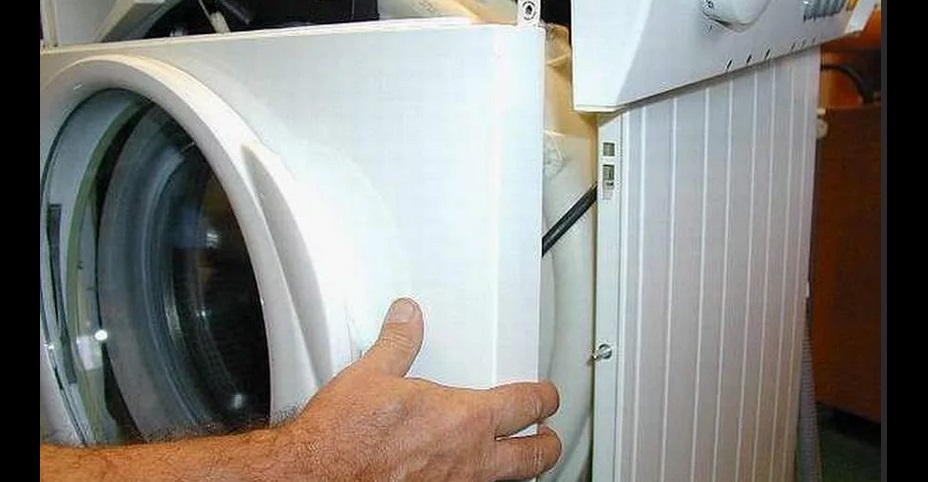
remove the screws around the perimeter of the front wall;
move the front panel of the case to the side;
Unhook the dampers and remove them from the washer.
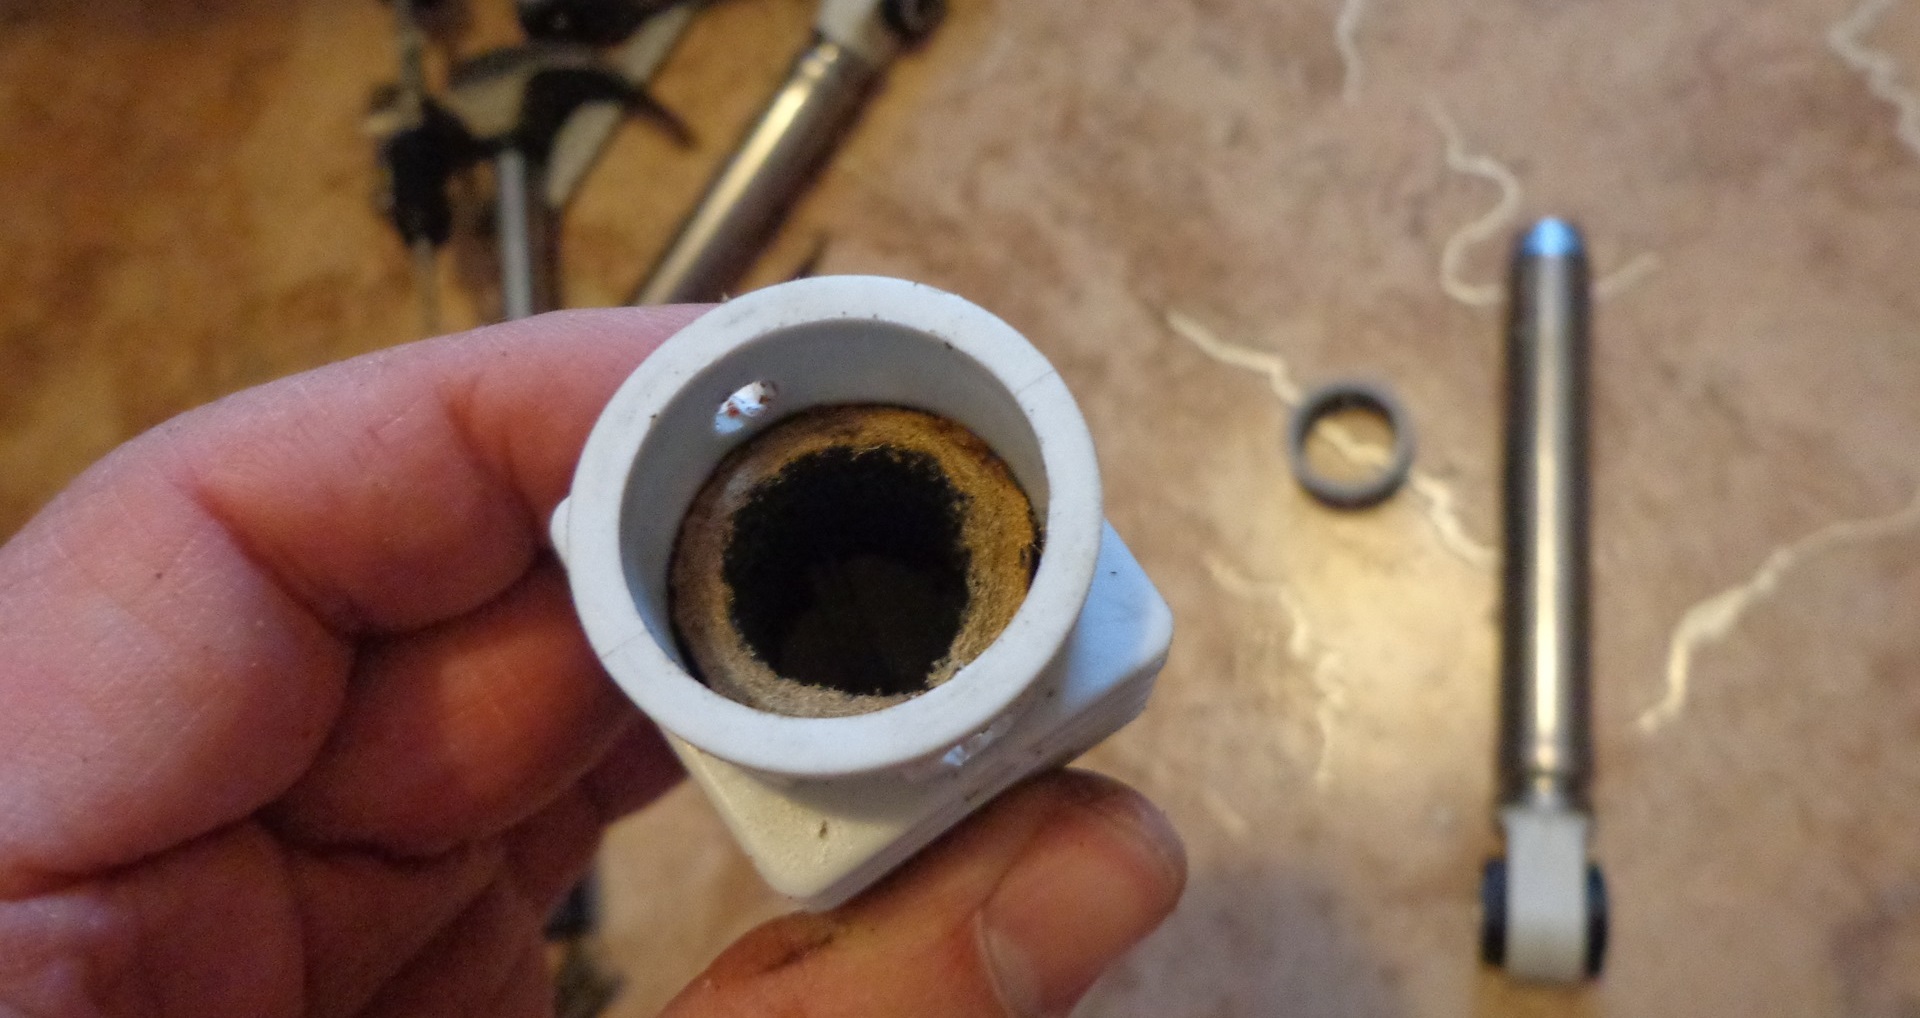
After this, you can begin disassembling the damper. Pull the rod out and inspect the gasket. If it really crumbles and no longer creates resistance, replace the part.
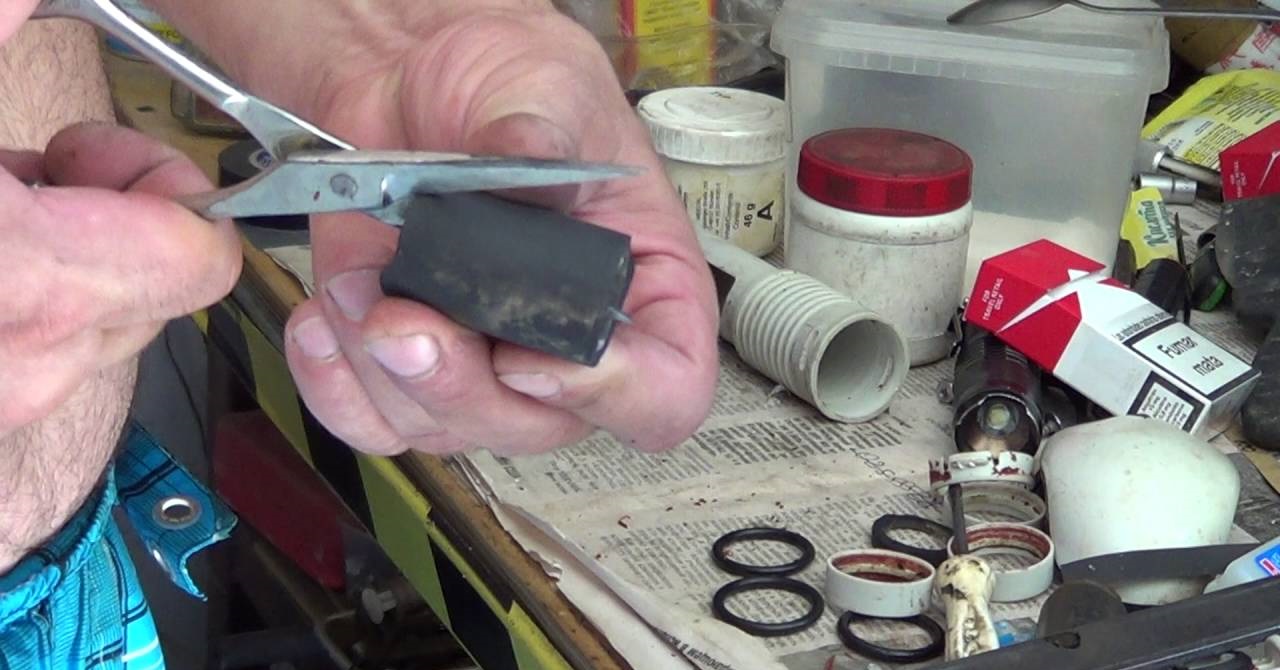
You can make a new gasket for the damper yourself from textolite, leather or rubber.
Having cut out an element of a suitable size, insert it into the damper in the designated place. Then push the rod back into the cylinder. Check the second vibration damper of the Samsung washing machine in the same way.
When the problem is not the gasket, but another fault, it may not be possible to repair the shock absorbers. Then you will have to buy and supply new components. Dampers must be replaced in pairs - this is necessary so that later they evenly dampen the vibration of the machine. Otherwise, one unit will wear out much faster than the other and the repair will soon have to be repeated.Spare parts are selected for a specific Samsung model. On some Samsung models, the dampers are tightly attached to the tank, so it is impossible to get to them without removing the plastic container. In this case, you will need to not only remove the front panel of the SMA, but also disconnect all pipes, wires, sensors, and elements from the tank. Then the reservoir is removed from the body, and only then the damaged shock absorbers are removed.
Restoring a broken damper
It is worthwhile to dwell in more detail on the damper restoration process itself. Once the shock absorbers are removed, the car can be left alone. Further actions are performed on the table. You need to have on hand:
slotted screwdriver;
scissors;
caliper or ruler;
a piece of PCB or rubber (an old leather belt will also work).
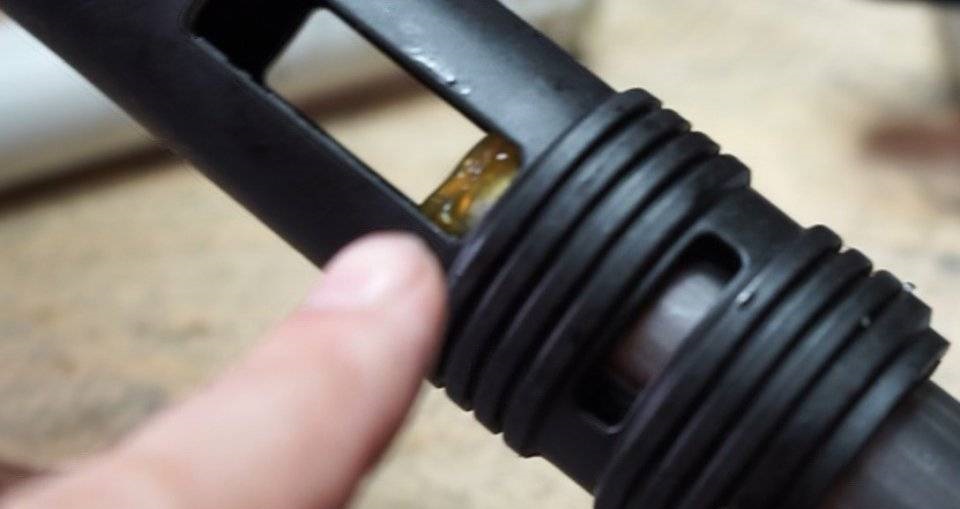
The factory gasket, which creates resistance to the movement of the rod, is secured inside the cylinder with a retaining ring. To remove worn rubber, pry up the plastic rim with a flathead screwdriver and lift it out of the rack. Then you can pull out the remaining bushings.
Now you need to figure out how to replace the worn gasket. There are two options. The first is to go to an automotive store and find the correct size bushing (or similar, and then trim the rubber). The second is to make a replacement part from available materials.
The second option is less time consuming. An old leather belt is suitable as a source. You need to cut two strips from it, the same size as the worn sample. The thickness of the new gasket, ideally, should be 3.5 mm, no less. More is possible, but then the stiffness of the shock absorbers will increase.
Some craftsmen recommend gluing the strip together to make a ring.However, this is not necessary; it is enough to overlap the leather strip in the cylinder. The gasket will not open to the outside anyway - the damper body will interfere with it, and it will not fold inside either - the metal rod will not allow this.
After placing the homemade gasket in the body, insert the rod. Check if resistance is created. The rod should “walk” with visible effort.
To complete the repair, place a little thick lubricant for MCA parts into the damper cavity. The substance will slightly ease friction and improve the shock absorber's ability to dampen vibrations. In addition, this is additional protection against corrosion.
The assembled dampers can be put back into the washing machine. Next, all previously disconnected parts, sensors, wires, and housing walls are returned to their place. Before fixing the top cover, do the test again - press firmly on the tank, lowering it, then quickly remove your hands. Repaired shock absorbers should immediately return the reservoir to its original position.
 In some cases, you can fix the washing machine yourself without calling a technician. For example, repairing the shock absorbers of a Samsung washing machine is easy to do yourself. The design of dampers is quite simple, so racks can often be restored.
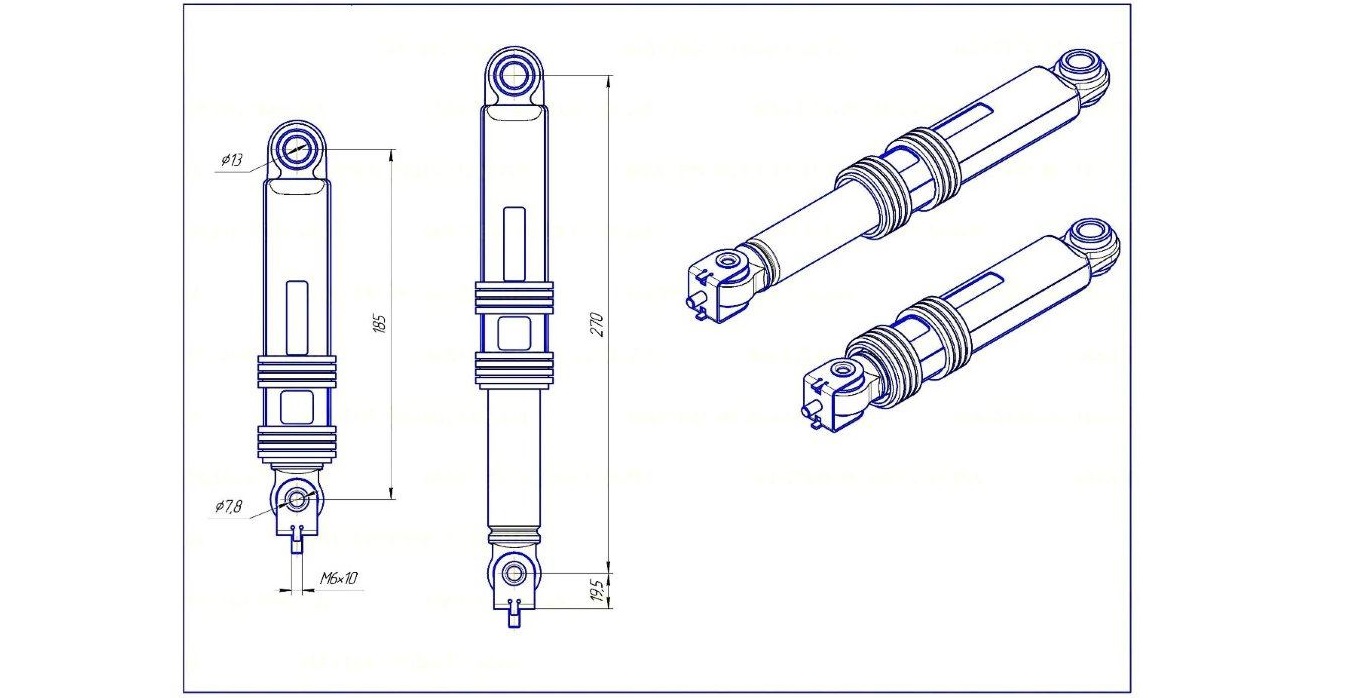


Add a comment