How to repair a pressure switch?
 The pressure switch is a part of the washing machine, located in most models on the side wall, just below the top cover. Its appearance is similar to a puck. Replacing an element is not difficult, and not all technicians can perform high-quality repairs to the pressure switch. What are the most common part malfunctions? Is there a chance to fix them at home without turning to the services of specialists?
Typical problems
A special code signaling an error helps to identify faulty pressure switches in washing machines equipped with a display. It appears on the control panel. There are other signs that indicate problems. Characteristic “symptoms” allow one to suspect a breakdown.
- Repeating wash cycle. A faulty mechanism designed to control the water level does not allow the equipment to function correctly. In such cases, experts advise disconnecting the machine from the electrical network and replacing the pressure switch with a new one.
- Failure to draw water when the device is turned on. The program often does not start due to the automatic execution of the dry wash mode or if the contact “sticks” in the “full” position.
- A burning smell appears when the drum is empty. This also serves as a reason to check the serviceability of the pressure switch and pump. The washing machine is capable of automatically turning on the program and the operation of the heating element. But if there is no liquid, the fuse of the heating device starts.
- Remaining water in the drum after completing a full wash cycle. It often results from a breakdown of the sensor that controls the water level.Sometimes the waste liquid is not completely drained from the machine, while at the same time fresh water enters the drum.
In addition to these signs, poor quality washing may also indicate problems. The laundry may remain dirty due to the fact that an insufficient amount of liquid is collected in the tank, and the pressure switch setting is incorrect. To eliminate a sensor malfunction, just turn the special adjusting screw and tighten the spring. Let's take a closer look at how to do this correctly.
Checking and adjusting the sensor
Before you begin to evaluate the performance of the pressure switch and start repairing it yourself, you should check whether the warranty period for the washing machine has expired. For most brands it does not exceed 12 months. If the warranty remains in force, then it is better to avoid independent intervention and contact a specialized center. In other cases, it is possible to repair the water level sensor on your own. To do this you need:
- disconnect the washing machine from the power supply;
- Unscrew the two small screws on the back wall of the case that hold the top panel. Remove it;
Important! The pressure switch is located on one of the walls of the machine body.
- remove the connector and release the screw;
- remove the hanging sensor;
- Unscrew the clamp and remove the device using pliers.
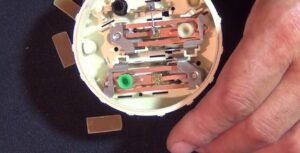
After completing these steps, you can check the adjustment of the pressure switch and evaluate the correctness of its operation. To do this, you need to take a piece of rubber tube and connect it to the sensor. The test method is simple: blow into the tube and observe whether a clicking sound is heard inside the device when the pressure changes. If there is no clicking, the pressure switch is working.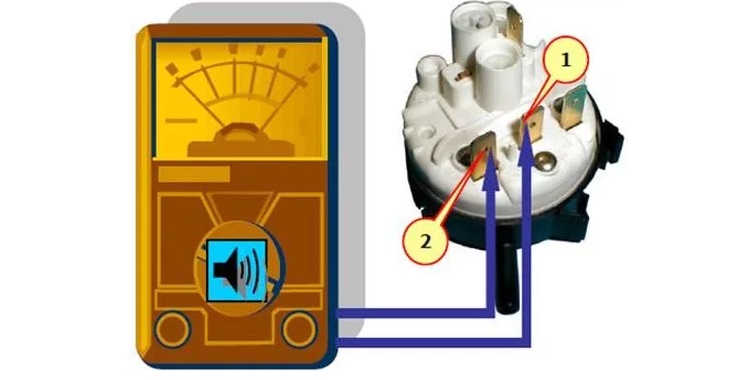
The water level sensor is also checked in another way, hardware. To do this, take a multimeter. Then do the following:
- prepare a device for measuring resistance;
- the probes are placed on the corresponding contacts of the pressure switch;
- increase the pressure in the air tube until a certain relay contact is activated.
If the contact is triggered and the resistance value does not change, the sensor is faulty and a new one must be installed. Experts advise: even if the listed verification methods indicate the absence of breakdowns, it makes sense to conduct an additional inspection of the mechanisms. To do this, you need to attach a tube to the pressure switch and evaluate its tightness.
Note! Setting up the sensor at home is possible only when it is necessary to increase or decrease the amount of liquid in the drum. To do this, it is enough to adjust the operating force of the pressure switch.
Before you begin setting up, you should disconnect the washing machine from the power supply. Then you need to remove the cover and disconnect the connector from the relay. The sensor is equipped with 3 adjusting screws. The one that is designed to control the primary force is located in the center of the relay housing in most models. The screw is often made for a Phillips screwdriver. You should start setting up the sensor only when the tank is empty. This work is carried out in several stages, constantly performing intermediate checks of the water level:
- turn the key - perform assembly;
- connect - conduct testing.
These actions are carried out several times, and in each case the screw is turned no more than half a turn. To independently check, change the pressure switch or adjust it, you must have at least basic theoretical knowledge.If you have no experience, it makes sense to turn to a professional master.
Interesting:


1 reader comment
Add a comment
Categories
Washing machine repair


For buyers


For users


Dishwasher


It’s not shabby when you write: “... having blown into the tube, you need to observe whether you can hear a clicking sound inside the device when the pressure changes. If there is no clicking, the pressure switch is working.”
Quite the opposite! 🙂