The Ariston washing machine fills and immediately drains water
Sometimes users of Ariston washing machines can observe a strange picture - the machine fills with water and immediately drains it into the sewer. This process can continue indefinitely until the device is de-energized. After restarting, the incident usually repeats itself. What is the cause of the problem and how can I get my “home assistant” back into operation? Let's look into the nuances.
What could have happened?
It’s very easy to notice that the washing machine takes in and immediately drains water. Firstly, the machine does not proceed to the next washing stage. Secondly, you will hear the constant murmur of liquid flowing into the pipe. This malfunction can be caused by:
improperly positioned drain hose;
incorrectly functioning pressure switch;
broken heating element;
damaged drain valve;
failed control module.
If you connect the drain hose below the required level, the water will leave the tank by gravity. Therefore, it is important to position the sleeve as indicated in the instructions, under a certain bend. The outlet point should be at a distance of 60-80 cm from the floor.
A faulty level sensor will transmit incorrect information to the “brain”. So, when the tank is empty, the pressure switch will report an overflow and the drain will start. Therefore, water will accumulate and immediately go down the drain.
The electronic unit controls all processes. If the control module breaks down, the SMA begins to behave incorrectly and may well collect and immediately drain water. In this case, in-depth diagnostics of the board will be required.
According to statistics, it is on Aristons that most often endless drainage and collection of water is observed due to improper connection of the drainage hose or a faulty heating element.
We'll tell you what to do if the machine doesn't wash. Let's figure out where to start diagnosing the Ariston washing machine. The problem with constant supply and drainage of water must be solved immediately, without delay.
We test the heating element with our own hands
When the machine fills and immediately drains water, rule out a problem with the drainage hose. If you connect the drain hose incorrectly, the liquid will begin to flow out by gravity. The pressure switch will again give the command to fill the tank and the process will continue indefinitely.
You can see recommendations for connecting the drain hose in the instructions for your Ariston washing machine. It should be at a level of 60-80 cm from the floor. Also, the sleeve is located under a certain bend.
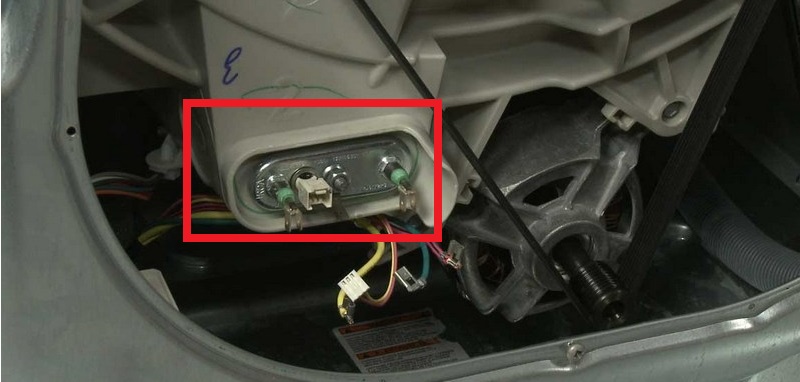
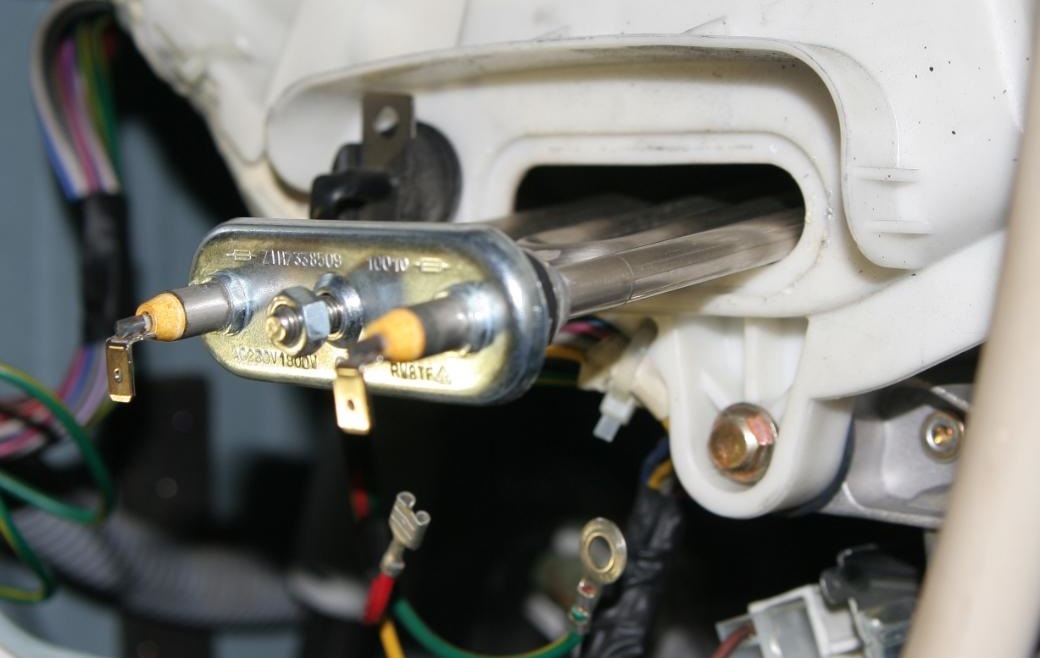
No matter how strange it may be, on Ariston washing machines a broken heating element can provoke uncontrolled draining and collection of water. And very often the cause is the heater. To check the tubular element you will need a special device - a multimeter. The algorithm of actions will be as follows:
turn off the power to the machine;
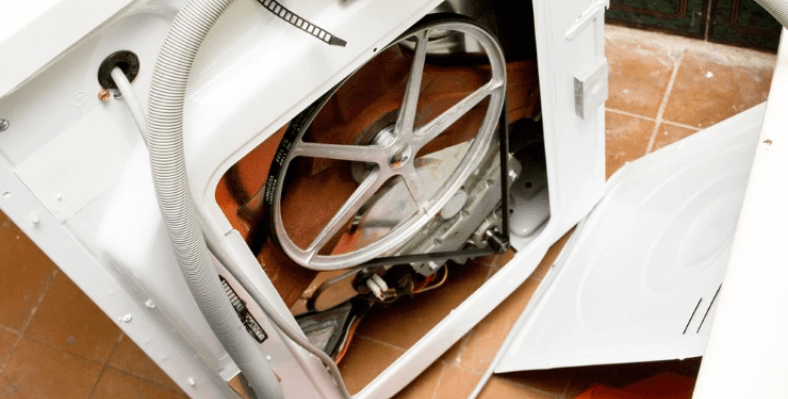
Unscrew the screws holding the back panel of the washing machine, move the wall to the side;
find the heating element - it is located in the lower corner;
remove the wiring from the heater;
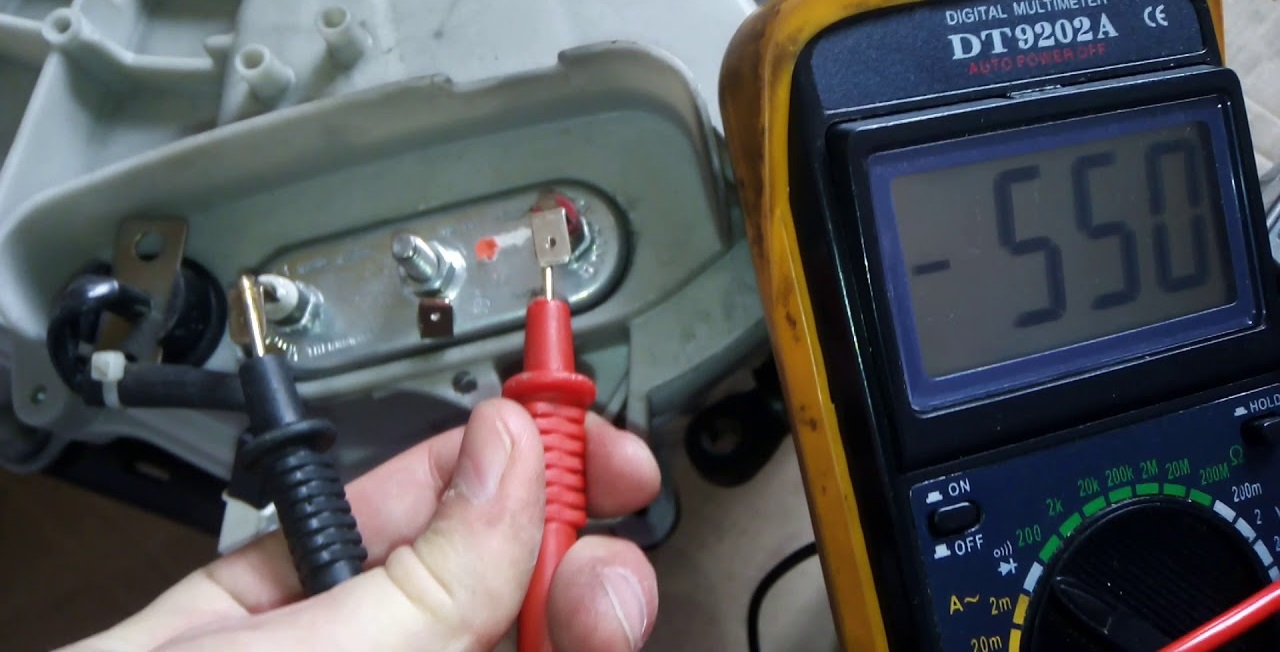
switch the multimeter to resistance measurement mode by setting the selector to the 200 Ohm position;
attach the multimeter probes to the contacts of the heating element;
measure the resistance.
Take a photo of the diagram for connecting the wires to the contacts of the heating element so as not to make mistakes when reassembling.
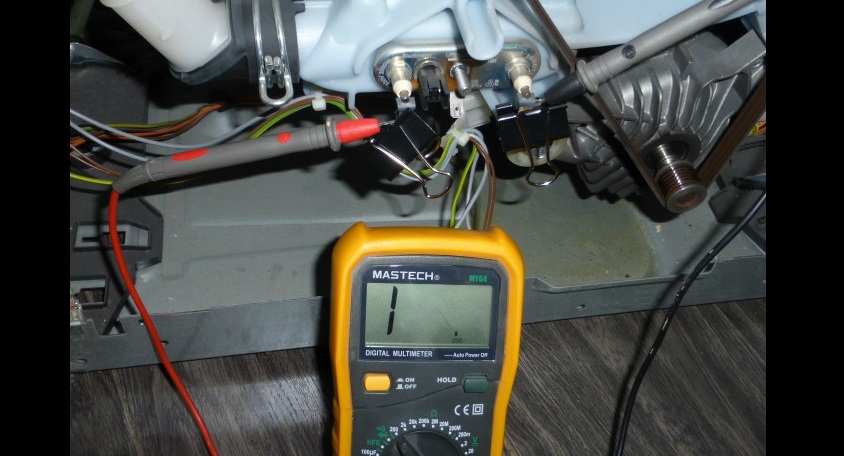
Normally, readings should be in the range of 20-60 ohms. After this, the heating element is checked for breakdown.To do this, you need to set the maximum permissible resistance value (in megaohms) on the multimeter. After this, one probe of the tester must be attached to the body of the heating element, and the other one must be brought in turn to each contact of the part.
When a breakdown occurs, a number other than one will be displayed on the multimeter screen. If a malfunction is detected, you will have to replace the heating element. The heating element cannot be repaired.
If measurements with a multimeter indicate that the element is in full working order, but the machine still leaves you without washing, try starting the machine after first turning off the heater. Most Ariston models work quietly without a heating element. Perhaps in this case the “home assistant” will quickly fill up and the drum will begin to rotate.
If the machine starts washing without a heating element, you will have to change the tubular element. When purchasing components, pay attention to the model of the Ariston washing machine and the power of the old heater. The replacement can be done independently, without the help of a specialist.
Troubleshooting
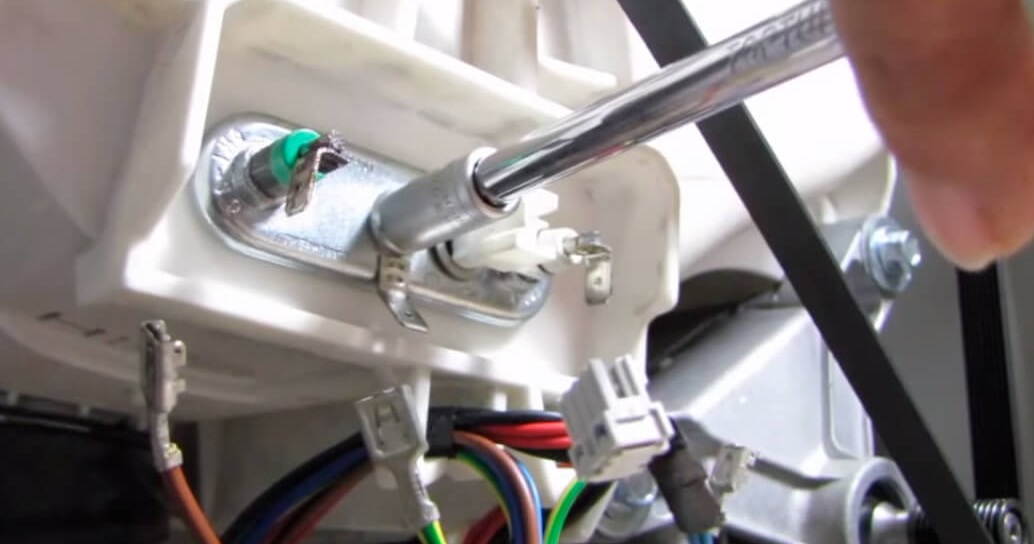
First of all, you will need to dismantle the old heater. It's already accessible, so loosen the center nut - a socket wrench will work for this. The screw must not be unscrewed completely, otherwise it will be difficult to remove the heating element.
Loosen the nut and press the bolt inward. Due to this, the second half of the heating element will shift slightly and the clamp of the black rubber band will be released. Next, you need to take a pair of slotted screwdrivers and use them to pull the heating element cover out of the tank.
Pulling out the heating element will not be easy. On one side, the heating element holds the tank mount, on the other - a rubber seal. Therefore, during the dismantling process you will have to make efforts.
After removing the element, all that remains is to remove the temperature sensor in order to install it on the new heater. The thermostat is a very reliable element and breaks down extremely rarely. By analogy, connect the thermistor to a working heating element.
Then you can begin installing the new tubular element. Clean the seat from scale and debris, insert the heating element into the “socket”. Next, secure it with a bolt and nut. Do not overdo it when tightening - a too-tightened heater may jump out of the tank during the washing process.
Afterwards, all that remains is to connect the wiring to the heater contacts. Refer to the photo taken during disassembly so as not to confuse the location of the chips. When finished, secure the back wall of the machine body. Next, run a test wash. The problem of uncontrolled collection and drainage of water must be resolved.
 Sometimes users of Ariston washing machines can observe a strange picture - the machine fills with water and immediately drains it into the sewer. This process can continue indefinitely until the device is de-energized. After restarting, the incident usually repeats itself. What is the cause of the problem and how can I get my “home assistant” back into operation? Let's look into the nuances.
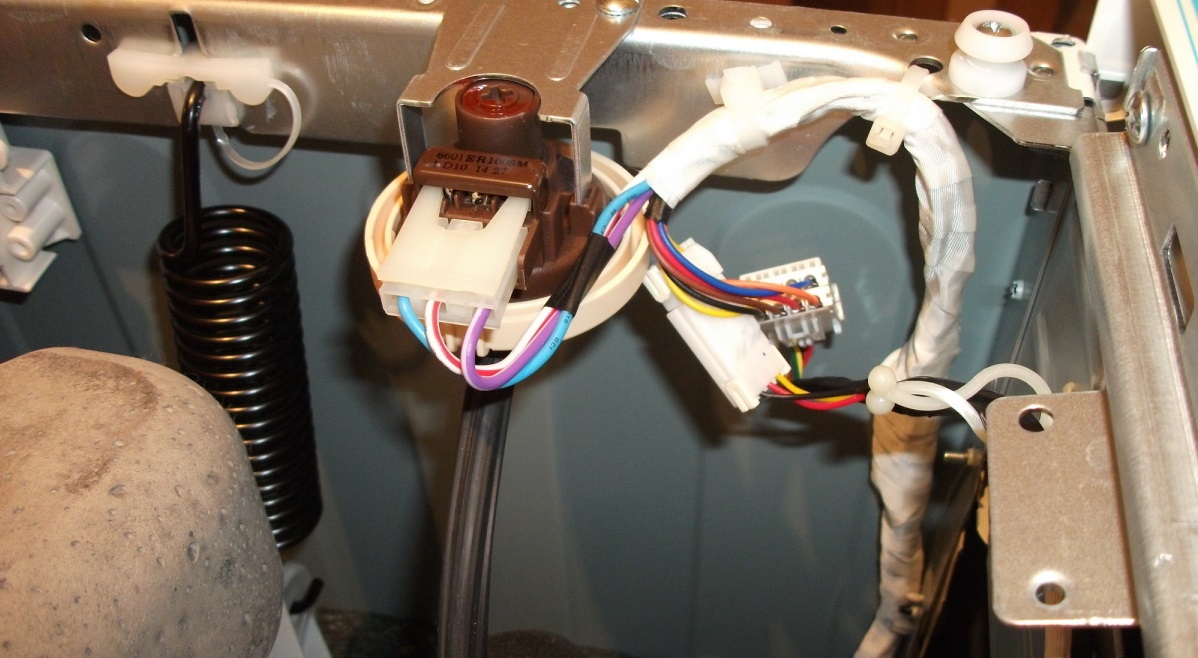


Add a comment