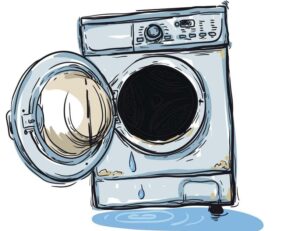
Washing machine leaks when rinsing
 For rinsing, an automatic machine draws much more water than for the main wash. Therefore, it is precisely at this stage that the likelihood of a leak increases. If you notice a puddle under the washing machine, you should act immediately.
Of course, if your washing machine is leaking during the rinse cycle, it is likely that some water is leaking out during other stages of the program. It’s just that the leak is especially obvious when the tank is filled to the upper limit. Let's figure out what could happen to the “home assistant” and how to fix the problem.
Where to start checking?
According to the experience of our technicians, leaks are usually caused by loose hose connections. Therefore, first of all, it is worth inspecting the joints. If the machine is leaking from below, you should pay attention to the drain pipe running from the tank to the pump.
When the washing machine is leaking from above, you will have to check the dispenser pipe. In addition, the powder receptacle itself may be the cause of the problem. Inspect the cuvette; it may be very dirty, so water cannot flow freely into the tank and overflows over the edges of the tray. If the detergent container is cracked, it will need to be replaced.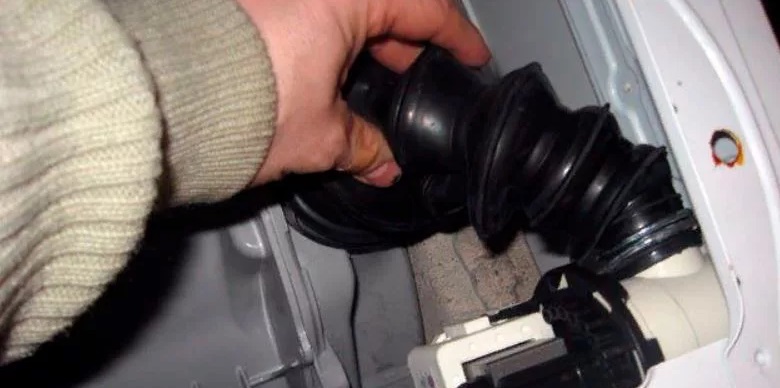
Inlet hose
To fix the machine, you need to identify the cause of the leak. What to do next? The next thing to inspect is the inlet hose. Check it for defects, carefully inspect the place where it is connected to the washing machine body. The inlet hose of an automatic machine may leak due to:
- wear of the rubber seal at the joints of the hose;
- violation of connections of components inside the tube;
- squeezing or kinking the hose.
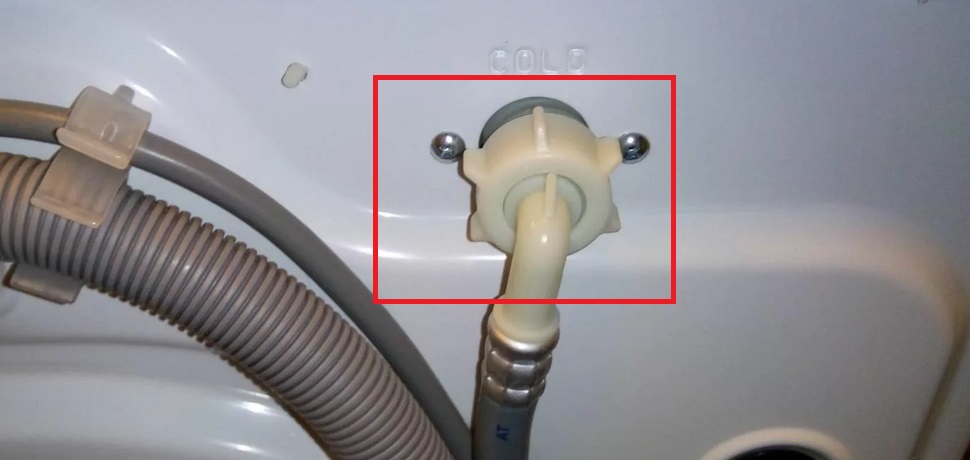
If drops of water are actually found on the surface of the inlet hose, the repair procedure will depend on the cause of the leak. You may have to change the seal at the joints, straighten out strong bends, or buy a new corrugation.
"Trash bin" lets water through
Leaks are often caused by a clogged drain filter. It is recommended to clean the trash bin regularly, approximately once every 2-3 months. After washing fluffy bedspreads, additional washing of the filter element is necessary.
The garbage filter is located at the bottom of the washing machine. To gain access to the element, you need to remove the decorative trim panel or open the technical hatch. The further algorithm of actions will be as follows:
- cover the floor around the SMA with dry rags;
- slightly tilt the body of the machine back, place a container under the washing machine in the area where the “trash bin” is located;
- Unscrew the filter half a turn, wait until the water drains;
- clean the filter element from debris;
- Shine a flashlight into the hole formed; if there is debris there, take it out, wipe the walls with a wet rag.
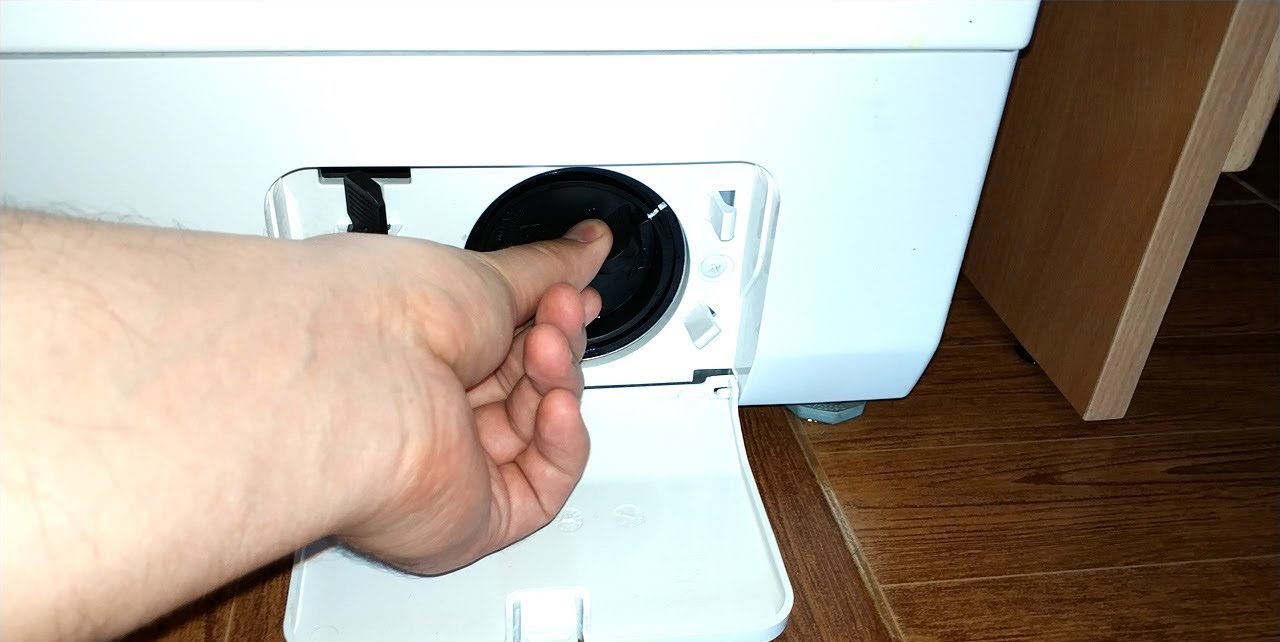
Then you can screw the filter back into place. You need to insert the “plug” evenly, otherwise the machine will leak again. Having placed the “trash can”, run a test wash and observe the behavior of the machine.
Powder shelf
After several years of using an automatic machine, its powder receptacle may become loose. This is another common cause of leaks. To understand whether this is causing the breakdown, watch how the washing machine draws water.
A water stream under high pressure enters the powder receiver, washing out the detergent. If the cuvette is loose, splashes may enter the opening between the tray and the body and flow out.
It may also be due to severe contamination of the detergent container. If you do not periodically clean the cuvette, a thick layer of plaque forms on the walls, and the holes intended for supplying water to the washing machine become clogged. The stream will enter the machine and partially overflow over the edges of the tray.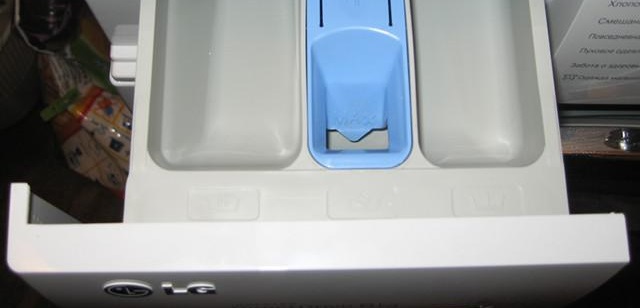
To fix the problem, you need to clean the walls of the powder receptacle and the holes through which water is poured into the tank. If the cuvette is cracked or loose, it will have to be replaced. Minor damage can be covered with moisture-resistant sealant.
Cuff, tube or pump
Leaks often result from damage to the pipes or loosening of their fixation. To fix the problem, you may need to seal the joints, tighten the clamps, or replace the hoses altogether. You can do the job yourself.
If the machine is leaking from below, check the drain pipe and the inlet valve or dispenser tubes from above.
If water leaks out from under the door during washing, inspect the hatch seal. Minor cracks in the seal can be closed with a special patch or treated with water-repellent glue. When the damage is significant, the rubber gasket will have to be replaced.
It is necessary to remove the outer and inner clamps holding the seal and remove the damaged gasket. Next, a new cuff is put in place. Please note that the drain holes on the elastic should be located at the bottom.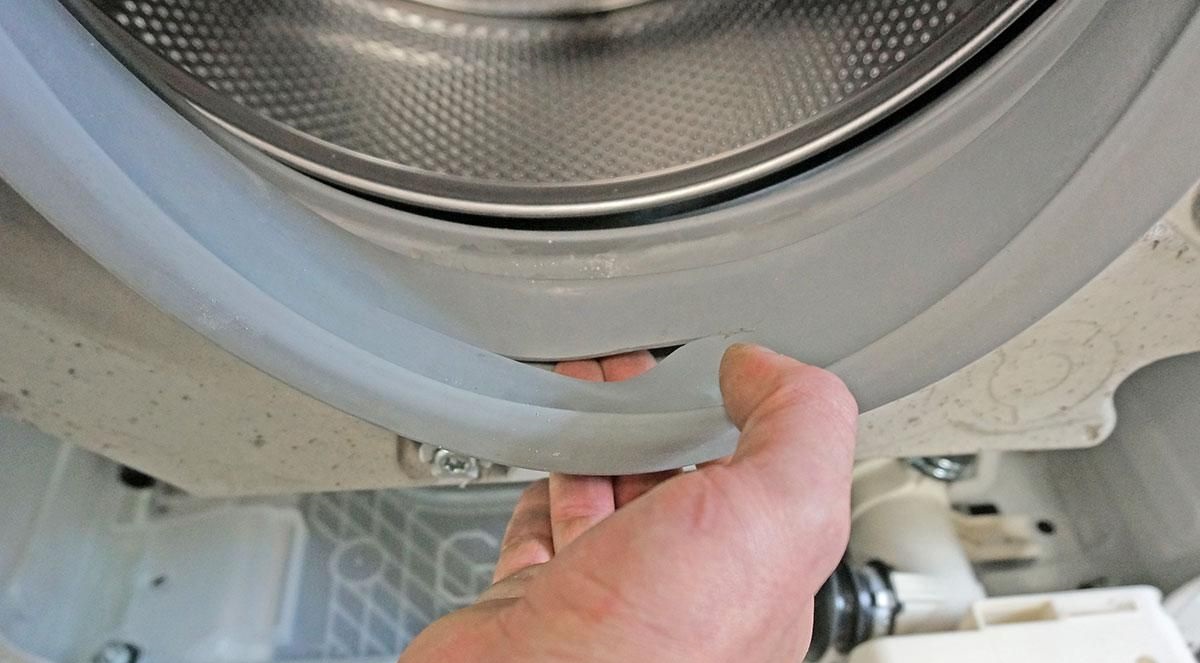
A failed drain pump can cause a leak. An uncharacteristic humming sound from the machine during the draining process will indicate a pump breakdown. It is not practical to repair the pumping station; it is much easier to buy and install a new unit.
You can replace the drain pump yourself.To do this, you need to turn off the power to the washing machine, drain the remaining water through the garbage filter and lay the machine on its side. The easiest way to get to the pump is through the bottom.
Having found the pump, reset the wiring connected to it and unhook the connected pipes. Then unscrew the fixing bolt, remove the element and replace the working pump. Connecting the hoses and contacts is done in the reverse order.
Tank, bearings, seals
When the machine leaks from below, the reason may be damage to the tank. It is best to replace the unit immediately. If this is not possible, it is permissible to solder the crack. Before starting work, the area to be treated should be cleaned and degreased.
When the area is degreased, you need to “cover up” the crack with a soldering iron. The seams need to be evened out as much as possible. Check how well the work is done - pour hot water over the area. There should be no leakage on the back of the tank.
If the tank is cracked at the bottom, the soldering is additionally reinforced.
A grinding noise made by the machine will tell you that the bearings are faulty. Some models are equipped with non-separable tanks; in order to get to the bearing assembly, the tanks have to be cut. However, in most washing machines, the tank is easily divided into two parts and can be put back together without any problems.
To remove the tank, you need to disassemble the washing machine almost completely. The general algorithm of actions is as follows:
- Turn off the power to the machine, turn off the water supply tap;
- remove the powder receptacle;
- remove the top and back panels of the case;
- reset the drive belt;
- disconnect the control panel;
- remove the lower false panel;
- remove the counterweight blocks;
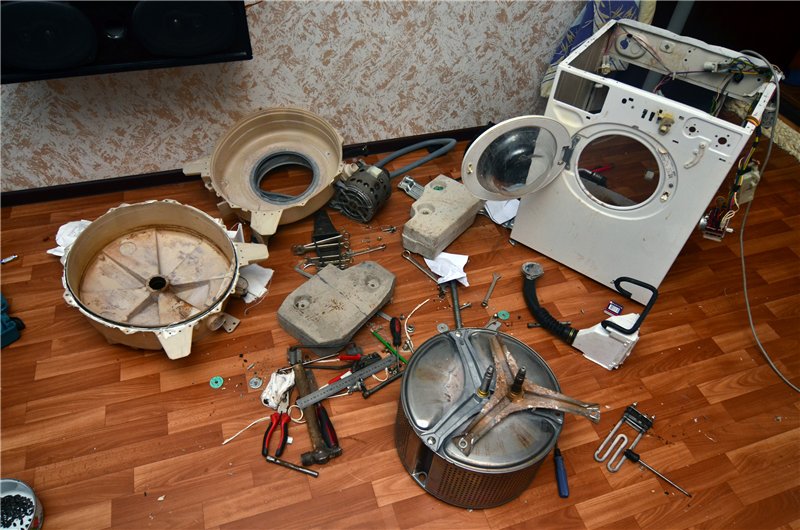
- insert the hatch cuff into the drum and remove the front wall of the housing;
- dismantle the door sealing rubber by removing the pair of clamps securing it;
- disconnect all wiring from the tank, disconnect the pipes connected to it;
- pull out the tank, having dealt with the shock absorbers.
If the tank is collapsible, as, for example, in LG washing machines, then you should unscrew the fasteners and divide the tank into two parts. Next, the oil seal is removed and the bearings are knocked out one by one. The seat is cleaned with a damp cloth.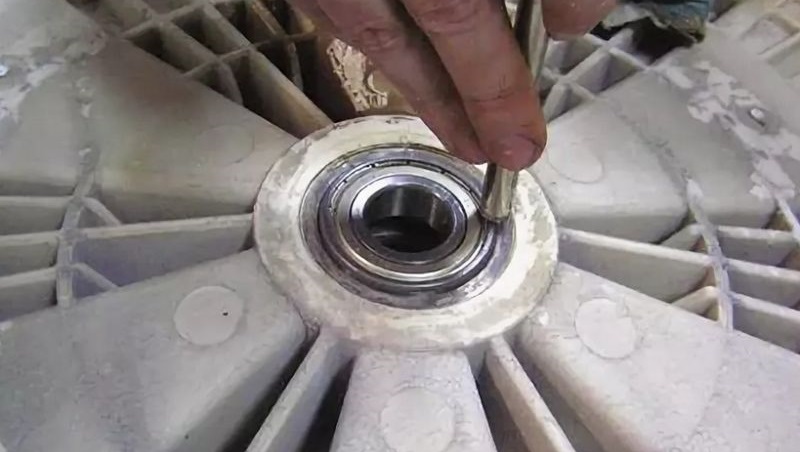
New bearings are lubricated and pressed back in. An oil seal is placed on top. During reassembly, it is recommended to treat the junction of the forecastle tanks with silicone moisture-resistant sealant.
The following “symptoms” will indicate a malfunction of the bearing assembly and wear of the seal:
- loud noise when the automatic machine is operating;
- excessive vibration when the drum rotates;
- leaks in the lower, rear part of the tank.
If the washing machine is equipped with a non-separable tank, it will be quite difficult to replace the bearings and seal yourself.
When the washing machine starts to leak, you need to carry out diagnostics as soon as possible. If you take care of the machine in time, it will be enough to clean the filter or cuvette, tighten the clamps more tightly or replace the pipes. Ignoring a problem for a long time can lead to more serious repairs.
Interesting:


Reader comments
- Share your opinion - leave a comment
Categories
Washing machine repair


For buyers


For users


Dishwasher


Add a comment