Lifespan of a Samsung washing machine
 Today, many people confuse the service life of a Samsung washing machine with the manufacturer's warranty period. From the outside, these concepts may seem similar, but in reality they have nothing in common. Service life is the estimated time that the equipment should operate provided that all operating rules are followed. The warranty period is the time during which the manufacturer guarantees free service and repair of the product if it breaks through no fault of the buyer. Let's look at the numbers - how many years, on average, the equipment of the South Korean brand serves users.
How many years have Samsung machines been in service?
On average, experts note that the service life of Samsung washing machines is approximately 8-10 years. But what is much more important is that this figure can become smaller or larger, which directly depends on the user’s actions. This list includes the activity of using equipment, the quality of household chemicals used, the level of hardness of tap water, the absence of defects in production, as well as the assembly features of the model.
According to GOST 8051-83 standards, the average service life of a washing machine should be at least 15 years, but not every device can “boast” of this.
Of course, the service life is most influenced by how the user uses the “home assistant”. If the owner of the device constantly violates standard operating rules, does not monitor the overload of the washing machine drum and does not take care of the unit after each operating cycle, then the machine will break down much earlier.
Extend service life
If you treat your “home assistant” correctly, regularly carry out basic diagnostics at home, and also repair it in a timely manner, then its service life can even exceed the 15 years specified in GOST. First of all, you should follow the first rule of using SM - leave the equipment open after each working cycle so that an unpleasant odor along with mold does not appear inside. Also, do not forget to wipe the hatch door glass, detergent dispenser, rubber seal on the door and the drum surface dry after each wash. As for more serious procedures that should be carried out at least once a quarter, we recommend the following:
- first disconnect the machine from all communications;
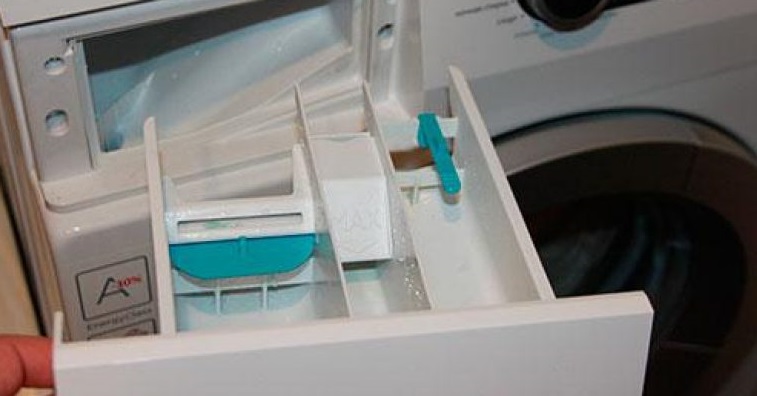
- Remove the household cleaning cuvette and wash it thoroughly in hot water and soap. If there is plaque or mold on the part, then the element will have to be kept in a vinegar solution for a short time, and then treated with a brush or sponge;
- disconnect the inlet hose from the washing machine, then remove the filter mesh, which should be rinsed in hot water to remove scale and all contaminants;
- get to the drain filter, which is installed in the lower right corner of the washer, hidden by a decorative panel. Before dismantling, you need to place a container for water under the washing machine, and also cover the floors with rags or towels - this is necessary because after you unscrew the drain filter plug, all the water from the system will quickly drain onto the floor. Wash the filter and the walls of the hole where it is installed;
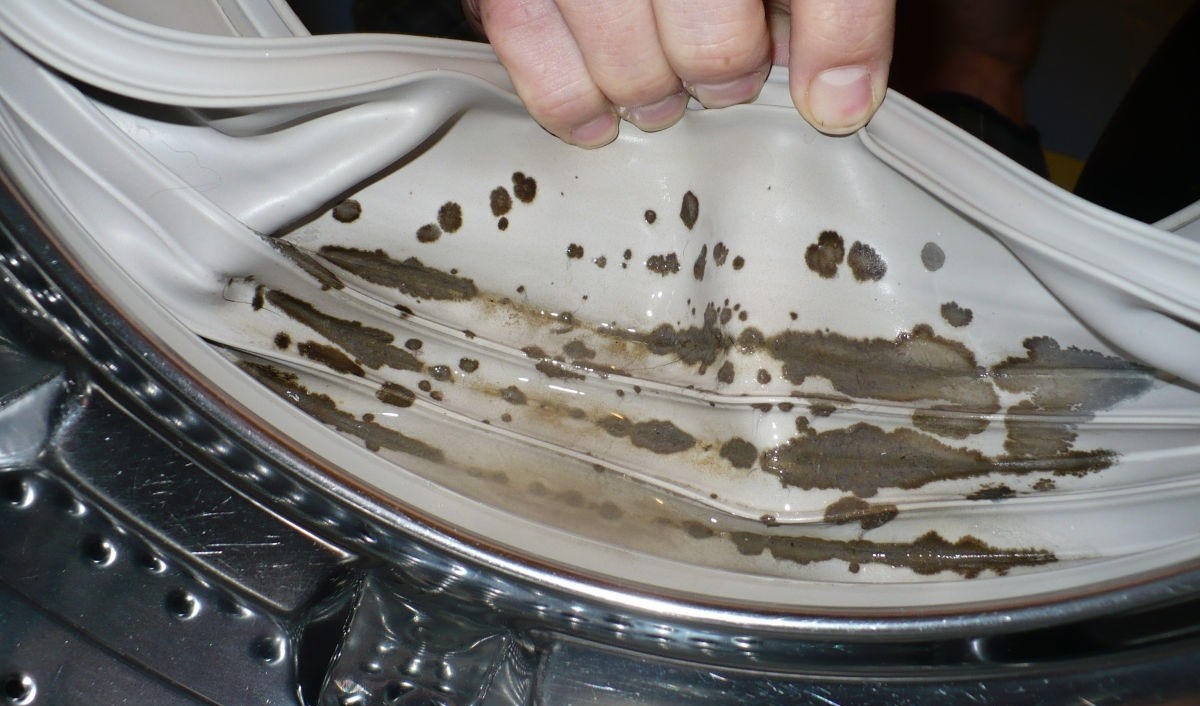
- Carefully examine the drum seal for cracks and mold. If damage is found, the element will have to be replaced;
- Turn the drum with your own hands - it should rotate without obvious obstacles, but with slight tension. It is very important during the process to listen to the sounds that the container makes - if there is a creaking or grinding sound, then there may be a serious problem with the drum;
- Remove the drain hose and touch it to make sure there are no cracks or blockages inside.
At first glance, the list may seem quite voluminous, but all actions need to be completed once every few months. Believe me, such diagnostics will not take you much time.
Notice problems early
In a situation where your “home assistant” has been serving you for more than one year, you should monitor her much more carefully. This is due to the fact that it is at this time that something bad often happens to equipment, which is much easier to prevent than to restore later. Always listen for suspicious noises and excessive vibrations. If these anomalies appear, you will have to partially disassemble the equipment and check a number of its key components. To do this, follow the instructions exactly.
- Disconnect the equipment from all communications - unplug the cord from the outlet, turn off the water supply, turn off the drain and inlet hoses.
- Provide free access to all sides of the washer.
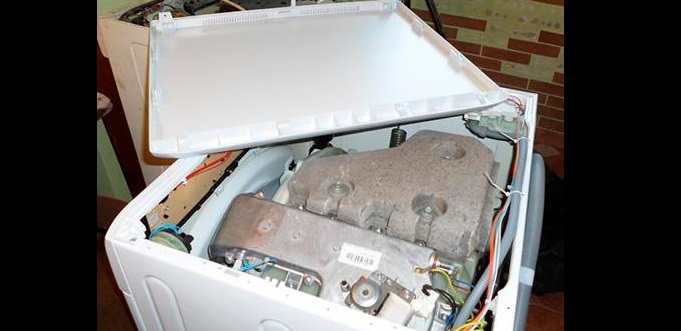
- Disconnect the top cover of the device by first unscrewing the bolts holding it.
- Detach the back panel of the device in the same way.
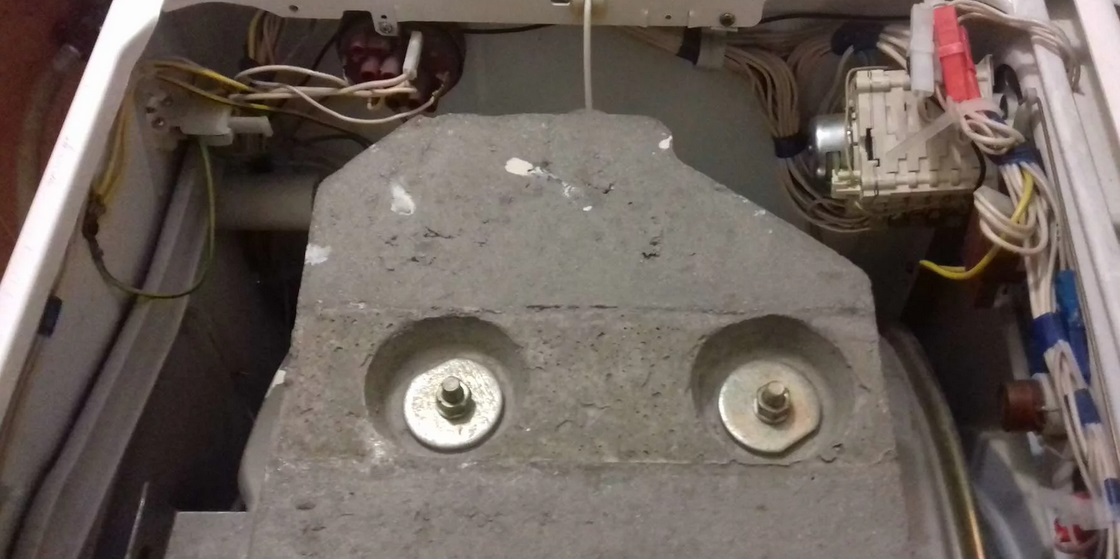
- Inspect the counterweights, which look like massive concrete blocks that provide stability to the machine during washing and spinning. These stones must be intact, without chips or cracks - otherwise they will have to be replaced. Additionally, evaluate how securely the blocks are secured with bolts and, if necessary, strengthen the fastenings.
- Assess the tension of the drive belt, which should not fly off. If this happens, it can be washed, dried and coated with pine rosin.
- Examine the dampers located at the bottom of the machine and if everything is in order, coat the springs with graphite lubricant.
- Remove the heating element by disconnecting the wiring and loosening the central nut. If it is covered with scale due to hard tap water, then soak the water heating element in a vinegar solution, and then remove all deposits with a brush.
Don’t be lazy to take a photo of connecting the wires to the heating element, so that later you will have an example of correct wiring at hand.
- Examine the integrity of the wires and sensors and replace damaged ones, if any.
- Check that the fill valve and the tubes that go from the dispenser to the tank are dry.
This completes the quarterly review. It is much better to spend a little time once a quarter on diagnostics at home, rather than then repair or replace damaged elements.
Interesting:


Reader comments
- Share your opinion - leave a comment
Categories
Washing machine repair


For buyers


For users


Dishwasher


Add a comment