Haier washing machine is leaking from below
 Typical failures of Haier washing machines include leakage. Sometimes it is a barely noticeable leak, in other cases it is obvious and threatening. One thing is clear - you cannot operate a leaking automatic machine; it is necessary to identify the problem area as soon as possible and fix the problem. Let's figure out where to start taking action.
Source of leak
If you see your Haier washing machine leaking from below, act immediately. Immediately turn off the power to the equipment. If there is a puddle under the appliance, remove the power cord from the socket carefully, without touching the water, so you will not receive an electric shock.
Try to remember exactly when the washer started leaking - this will make diagnosis easier.
To find the source of the leak, carefully inspect the machine. If drops drip from under the door, the cuff may be leaking. When water flows from the left, from above, the culprit may be the powder receptacle.
When the machine is leaking from below, the problem may be one of the cracked pipes or a damaged tank. It is important to conduct a thorough inspection, paying attention to all the nuances. If necessary, remove the back or side wall of the washer for a more complete and accurate diagnosis.
The progress of the repair will depend on the source of the leak. When the reason is a cuff or a cracked powder receptacle, you can change them yourself. If the problem is a damaged tank, you may need the help of a technician.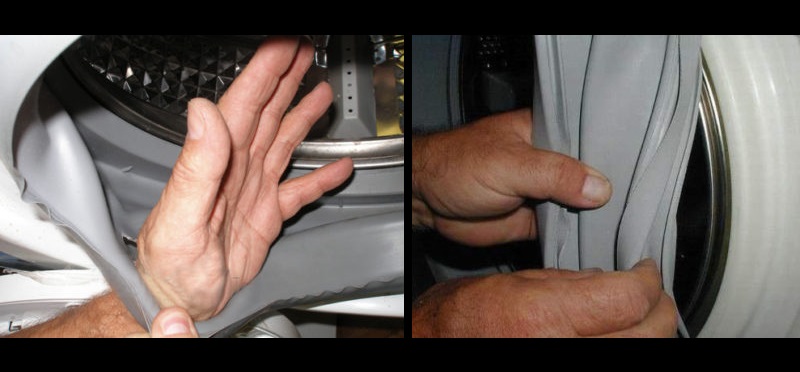
Typically Haier automatic machines leak due to:
- non-compliance by users with the rules for operating household appliances;
- using low-quality laundry detergents;
- factory defects;
- failure of some element of the SMA.
What to do when the machine is de-energized and inspected? If there are no visible signs indicating a problem, you will have to check each element one by one. It is recommended to start from simple to complex, for example, with a garbage filter.
Filter element or drain hose
A “lake” under the machine does not always indicate a breakdown of some part. Sometimes the reason for this is a simple user error. If you cleaned the dust filter a couple of days ago, make sure you put it back in place correctly. Check to see if the emergency drain hose is refilled. It is likely that it was the incorrect fixation of the elements that provoked the leak.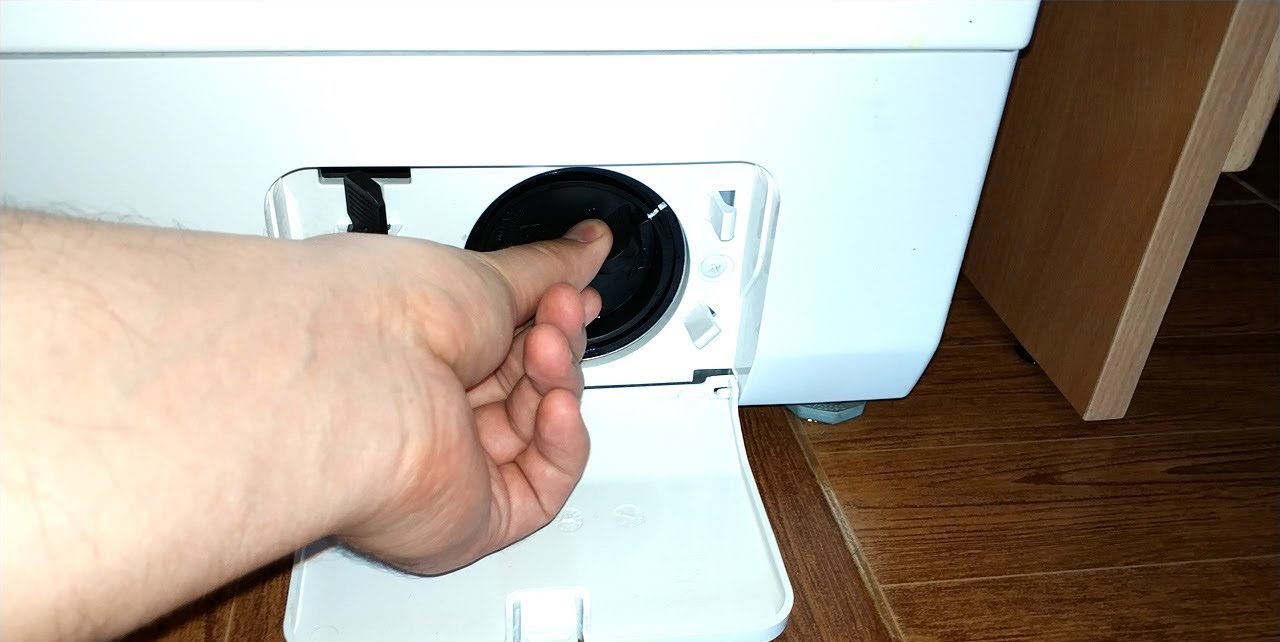
If everything is in order with the trash can, look under the machine. Perhaps the clamp securing the pipe to the pump has become loose or the fitting has cracked. The solution to the problem will be simple: either tighten the fasteners more tightly, or lubricate the cracks with waterproof sealant. If possible, it is better to immediately change the snail.
Powder box or tube
Even if water accumulates under the washer, the “root” of the leak may be at the top. Therefore, inspect the powder receptacle. If there is a lot of powder stuck to the walls of the dispenser, this may cause overflow. Water gets stuck in the tray, cannot “pass” into the tank and splashes out.
A cracked powder receptacle can also leak liquid. Remove the cuvette from the housing and inspect for defects. Then wipe the bottom dry and fill the container with water. If drops begin to appear from below, it means the tray is damaged.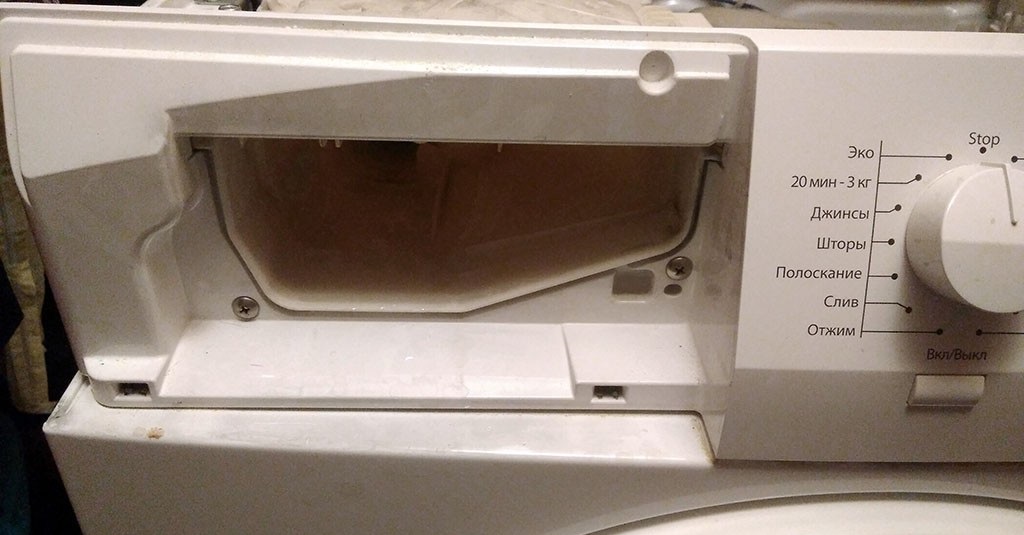
Another element that can cause a leak is the filler pipe. It often becomes unusable even on new Hayer washing machines, a year or two after purchasing the equipment.This is explained by low-quality components used in the production of equipment.
When the machine leaks precisely at the stage of drawing water into the system, concentrate your attention on the powder receiver and the filler pipe.
The inlet hose could also be the culprit. Firstly, after a while cracks appear on its surface, through which moisture begins to seep. Secondly, sometimes the clamps at the place where the tube is attached to the body become loose, and then water begins to come out from here.
In some cases, the problem lies in the drain pipe that goes from the tank to the pump. To confirm or refute this guess, look under the washer. A hose that is wet on the outside will have to be replaced.
Often the machine leaks in those places where the hoses are attached to the SMA elements. Experts recommend treating the areas connecting the pipes to other parts with moisture-resistant sealant. This will help prevent leaks.
Cuff or main container
The most unpleasant thing is if your Haier washing machine has a cracked tank. Usually it is not possible to “patch” such a hole, and you have to buy a new unit, which is not cheap. This defect can be caused by a foreign sharp object (nail, hairpin, bra wire) getting inside the system or frequent washing of shoes in a machine. A plastic container can also leak due to a manufacturing defect.
To inspect the tank, you will have to disassemble the body of the machine by removing the top and back panels. Sometimes it may be necessary to remove the front wall. Replacing a unit is a rather complicated job that is best left to a specialist.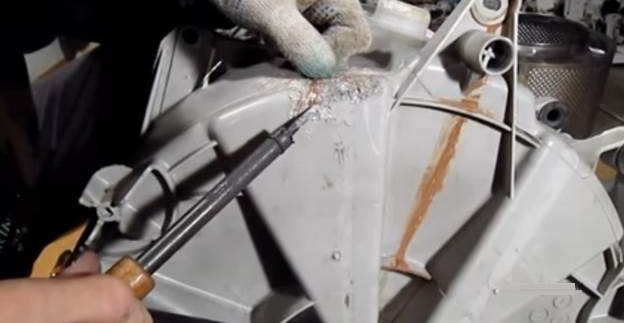
If a trickle comes from under the hatch door, it means the rubber cuff is leaking.When the defect is small, it is possible to treat the crack with sealant or cover it with a patch. If possible, it is advisable to immediately replace the seal with a new one.
To prevent damage to the cuff, be careful when loading and removing laundry from the drum. Do not forget sharp objects in your belongings (nails, keys, hairpins) that can pierce the seal.
How to find the problem and fix it yourself?
When an automatic machine is new and still under warranty, it is better not to attempt to repair it yourself. Call the service center - the technicians will perform diagnostics and identify the cause of the problem. If the free service period has expired, you can try to fix the washing machine yourself.
What to do if you discover a leak? Immediately turn off the power to the machine, without stepping into the water. If you cannot unplug the power cable from the socket without coming into contact with the liquid, turn off the lights in the room by turning off the circuit breaker on the panel.
The further algorithm of actions is as follows:
- close the shut-off valve;
- disconnect the washing machine from the water supply;
- if the machine did not have time to drain the water from the tank, do it yourself, through the emergency pipe or garbage filter;
- open the washer door and remove the clothes from the drum;
- start diagnostics.
Further actions will depend on the cause of the leak. If any hose or pipe is cracked, it is better to replace it. When it is not possible to buy components, it is permissible to install a patch or treat the hole with a moisture-resistant sealant.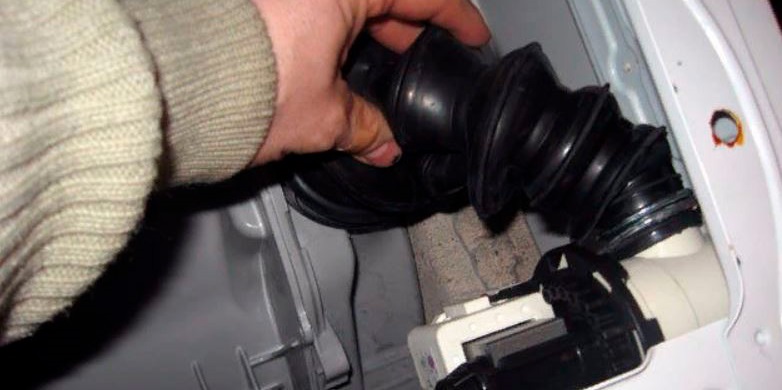
If the appliance is leaking from the left side, from the top, it is probably the detergent dispenser. Remove the dispenser from the housing and inspect. It happens that a lot of limescale accumulates on the walls of the cuvette, which will have to be washed off.Sometimes the powder receptacle holes become clogged and need to be cleaned as well.
If the dispenser is damaged, you will have to buy a new element. A powder receiver is selected for a specific AGR model. Sometimes a leak is caused by too much water pressure, and to eliminate it, it is enough to close the fill valve.
A stream of water flowing from under the hatch door usually indicates wear on the drum seal. Inspect the seal - if there are cracks or creases on the surface, it is advisable to replace it immediately. To remove the rubber band, you will need to remove the two clamps holding it.
If there is only one small crack on the gasket, you can limit yourself to a patch. It is also possible to treat the defect with a moisture-resistant sealant. Replacement of the rubber seal is necessary only if it is severely damaged.
If the unit begins to leak immediately after starting the cycle, check the inlet valve. To inspect the element, you must remove the top panel of the housing. If you notice damage, immediately replace the part; it is not advisable to repair it.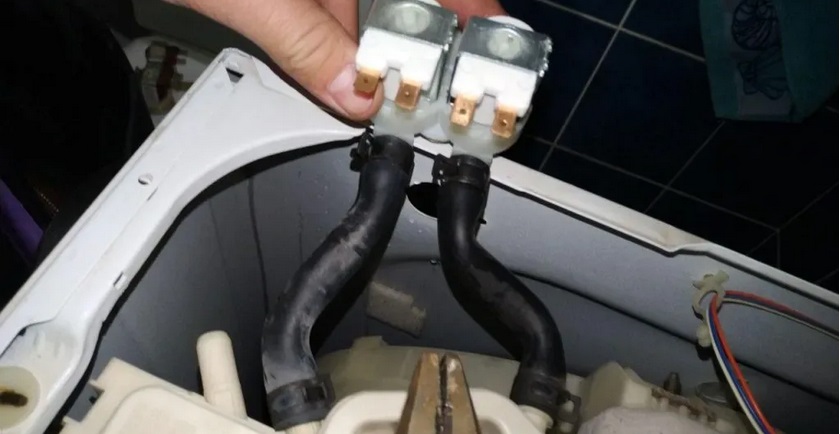
Sometimes a leak occurs due to a leaky inlet hose or a loose fitting. Inspect the place where the tube is attached to the machine. If smudges are visible there, then you should:
- disconnect the inlet hose from the washing machine;
- wipe the area dry;
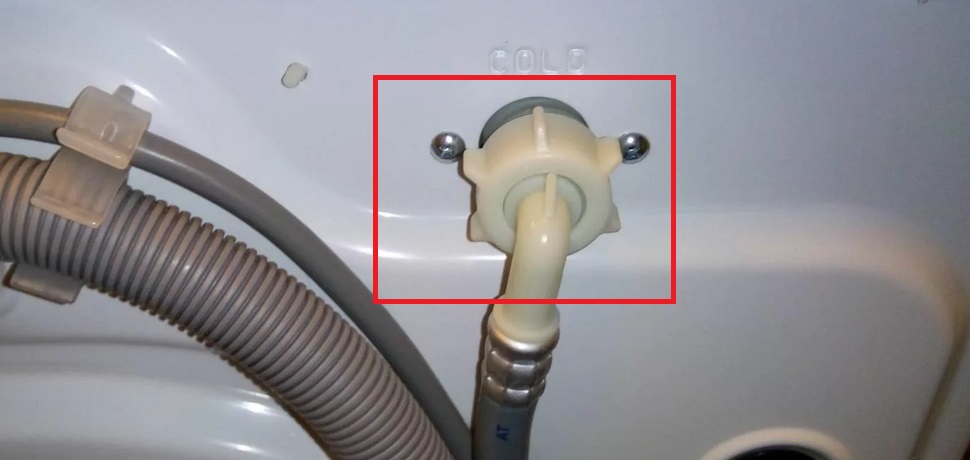
- clean off the glue present at the attachment point;
- dry the connection area;
- lubricate the end of the pipe with waterproof sealant or glue;
- connect the hose to its original location.
It happens that a leak occurs due to simple wear or damage to the inlet hose. In this case, the part needs to be replaced. It is not worth sealing or rewinding the pipe; this is unsafe, since water passes through it under strong pressure.
When the “culprit” of the problem is a cracked tank, you will have to completely disassemble the automatic machine. To dismantle the container you will need:
- remove the top housing cover;
- remove the powder receptacle;
- Unscrew the bolts holding the control panel and move it to the side;
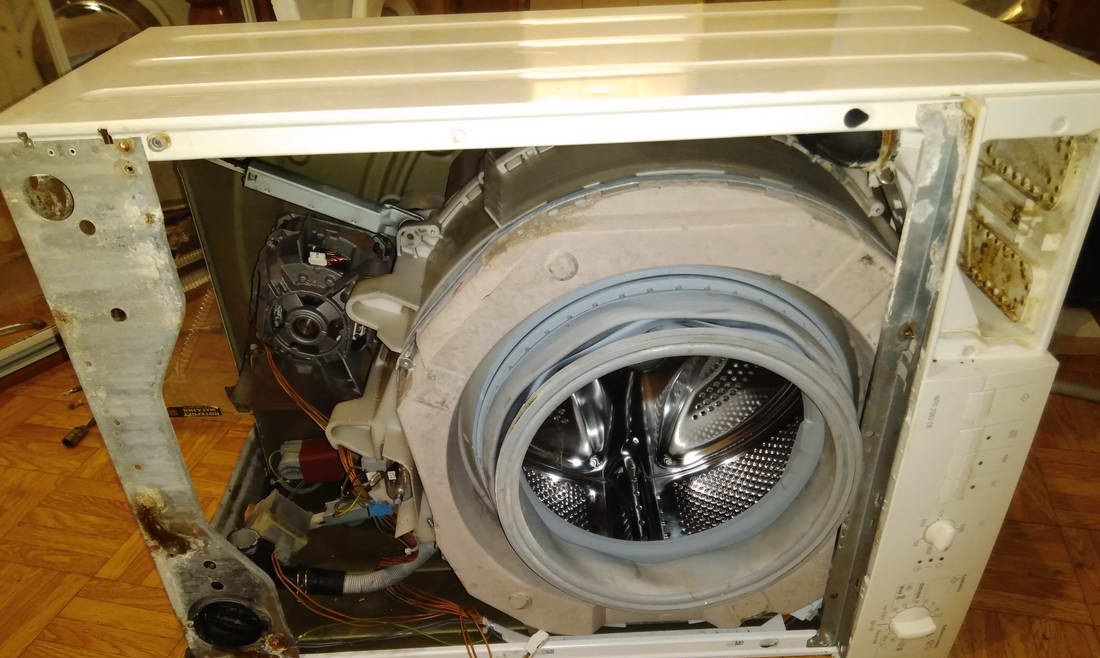
- remove the screws securing the back wall, remove the panel;
- remove the front wall of the case;
- remove one by one all the elements that interfere with the removal of the tank: drive belt, pressure switch, counterweights, heating element, motor, drain pipe, etc.;
- Having dealt with the shock absorbers, remove the tank from the car.
During dismantling, it is recommended to photograph or sketch wiring connection diagrams to the elements so as not to get confused during reassembly.
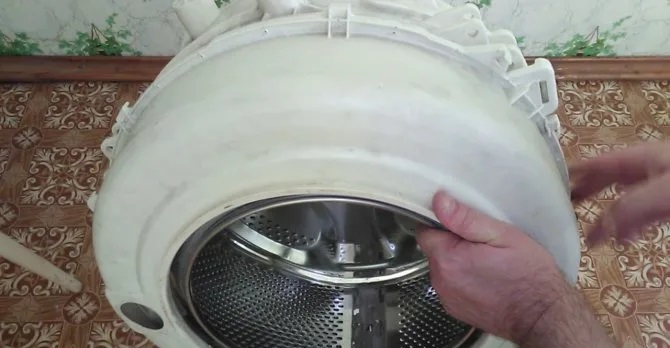
If the crack on the plastic tank is small, you can “seal” it with a soldering iron. You can see how this type of repair is performed on the Internet. When the hole is significant, it is better to replace the entire assembly.
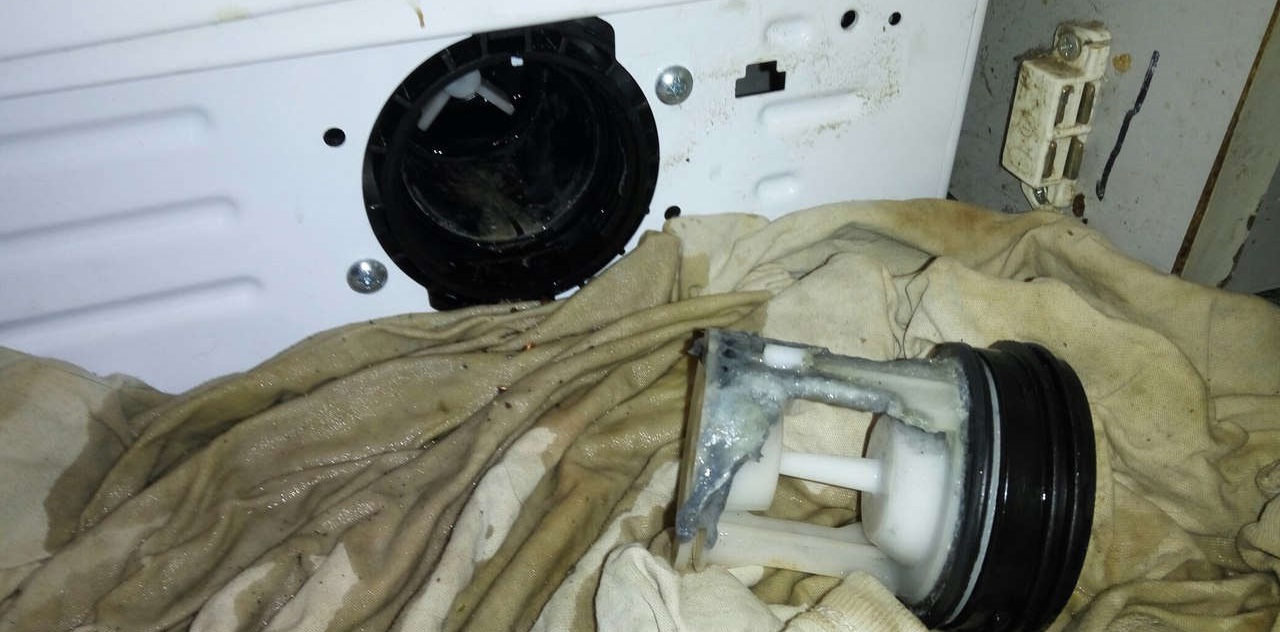
When a leak opens during the spin process, damage to the oil seal and drum bearings is likely. To get to the elements, you will have to halve the tank of the automatic machine. The parts cannot be repaired; it is necessary to dismantle the old ones and install new components.
Interesting:


Reader comments
- Share your opinion - leave a comment
Categories
Washing machine repair


For buyers


For users


Dishwasher


Add a comment