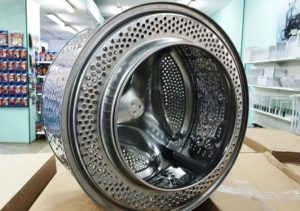
The drum is one of the main elements in the design of the “home assistant”. In case of certain malfunctions, it may be necessary to replace the drum in the LG washing machine. To dismantle the old part and install a new one, you will have to thoroughly study the structure of the machine in order to properly disassemble the equipment. The progress of the upcoming work will be described in detail below.
We collect tools and prepare the place
In order to remove the drum without problems, you need to thoroughly prepare for the upcoming work. The first step is to collect all the tools that will be needed in the process. To replace the drum with your own hands, you will need:
a medium-sized hammer (it is desirable that its striking part is copper or bronze);
multi-purpose lubricant WD-40 or similar spray;
pliers;
Phillips and slotted screwdrivers;
adjustable wrench;
universal silicone sealant;
set of horn heads;
metal pin (about 4 cm).
The presented set of tools is minimal. During the work, you may encounter other defects in the automatic machine, and other devices will be required to eliminate them.
It is very important to think in advance where exactly the washing machine will be disassembled. It’s good if you have the opportunity to change the drum in a garage or some utility room. If not, then disassembly can be done at home; you just need to drag the unit into a fairly spacious room. The floors are pre-covered with film or rags.
Removing the tank and drum
The first step is to disassemble the body of the washing machine to open access to its “insides”. Drum on automatic washing machines LG is located inside the tank, so in order to remove the metal container, you first need to remove the plastic one. The algorithm of actions when disassembling a machine with direct drive will be as follows:
de-energize the device;
disconnect the washing machine from the house utilities;
remove the top cover of the SMA housing by unscrewing a pair of bolts holding it, set the panel aside;
remove the detergent tray by pressing the central valve inside the cuvette;
Unscrew the bolts that secure the main control panel of the washing machine. Self-tapping screws are located around the perimeter of the panel;
carefully disconnect the wiring from the control panel (it is possible not to disconnect the wires, but then you will have to work carefully so as not to break the contacts);
Before removing the wires, it is recommended to take a photo so as not to confuse the connection diagram in the future.
Use a thin screwdriver to pry back the plastic clips holding the bottom panel in place. Remove it and put it aside;
Using a screwdriver, use a screwdriver to pry up the metal clamp holding the hatch cuff. After the fastening is loosened, remove the ring;
Use your hands to pull the outer part of the cuff out of the groove and tuck the seal inside the drum;
disconnect the wires from the sunroof locking device. Unscrew the bolts and remove the blocker sensor;
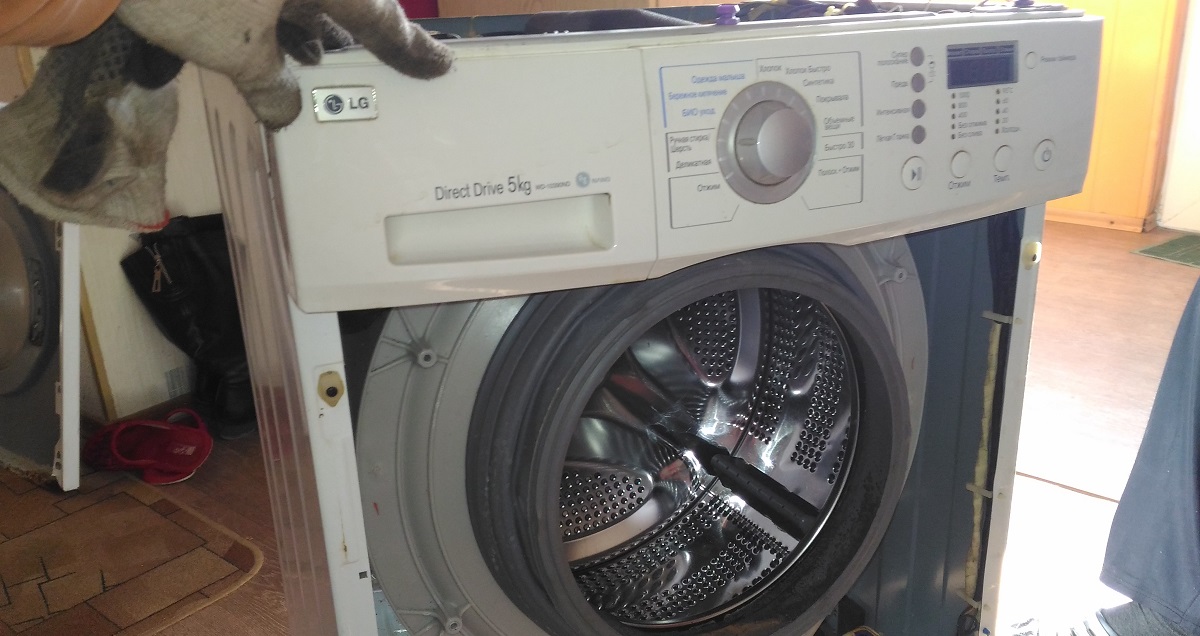
Unscrew the bolts securing the front panel of the machine. Once all the screws have been found and removed, remove the front wall of the case and set it aside;
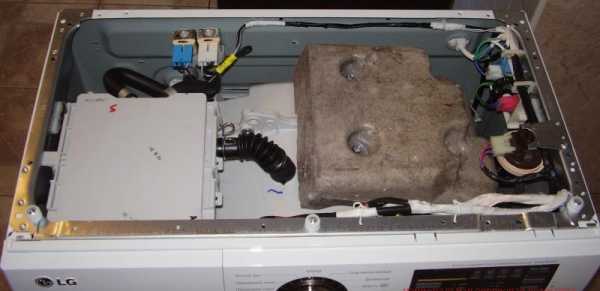
Unhook all fasteners from the tank. We are talking about clamps for the water intake valve, drain pipe, and pressure switch. It is also necessary to disconnect the wires from the heating element (it is generally advisable to remove the heating element), electric motor, thermostat, and drain pump.Be sure to remove counterweights and shock absorber fasteners;
make sure that all tubes going to the tank are disconnected;
Unscrew the screws securing the inverter motor and remove the motor.
Only after all the steps have been completed can you remove the tank. It is quite difficult to remove the plastic element alone, so it is better to invite an assistant. One will unhook the springs, and the second will lift the tank and pull it out of the body of the direct drive washing machine.
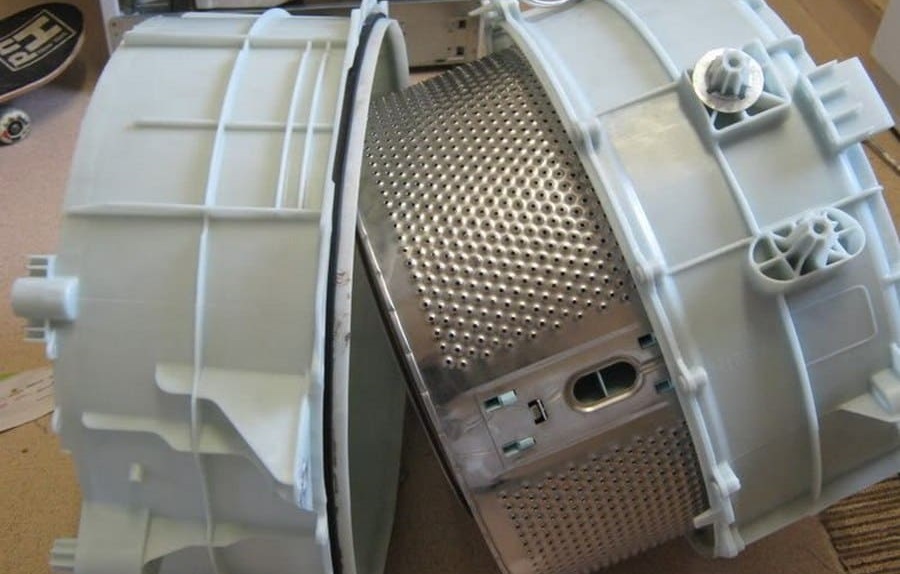
Let's disassemble the tank and change the drum
To remove the drum, you will have to disassemble the tank. If your washing machine model LG is equipped with a collapsible tank, the process is noticeably simplified: you just need to unscrew the bolts holding the two halves of the plastic container together.
After you have divided the tank into two parts, you should work on the central screw located in the middle of the inverter motor mounting area. The bolt must be unscrewed.
Before removing the screw, it is recommended to treat it with WD-40 aerosol lubricant, so the unscrewing procedure will go more smoothly.
After unscrewing the fastener, thoroughly lubricate the screw and screw it back into place. These actions are necessary in order to easily knock out the drum in the future without damaging the shaft. Next, take a metal pin prepared in advance and rest the rod with one end against the screwed in screw. Using a hammer, begin to gently hit the stud, thereby knocking out the shaft.
It is necessary to knock on the metal rod carefully so as not to damage the parts, otherwise the cost of repairs may increase significantly.
After the sleeve and shaft are removed, carefully inspect the components for defects and damage. Now you will have a drum in your hands, to which a cross with a shaft is attached.Using an adjustable wrench, remove the screws securing the crosspiece. Now the old drum no longer holds anything. All that remains is to take and install a new part. Assembling the tank, and subsequently the washing machine, occurs strictly in the reverse order. When connecting the halves of the tank, it is advisable to treat the seam with silicone waterproof sealant for greater structural reliability.
To replace the drum with your own hands, you will need several hours of free time, desire and skill. In principle, the order of work is quite clear. You need to stock up on the necessary tools, patience, and prepare your workplace.
 The drum is one of the main elements in the design of the “home assistant”. In case of certain malfunctions, it may be necessary to replace the drum in the LG washing machine. To dismantle the old part and install a new one, you will have to thoroughly study the structure of the machine in order to properly disassemble the equipment. The progress of the upcoming work will be described in detail below.


Thanks for the clarification, I'll try it tomorrow.