The rubber seal of the washing machine is leaking
 It is impossible not to notice that the cuff of the washing machine is leaking - water will accumulate under the machine. It is not recommended to solve the problem with rags or using a basin: over time, the problem will worsen, the pressure will increase, and a flood will begin. You can’t ignore a breakdown either - operating a washing machine with a leaky drum is dangerous. Having discovered a leak, it is necessary to identify its cause and eliminate it. Let's look at how and what to do in detail.
Problems with the hatch cuff
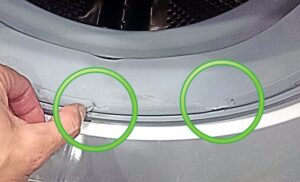
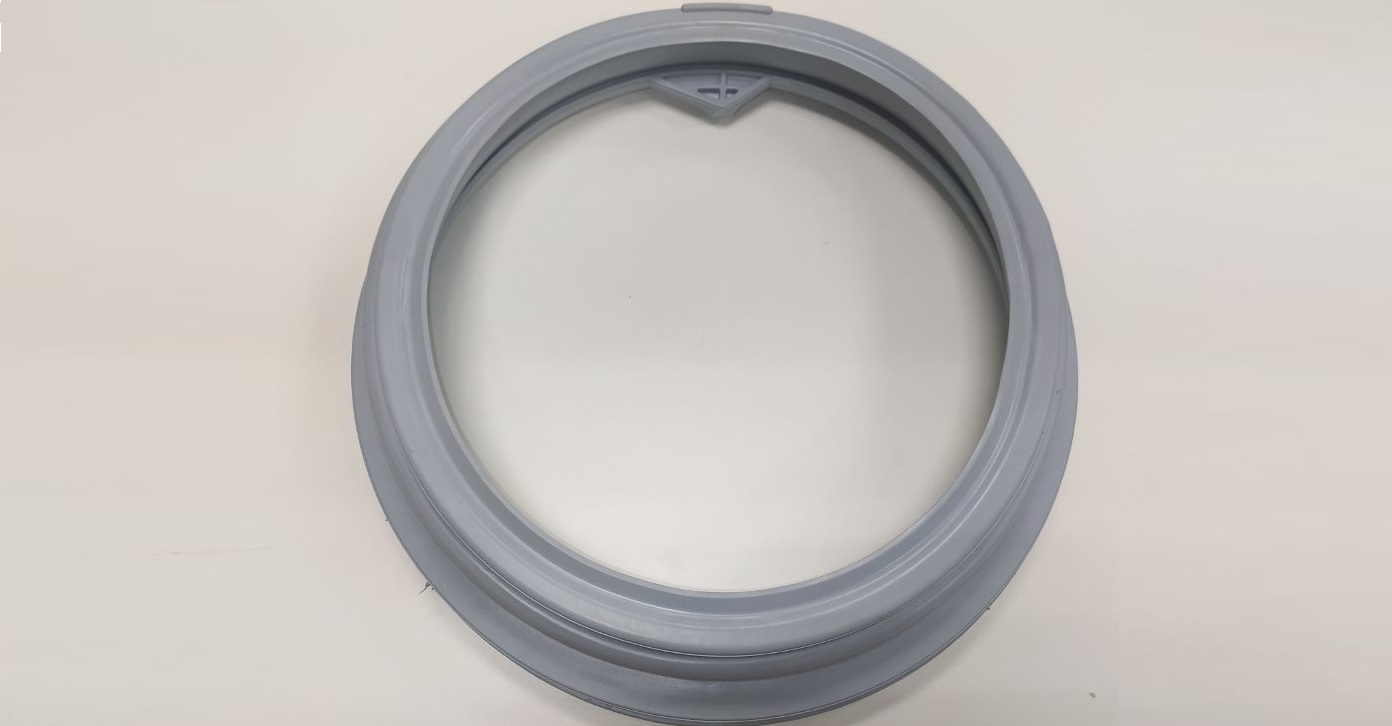
More often than not, a puddle under the washing machine appears due to the rubber seal. It is also called a cuff and is located around the circumference of the drum, ensuring the tightness of the system. But if the rubber wears out and becomes damaged, then cracks and holes form on its surface. As a result, the water is not retained in the machine, but flows out in portions.
Another possible cause is a leaking powder receptacle. Sometimes a trickle starts from the detergent tray, and then goes around the dashboard and down to the drum hatch. As a result, it seems that the rubber band is leaking. Sometimes a leak occurs due to a foreign object getting stuck between the sunroof glass and the cuff. The door does not slam tightly, the seal is broken, and some of the water flows out onto the floor during washing. Fixing a leak is simple - remove the item and slam the drum.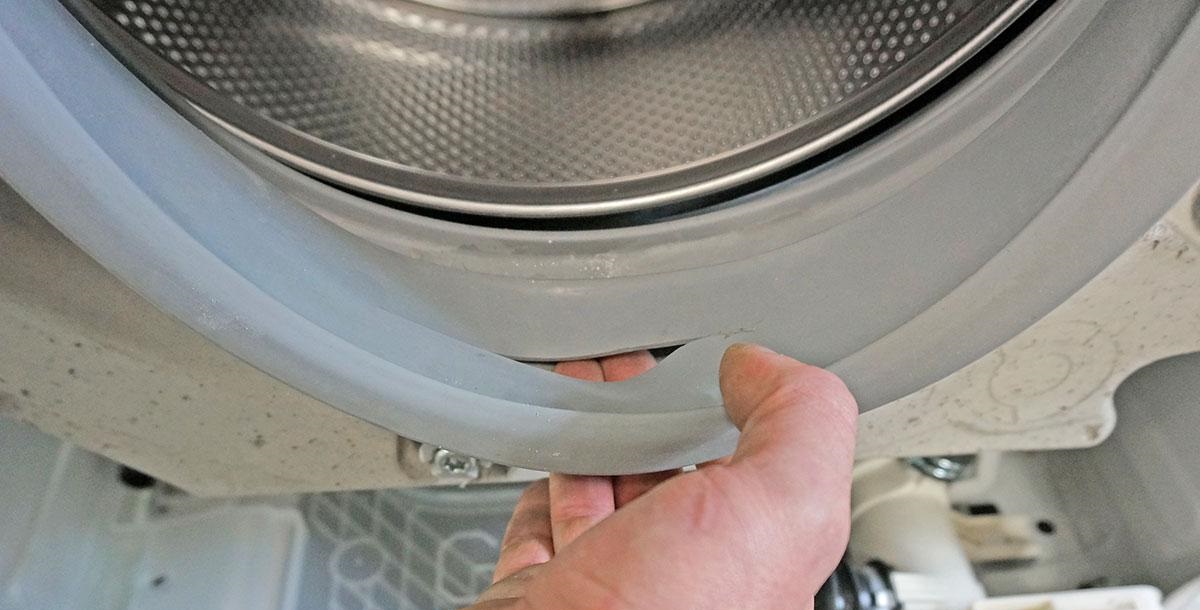
But more often the problem is in the cuff, especially if the washing machine has been in use for a long time. In this case, it is better to check your guess: inspect the seal for integrity and flexibility. If the rubber band is chipped or cracked, the system is not sealed and water is not retained in the drum. The gasket is not always torn - sometimes it is a matter of severe wear. Old rubber loses its smoothness and elasticity, which invariably leads to leakage.
Operating a washing machine with a leaking cuff is dangerous!
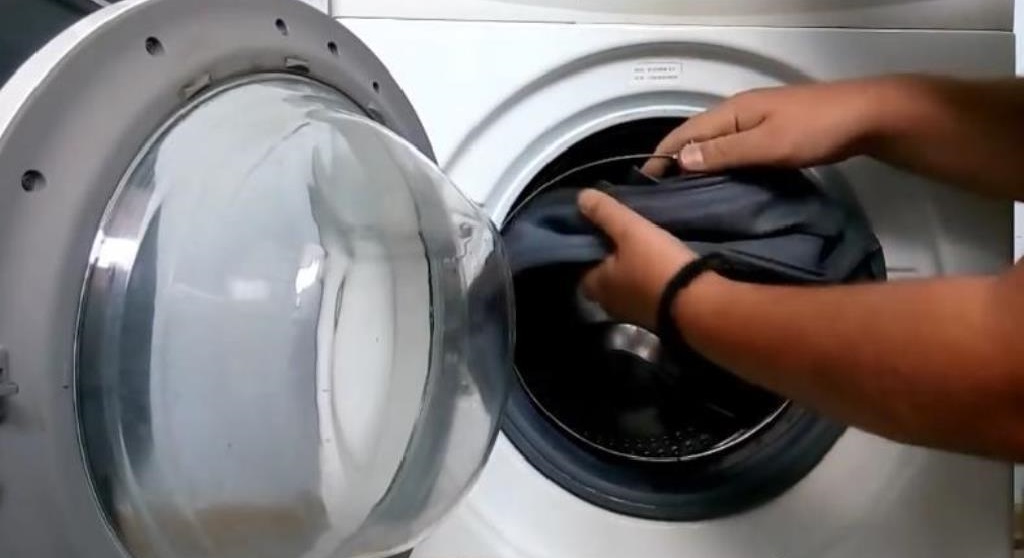
To understand why it is leaking and what to do to fix the problem, you need to stop the cycle and inspect the hatch door. If the cuff is visually intact and flexible, then it is enough to clean the elastic and the surfaces in contact with it from accumulated debris, plaque and dirt. If the seal is damaged, there are cracks, black traces of mold and chips, there is no alternative - only replacement.
You can replace the rubber seal either at a service center or at home. The procedure for dismantling the old cuff and installing a new cuff is complex, but quite realistic. The main thing is to prepare for repairs and not deviate from the instructions.
Removing the damaged rubber band
If you notice cracks and other damage on the rubber band, you don’t need to immediately call service – you can try to fix the problem yourself. Every washing machine user can cope with replacing the cuff. Step-by-step instructions and recommendations are given below.
The first step is to buy a replacement cuff. You should focus on the serial number of the existing machine, as well as on the marking of the gum itself. If the specified data is not available, then first we dismantle the old seal, and then we bring it to the store and ask them to select an analogue.
The new cuff is selected according to the serial number of the washing machine and the markings on the seal.
In any case, the leaking rubber will have to be dismantled. We proceed in the following order:
- disconnect the washing machine from communications (electricity and water supply);
- wipe the machine and its surroundings dry;
- open the hatch door;
- we find the outer and inner clamps;
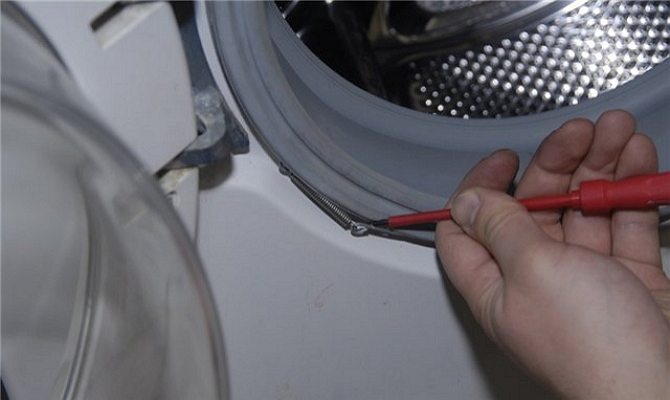
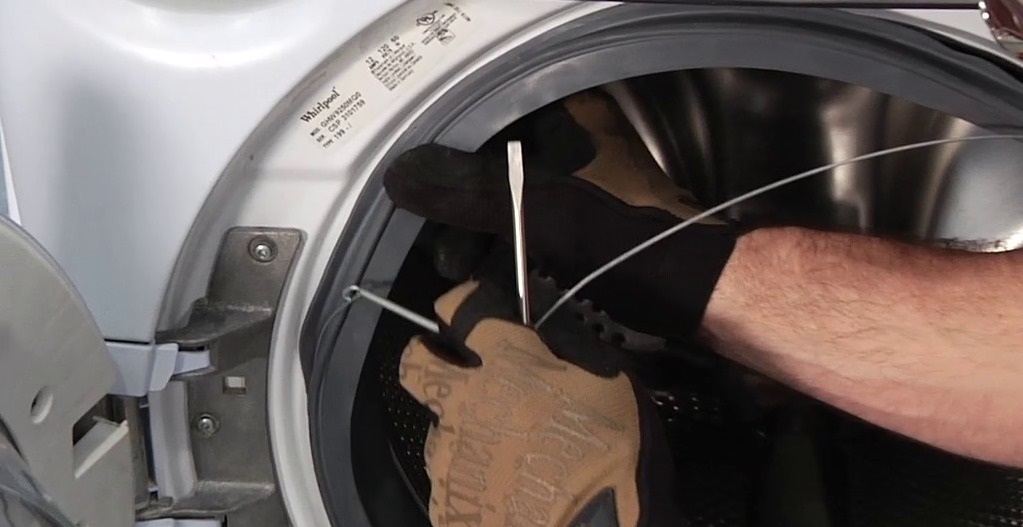
- remove the “rings” (if the plastic clamps are tightened, then the “tabs” are torn off with a flat screwdriver; if they are metal, loosen the screw mechanism);
- we pull the front part of the cuff from the grooves on the body;
- we look for the mounting mark on the rubber band (this is a marking or a small protrusion indicating the location of the rubber band in relation to the drum);
- transfer the mounting mark to the washing machine body with a marker;
- “unhook” the cuff completely.
All! Dismantling is completed by cleaning the seal seat. It is necessary to thoroughly wash the grooves, removing all accumulated debris, scale and deposits. It is enough to soap the dish sponge generously and “walk” through the recess. It is better to leave the foam - it will make it easier to tighten the new cuff.
Installing a new cuff
While removing the old cuff from the drum is not difficult, putting a new one on the grooves is not an easy task. The fact is that the rubber band just released from the factory is very dense and elastic, so it actively “resists” during installation. To fix the seal, you will have to call an assistant or show all your strength and skill. The new cuff is tightened as follows:
- inspect the seal (factory defects cannot be ruled out);
- find the mounting mark on the elastic band;
- apply the seal so that the mounting mark coincides with the previously made mark on the machine body;

- fix the elastic on the outer edge and, holding it with your hand, stretch it along the entire circumference;
- fasten the cuff from the inside to the edge of the tank;
- we probe the seal, checking whether the rubber is firmly seated in the grooves and whether there are any voids or holes;
- make sure that the mounting mark has not moved (if the difference is noticeable, you will have to remove the cuff and re-tighten it).
Replacing the cuff on most washing machines does not require disassembly and removal of the front panel - to access the edge of the tank, just open the hatch door. But it is more convenient to tighten the elastic without the end, since the drum will be completely “free” for repairs. True, you will have to spend time and effort to disconnect the front wall.
When pulling on a new cuff, you need to focus on the mounting mark - it indicates the required position of the elastic to the drum.
After tensioning, the cuff must be secured with clamps. The inner ring is secured first, and then the outer ring. The algorithm depends on the type of rim:
- on the metal one, the screw “latch” is first unscrewed, after which the ring is inserted into the groove and tightened to the maximum;
- on the plastic one, you need to press on the “tongue”, and then install and fix it;
- the wire clamp is laid along the edge and tightened with pliers, and the resulting “knot” is hidden in a special “pocket” with an elastic band.
After the internal clamp, the external clamp clings. The principle of its fixation is similar to the first and depends on the type of rim. It is allowed to use old rings, but subject to their absolute integrity. If the fasteners are damaged or stretched, be sure to replace them with new ones.
Knowing how to fix the problem with a leaking cuff, you don’t have to worry about the result - the rubber band will tightly “grip” the drum and provide the necessary tightness. All that remains is to check the quality of the work done:
- connect the washing machine to communications;
- run a test idle cycle (“Rinse” or “Quick Wash”);
- watch the hatch door.
Has water stopped flowing from under the door? This means that the cause of the leak has been correctly identified and completely eliminated. If drops accumulate under the hatch or, worse, “streams” begin, then you will have to stop the cycle, empty the drum and continue diagnostics. Sometimes the problem is that the cuff does not fit tightly to the body and the clamps are poorly tightened.. If the leak occurs again, it is recommended to reinstall the seal.
After replacing the cuff, you need to run a test wash and check the quality of the repair.
If replacing the cuff did not stop the leak, then the cause of the “flood” is different. You will have to check the integrity of the powder receptacle, tank and hatch door. Sometimes there is only one option left - contact the service for professional diagnostics and repairs.
Interesting:


Reader comments
- Share your opinion - leave a comment
Categories
Washing machine repair


For buyers


For users


Dishwasher


Add a comment