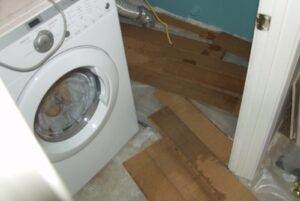
A dirty puddle under the machine is a clear signal that the washing machine is leaking from below when draining water. If the system remains sealed during filling and washing, then when you try to pump out the sewage, a “reset” occurs. Such a leak cannot be ignored, since the floor, the user and the equipment itself are at risk. Having noticed “streams” under the washer, it is necessary to find and eliminate the cause of the leak. There is no need to contact the service - you can handle the task at home.
Why is it leaking?
It’s not difficult to deal with a leaking washing machine drain with your own hands. The main thing is to be observant and arm yourself with pliers and screwdrivers. You don’t even need to disassemble the machine: just restart the system, reactivate the emptying of the drum and take a closer look.
The user’s task is to visually determine the leak area. It can be any element of the drainage system: a garbage filter, a sewer pipe, a drain hose, a snail or a drum pipe. Let's look at each “culprit” separately.
Garbage filter. If this nozzle has recently been cleaned or changed, then you should pay attention to it: loose screwing of the plug often leads to leakage. In this case, water “collects” at the front wall of the machine in a small amount. Repairing the “trash can” is simple: unscrew the spiral and mount it again.
The junction of the sewer pipe and the drain hose. The cause of the leak is also the incorrect connection of the machine to the sewer. During self-installation, users often “cheat” and, when connecting to a riser, limit themselves to inserting the hose into the pipe “tee”.As a result, some of the water spills onto the floor, since the diameter of the pipe is disproportionate to the corrugation - a small gap remains. The tightness is restored by installing a special rubber cuff, which can be easily purchased at any hardware store.
You cannot seal a torn drain hose - just replace it with a new one!
Drain hose. When the puddle starts from the back wall of the washer, inspect the drain sleeve. Sometimes the reason is damaged rubber, often it’s a loose clamp next to the volute. To find the problem area, you will have to turn off the power to the machine, place it on its left side and carefully examine the corrugation. If the problem is that the fixation has come loose, then we tighten the fasteners; if there is a crack, we replace the entire hose.
Snail. If damaged, the plastic volute, the seat for the drain filter and pump, also leaks. You cannot repair the element, you can only dismantle the old one and install a new one.
Drain pipe. The hose connecting the tank to the snail may also become leaky or come off the fitting. This requires repair and replacement of the pipe. It is strongly not recommended to solve the problem with a sealant or patch - this is unreliable and can aggravate the situation.
When diagnosing the drain system, it is important to act consistently and carefully, checking all rubber elements for strength and integrity. If cracks or crevices are noticed, it is better not to risk it and immediately replace the hoses and devices with new ones. There is no need to call a technician - diagnostics, dismantling, and subsequent installation of parts will not take much time and effort.
Other leak locations
Leaks do not always occur in the drain system. Sometimes the tightness is broken in completely different components of the equipment - a tank, a powder receiver, a cuff or on a shaft. It is easy to confuse breakdowns: a dirty puddle appears under the machine and is noticed by the user at the end of the cycle.
In any case, the “flood” cannot be tolerated. Every possible malfunction should be checked and, if necessary, eliminated. Let's consider all the options and instructions.
Tank. This is where the water spends most of its time, and if the tank is damaged, a leak will inevitably occur at the bottom of the machine. You cannot seal a crack - only solder it or replace it completely. In the first case, the instructions on what to do are as follows: the affected area is cleaned, degreased, soldered, and the resulting seams are leveled. Then we check the quality of the “patch” - fill the container and evaluate the tightness.
Sealing the tank is only a temporary measure; it is safer to replace the tank.
Powder receiver. During operation, the detergent tray may become loose - after 3-5 years, gaps will appear between the body of the machine and the dispenser. As a result, water entering the washing machine under high pressure splashes and “comes out” outside. Streams flow down the body, fall under the hatch door and form a puddle under the bottom, which creates the illusion of a large-scale leak. To fix the problem, you will have to adjust the position of the hopper, restoring its tightness. Blockages are often to blame for leaks - a thick layer of scale makes subsequent drainage difficult, and the liquid overflows over the edge of the compartment. Thorough cleaning of the cuvettes will help here. Sometimes the reason is damaged plastic.
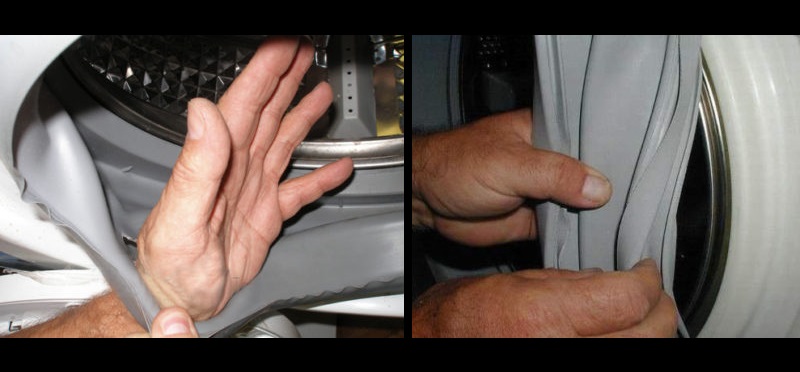
Hatch cuff. If water definitely leaks from under the door, then the problem is in the rubber seal. It's simple: the rubber band is damaged, the seal of the drum is broken, and a leak occurs.For temporary repairs, you can rotate the rim: remove the clamps, move the torn area higher and tighten it back. But it’s better not to risk it and change the cuff completely. A new “ring” is purchased using the serial number of the washing machine.
Before any repair work, the washing machine must be de-energized and disconnected from the water supply!
Bearing unit. Leakage is inevitable even if the bearings and seal are destroyed. In addition to a dirty puddle under the machine, this breakdown is also indicated by other unpleasant “symptoms”: noise, hum, knocking and imbalance. The “diagnosis” will also be confirmed by rusty smudges on the back of the tank.
Repairing a bearing assembly is a complex procedure. You will have to almost completely disassemble the washing machine, remove the top cover, dashboard, counterweights, shock absorbers, hatch cuff and front wall of the case. Be sure to remove the tank, previously freed from the connected pipes and wiring. Afterwards, the tank should be halved, the shaft should be knocked out and, finally, the bearings with the seal should be replaced. If you have the tools, experience and time, you can handle the job on your own, but it’s better not to risk it and contact a service center.
It is dangerous to operate a leaking machine - there is a high risk of flooding the room and short circuit. As a result, you can irretrievably lose the equipment itself, lose your living space, or seriously damage your health.
 A dirty puddle under the machine is a clear signal that the washing machine is leaking from below when draining water. If the system remains sealed during filling and washing, then when you try to pump out the sewage, a “reset” occurs. Such a leak cannot be ignored, since the floor, the user and the equipment itself are at risk. Having noticed “streams” under the washer, it is necessary to find and eliminate the cause of the leak. There is no need to contact the service - you can handle the task at home.
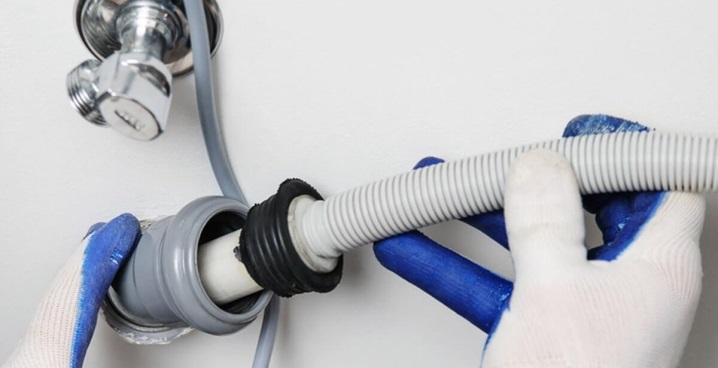


Add a comment