How to replace the cuff on a Siemens washing machine?
 If water begins to leak from under the machine door, an urgent replacement of the hatch cuff on the Siemens washing machine is necessary. This is necessary to restore the tightness of the system and ensure safe operation of the equipment. Let’s figure out how to repair a “home assistant” with your own hands.
Will any rubber band work?
To change the rubber seal, you should purchase a new cuff. Be sure to select the right components so that they are suitable for a specific Siemens model.
It is better to dismantle the old cuff and bring it with you to the store - this way the risk of buying the “wrong” will be reduced to zero.
Therefore, it is advisable to remove the rubber from the drum and show the damaged seal to the seller. The manager will select a similar part based on the gasket markings.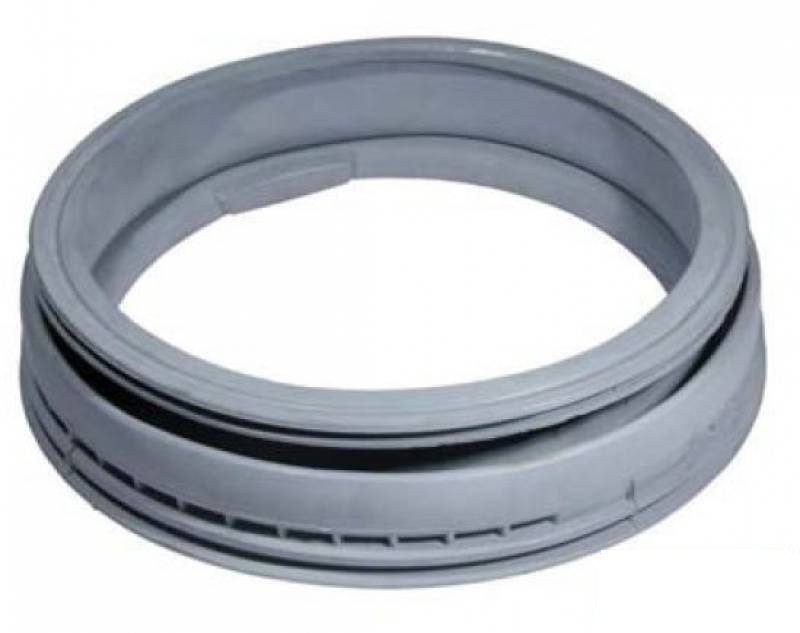
It happens that there is no way to remove the old cuff. Then you need to write down the model of the Siemens automatic machine and its serial number. All information about the washing machine is in the instructions for the equipment and on the “nameplate” - an information sheet glued to the body. It is advisable to take a photo of the “label” and show it in the store.
To install a new cuff, in addition to the elastic itself, you need a minimal set of tools. A thin screwdriver and pliers will come in handy. You will also need dishwashing liquid and a napkin.
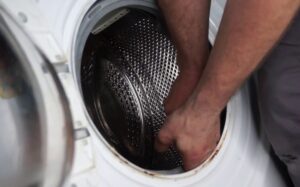
We dismantle the damaged part
First you need to remove the rubber from the drum. The cuff is secured in the body with two clamps. You will have to remove the internal and external fixing “ring” and only then remove the seal. The algorithm of actions will be as follows:
- turn off the power to washing equipment;
- open the drum door;
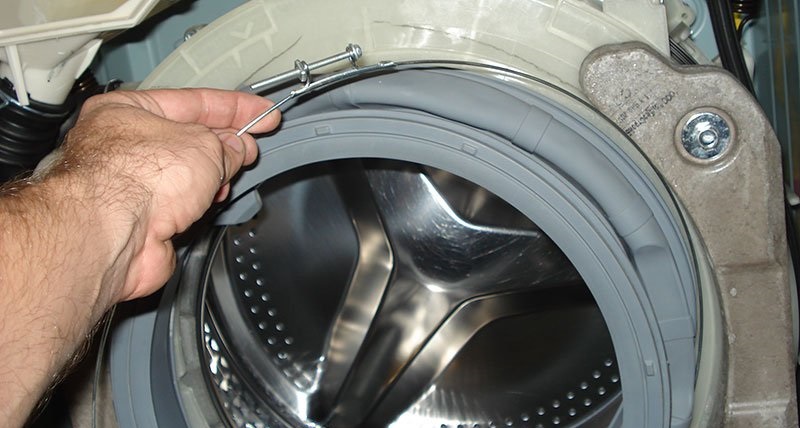
- Feel for the outer “rim” with your hands. For Siemens machines it is plastic;
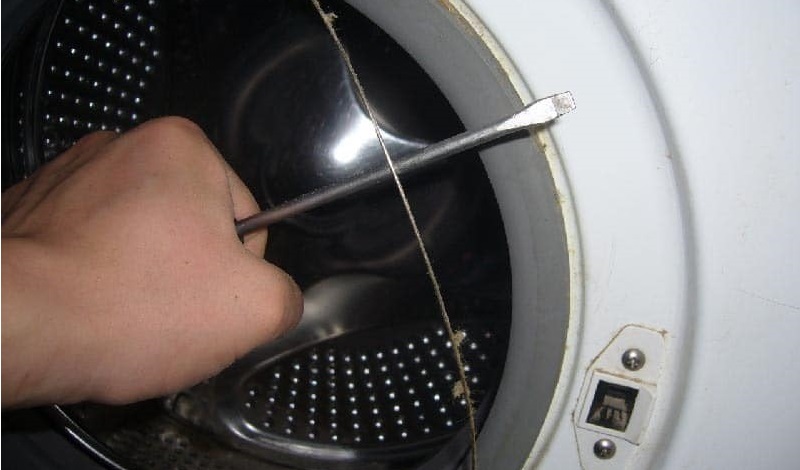
- hook the “latch” of the clamp with a thin screwdriver, pull the “tab” to the right and remove the ring from the body;
- remove the powder receptacle from the washing machine;
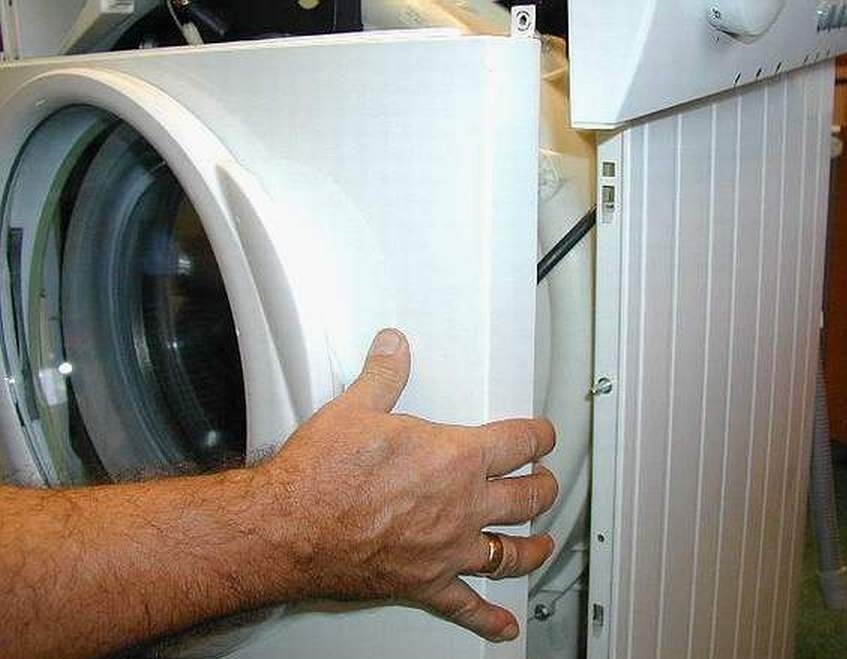
- Unscrew the bolts holding the front panel of the case;
- move the front wall to the side so that the wires connected to the UBL do not break;
- use a screwdriver to “handle” the internal clamp (also loosening its latch);
- remove the second plastic “rim” from the washer;
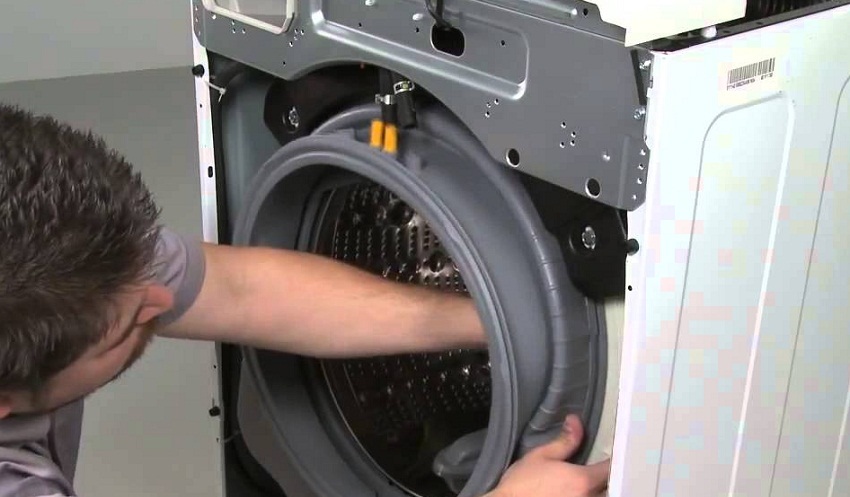
- pull the sealing collar out of the recess.
This way the rubber of the hatch door is removed. Having taken out the cuff, inspect it, find all the defects and cracks on the surface of the seal. This will help you understand why the gasket became unusable and prevent this from happening in the future.
Installing the main seal
The next stage of repair is installing a new rubber band in place. In order for the seal to fit tightly into the recess, you will have to make an effort. The new cuff is quite tight, so it may be difficult to tighten it. To install a cuff with your own hands, you should:
- remove plaque from the seat. This is where liquid detergent and a cloth come in handy. Clean the recess thoroughly. After “cleaning”, you should not wipe the treated area dry - a slippery soap “cap” will make it easier to install the new seal;
- find the factory marks on the cuff and position the elastic so that they coincide with the markings on the body;
Make sure that the drain holes on the sealing collar are at the bottom.
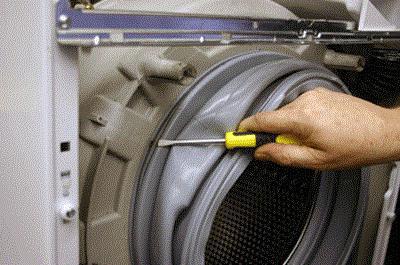
- put the elastic in the groove;
- pull the gasket over the entire circumference of the tank protrusion;
- install and fix the internal clamp;
- place the front wall of the case, secure it with bolts;
- return the detergent cuvette to the “hopper”;
- pull the “outer” edge of the seal onto the protrusion of the front wall;
- secure the outer clamp by inserting the “rim” into the recess with the spring down.
By following these recommendations, you can quickly change the rubber seal on a Siemens machine. After finishing work, be sure to test the washer. Activate the machine and start one of the programs, for example, “Rinse”. Watch the technique complete the cycle. If the system's tightness is restored, we can assume that the repair was completed successfully.
Why does the rubber band fail?
In fact, with proper care and careful operation of the washing machine, the cuff will “last” for many years and will not need to be replaced. The rubber seal deteriorates mainly due to the fault of the user. Although replacing the gasket does not take much time and effort, it is better not to carry it through to repairs. The drum seal is usually damaged if:
- the user uses low-quality household chemicals. Detergents with aggressive ingredients used for washing can damage the seal. Therefore, it is important to buy “safe” laundry powders and machine cleaning compositions to avoid harmful effects on the rubber parts of the machine;
- periodically reload the washing machine. For example, by placing all 8 kg of clothes in the drum instead of the required 6 kg of laundry, increased friction of the clothes against the sealing rubber will be ensured. This way the cuff will deteriorate much faster;
- Do not check the pockets of items loaded into the washing machine. Often keys, hairpins, paper clips and other metal objects that can pierce or cut the elastic are forgotten there;
- carelessly load the machine and remove clothes from it.Things will “tug” the cuff, and buttons, decor and lock pawls can lead to deformation of the seal;
- do not wipe the gum. Water accumulates in the cuff recess after washing. If you do not remove the liquid and do not “ventilate” the drum, over time mold will form on the rubber band and fungus will “settle.” Microorganisms will corrode the gasket, and it will soon become unusable;
- The replacement of the rubber band was carried out carelessly. It is very easy to pierce the cuff during installation, for example, with a screwdriver. That is why it is so important to carefully tighten the elastic band and insert the fixing clamps into the grooves.
If you do not allow any negative impact on the cuff, it will last 10 or 15 years, ensuring the tightness of the system. The user has the power to delay the wear of the seal. However, if you notice that water has begun to drip from under the drum door, it is important not to put off repairing the “home assistant”. You need to immediately install a new gasket to prevent a more serious leak.
Interesting:


Reader comments
- Share your opinion - leave a comment
Categories
Washing machine repair


For buyers


For users


Dishwasher


Add a comment