Disassembling the shock absorber of a washing machine
Due to the fact that conventional standard shock absorbers are quite expensive, simple single-cylinder dampers are installed in washing machines instead. They have a primitive design, so even a person without experience in repairing household appliances can disassemble the shock absorber of a washing machine. We will study in detail how to do this at home, thus saving the family budget on calling a specialist.
“Divide” the shock absorber of the machine into its component elements
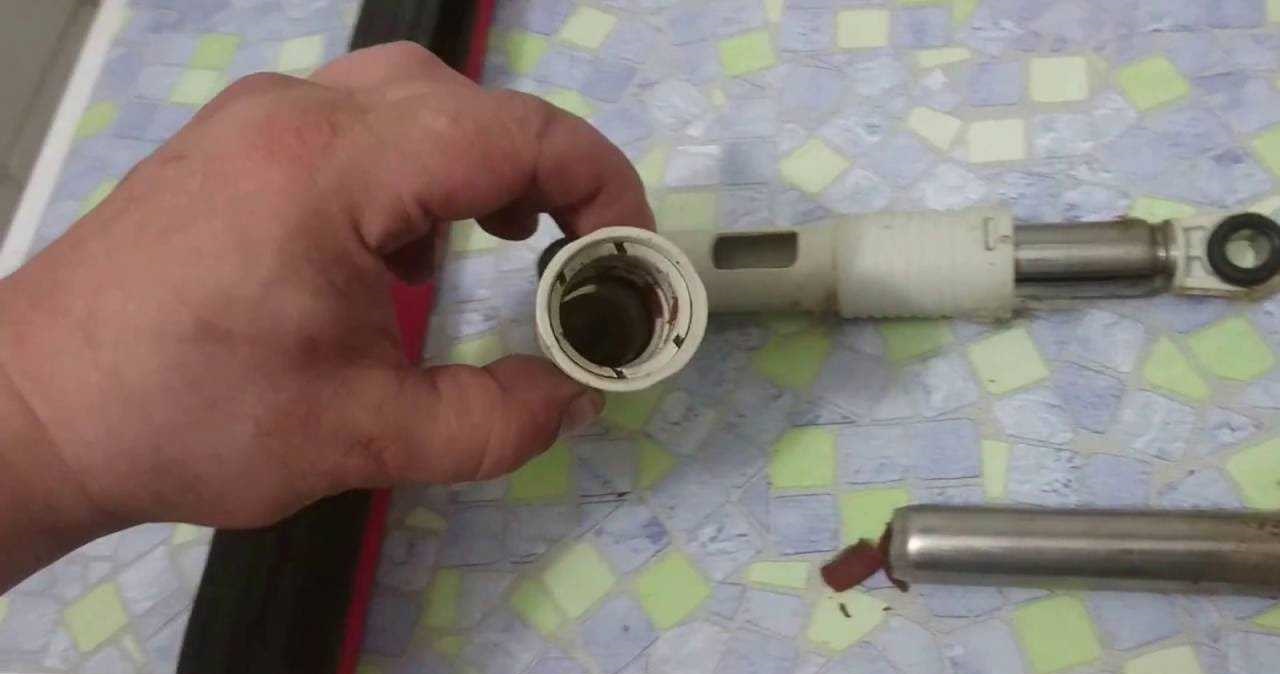
Before disassembling the part, you should study it carefully to understand the principle of operation. The shock absorber consists of a plastic cylinder, a small metal rod, two bushings mounted on the cylinder and a rod, plus a special gasket is installed as a piston in the design. Often it is the gasket that needs to be replaced, because over time it receives critical damage, due to which it can no longer perform its duties. This happens even if there is good lubrication inside the cylinder, which should create additional friction.
If the gasket loses its properties, then there will no longer be a working piston in the damper, so the rod will no longer stay in the cylinder, will begin to move freely in it, and sometimes even fly out of it. Let's analyze a situation in which the gasket has been deformed, but not yet completely, so it partially performs its functions, preventing the rod from leaving the cylinder.
To correct this problem, you must disassemble the shock absorber to carefully remove the rod from the cylinder. You can do this with your own hands using force - you just need to firmly grasp the element and remove it from the seat.Usually this is not difficult, because the piston loses its resistance and easily leaves the seat.
Do not forget to remove the safety plastic cover with a screw thread from the rod - it protects the element from falling out of the cylinder, but not every washing machine has it.
If you can’t get the rod out this way, you must first wrap the cylinder with a towel or rag, hold it in a vice, and only then try to remove the piston again. You should pull very carefully so as not to accidentally damage the plastic elements of the assembly. When the rod is in your hands, disassembly of the element will be completed.
We restore the shock absorber with our own hands
First of all, we will study the correct extraction of an element from the “home assistant”. Do not delay repairs under any circumstances if you find problems with the dampers. If you leave them to work in this condition, then you risk making the bearings with the washing tub unusable. Timely replacement of the unit will avoid breakdowns and save the family budget.
Usually the situation can be corrected by simply replacing the gasket. This requires partial disassembly of the washing machine, removal of the shock absorbers and installation of a new spare part. How to do it yourself?
Disconnect the washing machine from all communications.
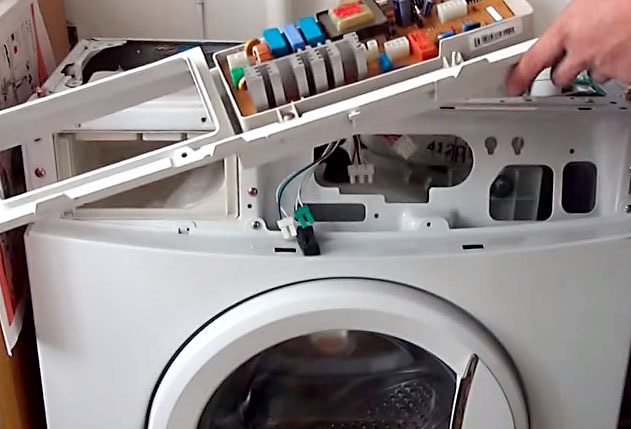
Remove the fasteners from the top housing cover, and then remove the cover itself.
Remove the household chemicals tray.
Carefully disconnect the CM control panel.
Disable the sunroof locking device.
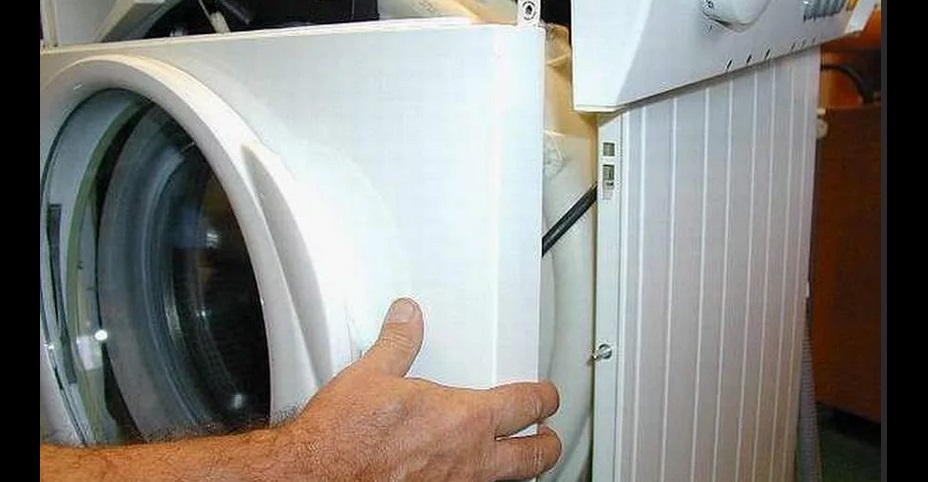
Insert the rubber hatch seal into the drum by first loosening the clamp holding the cuff.
Remove the front wall of the case.
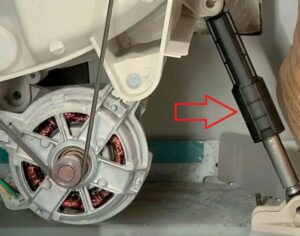
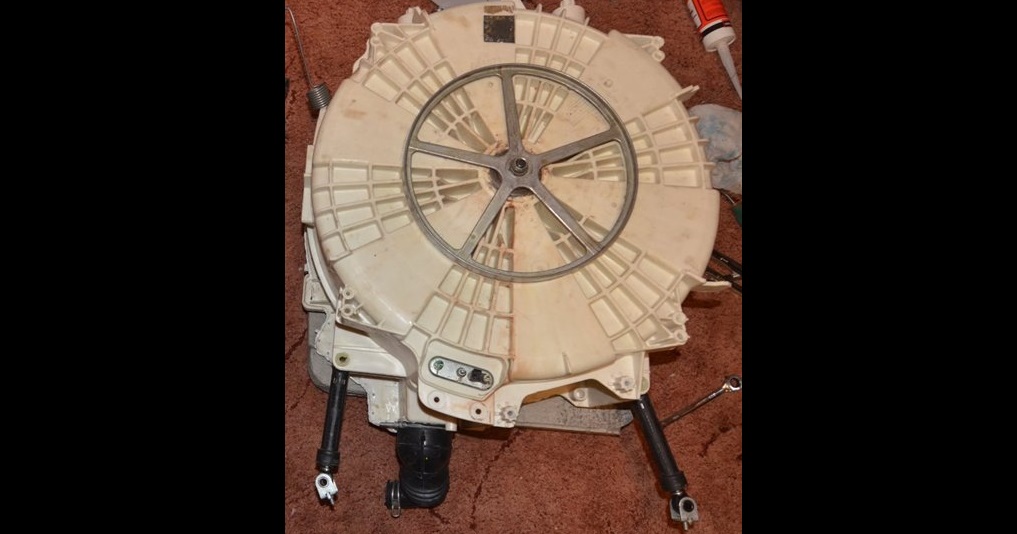
Remove the dampers.
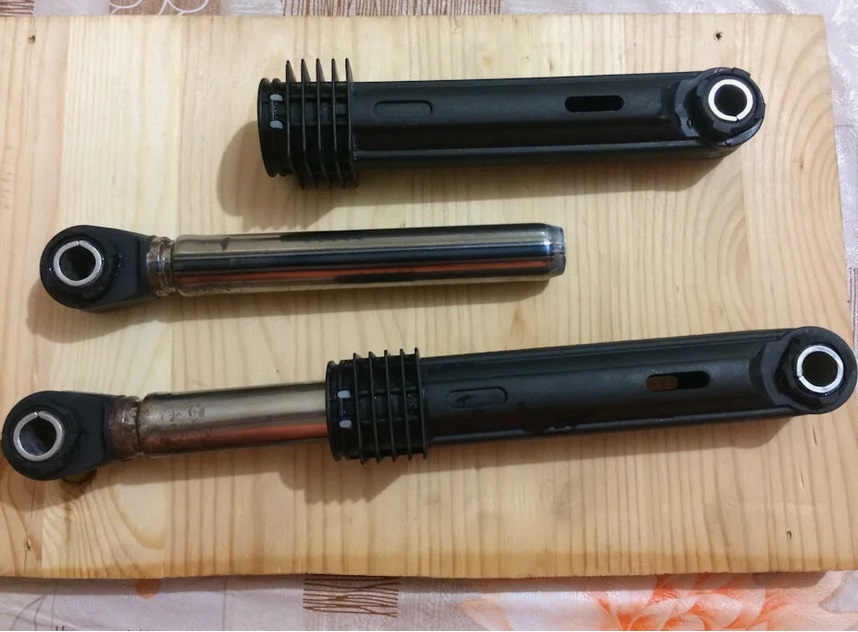
Disassemble the parts and evaluate the integrity of the gaskets.
If the element needs to be replaced, then cut out suitable size parts from PCB or rubber.
Install the resulting seals instead of the old ones.
Be sure to take photographs of all stages of disassembly, so that later during reassembly you will have examples at hand.
In some situations, it is impossible to restore the damper, so you will have to buy new parts. Unfortunately, even if only one damper fails, both still need to be replaced in order to achieve uniform vibration damping. Otherwise, the element will wear out very quickly, which will negatively affect the entire system.
Replacing the shock-absorbing unit begins with removing the parts. They can be detached from the washing tank, or they can be attached to it in such a way that they have to be removed along with the washing tank. The first option is better, because you can very quickly remove the front panel of the machine, remove the elements and install replacements in their place. If the dampers cannot be removed without the tank, then disassembling the washing machine will be required.
Unplug the machine.
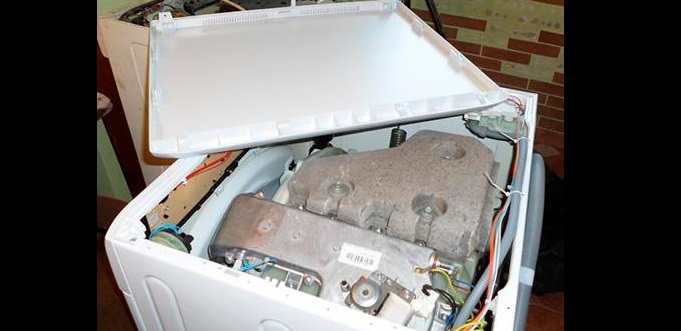
Remove the top panel of the housing, the powder receptacle, the control panel, the top springs, and then the front panel.
Disconnect the pipes from the tank, as well as all sensors with instruments.
Remove the large object and place it on a flat surface for easier handling.
Restore the dampers or install new ones to replace the damaged ones.
Disassembling the washing machine to check the dampers is an excellent opportunity to check other important components, such as bearings, crosspieces and drains. You should never wait for the final failure of an element that has begun to fail, because this can seriously aggravate the situation.If some elements of the system have suffered from blockage or the formation of a thick layer of scale, then technical lubricant WD-40 will correct the situation. When the maintenance work is completed, all you have to do is assemble the device according to our instructions in reverse order, and then run the test operating cycle.
Does the shock absorber need to be repaired?
At the first suspicion that the shock absorption system is faulty, you need to carefully check the dampers. There is no need to start disassembling the machine and dampers without checking, because there is a simple and quick test of the unit. What should I do for this?
Unplug your home assistant.
Remove the top panel after removing the fixing bolts.
Gently press the washing machine tank with your hands so that it drops at least 5-7 centimeters.
Drop your hands sharply and watch the tank.
If the elements are in good working order, they will work instantly - they will immediately return the tank to its normal position. If the tank begins to swing in different directions like a pendulum, then the shock absorption system needs repair. This can be understood without this check - damage to the dampers can be determined by the following signals:
During washing, a strange creaking and hum appeared;
The device began to bounce a lot during the spin cycle.
In order to try to prevent damage to shock absorbers in the future, it is worth finding out the cause of the problem. Most often, racks fail due to the following:
natural wear and tear that occurs during active use of the device;
deformation that could have occurred due to errors in the use of the SM, careless transportation, as well as due to manufacturing defects;
wear of fasteners - the bolts securing the dampers could simply become unusable over time.
If the shock-absorbing unit is completely out of order, then it can only be replaced with a new one. If the dampers begin to malfunction due to wear of the gasket or weak fixation, then you can cope with this problem yourself and save on the services of a service center.
 Due to the fact that conventional standard shock absorbers are quite expensive, simple single-cylinder dampers are installed in washing machines instead. They have a primitive design, so even a person without experience in repairing household appliances can disassemble the shock absorber of a washing machine. We will study in detail how to do this at home, thus saving the family budget on calling a specialist.
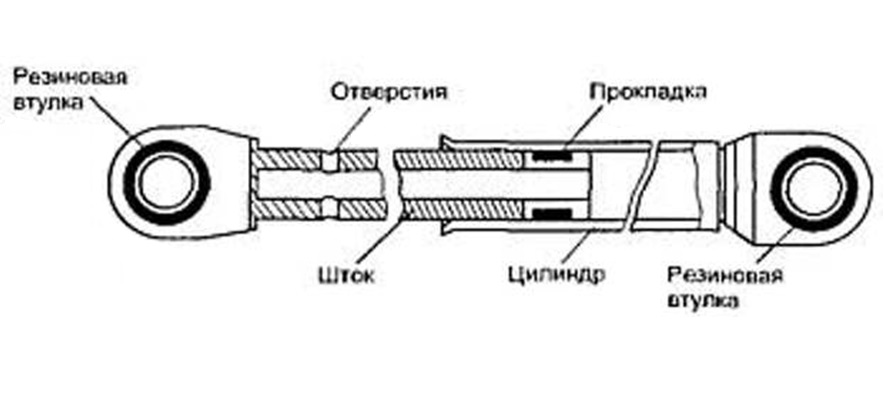


Add a comment