How to remove the drum on a Kandy washing machine?
 After some time of operation of the machine, it may require repair. In some cases, it is necessary to remove the drum of the Candy washing machine. For example, to change a bearing assembly or remove an object stuck between it and a plastic tank. The process of removing the drum is quite labor-intensive. But if you wish, you can easily handle the work yourself. Let's figure out how to properly disassemble the washing machine without turning to a specialist for help.
Preliminary actions
Surely, every owner has a small drawer with the most important tools: a hammer, drill, pliers, screwdriver, screwdrivers and hexagons. To disassemble Kandy's automatic machine, the listed devices will be sufficient. The only thing, in addition to this, in order to repair the unit, you will have to prepare a hacksaw for metal.
It is better not to order parts that need to be replaced in advance. You can confuse the markings of components and purchase unsuitable parts. It is advisable to first get the elements, and only then buy new ones, similar to the ones removed. Having prepared the tools, you can start working on the automatic machine itself. The repair process will take a lot of time, so it’s better to immediately arrange a comfortable workplace for yourself. Ideally, take the washing machine to a garage or workshop.
If this is not possible, the device should be moved to a spacious room where nothing will interfere with the disassembly procedure. The floors in the room must be covered with fabric. You also need to ensure that free access is provided to all sides of the washing machine. After preparing the workplace, you can begin repairs.
Let's remove the parts that prevent the drum from being removed
When performing repairs, it is important to follow safety precautions. Before starting work, be sure to turn off the power to the washing machine and turn off the water supply tap. Having done this, you can begin further manipulations.
Next, you need to drain the remaining liquid from the system. To do this, prepare a low container, place it under the machine, and unscrew the garbage filter. Water will flow into the basin. The removed filter element must be washed, dried and set aside.
When disconnecting elements, take photographs of the connection diagram of the wiring, sensors and components; this will help in the future to accurately assemble the automatic machine.
To remove the drum of a Candy washing machine:
- disconnect the “top” of the housing. Unscrew the bolts holding the panel, then slightly push the cover back and pull it up. Place the element aside;
- Unscrew the screws securing the rear panel of the case. Remove the wall;
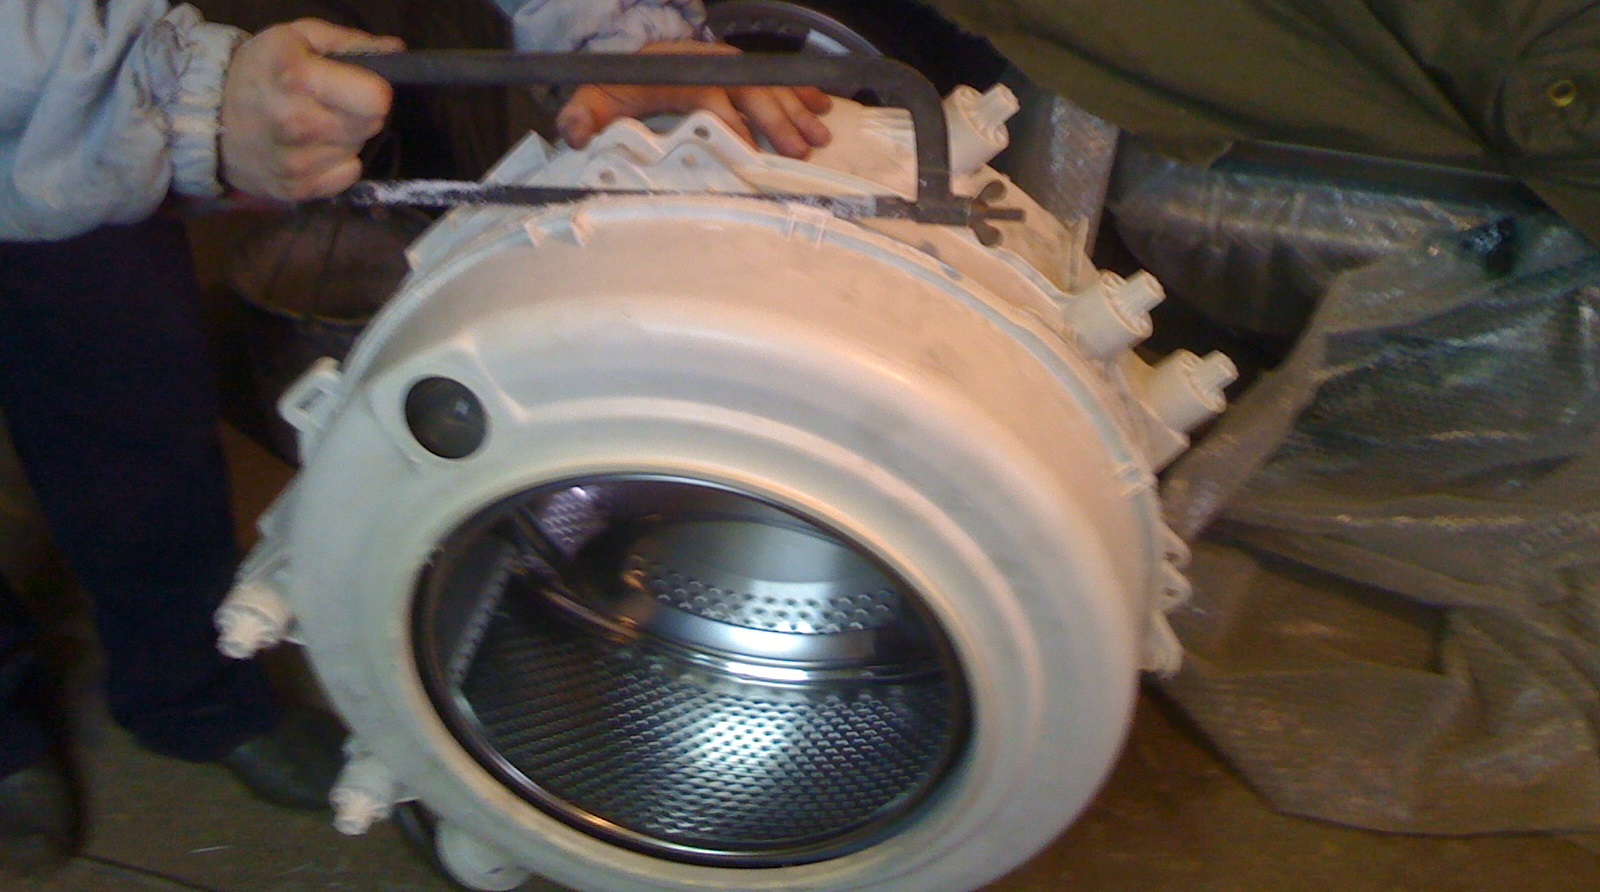
- remove the drive belt;
Rusty smudges on the back surface of the tank indicate a breakdown of the bearing assembly.
- Disconnect the wiring from the washing machine tank. Specifically, the contacts of the heating element and thermostat;
- loosen the central nut of the heating element. Using “rocking” movements, remove the heater from the socket;
- unscrew the bolts securing the engine of the automatic machine;
- remove the counterweight. The block is located on top and is easy to see immediately after removing the cover. Please note that it weighs quite a lot. To disconnect the element, you will need a hexagon. Unscrew the fasteners holding the part and remove the weighting material from the body;
- Disconnect the wiring and hose from the water level sensor. Then carefully remove the pressure switch from the machine;
- get the powder receptacle;
- loosen the hose clamps connected to the detergent cuvette, remove them and remove the dispenser “hopper” from the body;
- Place the washing machine on its right side. If there is no bottom pan, that’s good; if there is a bottom, you will have to remove it by unscrewing the fastening bolts;
- Unscrew the screws located on different sides of the drain filter. Next, push the snail, in which the filter element is located, into the housing;
- disconnect the chip with wires from the drain pump;
- loosen the clamps and unhook all the tubes from the pump;
- remove the drain pump from the automatic machine;
- pull the engine out of the housing. Grab the motor, move it back slightly and pull it down;
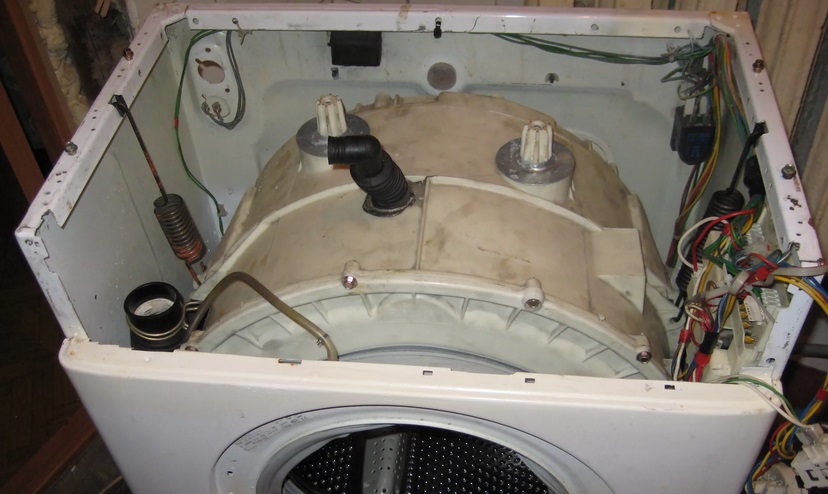
- disconnect the shock-absorbing elements supporting the washing machine tank from below.
This way, all parts that interfere with removing the drum will be removed. Next, all that remains is to take out the tank and start sawing it to gain access to the “centrifuge”. We'll tell you what actions to take at the next stage of work.
Removing and sawing the tank
Now you need to put the washing machine on its feet. Carefully return the machine to the vertical position. This must be done carefully, as the tank is now held in the housing only by a pair of springs.
Take a close look at your washer. The control module may interfere with removing the drum. If this is the case, you will have to disconnect the board. Unhook the wiring from the block, unscrew the bolts securing it, and, having mastered the latches, pull out the part.
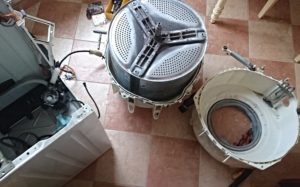
The tank-drum assembly is heavy, so it is better to pull it out with two people. Together with an assistant, remove the mechanism through the top of the housing, removing the reservoir from the shock-absorbing springs.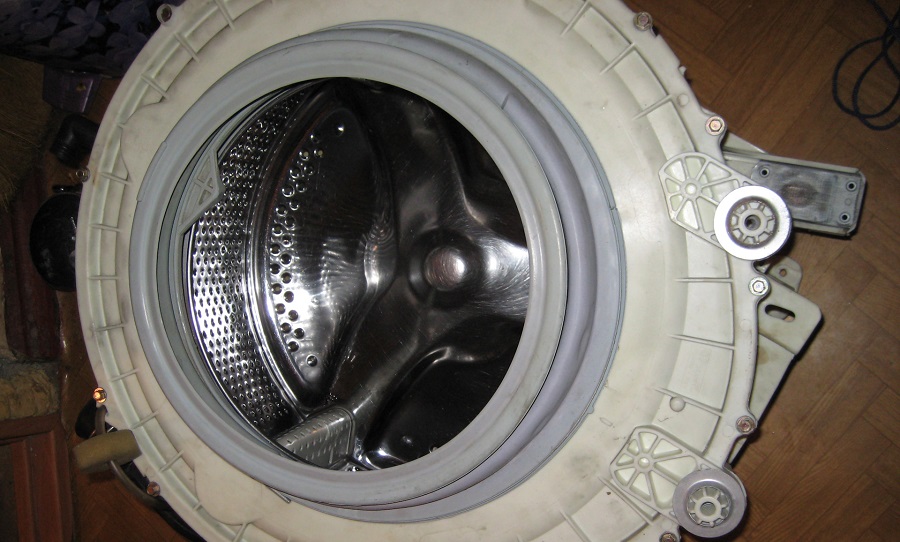
After removing the assembly, it may seem that the work has come to an end. This is wrong. Washing machine tank Candy non-separable, so to get to the drum, you will have to saw the container. Such a misfortune as a “monolithic” tank greatly complicates equipment repair.
It is very simple to understand why the supplier equips washing machines with a non-separable unit. At a minimum, this allows us to reduce production costs, and therefore the cost of production, as well as the assembly time of units. As a maximum, the manufacturer hopes that if the components “hidden” in the tank break down, the consumer will most likely buy an automatic machine in a store rather than repair the equipment, since the cost of repair is usually equivalent to a new purchase.
However, the masters found a way out of this situation. They discovered a way to split the tank in half and remove the drum from it. The body of the container is carefully sawed with a hacksaw, and after repair work is completed, it is connected back together using silicone waterproof sealant.
To cut a non-separable tank of a Kandy washing machine and carry out repairs, you must:
- carefully inspect the container;
- understand where the factory weld goes;
- using a marker or pencil, mark the line along which the cut will be made;
- make small holes in the tank with a drill with a thin drill bit along the entire length of the cut line, at a distance of 3-5 cm;
- cut the plastic container along the intended line using a hacksaw;
- separate the upper part from the half with the drum;
- remove the drum. To do this, turn over half of the tank, find the wheel connecting the parts and remove it;
- to solve a problem. If the bearing assembly breaks down, remove the worn-out components, replace them, and install a new oil seal.If the process started due to “interference” stuck between the tank and the drum, remove the object and make sure that the plastic walls are not damaged.
When all the planned manipulations are completed, all that remains is to assemble the container. Moisture-resistant silicone sealant is used to connect the tank halves. First, the area of the new seam should be degreased, then apply the product around the entire circumference and connect the parts.
Experts recommend not only “gluing” the tank halves together with sealant, but also strengthening the structure with self-tapping screws.
This is where the main difficulties end; all that remains is to assemble the Candy washing machine. The parts are attached to the housing in the reverse order. Refer to the photographs you took. Securely fix the elements inside, connect the wiring and sensors, and carefully check the connection diagram.
The process of removing the drum is very labor-intensive. This is why the cost of repairs carried out by specialists is so high. By doing the work yourself, without resorting to service, you can save a large amount of money.
Interesting:


Reader comments
- Share your opinion - leave a comment
Categories
Washing machine repair


For buyers


For users


Dishwasher


Add a comment