How to remove the drum from an Electrolux washing machine?
In almost any washing machine, after 7-10 years of use, the bearing assembly begins to “knock”. You can replace the elements yourself without resorting to the help of a specialist. You should understand that the repair will not be easy. You will have to disassemble the case, disconnect all the parts and wiring from the tank, remove the counterweights, shock absorbers and remove the drum from the Electrolux washing machine. Let's figure out what is required during the work, what rules you need to remember.
Gather everything you need for repairs
In order to disassemble an automatic machine “without incident”, you need to carefully prepare for the procedure. First, you should take care of your workplace. You need to move the washing machine to a spacious room where 4-5 square meters will be free. m. It is important that the room is well lit and ventilated. The floors must be covered with rags, or even better, with film, since the work to be done will be “wet” and not entirely “clean”.
In addition to arranging the workplace, you should:
Study the instructions for the washing machine. Pay special attention to the wiring diagram;
prepare the tools and devices that will be needed in the process;
remember the safety rules. It is important to follow them when working with electrical appliances.
Before disassembling the washing machine, be sure to study the factory instructions and other documents included with the equipment.
To remove the drum from the washing machine, you will need the following tools and tools:
a pair of screwdrivers: Phillips and slotted;
screwdriver;
set of wrenches;
small hammer;
8 mm hexagon;
pliers;
WD-40 aerosol lubricant;
silicone sealant;
hacksaw for metal;
marker;
a low basin and a dry rag (to drain remaining water from the machine).
Craftsmen also recommend taking photographs or even recording video of individual stages of disassembly during the process of “home” repairs. This will make it easier to assemble the washing machine in the future, connect sensors, pipes and valves. Pay special attention to the wiring; it is important to reconnect strictly to the terminals and connectors provided for this.
What will prevent the tank from being removed?
Even a person who has never looked “inside” a washing machine will be able to remove the “tank-drum” assembly if he strictly follows the instructions. First of all, it is necessary to remove all elements and components that come into contact with the tank: pressure switch, dispenser, heating element, motor, counterweights, etc.
For smooth and quick disassembly, it is important to understand in what order it is best to disconnect the parts from the tank. Algorithm of actions.
Turn off the power to the washer.
Turn off the water supply tap.
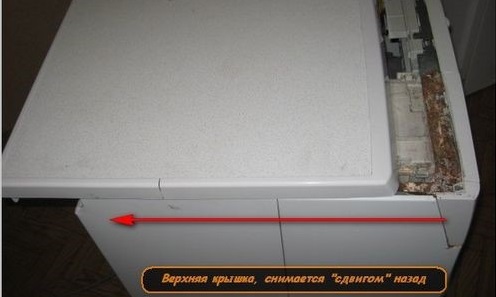
Remove the bolts holding the “top” of the housing. Remove the lid and set it aside.
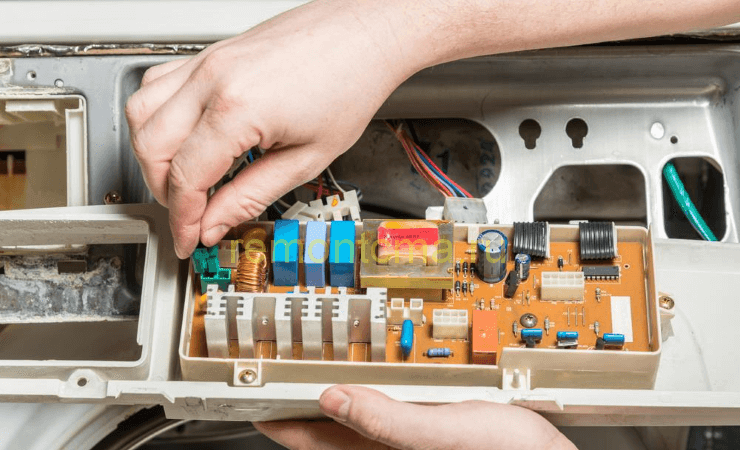
Unhook the control panel. The “tidy” is held on by several fasteners; they will have to be loosened. The first pair of clamps is “hidden” behind the powder receptacle, the rest are located around the perimeter of the module. There is no need to disconnect all wiring connecting the panel and the electronic unit. You can simply carefully place it on top of the case, or even better, hang it on the side on a special hook.
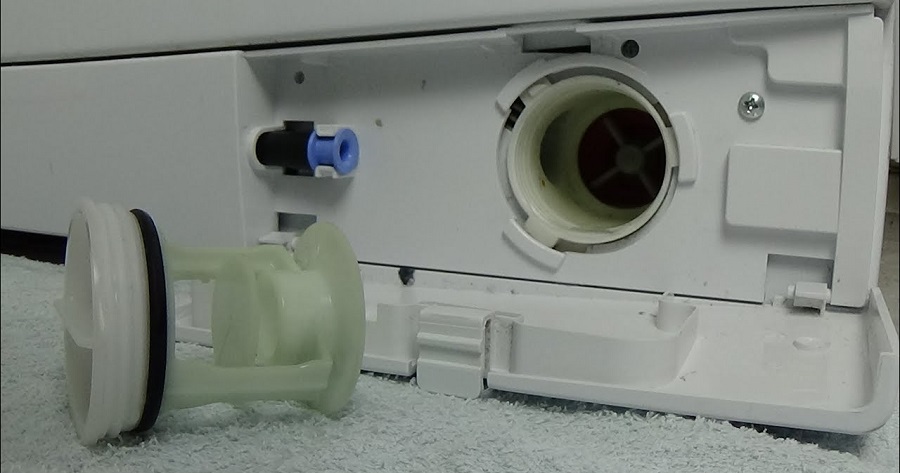
Drain any remaining water from the machine. At the bottom of the front panel, in the right corner there is a special hatch. Pry it open with a flat head screwdriver and open the door. Place a basin under the body and cover the floor around with rags. Unscrew the drain plug and catch any water that comes out of the hole.
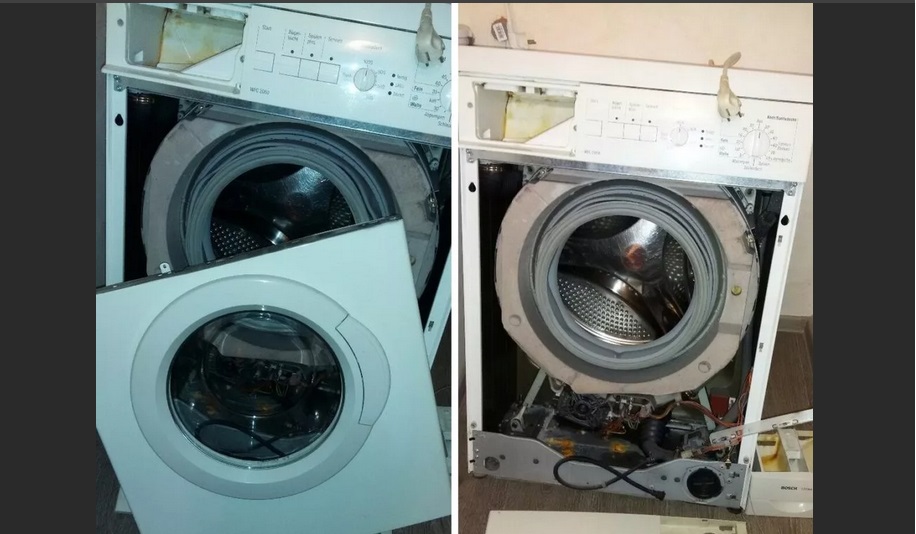
Remove the front panel of the case. First, loosen the clamp holding the door cuff and pull it out. Then tuck the sealing rubber into the drum. Then unscrew the bolts located around the perimeter of the wall and pull it towards you. When the “end” moves forward a couple of centimeters, disconnect the wires from the hatch locking device and remove the lock. Behind it, the front part of the housing can be completely detached.
Dismantle the main elements connected to the tank: heating element, drain pump, pressure switch, solenoid valve, etc.
Be sure to disconnect the pipe that connects the dispenser to the tank.
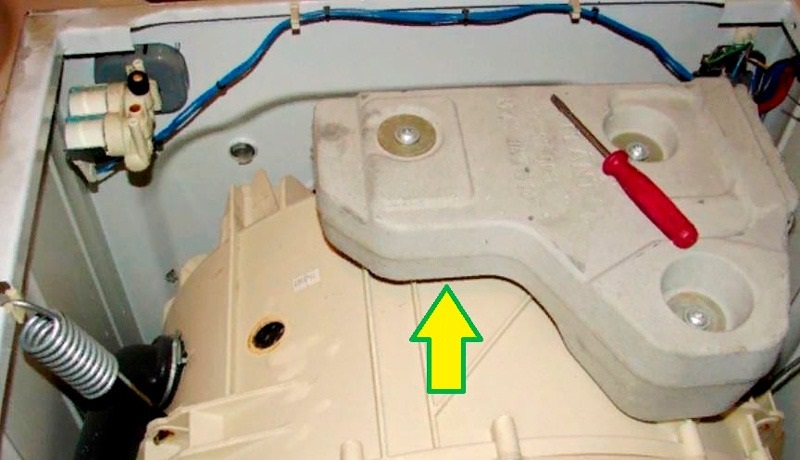
Remove counterweights. Each Electrolux washing machine has two concrete blocks under the lid. Weights give the body stability and “dampen” vibrations that occur during washing. To remove them, unscrew the fixing bolts and lightly shake the “stones”. Keep in mind that the elements are very heavy, do not drop the concrete from surprise.
Remove the shock absorbers. Springs are the last thing that will interfere with the removal of the drum. Unscrew the racks holding the tank and remove the shock-absorbing elements.
The tank in which the drum is “hidden” is very heavy, so it is better to pull the unit out together. You need to grab the edges of the container, lift it and pull it up.
The dismantled tank should be placed on the floor or table with the cross facing up. After removal, you need to disconnect the motor from the plastic container. Unscrew the fixing bolt, remove the engine and set it aside.
Experts recommend taking advantage of the situation and immediately checking all removed parts for functionality. Use a multimeter to test the heating element, water level sensor, motor, drain pump. It is also better to immediately clean the “insides” of the machine.Wash the garbage filter, pipes, powder receptacle in soapy water, and remove limescale from the heating element.
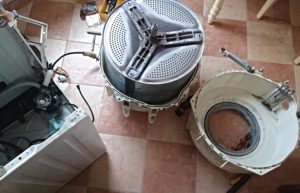
“Half” the tank and remove the drum
After the plastic container is removed from the case, all that remains is to halve it and pull out the drum. Most washing machines Electrolux are equipped with collapsible tanks, they can be easily separated if necessary.
The tank halves are securely fastened together; this is a prerequisite for protecting the tank from depressurization. Carefully examine how the parts of the plastic “shell” are connected. Typically, to halve the tank, you need to unscrew the screws located around the circumference (this is done using a screwdriver), or loosen the bracket fasteners (using a thin screwdriver).
Afterwards the algorithm of actions is as follows:
move the bottom of the tank to the side;
dismantle the pulley;
put a bolt in place of the pulley and knock out the shaft.
When the shaft does not give way, treat the joint with special lubricant WD-40. Wait 15-20 minutes and repeat the procedure. After this, you can remove the drum from the tank and perform the necessary repairs, in particular, begin replacing the bearings and oil seal.
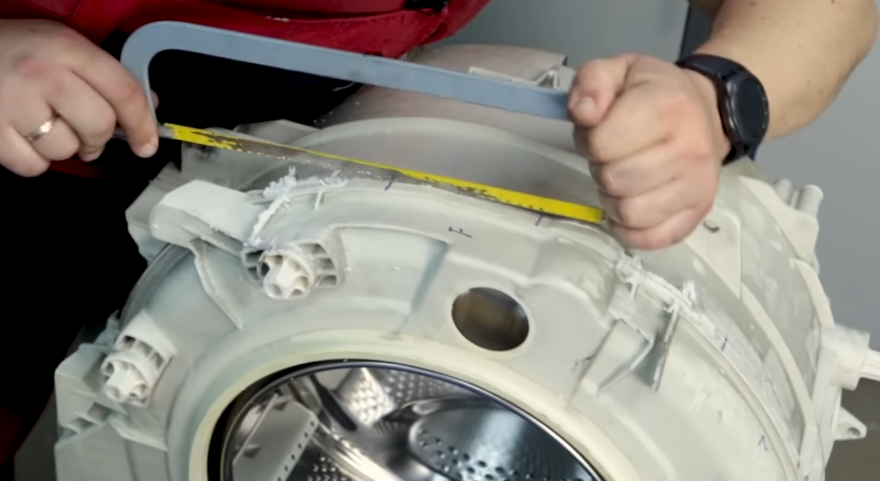
If the tank is non-separable, you can cut the container with a hacksaw, exactly along the seam, then connect the halves using silicone moisture-resistant sealant and screws.
Then all that remains is to assemble the automatic machine in the reverse order and run a test wash. If everything works and nothing is leaking, we can assume that the repair has been successfully completed.
 In almost any washing machine, after 7-10 years of use, the bearing assembly begins to “knock”. You can replace the elements yourself without resorting to the help of a specialist. You should understand that the repair will not be easy. You will have to disassemble the case, disconnect all the parts and wiring from the tank, remove the counterweights, shock absorbers and remove the drum from the Electrolux washing machine. Let's figure out what is required during the work, what rules you need to remember.
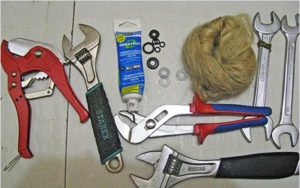


Add a comment