How to install a Beko dishwasher
 On average, a dishwasher lasts about 10 years, provided that the owners used the equipment correctly, observing all safety precautions and operating rules. After this kind of “expiration date” has expired, it is advisable to replace the machine with a new device, both in order to prepare in advance for the breakdown of the old device, and in order to start using modern technologies. Today we will look in detail at how to properly get rid of the old “home assistant”, check the new one for defects, and then install the Beko dishwasher.
Getting rid of the old broken PMM
First of all, you need to prepare a small set of tools, which will be useful for unpacking, connecting to the water supply and sewerage, as well as installing the PMM. You will need a stationery knife or ordinary scissors to open the box, a wrench or pliers, a minus screwdriver, FUM tape, as well as a building level to install the unit evenly with your own hands. If you've already prepared all this, then check out the following precautions to help you connect your dishwasher safely.
- Be sure to turn off all communications in the house before you begin dismantling old household appliances or installing new ones.
- Be sure to ensure that the equipment is unplugged.
- Place the dishwasher only on the most flat surface that can also support the weight of the machine.
Never place the PMM on carpet, rugs or any other type of carpeting as this will restrict air flow to the electrical components at the bottom of the machine, causing them to overheat and eventually fail.
- When you receive the device from a store or delivery service, be sure to make sure that it is not damaged and that the kit contains all the necessary elements described in the user manual.
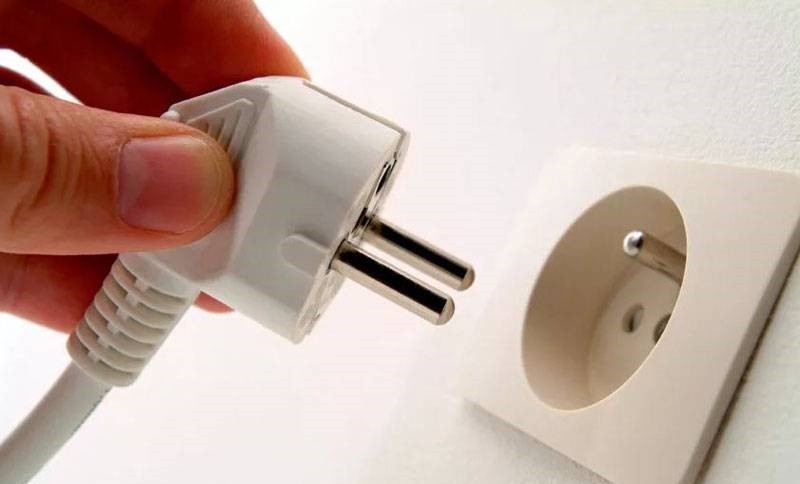
- Check the outlet in your home where you plan to plug your dishwasher. The outlet must be grounded, protected by a fuse, and must comply with the technical specifications specified in the instructions.
- After placing equipment in the house, make sure that it is not standing on its own wires or hoses.
- Never touch the fork with wet hands. Also, do not try to remove it from the outlet by holding it by the cord instead of by pulling the plug body.
- If you have a built-in PMM installed in your home, then do not forget to remove the mounting bolts before removing the device from the kitchen cabinet.
- Remember that dishwashers are very heavy, so either call movers or get help from your household. It is much easier to remove equipment from a niche by tilting it back and first placing an old carpet under the front legs, which can be pulled out along with the machine.
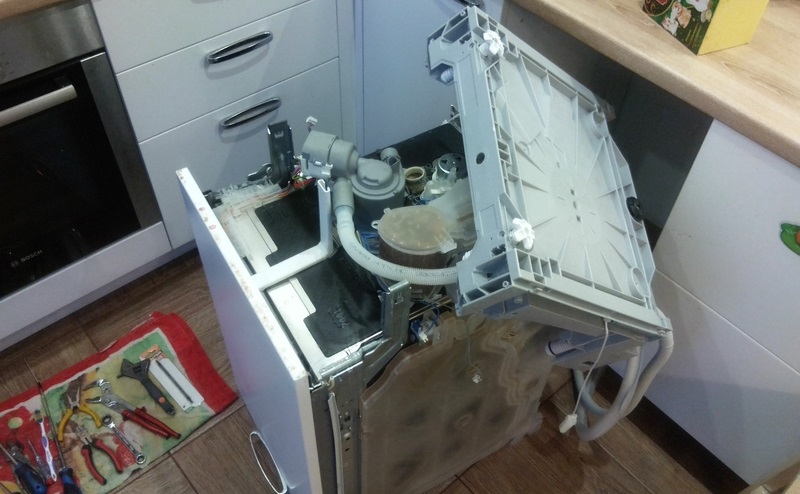
Once the dishwasher is removed from its old location, you will have access to the back panel of the appliance. The final step is to disconnect the power supply, as well as the inlet and drain hoses, for which you will need a wrench or pliers, as well as a small basin into which you will need to lower the hoses to drain the remaining water. At this point, the dismantling of the equipment is officially completed.
Preparing PMM Beko for installation
First, you need to free up space so that it is convenient to unpack your new purchase and install it in a new place. Having cleared the room, you can start unpacking, for which you will need a stationery knife or scissors. Open the box carefully so as not to accidentally scratch the PMM body with sharp objects. Remove all cardboard, foam and packaging that is located under the bottom of the machine. It is also a good idea to remove unnecessary advertising labels and stickers from the body and display of the machine, which will interfere with the operation of the device.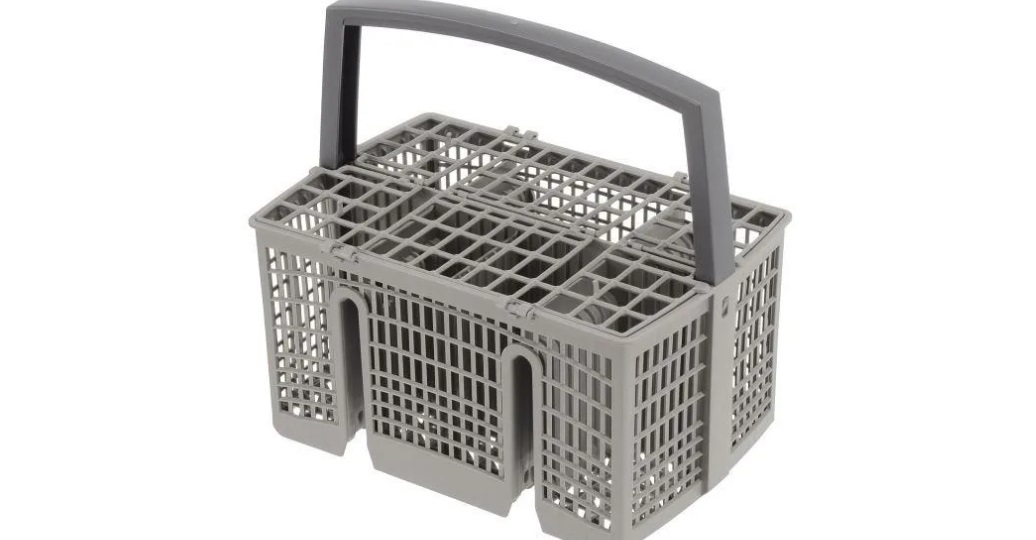
Once all packaging waste has been removed, you need to check the contents of your Beko dishwasher. It includes official instructions, a basket for cutlery, a funnel for conveniently loading special salt, and a test strip for checking the hardness level of tap water. Depending on the model of the “home assistant,” the package may also contain soundproofing tape, a starter set of household chemicals, and much more.
Finally, pay attention to the back of the machine, where the power cord and two hoses should be secured with plastic clips. The dark hose is for supplying water, and the light one is for draining. After completing the test, all that remains is to move the machine to the installation site to connect it with your own hands and start washing the dishes.
We install the PMM with our own hands
It is very convenient to install a new PMM in a situation where you previously already had a dishwashing machine. In this case, you will not have to prepare a place for a free-standing device or drill holes in the walls of cabinets for hoses and wires for built-in equipment.
The same applies to the prepared water supply system. If it is not there, you will have to additionally purchase a double valve to connect to the water supply and sewerage system. There are two holes prepared on this valve in order to connect two hoses to one water pipe at once. You can read more about this process in the Beko appliance user manual.
We begin installation by connecting the drain and inlet hoses. To do this, you need to release the water supply hose from the clamp in which the manufacturer fixed it and connect it either to the water supply or to the already mentioned convenient double valve. Afterwards, all that remains is to fix the connection by turning the plastic bolt with your own hands and additionally sealing it with FUM tape.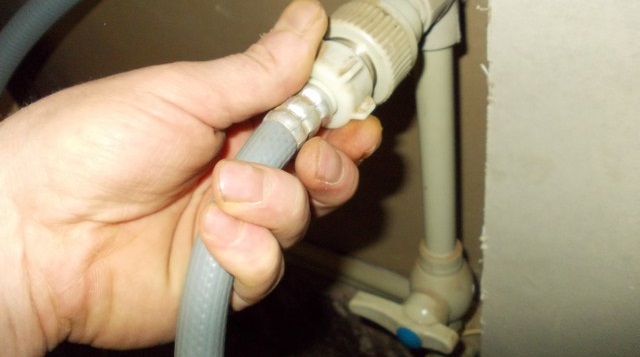
There is no need to release the drain hose from the plastic holder, since it must be permanently fixed to the PMM body so that the waste liquid does not return back to the washing chamber, but goes directly to the sewer. Connect the drain hose to a separate outlet, to a sink drain pipe, or to a wall drain if it was prepared in advance for the previous dishwasher. In the latter case, you need to pull the edge of the drain sleeve inside the hole about 12 centimeters.
If you connect the drain hose to a sink pipe or to another separate outlet, make sure that it is at a height of 40-100 centimeters from the floor level to avoid problems with draining the waste liquid.
When there is no separate drain hole, you will have to connect the drain hose to the drain on the sink pipe. Usually there is a separate hole on the U-shaped pipe bend in order to connect the drain hose to it.If during the previous PMM you used this particular drainage method, then the pipe should already have a connecting element for the hose.
If this is the first installation of a dishwasher, then most likely you will have to install the connecting element for the drain hose yourself. To do this, you need to unscrew the plug of the auxiliary drain hole and connect the connecting element in its place, after making sure that all limiters and plastic fuses have been removed.
Having finished preparing the water communications for draining, all that remains is to connect the drain hose. Secure it tightly with a metal clamp, and then proceed to connecting the equipment to the power supply. As we wrote earlier, only a separate power outlet is suitable for this, preferably with moisture protection and a circuit breaker for increased safety.
When connecting the dishwasher to electrical communications, you should not only use an extension cord or multi-pin sockets, which can cause a fire, but also refurbished power cords, which are best replaced immediately with new ones.
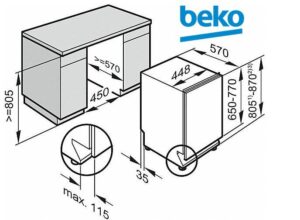
After connecting to the water supply and electrical network, all that remains is to install the new “home assistant” in a place prepared in advance for it. Once again, make sure that you do not accidentally install it on a wire or hose. Finally, level the equipment to a building level so that there is no risk of internal components becoming unbalanced and causing unnecessary shaking when operating your Beko dishwasher. The adjustable legs of the equipment will help you achieve a perfectly level installation, which is most convenient to handle with a wrench.
At this point, the installation is complete - you can first begin a test dry wash, and if everything goes well, then a full operating cycle.
Interesting:


Reader comments
- Share your opinion - leave a comment
Categories
Washing machine repair


For buyers


For users


Dishwasher


Add a comment