How to install a clamp on the cuff of an LG washing machine
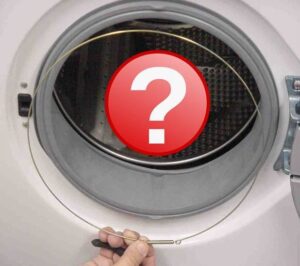 When water flows from under the hatch door of the washing machine, it is extremely dangerous both for the flooring and household appliances, and for family members who may suffer from an electric shock. This is why a leak should always be repaired without delay, especially if it appears due to such a minor problem as a damaged rubber seal. Putting a clamp on the cuff of an LG washing machine is very simple if you know the correct procedure, follow safety precautions and take your time. To avoid accidentally damaging the rubber during dismantling and installation, read our publication.
We install a clamp hidden behind the front wall of the case
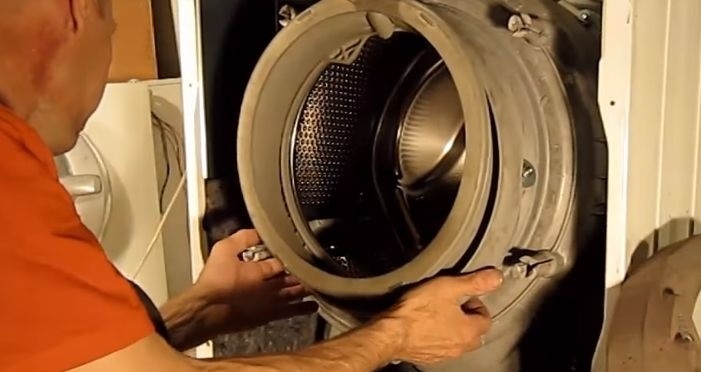
If you need to replace the clamp holding the rubber seal in place, then someone has already successfully dismantled it. Any cuff in the “home assistant” is securely fixed by two reliable metal holders. These external and internal fasteners are installed at the factory so that nothing can accidentally loosen them. That is why it is so difficult to install them back, because poor installation can cause another leak. Depending on the model of the washing machine, there can be two ways to install the clamp:
- if the clamp is screw-type, then you need to loosen it before putting it on, and then tighten it securely;
- if the clamp is spring, then it should first be stretched by hand and fixed on the cuff, where it will return to its original size.
In the second case, it is necessary to use brute force and try to clearly place the element in a small seat, so this procedure is rarely successful for beginners the first time.Because of this, experts recommend that you first try to fix the old cuff in order to get used to the process of installing the spring clamp and then not accidentally damage the working rubber seal with a screwdriver.
This practice will save the family budget, which will not suffer due to the inappropriate purchase of a new cuff instead of a damaged one. How to properly install a spring clamp?
- Thread the edges of the elastic into the drum.
- Unscrew the hatch lock, having first removed the two fixing screws on the front part of the housing.
- Place a flathead screwdriver into the lock where you want to engage the latch with it.
- Use another screwdriver to tighten the spring all the way around, starting at the snag.
- Return the rubber seal and lock to their normal position.
This concerns the spring clamp, the installation of which can make even an experienced service center employee sweat. If you need to install a screw clamp, then follow these instructions:
- remove the top panel of the LG automatic SM;
- unscrew the screw to a suitable diameter;
- bring it to the designated place where it will be on top;
- Through the hole in the washing machine formed after removing the top cover, get to the screw and tighten it securely.
Use the type of clamp installation that is convenient for you personally, because the type of clamp does not depend on the model and brand of household appliances.
The described methods are relevant for new machines that provide for adjusting the clamp with screws and springs. If you are using an old device, then most likely you will have to use pliers or a similar tool.
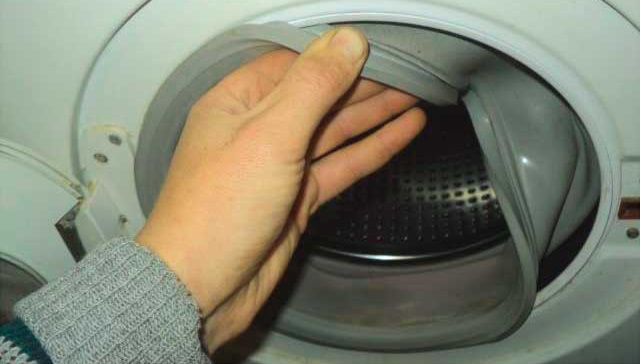
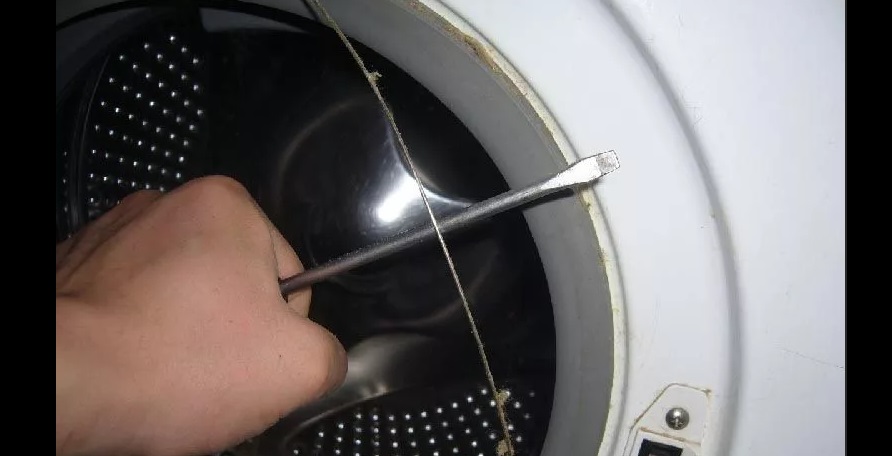
Installing the outer clamp
Fortunately, installing the outer clamp is much easier, because there is nothing blocking access to its seat, so this process will take less time. The instructions for fixing remain the same - first you need to put the spring ring on one side, hook it on the opposite edge with a screwdriver, and then install it in the seat. After installation, it is very important to check the quality of the installation, paying attention to the marks of the rubber seal with the housing, which must correspond to each other. If the clamp is not installed in the groove provided for it, the user risks suffering from leakage during the operating cycle of the SM.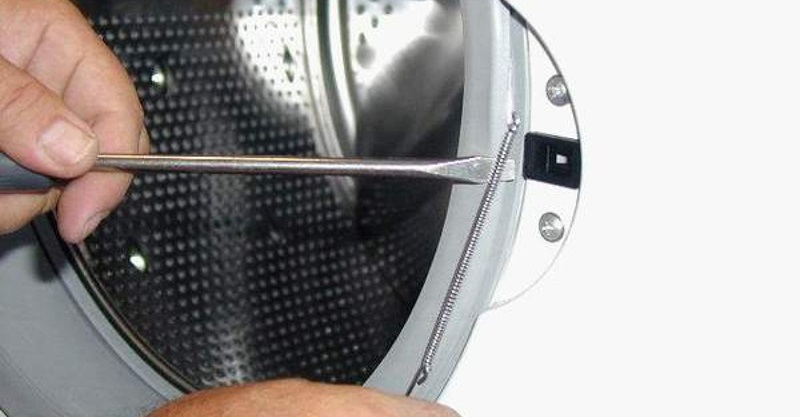
At the same time, the algorithm for installing a spring clamp also remains the same - you need to unscrew the screw, loosen the ring, place it on top of the rubber seal along the outer edge, and then tighten the screw securely. Do not under any circumstances overtighten the bolt so as not to accidentally strip the thread, which will cause the retainer to fail and you will have to buy a new spare part. It is also worth making sure that during washing the ring does not fall out of its seat and does not become warped due to the fact that it was not tightened tightly enough or was installed past the thread.
During restoration work, do not rush, strictly follow the instructions, and also enlist help to make it easier to install the clamps.
If you can only turn the screw with great force, you should not try to apply even more force. In this situation, a technical lubricant, such as WD-40, will help. Carefully lubricate the screw threads, rotate the holder several times to distribute the product throughout the entire element, and then finally install it in place, fixing the clamp.
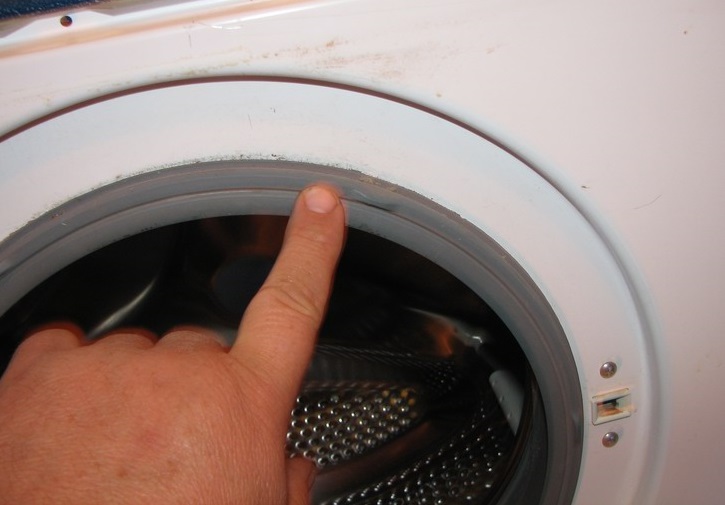
Is it necessary to change a torn cuff?
It is not always necessary to install a new rubber seal instead of a damaged one. If the cuff is damaged due to a small hole at the bottom of the element, then the user is lucky, because in this case you don’t have to buy a new elastic band and save money. To do this, you can simply turn the cuff over so that the hole is on top. Due to this procedure, the damaged area of the elastic will simply no longer come into contact with water, so leakage will be prevented.
It is extremely important not to force the cuff upwards. If you have already removed and installed the fixing clamps, then you know very well that they will not allow you to move the rubber element of the washing machine even a centimeter. Therefore, brute force in this situation will only make the problem worse. What should I do to properly flip a damaged cuff?
- Bend the edge of the rubber band near the hatch wall and find a plastic or metal clamp there.
- Pry it up with a screwdriver and move along it to the fastener.
- Loosen it and put it aside temporarily.
- Return the rubber seal to its normal position to locate the internal retainer.
- Pry it off with the same screwdriver, but do not remove it, because this is not necessary.
- Turn the cuff over so that the hole is at its maximum height.
- Secure the part with an internal clamp.
- Unscrew the rubber band again, install the outer holder, and then return the seal to its normal state.
- Make sure that all elements are securely fixed in their seats and do not interfere with the normal locking of the CM door.
During any work with the rubber seal of the washing machine, it is very important not to use sharp objects that can damage the element.This applies to thin screwdrivers, stationery and table knives, as well as other dangerous tools.
Interesting:


Reader comments
- Share your opinion - leave a comment
Categories
Washing machine repair


For buyers


For users


Dishwasher


Add a comment