Disassembling the drum of a Zanussi washing machine
 Not everyone can disassemble the drum of a Zanussi washing machine. The equipment of this brand has a non-standard design, and to access the tank you will have to at least halve the body of the machine. Further, it is even more difficult to take the containers out, and the main difficulties begin at the stage of separating the plastic container and removing the drum. Despite all the obstacles, you can cope with Zanussi on your own. The main thing is to be prepared and follow the instructions.
What will you need for the job?
Disassembling a Zanussi washing machine begins with preparation. The first thing you need to do is take care of your workplace. Disconnect the equipment from communications, move it to the center of the room, providing free access to all sides of the case, and cover the surrounding space with oilcloth and rags.
Then we start collecting tools. For disassembly you will need: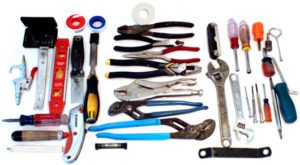
- pliers;
- awl;
- screwdriver;
- heads of different sizes;
- hammer;
- Screwdriver Set;
- a drift or car puller (for knocking out the drum shaft);
- WD-40 lubricant (for cleaning elements that cannot be twisted out).
Zanussi washing machines are very different in design from machines from other manufacturers - to disassemble them you will have to halve the body, and not just remove the back panel.
Having prepared the place and tools, you can begin the repair. To avoid mistakes during reassembly, it is recommended to record all your actions on a video camera. We must not forget about safety precautions and caution.
Removing and separating the tank
So, to access the “insides” of the Zanussi washing machine, you will have to divide the body into two parts.It sounds problematic, but in reality the task is complicated only by a few manipulations. So, to get to the tank with the drum, you need to:
Before any repair operations, the washing machine must be disconnected from all communications, especially from the water supply and electrical network.
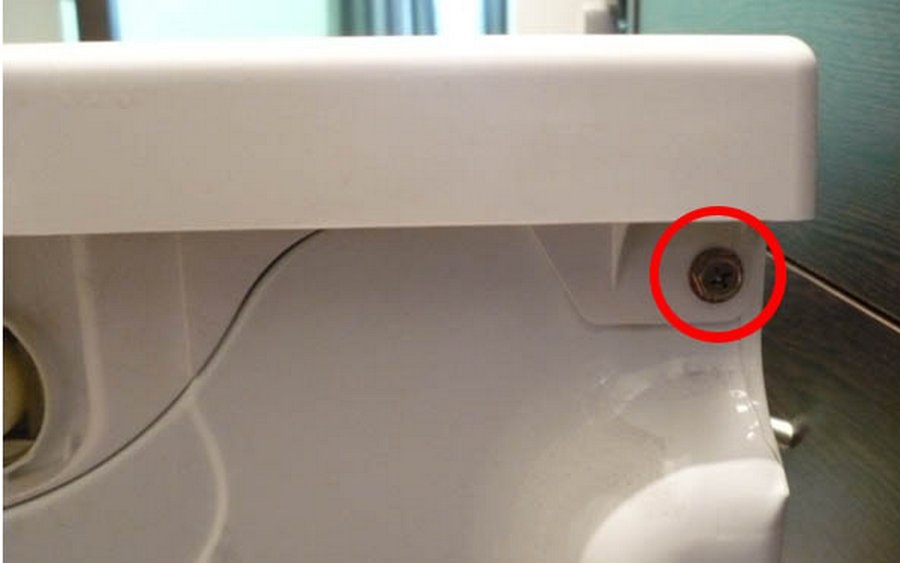
- approach the right side of the machine;
- find the bolt at the bottom center of the side panel;
- use an awl or other sharp object to pry off the rivet head, exposing the screw;
- install a 7-8 head on the screwdriver (depending on the Zanussi brand) and unscrew the bolt;
- approach from the left side and unscrew the bolt there in the same way;
- go around the washing machine and unscrew another 3-5 bolts from the bottom and top that hold the “back”;
- unhook the drain hose from the back wall, putting it aside;
- remove the top cover by pushing and lifting away from you;
- find a metal strip under the cover, loosen the screws securing it and remove the “spacer”;
- use a screwdriver to pick up the part with the power cord and disconnect it from the body;
- grab the back half of the body and push it to the side.
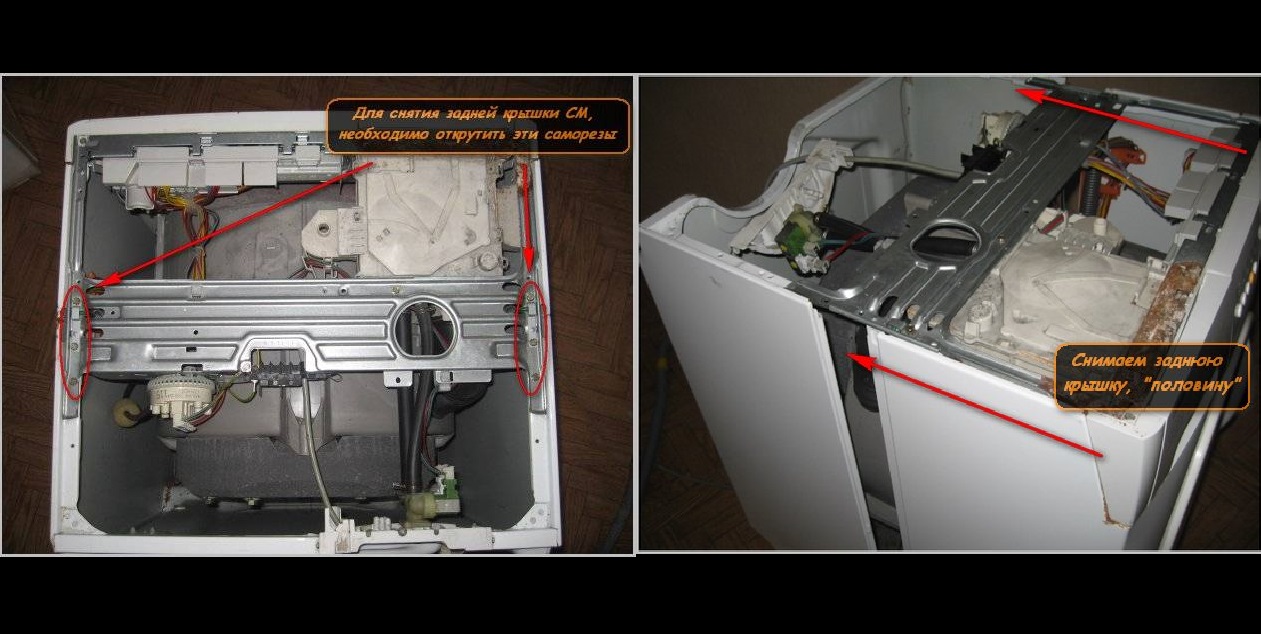
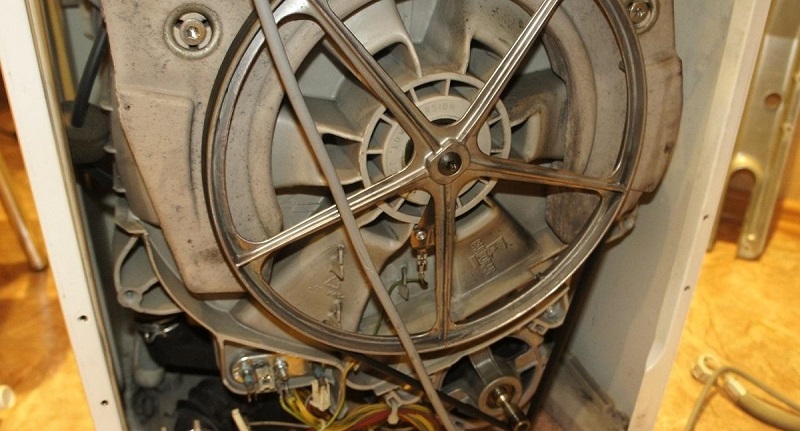
After removing the “back”, access to the internal structure of Zanussi will open. Now you need to free the tank from the parts and devices connected to it. First of all, remove the drive belt by carefully pulling the rubber band off the pulley while turning the “wheel”. Then we disconnect the crosspiece, disconnect the wiring connected to the electric motor, and then unscrew the bolts holding the motor and, after swinging it, remove the engine from the housing. There is no need to touch the heating elements or counterweights - they must remain in place.
Next in line is the tank. It is necessary to free it from all connected pipes and hoses, as well as from the pressure switch, dampers and heater wires.Next, we move to the front panel and take on the hatch. You will need to remove the spring clamp from the cuff and tuck the elastic into the drum.
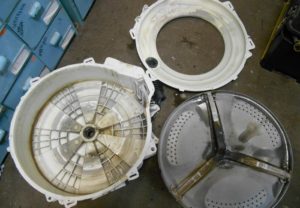
At the finish, we unhook the two upper springs from the body that hold the tank suspended, and freely remove the container out. We place it on a dry, flat surface with the shaft down and proceed to divide the tank into two halves and then remove the drum:
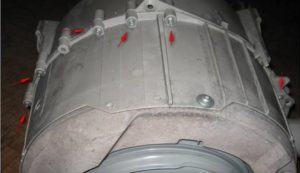
- Using a screwdriver around the entire perimeter of the tank, unscrew the bolts on the central seam;
- disconnect the top part from the bottom and put it aside;
- turn the tank with the drum upside down.
All! It makes no sense to take out the drum cleanly - it always comes “complete” with the back of the tank. Moreover, it is recommended to change both tanks together, as a single unit. Also with the dismantling and replacement of bearings with an oil seal, which can be reached without completely disconnecting the containers.
When disassembling Zanussi, it is recommended to clean and “ring” all structural elements in order, if necessary, to replace faulty parts and extend the service life of the machine.
The further procedure depends on the purpose of the repair. If it was necessary to clean the tanks from dirt and plaque, then you can start “cleaning” at this stage. To replace the bearing assembly, you just need to place an old tire under the tank so as not to damage the drum when the shaft is subsequently knocked out, take a drift, WD-40, a hammer and remove the gasket with bearings. The machine is assembled according to the instructions described above, only in reverse order. At the “finish line”, the equipment is connected to communications and checked for functionality.
Interesting:


Reader comments
- Share your opinion - leave a comment
Categories
Washing machine repair


For buyers


For users


Dishwasher


Add a comment