How to remove the washing machine door?
 If the door on the front washing machine breaks down, then you should not immediately rush to the service center. The locking mechanism on horizontal-loading machines is quite simple, and the user can independently deal with even a complex breakdown. You just need to understand how to remove the washing machine hatch, disassemble it and replace the damaged elements. Detailed instructions will help you cope with the task.
Removing the element from the body
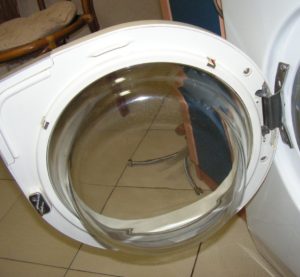
Repairing a suspended door is a troublesome and extremely inconvenient task. It’s better not to complicate your task and remove the hatch from the body along with the hinges. This is done simply:
- remove the outer clamp on the hatch cuff;
- we fill the seal inside the drum (it is not recommended to completely remove the rubber band, since returning it to its place is difficult and time-consuming);
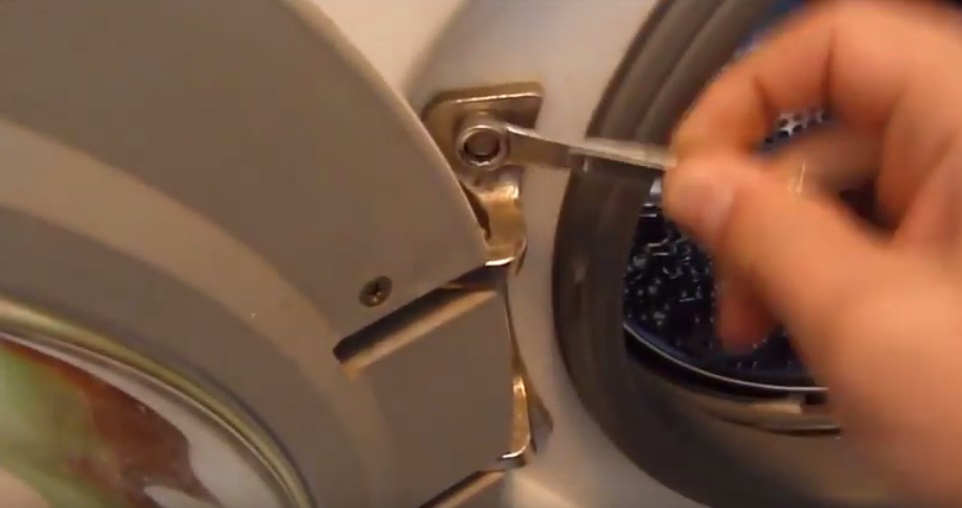
- We find one retaining bolt near each door hinge;
- take the key that fits head number 8.
- completely unscrew the bolts.
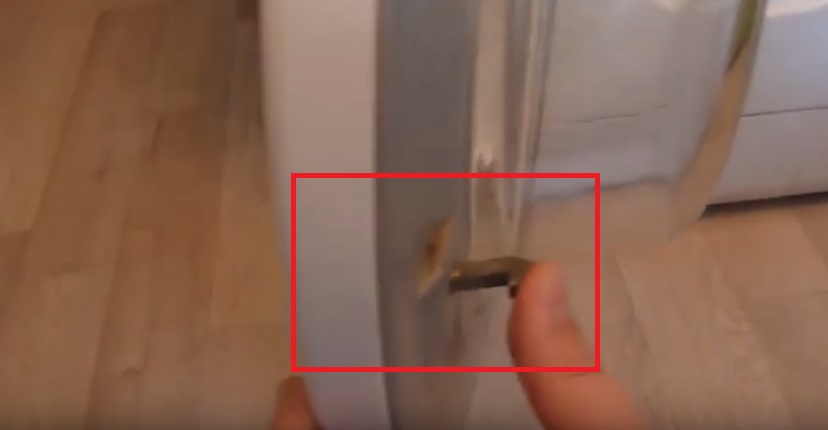
Be prepared for the door not to come off right away. In addition to the removed bolts, it is also secured with special hook holders. To free the hatch from them, you need to carefully lift the hinges 4-5 mm up, and then pull them towards you. If everything is done correctly, the door will easily leave the grooves.
When removing the door, be extremely careful: the locking hooks are made of plastic and can break off under strong pressure.
Why remove the manhole cover?
Before you start repairing a door, it is worth studying its structure and mounting features. As a rule, all washing machine manufacturers adhere to the same design. But each model has its own characteristics that must be taken into account when carrying out any work.We also make sure to study the electrical diagram and try to determine the nature of the malfunction before disassembling. There are enough reasons to replace the door or its components:
- broken glass;
- latch that does not work or sticks;
- sagging hinges;
- failure of the hinge support.
In addition to the glass, lock and hinges, the UBL can also fail. The hatch locking device is located separately on the washing machine body, but plays an important role in closing the drum. Now we will analyze each breakdown and necessary repairs in more detail.
Looking at the locking device
You can guess that the UBL is malfunctioning by several telling “symptoms”. The most important thing is that the machine will display the corresponding error. A door that does not open at the end of the cycle or does not lock when closing also indicates problems with the electronic locking.
To remove and check the functionality of the UBL, you need to remove the device from the housing. But first, you should prepare some tools: a flathead and Phillips screwdriver, a multimeter and a double wire. The latter must have terminals on one side and a plug on the other for connecting to a 220-volt outlet.
Now we remove the UBL from its seat through the top cover of the washer. You can also get the device through the drum, but, we repeat: it is better not to touch the hatch cuff.
- Disconnect the washing machine from the power supply and water supply.
- We unhook the drain and inlet hoses from the machine.
- We provide free access to equipment by moving it away from the wall by 0.5-1 m.
- Loosen the bolts holding the housing cover and remove it.
- We find the fasteners that secure the UBL, which are located directly behind the door lock, and unscrew them.
- We put our hand through the top to the UBL and, holding it with the other hand, disconnect it from the supplied wiring.
- We take out the device.
Next, we begin to diagnose UBL. We take a multimeter, set it to measure resistance and apply the probes to “zero” and “phase”. Then we evaluate the result on the scoreboard: if a three-digit number is shown, then there are no problems with blocking.
Now, using a thin screwdriver, switch the UBL to the “Open” position and connect the device to the socket through the wire. If the mechanism works and a click is heard, then there are no complaints about the performance of the blocker. It doesn’t hurt to attach probes to the neutral and common contacts. The part is operational when “0” is displayed on the display.
Repairing the locking mechanism
If the door does not close tightly, then there is suspicion of deformation of the latch lever. More precisely, irregularities appear on the part, which prevent the hatch from being fixed in the locking mechanism. It's easy to fix the situation:
- remove the door according to the algorithm described above;
- unfold the hatch with the latch towards you;
- take a file and grind off all the existing nicks and irregularities;
- lubricate the surfaces with graphite lubricant for prevention;
- we return the door to its place.
You must handle the hatch door with extreme care: do not hang wet things on it and do not allow children to “ride” on them.
When problems with closing the hatch are caused by sagging hinges or loose fasteners, you need to adjust the position of the door hinges. But here everything is determined by eye: we twist and tighten the fasteners until they fit completely into the grooves.
Fixing the glass problem
Broken, broken or cracked glass will prevent you from continuing to use the washing machine. To continue washing, you will have to either replace it or seal it securely.Unfortunately, the replacement option is not suitable for all machine models. More often, the user has to seal the cracks or go to the store for new equipment. Fortunately, it is not difficult to cover up cracks in glass if you follow the instructions.
- Tape the plastic film on the outside without any gaps or voids.
- Place reinforcing tape on the inside of the damage.
- Prepare an epoxy resin solution. Mix the resin and hardener until smooth in a ratio of 6 to 4 based on EDP glue. The consistency of the mixture should be like thin sour cream. If it turns out thicker, then heat it in a water bath, stirring occasionally.
It is better to seal cracks using an epoxy resin solution, since special sealants are washed out over time and leak.
- Fill all cracks and cracks with the resulting resin solution.
- Wait 24 hours.
- Remove the polyethylene and clean out any irregularities on the glass.
It is important to observe the timing and ratio of ingredients when using a resin and hardener solution. Otherwise, the protection will not last as long as desired.
Repairing the handle
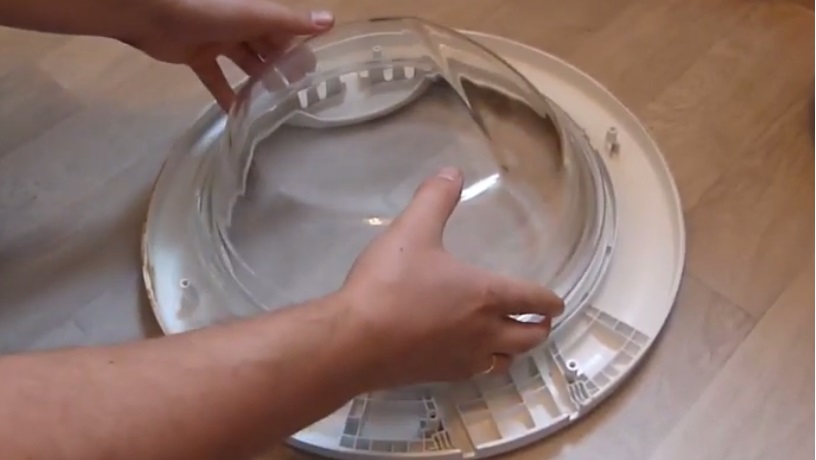
Repairing or replacing a door handle is different. The removed hatch must be placed on a flat surface and all bolts around the perimeter must be unscrewed.. Next, we will half the structure and remove the glass.
The next step is to repair the support:
- drill a hole of about 3.8-4 mm on the part;
- cut the nail to the appropriate depth;
- heat the sawn nail and insert it into the hole;
- We wait a few minutes and check the integrity of the support.
Follow the operating instructions for the washing machine and read the instructions before using it for the first time.
It is better to avoid problems with closing the door.To do this, it is enough to operate the washing machine carefully, do not tug the handle too much and do not clap when locking the drum. Careless handling leads to premature wear, sagging and breakdowns, which are not difficult to fix, but quite troublesome.
Interesting:


Reader comments
- Share your opinion - leave a comment
Categories
Washing machine repair


For buyers


For users


Dishwasher


Add a comment