How to install the drum of an Indesit washing machine?
 Often, if it is necessary to replace the bearings and seal in the SMA, the owners remove the tank themselves and hand the unit over to professionals for repair. Craftsmen disassemble the tank, make a replacement, and transfer the repaired prefabricated structure to customers. Self-removal of the tank with the drum and their subsequent installation allows the owner to save on repairs. How to install a drum on an Indesit washing machine so that the “home assistant” starts working again?
Description of the drum installation process
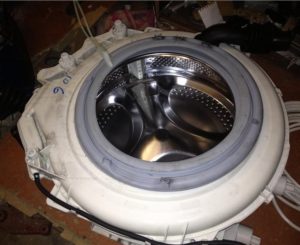
If you removed the tank, then you have an idea of how to put the drum in place. The first step is to put the pressure switch hose on the fitting. Afterwards, the assembly unit is inserted inside the washing machine body so that the hole in the front wall for the hatch coincides with a similar hole in the drum. At the same time, the tank is suspended by two springs.
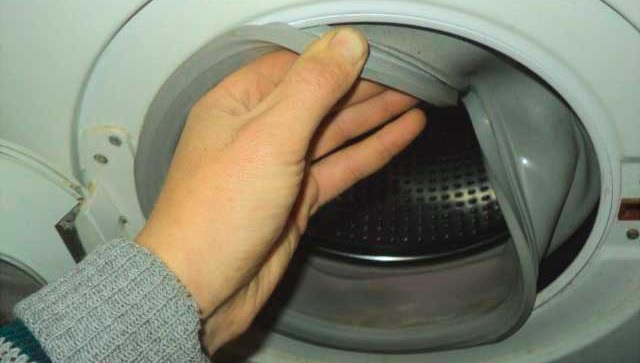
Next, the control panel of the machine is put in place. It should fit into the grooves, after which you can fix the panel with bolts. Next, the edges of the sealing cuff are treated with liquid soap, after which the elastic band is pulled over the protrusion of the front wall of the case. Please note that if the cuff was removed completely when removing the tank, you will first have to put it on the tank, secure it with an internal clamp, then pull the edge of the seal onto the front wall and secure it with an external metal clamp.
Then you need to put the Indesit washing machine on its side and begin connecting the previously removed elements. Installation of parts is carried out through the bottom of the machine.
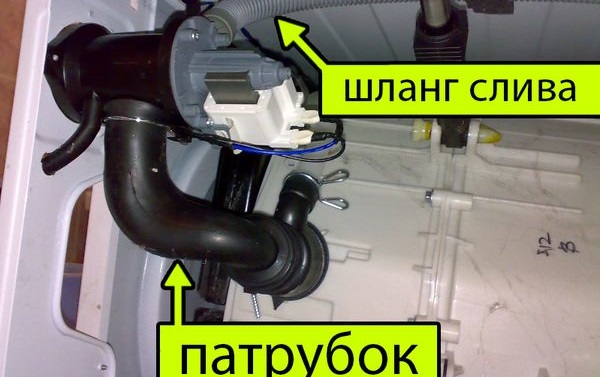
- Connect the drain pipe to the tank and secure it with a clamp.
- Secure the dampers well.
- Replace the electric motor and tighten it with bolts.
- Connect the wiring to the engine and drain pump.
- Attach the heating element (heating element) and temperature sensor, connect the wires supplying them.
- If the machine has a belt drive, put it “on its feet” and install the pulley through the rear panel of the case, tension the drive belt.
- Put the water level sensor in place, connect the wiring that powers the pressure switch. Also secure the hose, making sure it is not clogged.
- Install a detergent dispenser.
Make sure that all hoses and pipes connected to the tank are secured with clamps.
Then you should install a water intake valve. The inlet hose and all pipes are connected to the element. It is important to check that the valve is installed securely and is not loose.
The Indesit washing machine is almost assembled. Now you need to put the counterweight in place and secure it with bolts. Next, the top cover of the housing is installed and secured with two self-tapping screws. Next, all that remains is to close the technical hole in the back wall of the washing machine and connect the equipment to the water supply and sewerage system.
Problems during reassembly of SM Indesit
Putting the drum in place and connecting the remaining parts and elements of the automatic machine is not a problem for the master. However, an inexperienced user encountering such work for the first time may experience some difficulties. What problems are we talking about?
- It is difficult to pull the cuff over the edges of the tank and the groove in the front wall of the machine. It is necessary to align the marks on the sealing rubber and the body. The “naughty” cuff fits quite tightly. It is better not to skimp on liquid soap to lubricate the edges of the elastic. The slippery edge of the cuff will fit over the ridge much easier.After installing the cuff, make sure that the hatch door closes freely. If something interferes with it, it means the seal is installed incorrectly.
- It is difficult to lock the engine in place. To be honest, doing this work from below is not very convenient. Professionals mount the motor in advance and immediately insert the tank with the motor attached to it into the housing. Of course, the prefabricated unit will be somewhat heavier, but subsequently you will not have to “tinker” with the engine separately.
- Putting on the drive belt is quite simple, but there is a small catch. It is important to align the grooves on the belt with the threads of the electric motor pulley, and only then straighten it on the drum wheel. Otherwise, the belt may come off during the first wash.
- Sometimes difficulties are caused by connecting the wiring of the heating element. If you have even the slightest doubt, be sure to look at the diagram. Incorrect connection of wires can lead to serious consequences.
In principle, installing a tank with a drum in the SMA Indesit is not difficult. Especially if you've already filmed it. Assembly is carried out in the reverse order, following the recommendations described above.
Interesting:


Reader comments
- Share your opinion - leave a comment
Categories
Washing machine repair


For buyers


For users


Dishwasher


Add a comment