Most Candy washing machines are equipped with non-removable tanks. The manufacturer recommends replacing the entire unit in case of breakdown. The work is quite labor-intensive, but you can do it yourself, at home, without the help of a specialist.
How to replace the drum in a Candy washing machine? We'll explain how to prepare for the repair and what tools you'll need for the job. Let us tell you the sequence in which SMA is analyzed.
Getting ready to repair the machine
The first step is to prepare the tools that may be required during the work. This is the standard set. You need to have on hand:
slotted and Phillips screwdrivers;
screwdriver;
hammer;
pliers;
side cutters;
set of socket heads;
hexagons.
The next stage is preparing replacement components. The “tank-drum” assembly is purchased for a specific model of Kandy washing machine. It is recommended to order spare parts from official representatives of the brand. When purchasing, be sure to refer to the serial number and name of CMA Candy.
To replace the drum, you will have to almost completely disassemble the washing machine. Therefore, it is recommended to prepare a full-fledged workplace. It is advisable to move the machine to a utility room where the most comfortable conditions for repairs will be provided.
If this is not possible, free up 2-3 square meters in the apartment. The floor should be covered with a blanket. Place the prepared tools nearby. Having equipped the workplace, you can proceed directly to the repair.
We remove the parts that prevent you from removing the tank
The next stage is preparing the washing machine. To replace the tank-drum assembly, you will need to almost completely disassemble the washing machine. To begin, de-energize the SMA by unplugging the power cord from the outlet. Afterwards, close the shut-off valve on the water pipe and disconnect the drain and inlet hoses from the housing.
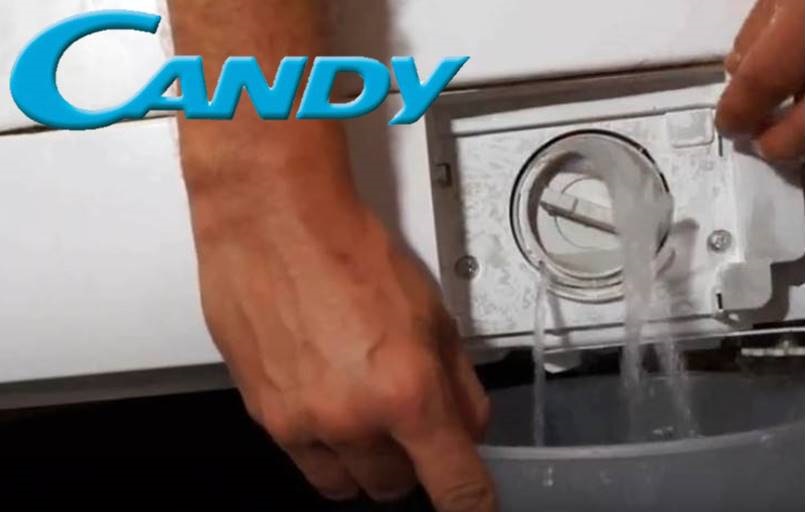
Next, you will need to remove any remaining liquid from the tank. This is done like this:
take a capacious container with low edges;
place it under the washing machine, at the location of the garbage filter;
Gradually unscrew the filter from the machine - the water will begin to flow into the container.
Then the drain filter must be washed, dried and put aside. You only need to screw it back in after the repair is complete. It is also advisable to immediately clean the hole that was formed after removing the “trash can”. Now you can start disassembling.
It is better to photograph all the actions performed - this will help to correctly assemble the automatic machine after the repair is completed.
To remove the tank-drum assembly from the Kandi SMA, you must:
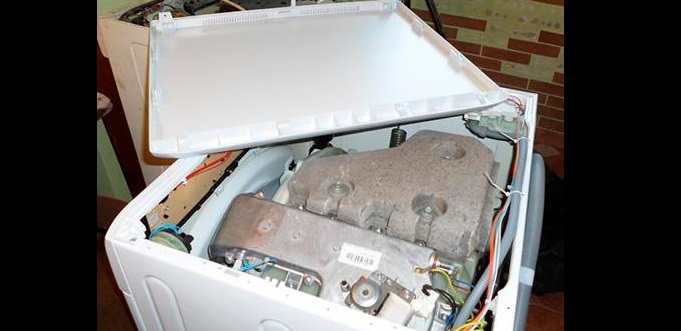
Unscrew the two bolts holding the top panel of the machine;
remove the housing cover (first you need to move it back, then pull it up);
remove all the screws securing the rear wall of the SMA housing, remove and put away the panel;
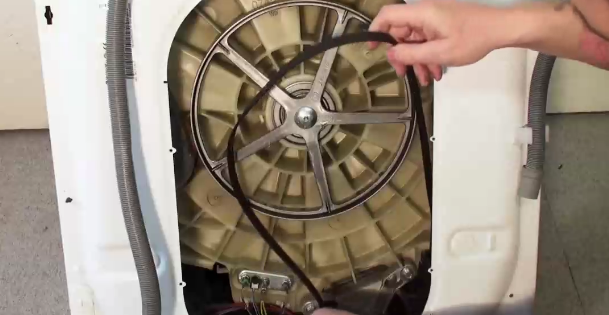
remove the drive belt from the pulley;
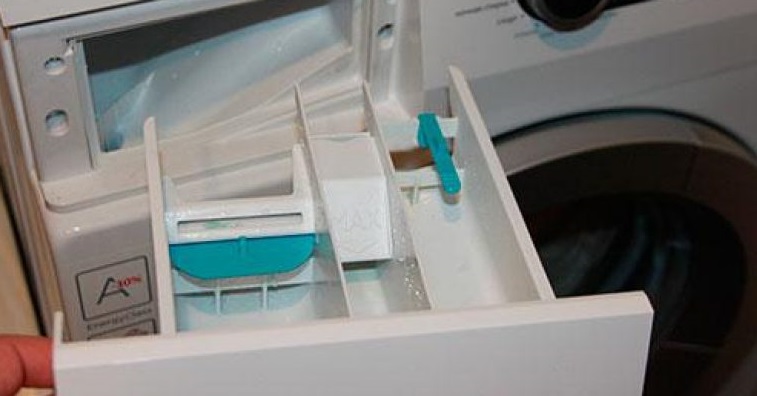
remove the powder tray from the washing machine;
loosen the clamps of the pipes connected to the dispenser, remove the tray hopper from the machine;
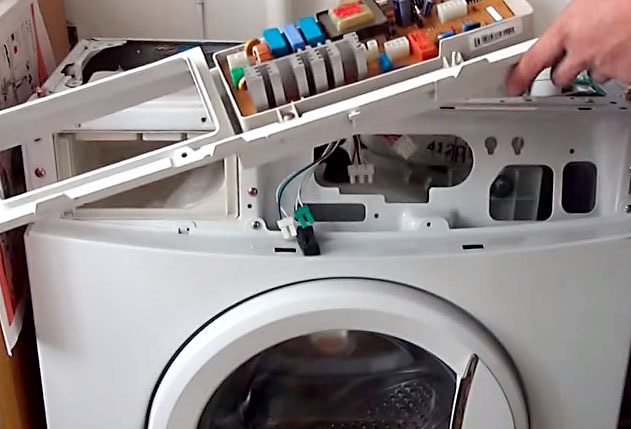
Unscrew the screws holding the SMA control panel, carefully hang the device on the service hook on the side of the washing machine (it is not necessary to disconnect the wires from the electronic module);
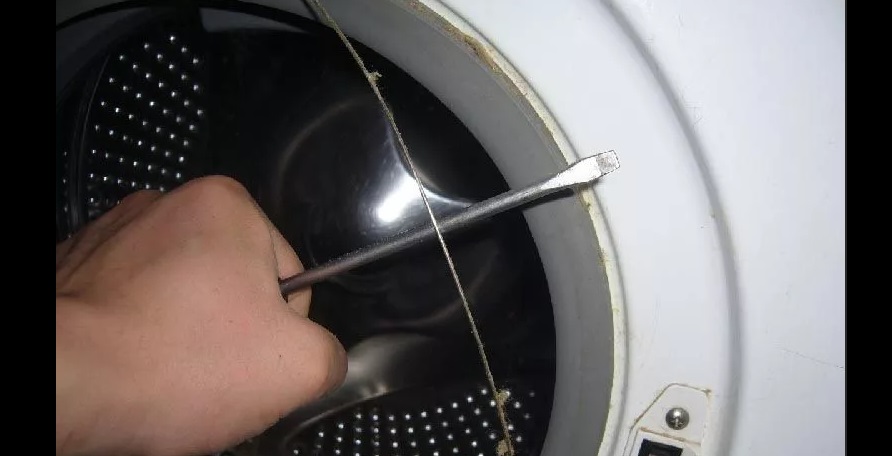
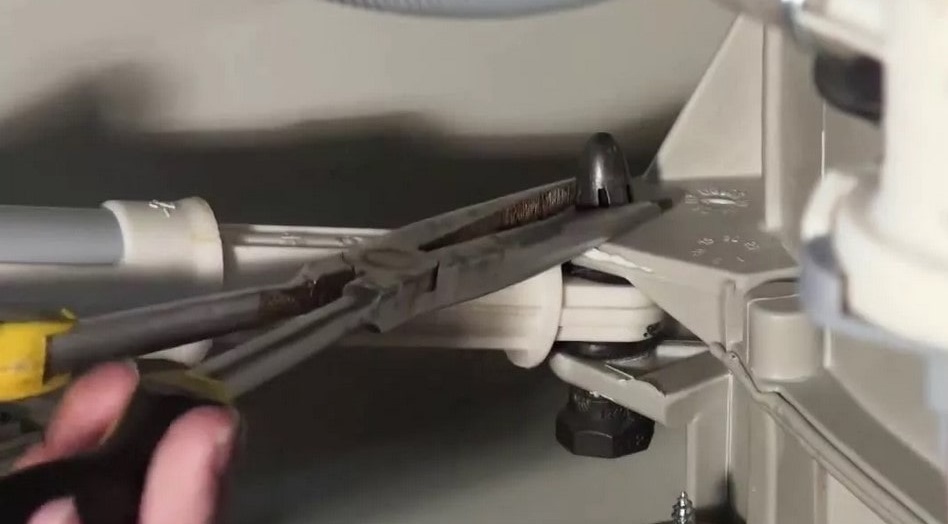
remove the outer clamp securing the hatch cuff, insert the seal into the drum;
remove the inner crimp clamp of the cuff through the top and pull out the elastic band from the SMA;
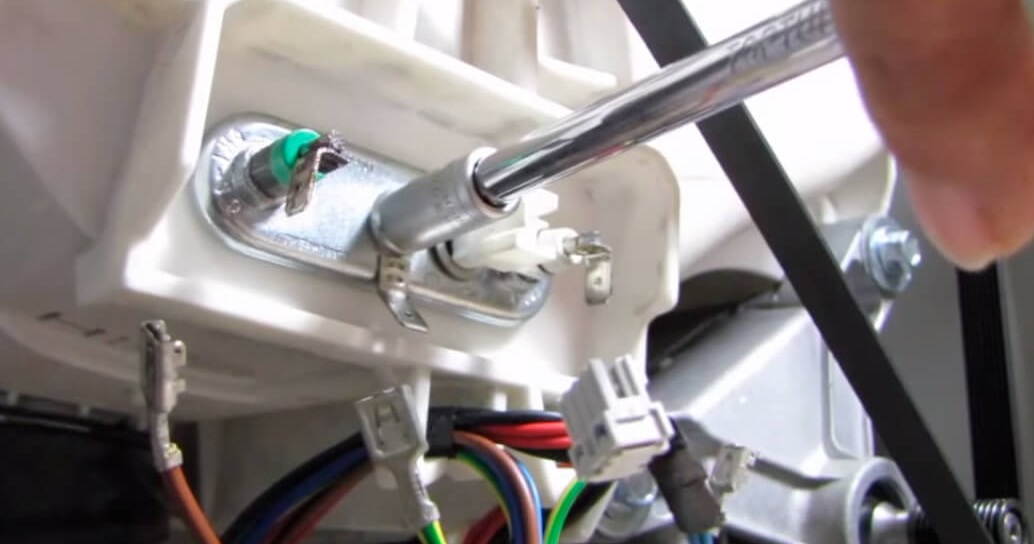
disconnect the wires connected to the washing machine tank (before doing this, be sure to photograph the contact connection diagram so as not to make a mistake during reassembly). We are talking about powering the heating element and thermistor;
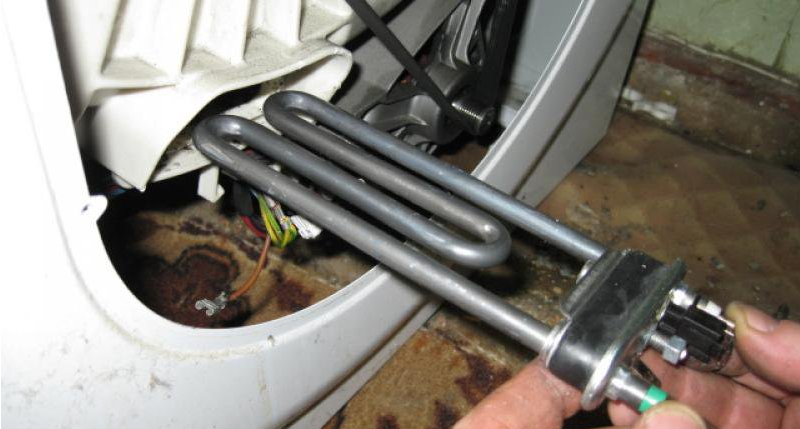
twist the nut securing the heating element and press the central bolt inward;
Using gentle, rocking movements, remove the heating element from the machine;
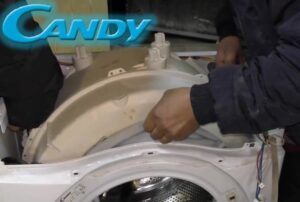
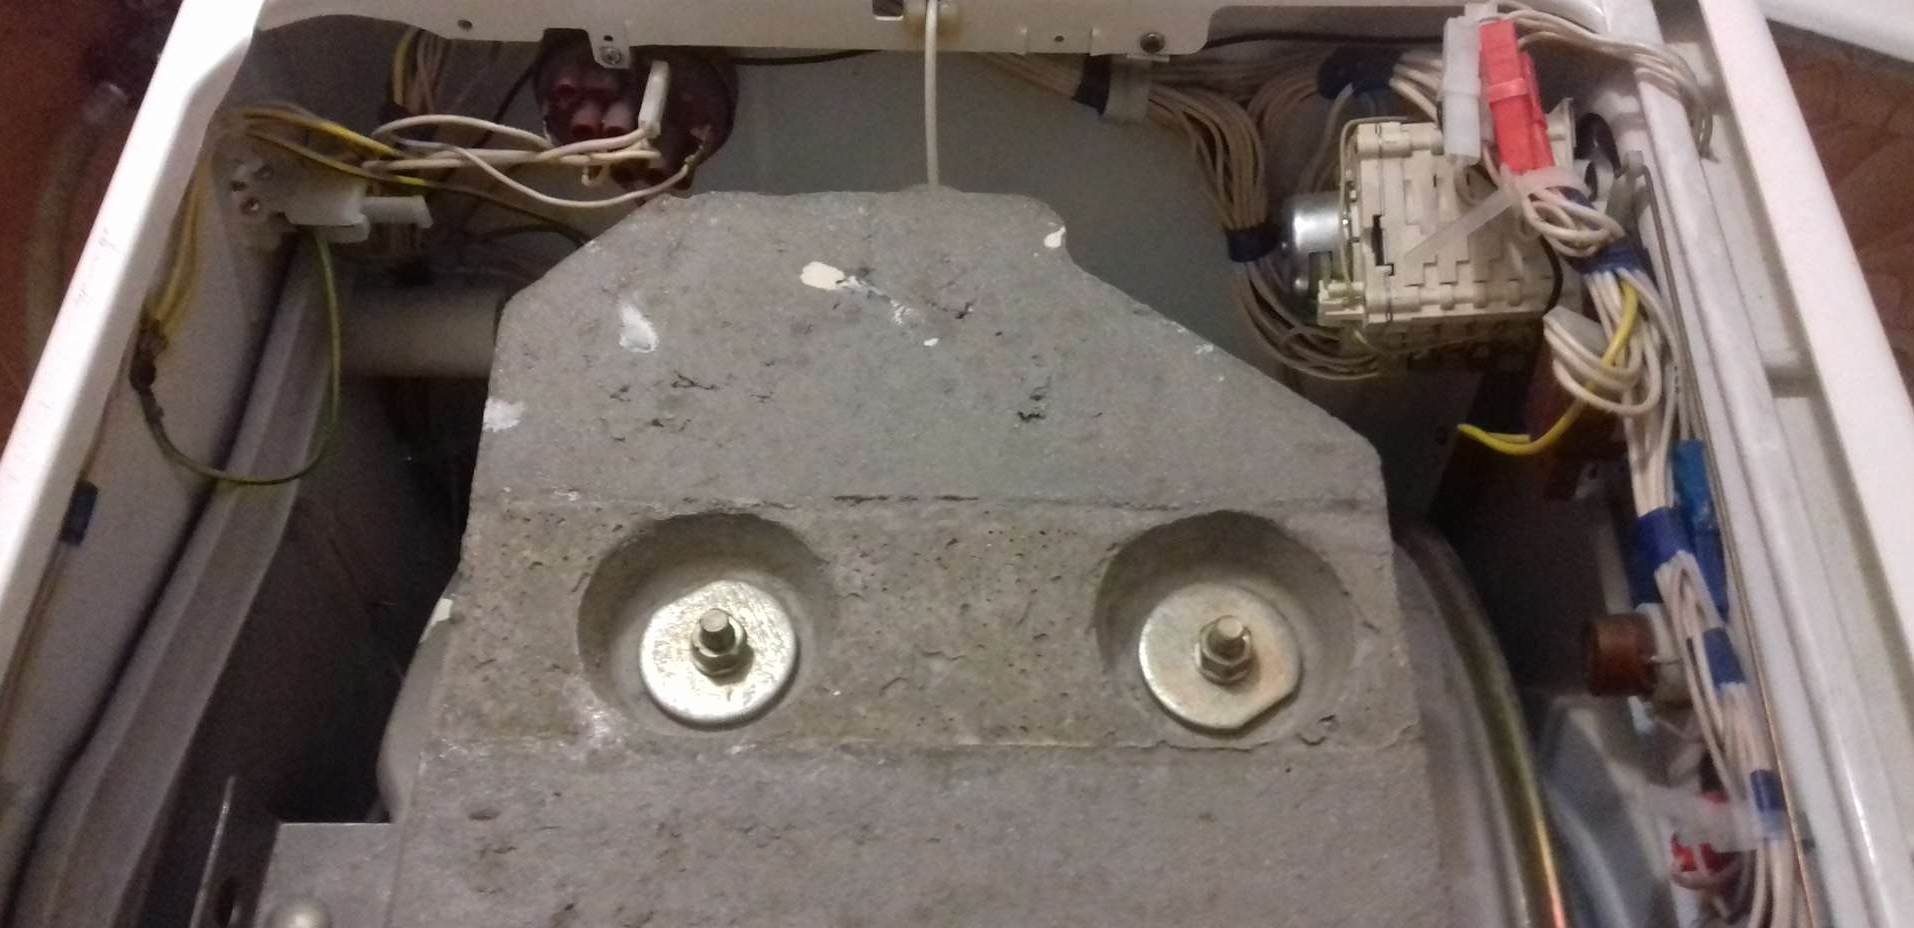
Having dealt with the fastenings, remove the counterweight (the weighting agent is located on top and serves to give stability to the machine);
carefully lower the machine onto the right side and look under it (if there is no bottom, great, if there is a bottom, you will need to remove it)
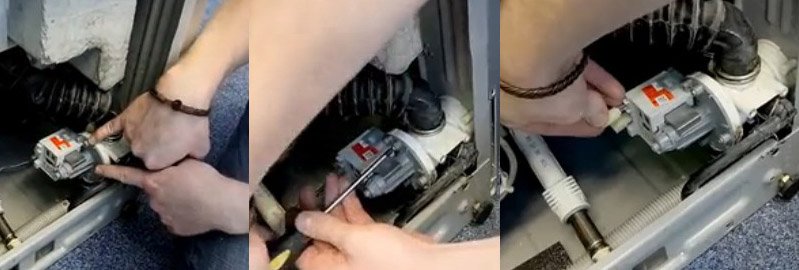
remove the bolts located on both sides of the garbage filter, press on the snail so that it falls into the SMA body;
remove the chip with wiring from the drain pump;
Having dealt with the clamps, unfasten all the pipes from the pump;
remove the pump from the washing machine;
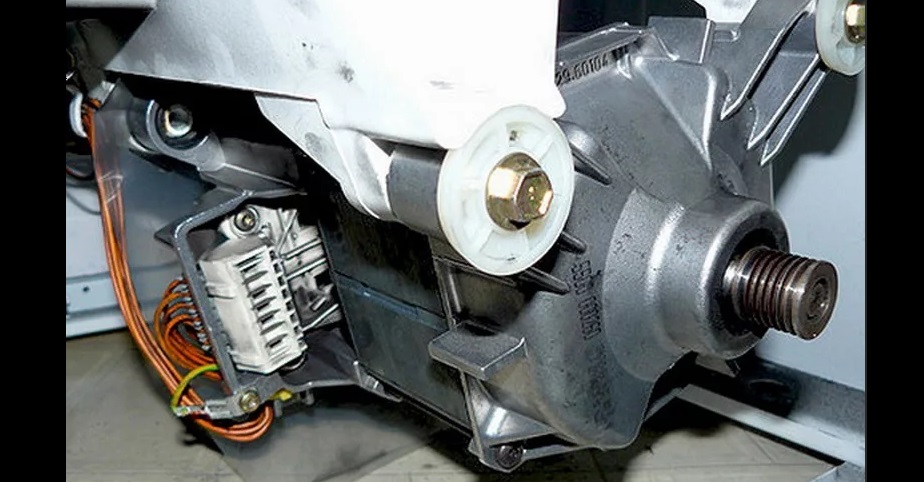
Unscrew the screws holding the washing machine motor;
remove the electric motor from the housing (to do this, you need to move the part back a little and pull it down);
Unscrew the shock absorbers holding the tank from below.
To remove the tank from the SMA Candy body, you need to disconnect all wires, pipes and parts connected to the tank.
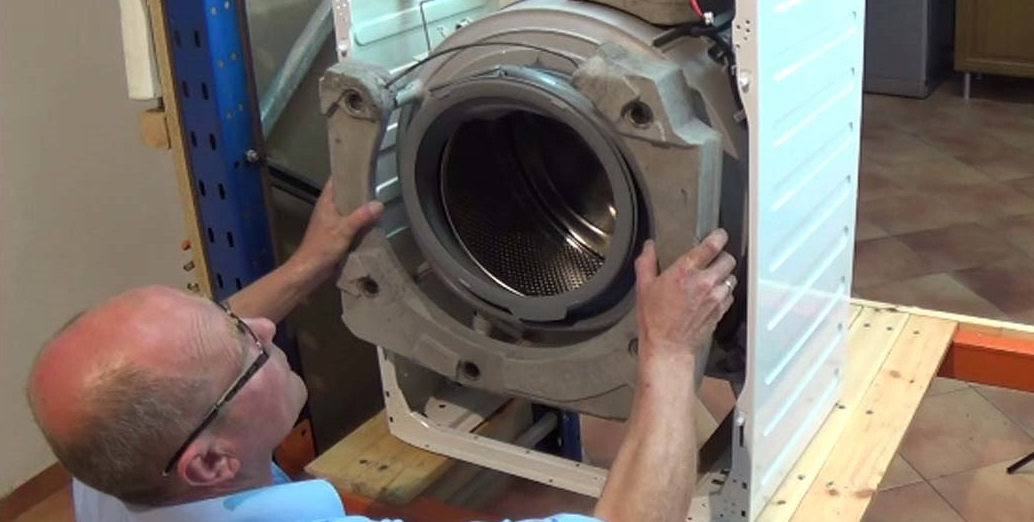
Now nothing will interfere with the removal of the node. It is difficult to remove the tank from the washing machine on your own, so it is better to call an assistant. Pulling out the drum with four hands is much easier.
We remove the faulty tank and install a new one
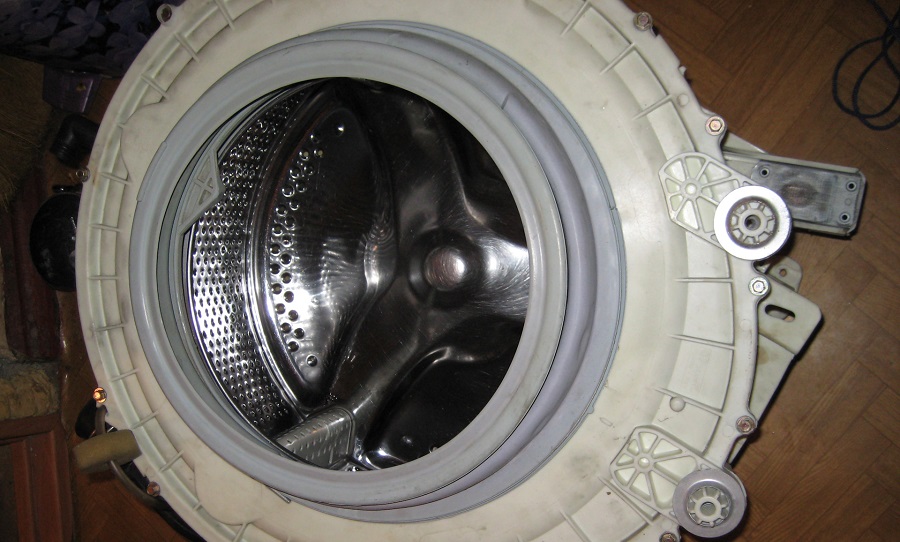
Now the tank-drum assembly is completely freed and nothing interferes with its removal. The container is removed through the top of the washing machine. New components are installed in the same way.
Pulling out the tank alone is inconvenient. Even without the top counterweight and motor, the unit will weigh enough.Therefore, it is better to call an assistant and take out the drum with four hands.
After removing the knot, place it on a flat surface. Next, it will be necessary to disconnect the shock absorbers and front counterweights from the old tank. These parts are installed on the new container.
Now the new tank, along with the front counterweights and shock absorbers, is loaded into the washing machine body. It is important to act carefully so as not to damage anything. The element is fixed inside, after which all previously removed wires, pipes, terminals, and parts are connected to it one by one.
The drum cuff is inserted inside through the loading hatch. The drain hole should be located strictly at the bottom. Next, the edges of the seal are pulled onto the tank. The elastic band is secured with an internal and external crimp clamp.
Having secured the drain pump, motor, heating element, and drive belt in place, assemble the washing machine body. Replace the control panel, back wall, and top cover. Before washing items, run a test dry cycle.
This should be a standard program, with all stages of washing: adding water, heating, spinning and draining. During the test cycle, carefully monitor the operation of the machine, make sure there are no leaks. If everything goes well, the repair can be considered successfully completed.
 Most Candy washing machines are equipped with non-removable tanks. The manufacturer recommends replacing the entire unit in case of breakdown. The work is quite labor-intensive, but you can do it yourself, at home, without the help of a specialist.


Add a comment