How to change a bearing on a washing machine with a non-separable tub?
 Many manufacturers of washing household appliances have decided to switch to equipping machines with non-separable tanks. Firstly, they are faster and cheaper to manufacture, since there is no need for additional fasteners and screws. Secondly, soldered containers are more difficult to repair, so if there is an internal breakdown, the manufacturer buys the entire assembly as a replacement, increasing the supplier’s profits. All this complicates and increases the cost of replacing bearings and seals at home. But if you wish, you can make repairs cheaper and easier.
"Fine" disassembly of the tank
The first step is to remove the tank from the washing machine. There is no point in describing in detail the process of disassembling the machine - this is labor-intensive work, but relatively simple. It is necessary to sequentially disconnect all the removable components of the washing machine: from the motor, counterweights, UBL and pressure switch to the pump, pipes and heating element. The heater must be pulled out, otherwise there is a high risk of damaging it when working on the drum. It is better to record your actions on a camera to simplify reassembly and avoid errors during subsequent connections.
Having taken the tank with the drum out of the machine, we proceed to disassembly:
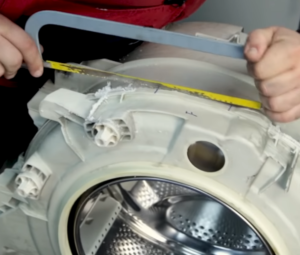
- turn the tank with the weld seam facing up;
- on the seam we make holes of 3-5 mm every 5-8 cm with a drill (the distance cannot be exceeded, as the tank may leak);
- Using a hacksaw for metal, carefully halve the tank, moving strictly along the seam.
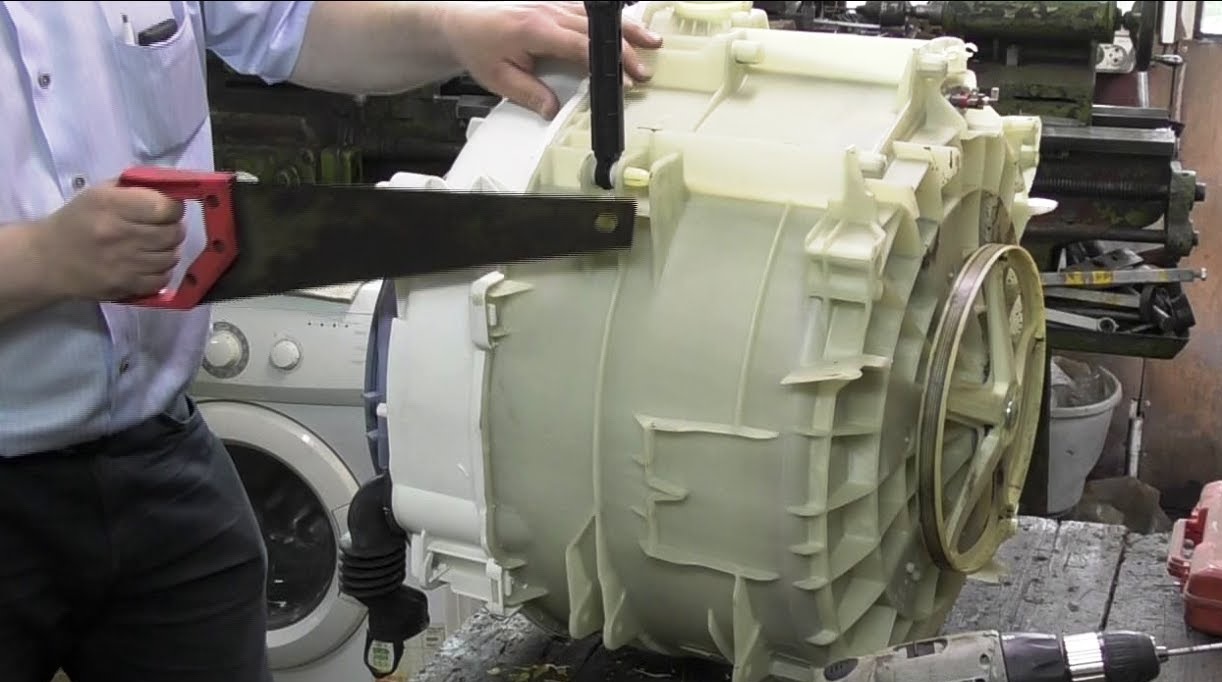
It will take a long time to cut – the first time the process will take 1.5-2 hours. Instead of a hacksaw, you can take a universal tool with fine teeth. It's easier and faster for them to work.It is strongly not recommended to use circular saws and grinders, since at high speed the disk often “flies off” and irreparably damages the tank.
You cannot saw the tank with a grinder or a circular saw: the disc may break off and ruin the tank.
After cutting, the tank will be divided into two parts: a “ring” with a cuff and a “back” with a drum, bearing unit and cross. Now you need to remove the drum cylinder.
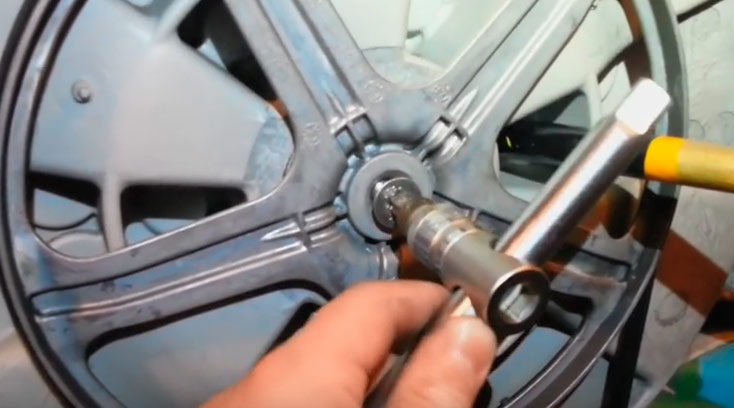
- We take the rod, fix it to the screw holding the crosspiece and punch it 2-3 times with a hammer (the blows will cause the glue to come away from the fastener, which is used to fill the bolt for reliability).
- Unscrew the screw and remove the freed wheel.
- We take out the drum and install it on the bars with the rod up.
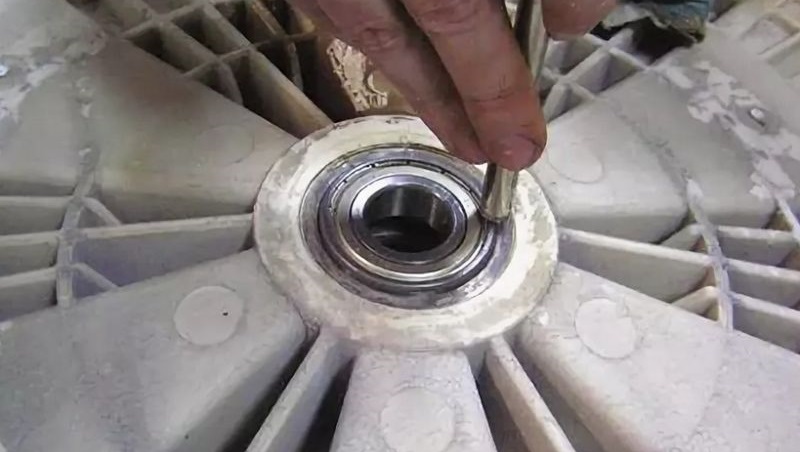
All that remains is to remove and replace the bearings. There is no need to disassemble the drum further. We take a steel rod or chisel and tap it around the joint, softening the blow with the help of a wooden block. First, the area is broken through from the outside, then from the inside. We take out the knocked out “rings” and throw them away, and clean the shaft by polishing, removing all scale and dirt. At the same time, we also wash the seat, preparing it for subsequent replacement. There is no need to remove the crosspiece itself.
Installation of new bearings
To replace the bearings on a washing machine with a non-separable tub, you need to find similar components. To do this, check the serial number of the machine in the instructions or according to the markings on the back panel of the unit. Another option is to bring old “rings” to the store and ask them to find identical parts. You can order an analogue directly from the manufacturer via the website.
After purchasing new bearings, we proceed to replacement:
- install a ring of smaller diameter on the outside of the drum, acting through the rear wall;
- we hammer the bearing with a hammer and a bench drift;
- when driving, we rest the tool only on the outer part of the ring, since blows to the inner side will destroy the tightness of the ring;
The smaller diameter bearing is clogged first, and the larger ring is installed on top.
- insert the second bearing into the hole;
- fix the position of the ring by accurately hitting it with a hammer once;
- Use a drift and a hammer to firmly press the bearing;
- close the bearing with an oil seal.
Don't forget about the sealant. The oil seal, the joint and the drum shaft must be treated with moisture-repellent lubricant. This is necessary to improve the performance characteristics of the rubber gasket and extend the life of the bearing assembly. Otherwise, water that gets in while washing things will get inside the ring and destroy it.
Assembling the tank
After replacing the bearings and seals, you can begin assembling the tank and the machine as a whole. First, we take the drum and fix it on the crosspiece so that the rod “enters” the bearings. Next, tighten the pulley ring by tightening the corresponding screw.
The next step is to treat the perimeter of the tank with a special sealant with moisture-resistant and heat-resistant properties. There is no need to skimp on the lubricant, nor do you need to fill the entire surface - everything should be in moderation. Then we connect the halves together and securely tighten the container with fasteners. It is recommended not to skimp on fasteners, using a proportional screw, nut, lock nut and a couple of washers.
The disassembled tank must be securely connected: treated with moisture-resistant lubricant and tightened with fasteners.
It is important to let the sealant dry completely. The waiting time depends on the type of lubricant, but it is better to play it safe and increase the recommended period by another 1-2 hours.If the product has come out of the seams, then there is no need to remove the frozen areas. Before assembling the machine, it is recommended to test the tank. We close the holes allocated for the pipes and pressure switch with rags, fill the container with water and check for leaks. If there are no drops or smudges on the seam, then everything is done perfectly.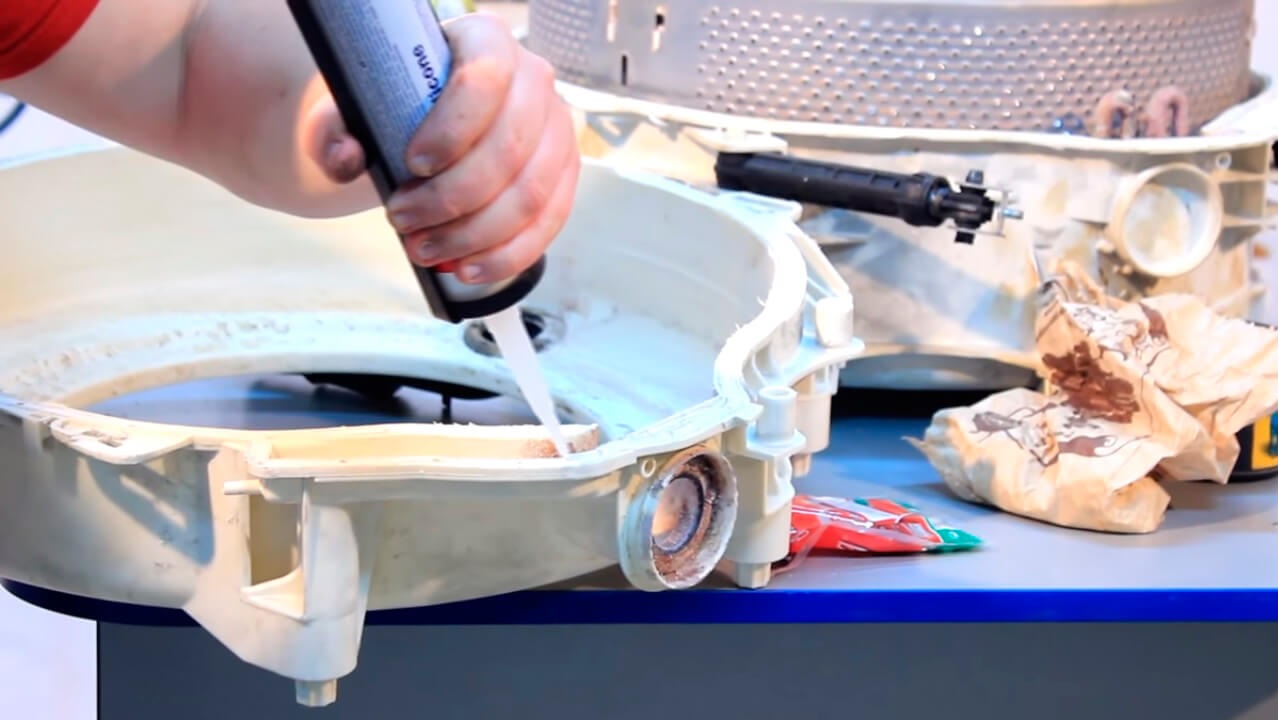
All that remains is to assemble the washing machine. First, we return the tank, fixing it on the spring and shock absorbers, and then, focusing on the video recording, we sequentially connect all the previously removed elements. We start the machine, ready for operation, on a high-temperature program and evaluate the condition of the seam after the end of the cycle. If leaks are noticed, you need to contact a service center and replace the entire drum assembly.
Interesting:


Reader comments
- Share your opinion - leave a comment
Categories
Washing machine repair


For buyers


For users


Dishwasher


Add a comment