How to remove the cuff on an LG washing machine?
 If during the washing process you notice a stream of water flowing from under the hatch door, most likely you will have to change the cuff. If you discover obvious damage on its surface during inspection of the seal, you should not postpone repairs. Removing the rubber seal from the drum on LG machines is quite simple. Let's figure out how to do this.
Dismantling the damaged part
Having identified serious damage to the cuff, you need to buy a replacement elastic band and get to work. The first step is to remove the old seal. To remove the cuff from an LG washing machine, you must:
- de-energize equipment, disconnect from house communications;
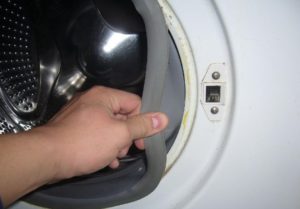
- loosen the metal ring holding the gasket on the outside. Feel for the spring, carefully pick it up with a slotted screwdriver and pull it off;
- tuck the outer edge of the cuff deep into the drum;

- Unscrew the two bolts holding the top cover of the housing and remove it;
- remove the powder receptacle;
- unscrew the screws holding the control panel;
- by prying the latches, completely disconnect the control panel;
- Working carefully to avoid breaking the power wires, place the panel on top of the washing machine. You can secure it with mounting tape to prevent it from falling;
- disconnect the false panel covering the garbage filter, unscrew the bolt that it hid;
- Unscrew the remaining screws holding the front wall of the LG machine case, remove it and put it aside;
It is not necessary to disconnect the hatch locking device; it will not interfere with the work.
- dismantle the two counterweights by unscrewing the retaining screws;
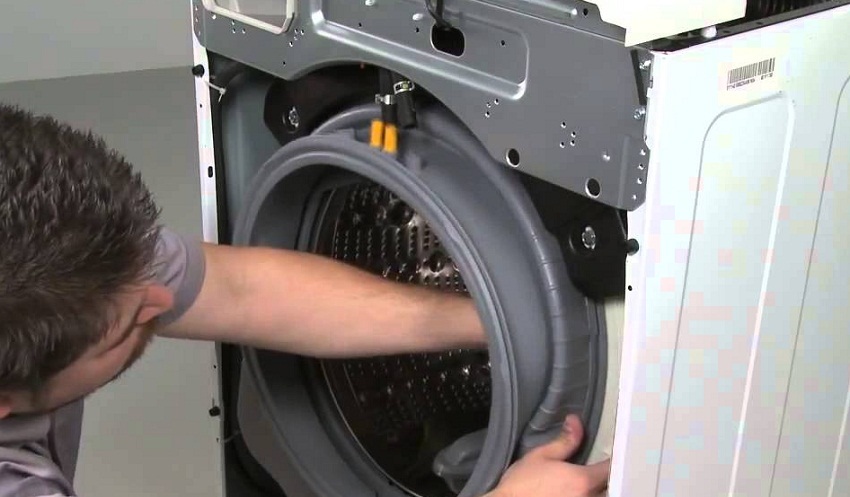
- Carefully pull off the inner metal clamp of the rubber seal.
After these steps, you can begin to directly remove the cuff. Pull the elastic band and remove it from the fastening point.
We put on a new rubber band
To correctly put the seal in place, you need to decide where the top and bottom of the element are. The cuffs are asymmetrical and the lower part of the gasket can be identified by special technological holes. The top of the elastic is marked with a small protrusion. Directly on the tank of the machine there is a mark - a triangle symbol. Installing a cuff from a washing machine LG should start at the top, aligning the markings on the surface of the seal and the CMA tank. Afterwards, the elastic band is pulled over the edges of the tank, and so on in a circle.
If you have any difficulty, use a small amount of liquid detergent on the cuff to make it easier to pull it into place.
Upon completion of installation of the rubber seal, check that it is seated tightly. Turn the drum by hand, it is important that it does not touch the cuff. Then you should install the clamp: first insert the end with the hook into the recess, and pull the second edge with the spring over it. To make it easier to install a metal clamp, it is better to use round-nose pliers.
Assembling the machine
Reassembling the automatic washing machine is carried out in the reverse order. Counterweights are hung and secured with bolts. Afterwards, the front wall of the case is installed in place, and the screws holding it are screwed in.
The next step is to fasten the lower false panel of the unit into place. It is inserted until the latches engage. Then you need to begin reinstalling the control panel of the machine, which is also secured with the previously removed bolts. The powder receptacle is inserted into place.
After the appearance of the washer becomes the same, you can pull the outer edge of the cuff onto the body and secure it with a metal clamp. Connect the machine to the water supply and sewerage network, and plug it into the electrical network. Run a test wash.
Interesting:


Reader comments
- Share your opinion - leave a comment
Categories
Washing machine repair


For buyers


For users


Dishwasher


Add a comment