How to remove the drum from the washing machine tub
 The need to knock the drum out of the washing machine tank may arise when replacing bearings, oil seal or crosspiece. In any case, to get the tank, you will have to almost completely disassemble the machine. We'll tell you how to do it yourself, quickly and without making mistakes.
Tools and materials
To remove the drum, you need to remove the tank from the machine. To do this, you will have to remove the top, front and rear walls of the case, remove the motor from the washing machine, disconnect all the wiring from the plastic tank, etc. When performing work, you must have on hand:
- a pair of screwdrivers – slotted and Phillips;
- set of wrenches;
- a hacksaw or cutting saw (if the tank of your automatic machine is non-separable);
- screwdriver;
- hammer;
- punch.
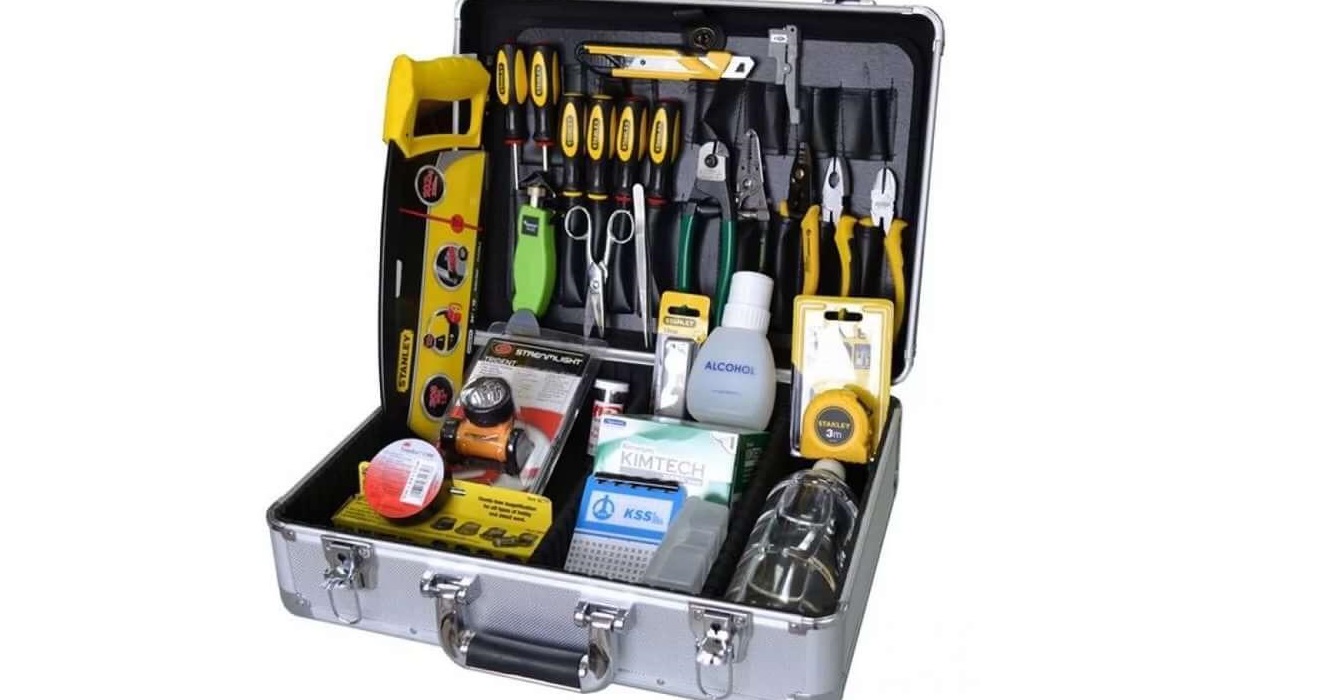
It is also useful to buy WD-40 spray liquid. The spray will help deal with “stuck” parts and fasteners. Having prepared all the necessary tools, you can begin the repair. Be sure to turn off the power to the automatic machine before disassembling its body.
“Half” the tank
Many people are concerned about how to remove the tank from the washing machine. First, you need to move the machine away from the wall in order to have free access to it from all sides and disconnect the equipment from communications. Further algorithm of actions:
- remove the top cover of the case;
- pull out the powder receptacle;
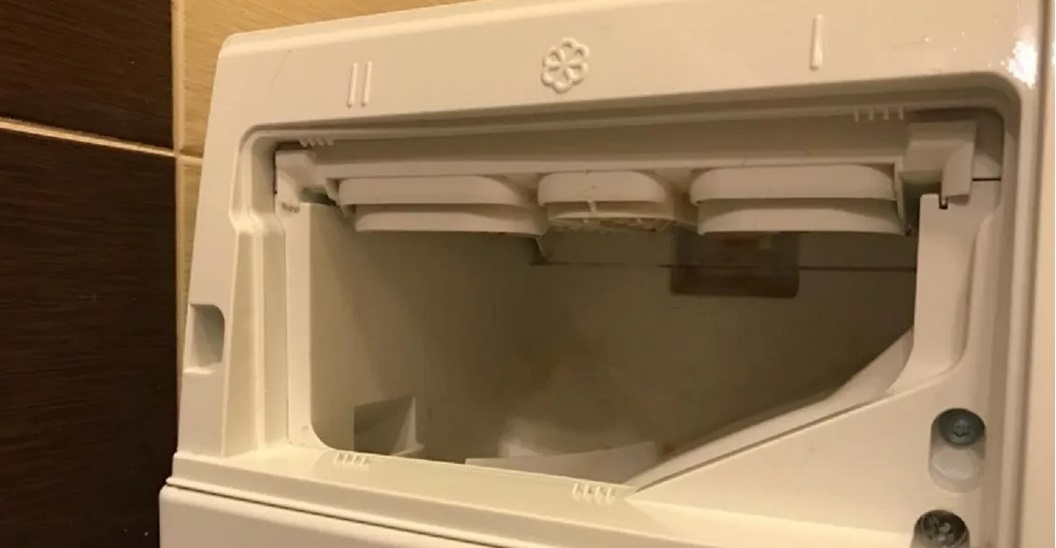
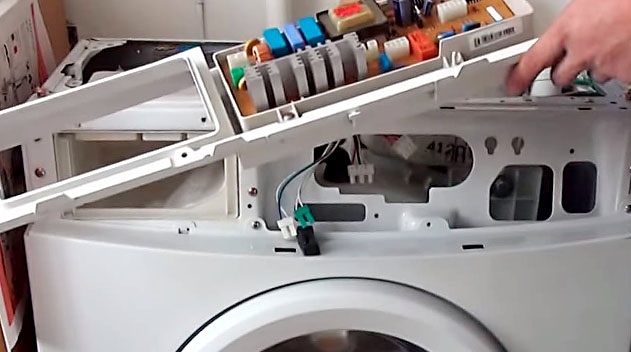
- Unscrew the bolts that hold the control panel;
- remove the “tidy” by disconnecting the wiring from it;
- remove the lower decorative trim panel;
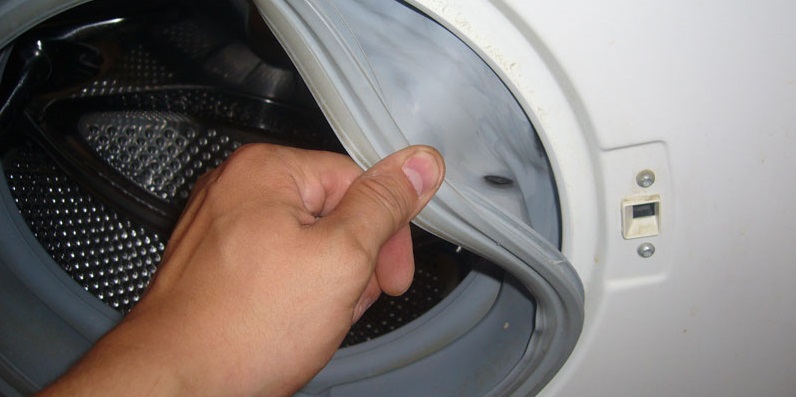
- pull out the clamps holding the drum cuff;
- remove the rubber seal;
- Unscrew the bolts holding the UBL and remove the lock;
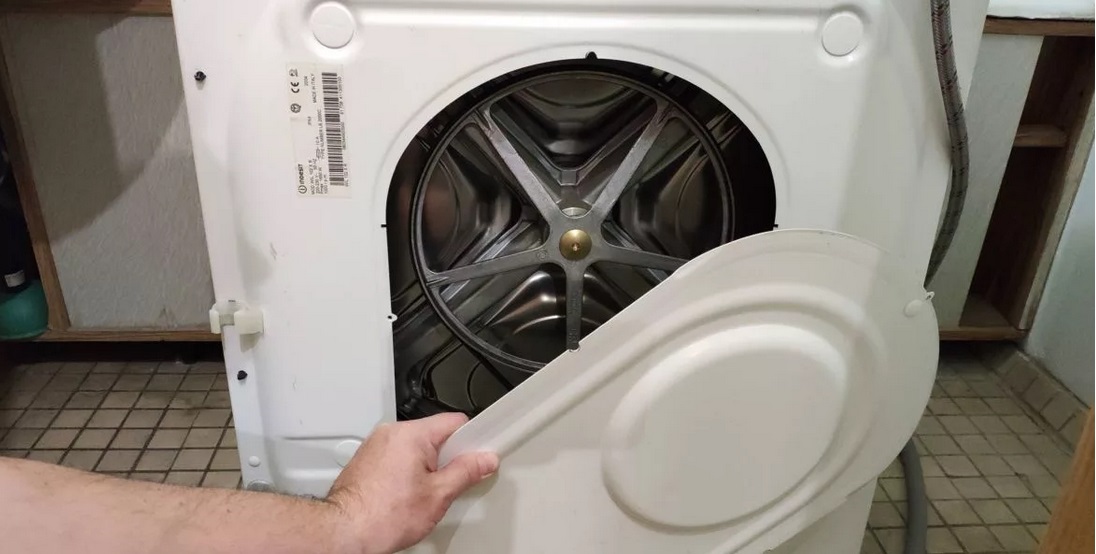
- unscrew the bolts securing the front wall of the case and remove the panel;
- remove the back wall;
- remove the drive belt;
- unhook from the tank all elements connected to it: sensors, pipes, wires, parts;
- Having dealt with the shock absorbers, remove the reservoir from the body.
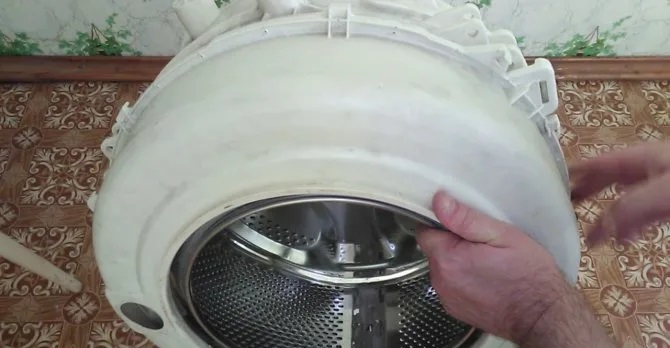
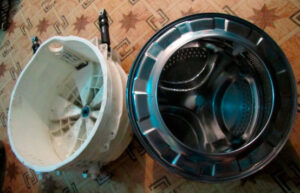
The further progress of work will depend on what type of tank is installed on your automatic machine. If the tank is collapsible, to “halve” it, you only need to unscrew the screws holding the two parts together and release the plastic latches. It’s a completely different matter if the tank is “monolithic”.
To remove the drum from a non-separable tank, you will have to cut the plastic container.
There are several options for sawing a plastic tank. It could be:
- hacksaw for metal;
- Bulgarian;
- cut-off saw;
- renovator
First, you need to mark with a marker the boundary along which the cutting will take place. Some craftsmen advise cutting the tank half directly along the factory seam. In this case, the work can be easily done with a regular hacksaw.
Most craftsmen recommend sawing the tank from the top side so that in the future the load on the tank will be less. The “path” for sawing looks like the one shown in the figure.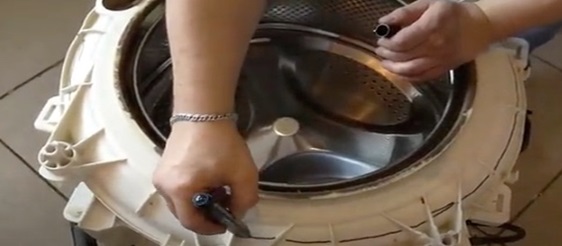
In this case, it is more convenient to saw the tank using a cutting saw or renovator. Place a suitable attachment on the tool and get to work. It is important to wear safety glasses as hot plastic shavings may fly off the tank during disassembly.
A chop saw or renovator produces a finer cut than an angle grinder, so it is best to use one of these tools to disassemble the tank.
Another advantage of a chop saw is the ability to cut curves.This may be necessary if there is some important structural element on your tank at the cut site that needs to be bypassed. For example, a stiffener.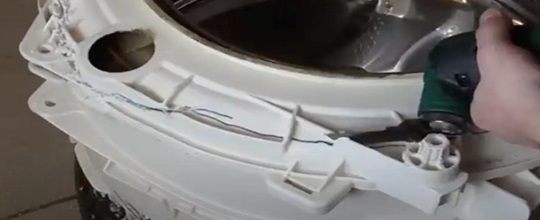
If you have a renovator at home (a multifunctional tool with various attachments), you can use it to cut the tank. It is more powerful, so it will be easier to “half” the tank. There won't be as many plastic shavings flying around as you work.
To get the drum itself, you need to do some more work. Turn the tank over, place wooden blocks under it on both sides and remove the pulley. Next, apply WD-40 liquid to the place where the “drum wheel” is attached and let the mixture sit for 15-20 minutes. Using a drift and hammer, gently tap down the center so that the drum pops down from the mount. This way you can remove the drum from the tank of the automatic machine. Next, the worn parts are replaced and everything is reassembled in the reverse order. To hold the two parts of the tank together, you need a soldering iron and a hair dryer.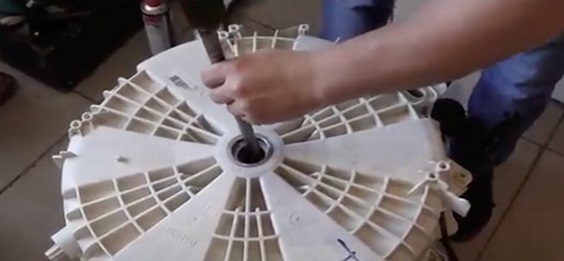
First, with a soldering iron, you need to “grab” the parts of the tank together on four sides so that the upper, sawn-off rim is fixed in place. To do this, one and a half to two centimeters of plastic are heated with a hairdryer, then the soft area is leveled with a soldering iron. This way the “halves” are securely fastened to each other.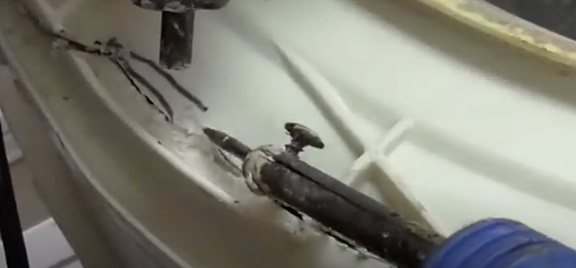
Having soldered the entire seam, you can begin assembling the body of the automatic machine. Please note that sawn stiffeners must be restored as best as possible so as not to disrupt the normal operation of the machine. Having returned all the parts to their places, run a test wash and watch how the “home assistant” copes with the task.
Interesting:


Reader comments
- Share your opinion - leave a comment
Categories
Washing machine repair


For buyers


For users


Dishwasher


Add a comment